
Dim or foggy headlights don’t just look bad—they compromise safety. Over time, UV exposure, road debris, and oxidation dull polycarbonate lenses, reducing light output by up to 90%. Restoring clarity isn’t about replacing parts; it’s about understanding materials, causes of degradation, and selecting the right cleaning method. Whether you're dealing with mild haze or deeply yellowed covers, the right approach can restore brightness, improve nighttime visibility, and extend the life of your lighting system.
Understanding Headlight Degradation
Most modern vehicles use polycarbonate plastic for headlight lenses because it's lightweight and impact-resistant. Unlike glass, however, polycarbonate is vulnerable to UV damage. The factory-applied UV-protective coating wears down over time, allowing sunlight to oxidize the surface. This creates a hazy, yellowed layer that scatters light instead of focusing it forward.
Environmental factors accelerate this process:
- Exposure to rain, salt, and pollution
- Frequent temperature swings
- Contact with abrasive cleaning tools
- Lack of routine maintenance
Ignoring cloudy headlights doesn't just affect aesthetics—it reduces beam intensity, increases glare for oncoming drivers, and compromises reaction time in low-light conditions. The National Highway Traffic Safety Administration (NHTSA) notes that poor visibility contributes to nearly 50% of nighttime crashes. Maintaining clean, functional headlights is a critical part of responsible vehicle care.
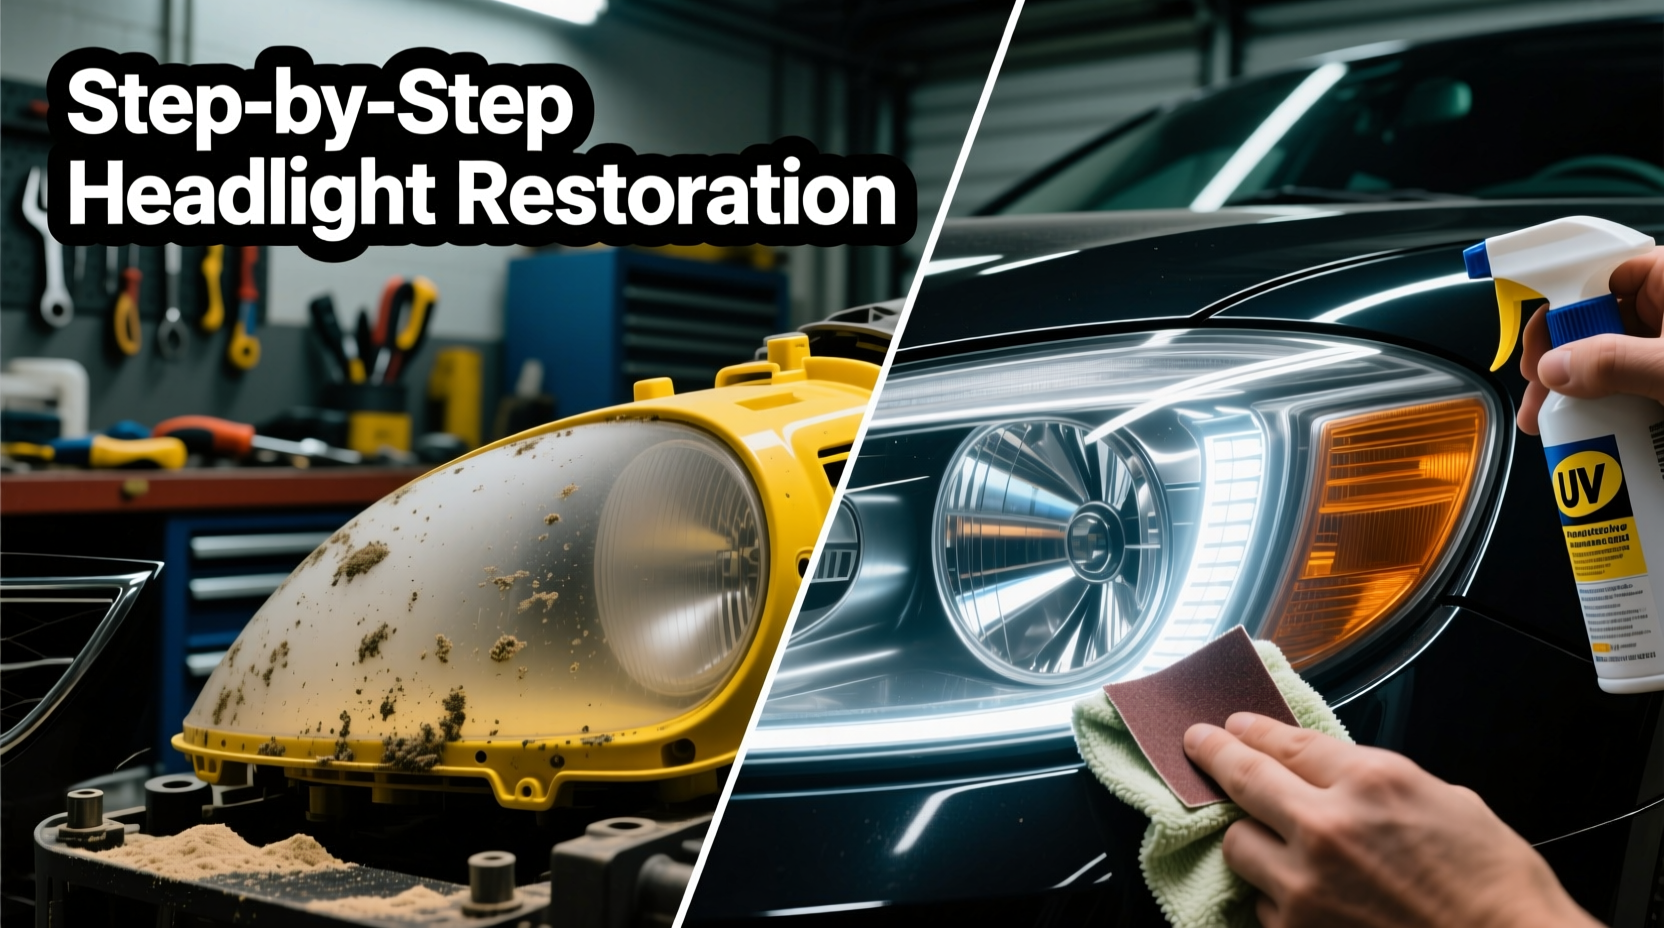
Step-by-Step Guide: Restoring Headlights at Home
Professional restoration services can cost $75–$150, but effective results are achievable at home with basic supplies. This six-step method uses wet sanding and polishing to remove oxidation and restore optical clarity.
- Clean the Surface: Wash the headlights with soap and water. Dry thoroughly. Use masking tape to protect surrounding paint.
- Wet Sand with 1000-Grit Paper: Soak sandpaper for 5–10 minutes. Gently sand in straight lines across the lens for even abrasion. Rinse frequently.
- Progress to 2000-Grit Paper: Repeat the process with finer grit to smooth micro-scratches left by coarser paper.
- Apply Polishing Compound: Use a microfiber pad with automotive polish (or toothpaste in a pinch) on a drill or by hand. Buff in circular motions until the lens appears glossy.
- Seal with UV Protectant: Apply a spray-on acrylic sealer or dedicated headlight sealant. This replaces the lost factory coating and slows future oxidation.
- Final Wipe and Test: Clean residue with a lint-free cloth. Turn on headlights to evaluate beam clarity and spread.
This method typically takes 30–45 minutes per headlight and costs under $20 in materials. Results last 1–3 years depending on climate and exposure.
Alternative Cleaning Methods Compared
Not all solutions are equal. Some offer temporary fixes; others provide lasting protection. Here’s how common approaches stack up:
| Method | Effectiveness | Cost | Longevity | Best For |
|---|---|---|---|---|
| Toothpaste + Cloth | Moderate (surface-only) | $ | 1–4 weeks | Mild haze, quick fix |
| Baking Soda Paste | Low | $ | Days | Emergency touch-up |
| Commercial Restoration Kit | High | $$ | 6–18 months | DIYers wanting reliable results |
| Wet Sanding + Polish | Very High | $$ | 1–3 years | Severe oxidation |
| Professional Refinishing | Very High | $$$ | 2–5 years | Time-poor owners, leased vehicles |
While toothpaste may work temporarily, its abrasive particles are inconsistent and lack UV protection. Restoration kits often include pre-soaked pads, sanding discs, and sealants—making them more reliable than household items.
Expert Insight: What Mechanics Recommend
Automotive technicians emphasize prevention as much as correction. Regular maintenance prevents deep oxidation that requires aggressive treatment.
“Once headlights lose their UV coating, they start degrading fast. I tell customers: treat them like paintwork. Wax or seal every 6 months, and you’ll avoid 80% of restoration jobs.” — Carlos Mendez, ASE-Certified Auto Technician, 18 years experience
Many high-end detail shops now include headlight conditioning in ceramic coating packages. A nano-ceramic layer applied after polishing can last up to five years and resist yellowing far better than traditional sprays.
Checklist: Maintain Clear Headlights Year-Round
Preventive care keeps headlights brighter longer. Follow this seasonal checklist:
- ✅ Every 3 months: Clean lenses with pH-neutral car wash soap
- ✅ Every 6 months: Apply UV-blocking headlight sealant
- ✅ Annually: Inspect for cracks, moisture ingress, or delamination
- ✅ After restoration: Reapply protective coating if using non-ceramic products
- ✅ In winter: Rinse off road salt weekly to prevent chemical etching
Avoid pressure washing directly on lens seams—this can force water inside, causing internal fogging. Also, never use gasoline, acetone, or window cleaners containing ammonia; these degrade plastic.
Real Example: From Faded to Factory-Fresh
Janice, a delivery driver in Arizona, noticed her 2017 Honda CR-V’s headlights had turned amber after three summers of daily sun exposure. Her night routes became stressful due to reduced visibility. She tried a $10 wipe-on kit with minimal improvement. Then she followed the wet-sanding method described above.
After two hours of work, the difference was dramatic. Beam output increased visibly, and the cutoff line—the sharp edge of the low-beam pattern—was crisp again. “It’s like having new headlights,” she said. “I can finally see road signs at 200 feet instead of 75.” She now applies a UV spray every spring and fall, and four years later, the lenses remain mostly clear.
Frequently Asked Questions
Can I use a magic eraser on my headlights?
Melamine foam (magic erasers) can remove surface grime but won’t fix oxidation. Worse, they leave fine scratches that worsen haze over time. Avoid using them on plastic lenses.
Do headlight restoration kits really work?
Yes, but quality varies. Kits from brands like 3M, Sylvania, or Meguiar’s include proper abrasives, polish, and sealants. Cheap no-name kits often skip the UV protection step, so results fade quickly.
How do I know if my headlights are beyond cleaning?
If the lens is deeply cracked, internally fogged, or delaminated (layers separating), cleaning won’t help. Replacement is the only solution. Minor surface cracks can sometimes be sealed after polishing, but structural damage requires professional assessment.
Conclusion: Drive Safer with Clear Vision
Clear headlights aren’t a luxury—they’re a safety necessity. With the right method, even severely degraded lenses can be restored to near-factory condition. Whether you choose a DIY sand-and-polish approach or opt for a premium restoration kit, the key is consistency. Combine initial restoration with regular UV protection to maintain brightness for years.
Don’t wait until night vision becomes dangerous. Take an hour this weekend to assess and treat your headlights. The result? Sharper beams, safer drives, and a vehicle that looks well-maintained from every angle.


 浙公网安备
33010002000092号
浙公网安备
33010002000092号 浙B2-20120091-4
Comments
No comments yet. Why don't you start the discussion?