
A dripping kitchen faucet is more than just an annoyance—it’s a silent drain on your wallet and the environment. A single leaky handle can waste hundreds of gallons of water each month, increasing utility bills and contributing to unnecessary water usage. The good news? Most faucet leaks stem from simple, repairable issues like worn washers, corroded valve seats, or degraded O-rings. With basic tools and a bit of patience, you can fix a leaky kitchen faucet handle yourself—no plumber required.
This guide walks you through identifying the source of the leak, disassembling your faucet, replacing faulty components, and reassembling everything securely. Whether your faucet drips constantly, sprays erratically, or won’t shut off completely, these steps will restore reliable performance and extend its lifespan.
Identify the Type of Faucet You Have
Before reaching for tools, determine your faucet’s internal mechanism. The repair process varies significantly depending on whether you have a compression, ball, cartridge, or ceramic disk faucet. Each type has distinct parts and failure points.
- Compression faucets: Found in older homes, they use rubber washers pressed against a valve seat to stop water flow. Leaks here are typically caused by worn washers.
- Ball faucets: Common in single-handle models, they use a rotating ball with chambers to control hot and cold water. Worn springs and seals often cause leaks.
- Cartridge faucets: Use a replaceable cartridge that moves up and down or side to side. These fail when the cartridge cracks or becomes misaligned.
- Ceramic disk faucets: Most modern and durable, they use two ceramic disks to regulate flow. Leaks are rare but usually require full disk replacement.
Step-by-Step Guide to Fixing a Leaky Faucet Handle
The following timeline applies primarily to compression and cartridge-style faucets—the most common types in residential kitchens. Always refer to your manufacturer’s manual if available, as some designs have unique configurations.
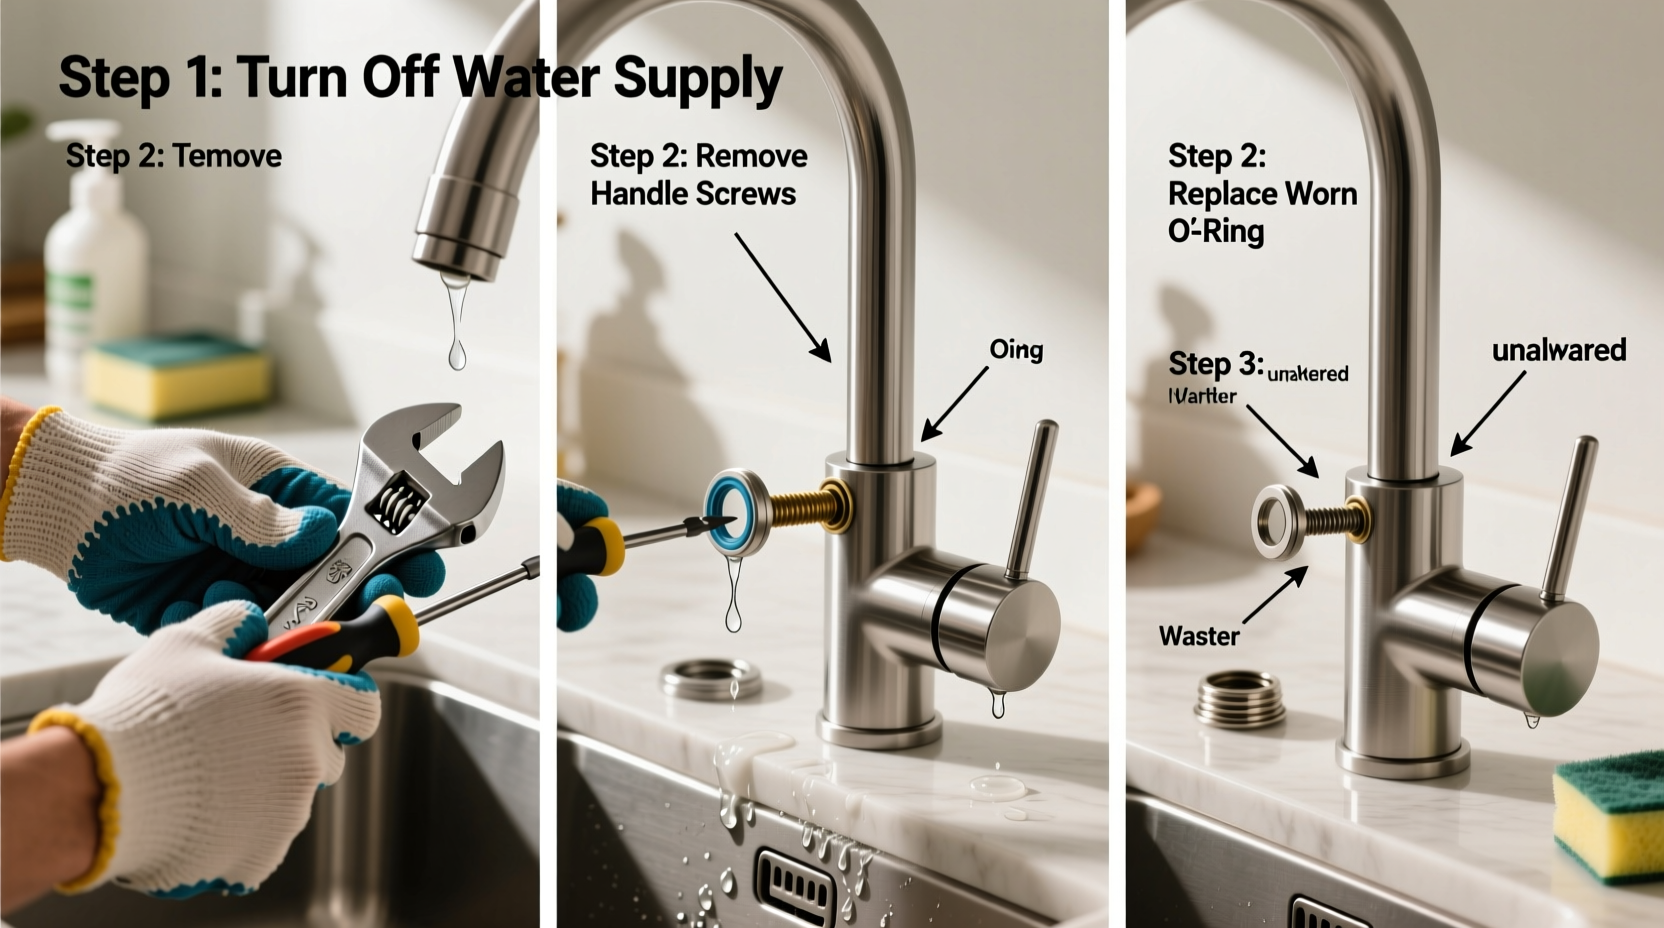
- Shut off the water supply. Locate the shutoff valves beneath the sink. Turn them clockwise until tight. Open the faucet to release residual pressure and drain remaining water.
- Plug the drain. Place a rag or small plug in the sink opening to prevent dropping screws or small parts down the drain.
- Remove the faucet handle. Most handles have a decorative cap on top. Pry it off gently with a flathead screwdriver. Underneath, you’ll find a screw. Remove it, then lift the handle straight up. If stuck, gently wiggle it or use penetrating oil after a few minutes’ wait.
- Take off the packing nut or retaining clip. Use adjustable pliers or a wrench to loosen the nut securing the stem or cartridge. For cartridge faucets, there may be a metal or plastic retaining clip—remove it carefully.
- Pull out the stem or cartridge. Grasp the center component and pull it upward. For stiff stems, use needle-nose pliers wrapped in cloth to avoid damage.
- Inspect internal components. Check the washer at the base of the stem (in compression faucets). Look for cracks, warping, or erosion. In cartridge models, examine the entire cartridge for splits or mineral buildup.
- Replace damaged parts. Take the old parts to a hardware store to ensure exact matches. Replace washers, O-rings, cartridges, or seats as needed. Never reuse compromised parts.
- Clean the valve seat. Over time, corrosion builds up where the washer seals. Use a valve seat wrench to remove and inspect it, or smooth it with fine-grit sandpaper if minor pitting exists. <9> Reassemble the faucet. Insert the new stem or cartridge, secure the packing nut, reinstall the handle, and tighten the screw. Replace the decorative cap. <10> Turn water back on and test. Slowly open the shutoff valves. Run the faucet and check for leaks around the handle and spout. Operate it several times to ensure smooth function.
Common Mistakes to Avoid During Repair
Even experienced DIYers make errors when repairing faucets. Avoid these pitfalls to prevent further damage or recurring leaks:
| Mistake | Why It’s a Problem | How to Avoid |
|---|---|---|
| Not turning off water first | Causes flooding and complicates repairs | Always confirm shutoff valves are closed and test by opening faucet |
| Over-tightening nuts and screws | Cracks porcelain handles or strips threads | Tighten snugly by hand, then give only a quarter-turn with tools |
| Using mismatched replacement parts | Leads to improper sealing and early failure | Bring old parts to the store; match size, shape, and material exactly |
| Ignoring mineral deposits | Buildup prevents proper seating and causes persistent leaks | Soak parts in vinegar for 30 minutes to dissolve lime and calcium |
| Skipping the valve seat inspection | A damaged seat ruins new washers quickly | Check seat condition and resurface or replace if pitted |
Real Example: Fixing a Persistent Drip in a 15-Year-Old Faucet
Martha, a homeowner in Portland, noticed her kitchen faucet developed a slow drip every time she turned it off. She tried tightening the handle, but the leak worsened over weeks. After reading this guide, she turned off the water, removed the handle, and discovered a mushy rubber washer nearly disintegrated at the base of the stem.
She took the old stem to a local plumbing supply store and matched the washer to an exact replacement. While there, the clerk suggested checking the valve seat, which showed visible pitting. Martha bought a replacement seat and installed it using a seat wrench. After reassembly, the faucet operated smoothly with no drip. The entire repair cost $7.50 and took less than 45 minutes.
“I assumed I’d need a plumber,” she said later, “but it turned out to be one of the easiest fixes I’ve done myself.”
“Over 80% of kitchen faucet leaks are caused by failing washers or O-rings—both inexpensive and simple to replace.” — James Rutherford, Master Plumber & Home Repair Instructor
Detailed Checklist for Your Repair Project
Use this checklist to ensure you complete every critical step without oversight:
- ☐ Shut off water supply under the sink
- ☐ Open faucet to relieve pressure and drain lines
- ☐ Plug the sink drain to protect small parts
- ☐ Remove handle cap and mounting screw
- ☐ Lift off the handle carefully
- ☐ Unscrew the packing nut or remove retaining clip
- ☐ Extract the stem or cartridge assembly
- ☐ Inspect washer, O-ring, and valve seat for wear
- ☐ Soak parts in white vinegar to remove mineral deposits
- ☐ Replace all damaged components with exact matches
- ☐ Reinstall stem/cartridge and secure the nut
- ☐ Reattach handle and tighten screw
- ☐ Replace decorative cap
- ☐ Turn water back on slowly
- ☐ Test faucet operation and check for leaks
- ☐ Clean up workspace and dispose of old parts responsibly
Frequently Asked Questions
Why does my faucet still leak after replacing the washer?
The issue may lie beyond the washer. A corroded valve seat, cracked cartridge, or damaged O-ring around the stem can all cause leaks even with a new washer. Also, ensure the replacement washer is the correct size and properly seated. Over-tightening can distort soft rubber parts, preventing a seal.
Can I fix a leaking faucet without turning off the water?
No. Attempting repairs with water still flowing risks flooding, injury from high-pressure spray, and damage to cabinet interiors. Always shut off both hot and cold supply lines before beginning. If shutoff valves are stuck or leaking, consider replacing them first.
How long should a repaired faucet last before needing another fix?
A properly executed repair using quality parts should last 5 to 10 years, depending on water hardness and usage frequency. Homes with hard water may see faster wear due to mineral buildup. Regular maintenance, like descaling and lubricating moving parts annually, extends longevity.
Conclusion: Take Control of Your Home Maintenance
Fixing a leaky kitchen faucet handle isn’t just about stopping a drip—it’s about reclaiming control over your home’s functionality and efficiency. What seems like a small nuisance can escalate into wasted resources and higher costs over time. By understanding your faucet’s mechanics and following a structured repair process, you gain confidence in handling similar household issues in the future.
Millions of homeowners pay professionals for repairs they could easily do themselves. With the right knowledge, a modest toolkit, and attention to detail, you can save time, money, and water. Don’t let a persistent drip undermine your peace of mind. Gather your supplies, follow the steps outlined here, and restore quiet, reliable performance to your kitchen faucet today.


 浙公网安备
33010002000092号
浙公网安备
33010002000092号 浙B2-20120091-4
Comments
No comments yet. Why don't you start the discussion?