
A running toilet is more than just an annoyance—it's a silent water waster that can add hundreds of gallons to your monthly water bill. The sound of constant trickling or periodic refilling often points to a problem within the tank. While many assume the entire toilet needs replacement, the reality is far simpler: in most cases, the issue lies with either the flapper or the fill valve. Knowing which component is at fault—and how to fix it—can save time, money, and unnecessary plumbing calls.
Both the flapper and the fill valve play crucial roles in your toilet’s flush cycle. The flapper controls water release from the tank into the bowl, while the fill valve regulates how the tank refills afterward. When either fails, symptoms can overlap, making diagnosis tricky for homeowners. This guide breaks down how to identify the source of the problem, walks through repair steps, and helps you decide whether to replace the flapper, the fill valve, or both.
Understanding How Your Toilet Tank Works
To effectively troubleshoot a running toilet, it’s essential to understand the basic mechanics inside the tank. When you flush, the lift chain pulls the flapper upward, allowing water to rush from the tank into the bowl. After about 7–10 seconds, the flapper drops back into place, sealing the flush valve. Simultaneously, the float attached to the fill valve drops with the water level, triggering the valve to open and refill the tank. Once the water reaches the proper height, the float rises and shuts off the fill valve.
Problems arise when:
- The flapper doesn’t seal completely, causing water to leak into the bowl.
- The fill valve fails to shut off, leading to continuous water flow and potential overflow.
- The float is misadjusted, keeping the valve open too long.
Because both components control water flow, their failure modes can look similar. However, subtle differences in sound, water behavior, and test results can help pinpoint the real culprit.
Signs You Need to Replace the Flapper
The flapper is one of the most common sources of toilet malfunctions. Made of rubber or silicone, it degrades over time due to mineral buildup, chlorine in water, and general wear. Here are the key signs it’s time to replace the flapper:
- Intermittent running: The toilet runs every few minutes as the tank slowly empties and then refills.
- Water trickling into the bowl: Visible flow even when the toilet hasn’t been flushed.
- Cloudy or warped flapper: Physical inspection reveals brittleness, cracks, or warping.
- Dye test confirms leakage: As mentioned earlier, colored water seeping into the bowl indicates a faulty seal.
Flapper failure is especially common in homes with hard water or where bleach-based cleaners are frequently used in the tank. These substances accelerate material breakdown, shortening a flapper’s lifespan from the ideal 4–5 years to as little as 1–2 years.
“Over 70% of running toilets I see are due to worn flappers. It’s the easiest and cheapest fix homeowners can do themselves.” — Mark Reynolds, Master Plumber with 22 years of experience
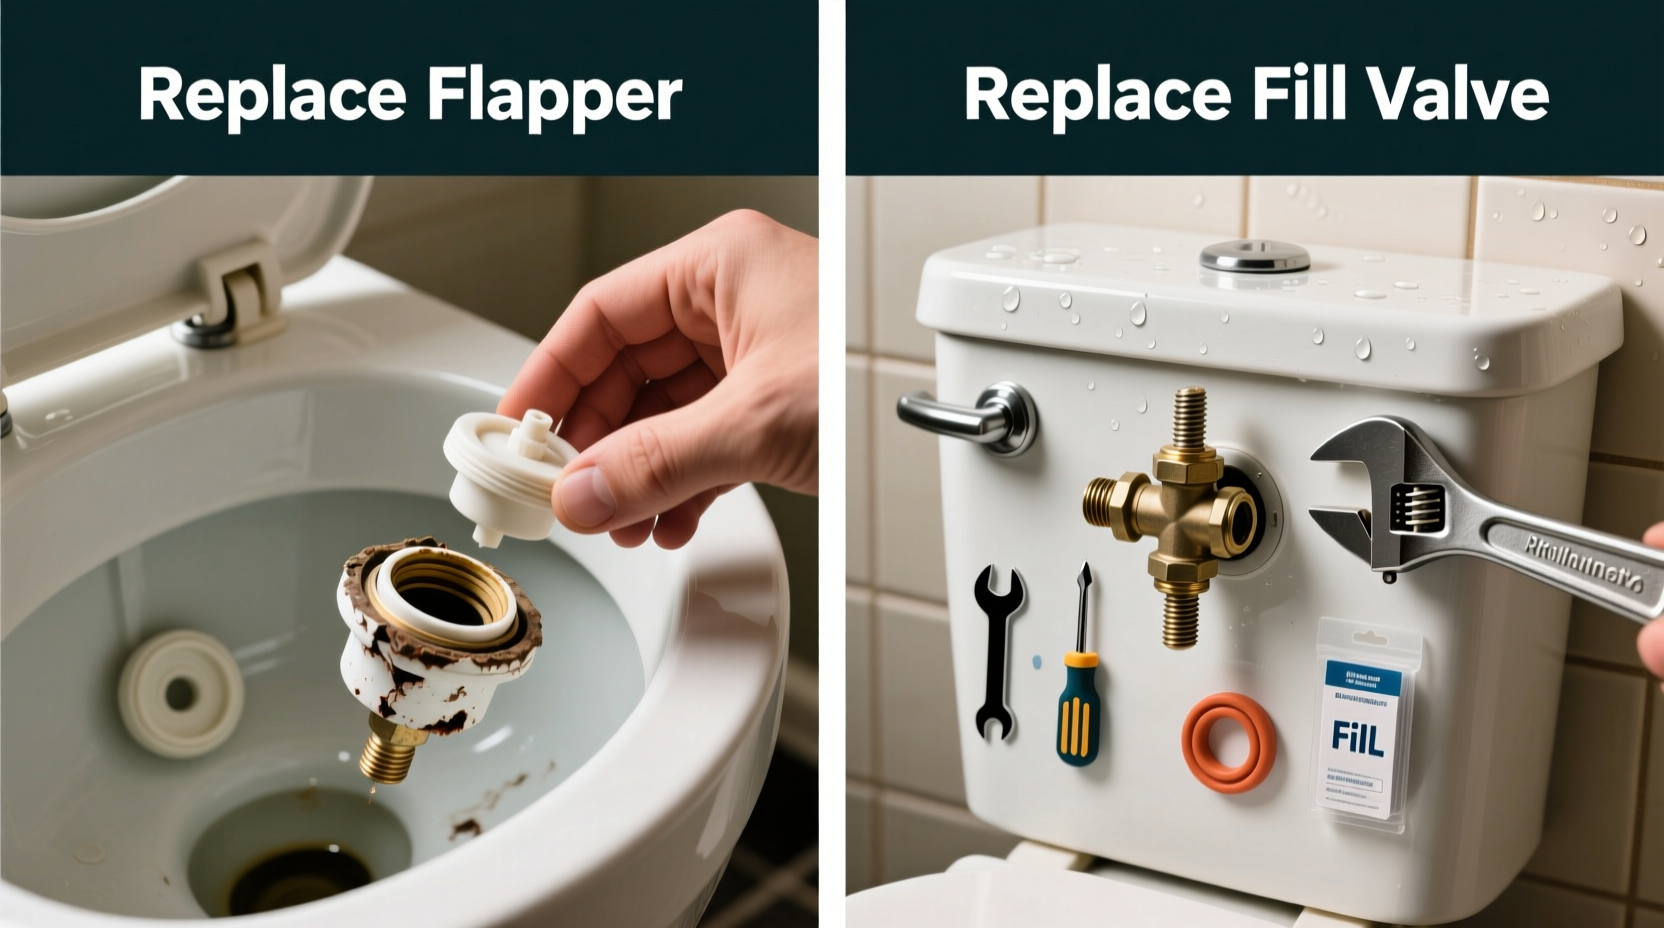
How to Replace the Flapper: Step-by-Step
- Turn off the water supply: Locate the shutoff valve near the base of the toilet and turn it clockwise until tight.
- Flush the toilet: This drains most of the water from the tank. Use a sponge to remove any remaining water.
- Unhook the old flapper: Detach the chain from the flush lever and unclip the ears of the flapper from the pegs on the flush valve.
- Take the old flapper to the store: Bring it with you to ensure you buy the correct replacement (round or oval, size-specific).
- Install the new flapper: Hook the ears onto the pegs and reconnect the chain, leaving a small amount of slack.
- Turn the water back on: Open the shutoff valve and let the tank refill.
- Test the flush: Check for leaks, proper sealing, and smooth operation.
Adjust the chain length if necessary—too tight, and the flapper won’t close; too loose, and it may not lift fully.
When the Fill Valve Is the Real Problem
If the flapper appears intact and the dye test shows no leakage into the bowl, the issue likely lies with the fill valve. Unlike flapper leaks, fill valve problems usually involve continuous water flow into the overflow tube, even after the tank is full.
Symptoms of a failing fill valve include:
- Constant running sound: Water flows nonstop into the overflow tube.
- Hissing noise: A high-pitched sound coming from the top of the fill valve.
- Delayed or incomplete filling: The tank takes too long to refill or never reaches the correct level.
- Water spilling into the overflow tube: Visible above the fill line, indicating improper shut-off.
Modern fill valves are adjustable and designed to last 5–7 years, but sediment buildup, pressure fluctuations, or manufacturing defects can shorten their life. Some older models use ballcocks, which are more prone to sticking and noise.
Replacing the Fill Valve: What You Need to Know
Replacing a fill valve is slightly more involved than changing a flapper but still manageable for most DIYers. Here’s what to do:
- Shut off the water and drain the tank: Same as with flapper replacement.
- Disconnect the water supply line: Use an adjustable wrench to loosen the nut connecting the supply tube to the bottom of the fill valve.
- Remove the old fill valve: Unscrew the large plastic nut at the base of the valve inside the tank. Lift the unit out.
- Install the new fill valve: Insert the new unit through the hole, hand-tighten the mounting nut, and secure it gently with pliers (don’t overtighten).
- Reconnect the supply line: Attach the tube and tighten the fitting.
- Adjust the float height: Follow manufacturer instructions to set the water level about 1 inch below the top of the overflow tube.
- Test the system: Turn the water on, let the tank fill, and check for leaks and proper shut-off.
Most modern kits come with universal fittings and clear calibration marks, simplifying installation. Brands like Fluidmaster and Korky offer reliable, easy-to-install models widely available at hardware stores.
Flapper vs. Fill Valve: Decision-Making Table
| Issue | Flapper Likely Cause? | Fill Valve Likely Cause? | Action Recommended |
|---|---|---|---|
| Toilet runs every few minutes | Yes | No | Replace flapper |
| Continuous water flow into overflow tube | No | Yes | Replace fill valve |
| Dye test shows bowl discoloration | Yes | No | Replace flapper |
| Tank doesn’t fill completely | No | Yes | Adjust or replace fill valve |
| Hissing sound from tank top | No | Yes | Replace fill valve |
| Older toilet (10+ years), multiple issues | Possible | Possible | Replace both components |
Mini Case Study: Solving a Persistent Leak in a 12-Year-Old Toilet
Sarah, a homeowner in Denver, noticed her upstairs bathroom toilet was running constantly. She initially assumed the flapper was bad and replaced it—but the problem persisted. Frustrated, she called a plumber, who performed a quick inspection. He observed water flowing into the overflow tube, not the bowl, and concluded the fill valve was failing despite looking “fine.”
The plumber replaced the fill valve with a modern Fluidmaster model. After adjusting the float, the running stopped immediately. Sarah later learned that her previous flapper had also degraded, so she replaced both parts during the same visit. Since then, the toilet has operated silently and efficiently. Her water bill dropped by $18 the following month.
This case illustrates why accurate diagnosis matters. Replacing only the flapper would have wasted time and money. A systematic approach saved resources and fixed the root cause.
Checklist: Diagnose and Fix a Running Toilet
- Listen for running sounds after flush completes.
- Perform a dye test to check for flapper leaks.
- Inspect the flapper for cracks, warping, or mineral deposits.
- Observe water level—does it rise above the overflow tube?
- Check for hissing or continuous flow into the overflow.
- Ensure the chain isn’t tangled or too tight.
- Verify the float moves freely and shuts off the fill valve.
- Decide: Replace flapper, fill valve, or both.
- Turn off water before starting repairs.
- Test thoroughly after installation.
Frequently Asked Questions
Can I replace the flapper and fill valve myself?
Yes. Both replacements are considered beginner-friendly plumbing tasks. No special tools are required beyond a wrench and sponge. Most hardware stores carry universal kits with detailed instructions. Just remember to shut off the water first.
How much does it cost to replace these parts?
A new flapper costs between $5 and $15. A fill valve kit ranges from $15 to $30. In contrast, hiring a plumber for the same job typically costs $100–$200. Doing it yourself offers significant savings.
Should I replace both the flapper and fill valve at the same time?
If your toilet is over five years old and you’re already opening the tank, replacing both components proactively can prevent future issues. They wear at similar rates, and buying a combo kit often saves money. It’s a smart preventive measure, especially if one has already failed.
Conclusion: Take Control of Your Toilet’s Performance
A running toilet doesn’t have to be a mystery or a burden. With a basic understanding of how the flapper and fill valve function, you can quickly diagnose and resolve the issue. Whether it’s a simple flapper swap or a fill valve upgrade, these repairs are affordable, sustainable, and well within the reach of most homeowners.
Fixing a leaky toilet conserves water, reduces utility bills, and prevents long-term damage. Don’t wait for the drip to become a flood—take action today. Armed with the right knowledge and a trip to the hardware store, you can silence that running sound and restore quiet efficiency to your bathroom.


 浙公网安备
33010002000092号
浙公网安备
33010002000092号 浙B2-20120091-4
Comments
No comments yet. Why don't you start the discussion?