
A running toilet is more than just an annoyance—it can waste up to 200 gallons of water per day, spike your utility bill, and signal underlying issues in your bathroom plumbing. The good news? Most causes are easy to diagnose and fix with basic tools and a little know-how. Whether the sound is a constant trickle or a ghost-flush every few minutes, this guide walks you through identifying the root cause and restoring quiet, efficient operation—all without calling a plumber.
Understanding How a Toilet Works
To effectively troubleshoot a running toilet, it helps to understand the internal components and their roles. A standard gravity-flush toilet has two main systems: the bowl and the tank. The tank fills with water after each flush and releases it into the bowl via a flush valve. Once emptied, the tank refills automatically through a fill valve connected to your home’s water supply.
Key parts inside the tank include:
- Flush valve: Releases water from the tank into the bowl when the handle is pressed.
- Flapper: A rubber seal at the bottom of the tank that lifts during flushing and reseals afterward.
- Fill valve: Regulates incoming water to refill the tank after flushing.
- Float: Controls the water level by rising with the water and shutting off the fill valve when full.
- Overflow tube: Prevents flooding by directing excess water into the bowl if the fill valve fails.
When any of these components fail or become misaligned, the tank may not seal properly, causing water to continuously run into the bowl. This persistent flow is both inefficient and disruptive.
Step-by-Step Guide to Diagnose and Fix a Running Toilet
Follow this logical sequence to identify and resolve the issue efficiently.
- Turn off the water supply. Locate the shutoff valve near the base of the toilet and turn it clockwise until tight. Flush the toilet to empty the tank.
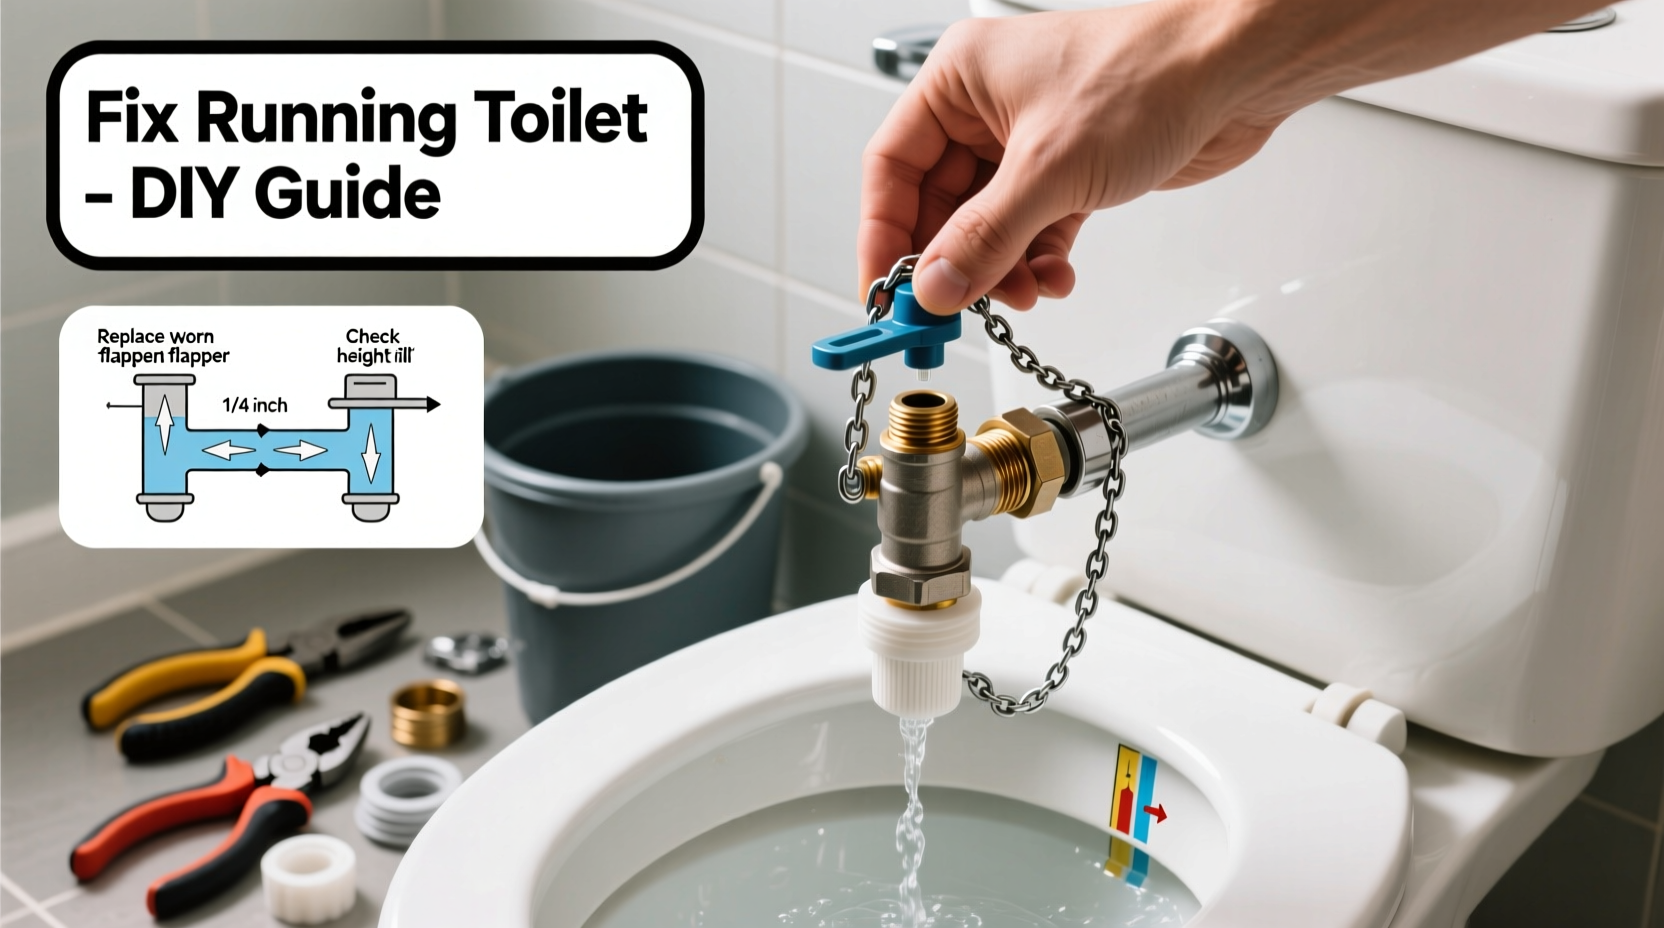
- Inspect the flapper. Check for warping, cracks, or mineral buildup on the rubber surface. If damaged or worn, replace it—it's one of the most common causes of a running toilet.
- Test the chain length. Ensure the lift chain connecting the flush handle to the flapper isn’t too tight or too loose. There should be about 1/4 inch of slack when the flapper is closed.
- Examine the overflow tube. Water flowing into this tube indicates the fill valve isn’t shutting off. Adjust the float height so water stops about 1 inch below the top of the tube.
- Clean or replace the fill valve. Sediment buildup can prevent proper sealing. If adjusting doesn’t work, consider replacing the entire assembly—it’s a $15 part and takes under 20 minutes to install.
- Check the flush valve seat. Over time, corrosion or debris can prevent a good seal between the flapper and the seat. Use fine sandpaper or steel wool to gently smooth imperfections.
- Restore water supply and test. Turn the shutoff valve back on, let the tank refill, and observe whether the flow stops completely.
This process resolves over 90% of running toilet cases. Most homeowners can complete it in less than 30 minutes using only a wrench and replacement parts available at any hardware store.
Common Causes and Quick Fixes
Different symptoms point to specific problems. Use this reference table to match what you’re seeing with the likely culprit.
| Symptom | Possible Cause | Solution |
|---|---|---|
| Water trickles constantly into the bowl | Worn or misaligned flapper | Replace flapper or adjust chain |
| Tank refills every 10–15 minutes | “Ghost flush” due to slow leak past flapper | Perform dye test; replace flapper if needed |
| Hissing or high-pitched refill sound | Faulty fill valve or sediment blockage | Clean or replace fill valve |
| Water runs into overflow tube | Float set too high | Adjust float level downward |
| No sound but tank empties slowly | Cracked overflow tube or flush valve | Inspect for hairline fractures; replace if necessary |
The “ghost flush” phenomenon—when the toilet randomly cycles on without being used—is almost always due to a degraded flapper allowing small amounts of water to seep into the bowl, eventually triggering the float to activate the fill valve.
“Most toilet issues stem from inexpensive parts that wear out over time. Replacing them every 4–5 years as preventive maintenance can save hundreds in water costs.” — James Holloway, Master Plumber & Plumbing Instructor
DIY Checklist: Fix a Running Toilet in Under 30 Minutes
Keep this checklist handy before starting your repair:
- ☑ Shut off water supply at the valve
- ☑ Flush toilet to drain tank
- ☑ Inspect flapper for wear, warping, or mineral deposits
- ☑ Verify chain has proper slack (¼ inch)
- ☑ Check water level relative to overflow tube (should be ~1 inch below)
- ☑ Adjust float height if water is too high
- ☑ Clean sediment from fill valve inlet screen
- ☑ Replace flapper or fill valve if defective
- ☑ Turn water back on and monitor for 5 minutes
- ☑ Perform dye test to confirm no leaks (optional but recommended)
Completing this checklist ensures no critical step is missed and gives you confidence the repair is thorough.
Real Example: Sarah’s Midnight Toilet Troubles
Sarah, a homeowner in Portland, was awakened nightly by her guest bathroom toilet cycling on and off. She initially ignored it, assuming it was normal. After three months, her water bill jumped by $65. Curious, she performed a dye test: she added food coloring to the tank and waited 20 minutes without flushing. Color appeared in the bowl—confirming a leak.
She removed the old flapper and noticed visible cracks along the rim and calcium buildup preventing a tight seal. She purchased a universal replacement flapper for $7.99, installed it following online instructions, adjusted the chain, and restored water. The running stopped immediately. Her next water bill dropped back to normal, and the bathroom regained its peace.
Sarah’s experience is typical. Many people live with running toilets for months, unaware of the cost and environmental impact. A five-minute inspection could have saved her money and sleep.
Frequently Asked Questions
How do I perform a dye test to check for leaks?
Add a few drops of food coloring or a dye tablet to the toilet tank. Wait 15–20 minutes without flushing. If color appears in the bowl, water is leaking past the flapper, indicating it needs replacement.
Can I use any brand of flapper in my toilet?
Most modern flappers are universal, but some older or high-efficiency models require specific sizes or flush valve configurations. Take the old flapper to the hardware store to ensure compatibility, or check the manufacturer’s model number inside the tank.
Why does my toilet keep running after I replaced the flapper?
If the problem persists, the issue may lie elsewhere. Common culprits include an incorrectly adjusted float, a failing fill valve, sediment blocking the flush valve seat, or a cracked overflow tube. Double-check water level and listen for hissing sounds, which indicate fill valve trouble.
Preventive Maintenance Tips for Long-Term Reliability
Fixing a running toilet is straightforward, but preventing future issues requires consistent care. Consider these habits to extend the life of your toilet’s internal mechanisms:
- Flush only waste and toilet paper. Avoid wipes, feminine hygiene products, or cleaning cloths—even those labeled “flushable.”
- Clean the tank annually. Sediment and mineral deposits accumulate over time, especially in hard water areas. Drain the tank and wipe components with a soft cloth.
- Replace flappers every 4–5 years. Rubber degrades even without visible damage. Proactive replacement prevents surprise leaks.
- Monitor water pressure. Excessively high pressure can strain valves and seals. Ideal household pressure is between 40–60 psi.
- Install a water meter alarm. Some smart meters alert you to continuous water flow, helping detect hidden leaks—including running toilets—before they become costly.
Regular maintenance not only avoids annoying noises but also contributes to water conservation. According to the Environmental Protection Agency (EPA), household leaks waste nearly 1 trillion gallons of water nationwide each year. Fixing a single running toilet can save thousands of gallons annually.
Conclusion: Silence the Sound and Save Every Drop
A running toilet doesn’t need to be a permanent fixture in your home. With basic tools, a modest investment in replacement parts, and a few minutes of attention, you can restore quiet operation and stop wasting water. The key is prompt action: don’t wait for higher bills or worsening symptoms. By understanding how your toilet works, diagnosing the cause accurately, and applying proven fixes, you maintain control over your home’s efficiency and comfort.


 浙公网安备
33010002000092号
浙公网安备
33010002000092号 浙B2-20120091-4
Comments
No comments yet. Why don't you start the discussion?