
Controller drift on Nintendo Switch Joy-Cons is a widespread issue that affects gameplay, precision, and user satisfaction. The analog stick registers movement even when untouched—causing characters to walk, jump, or turn unexpectedly. While Nintendo has offered repair programs in the past, many users face long wait times or are outside eligible regions. Replacing the entire controller can be costly, especially if multiple Joy-Cons are affected. Fortunately, there are several effective temporary fixes you can perform at home using simple tools and techniques. These solutions won’t replace professional repairs or permanent replacements, but they can restore functionality for days or even weeks—buying time until a more permanent solution is possible.
Understanding Joy-Con Drift
Analog stick drift occurs when the internal components of the joystick no longer report accurate resting positions. The root cause lies in the potentiometer—a small sensor that tracks the position of the stick. Over time, dust, debris, moisture, and normal wear degrade the contact points between the wiper (the moving part) and the resistive film inside the sensor. This leads to inconsistent readings, which the console interprets as unintended input.
Nintendo’s design choices have been scrutinized for contributing to premature wear. The rubber cap beneath the stick collects debris easily, and the metal ring around the shaft can press too hard against the sensor, accelerating abrasion. According to iFixit’s teardown analysis, “The materials used in the analog module aren’t built for longevity under frequent use.”
“Drift isn’t always failure—it’s often contamination or misalignment. Cleaning and recalibration can buy meaningful playtime.” — Carlos Mendez, Electronics Repair Technician
Step-by-Step Guide: Temporary Fix Using Compressed Air
One of the safest and quickest ways to address minor drift is by removing debris trapped beneath the analog stick. Dust and skin particles accumulate over time, interfering with sensor accuracy. Using compressed air can dislodge these contaminants without opening the device.
- Power off your Nintendo Switch completely.
- Remove the Joy-Con from the console.
- Hold the Joy-Con vertically so gravity helps eject debris.
- Aim a can of compressed air at a 45-degree angle toward the base of the analog stick.
- Spray short bursts (1–2 seconds each) while gently rotating the stick in full circles.
- Repeat 6–8 times, covering all directions.
- Wait 30 seconds for any moisture from condensation to evaporate.
- Reattach the Joy-Con and test in a game like *Super Mario Odyssey* or the system's control menu.
This method works best within the first few weeks of noticing drift. It’s non-invasive and preserves warranty status. However, results vary—some users report restored accuracy for over a week; others see only brief improvement.
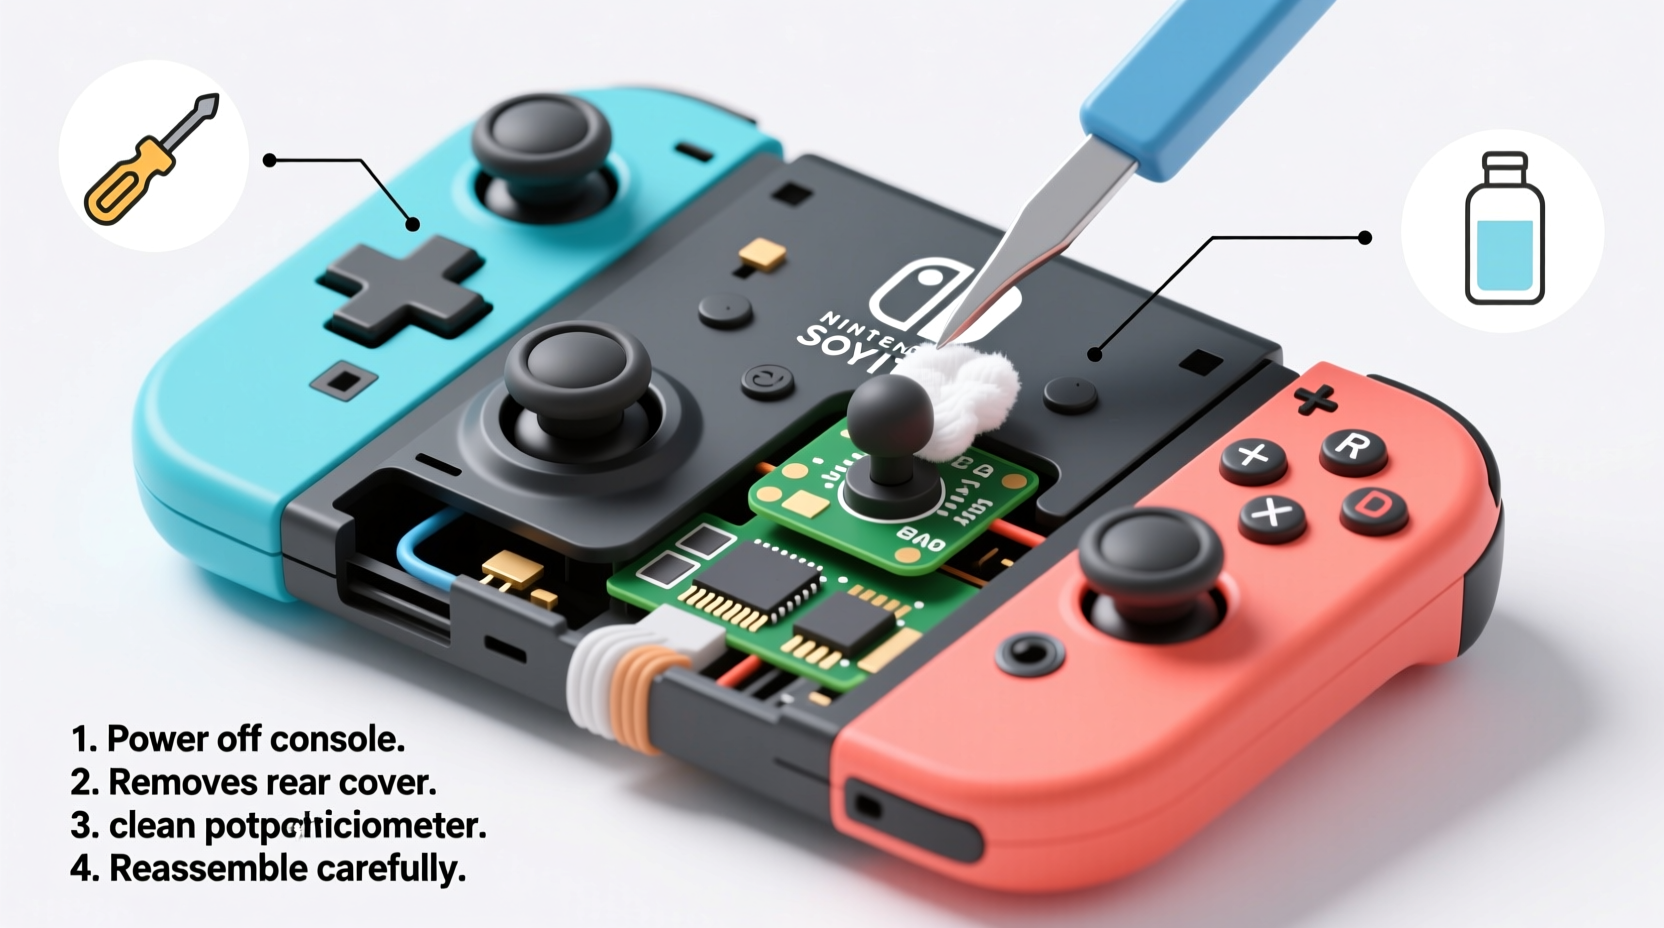
Deep Cleaning with Isopropyl Alcohol (Advanced Method)
When compressed air fails, a deeper clean involving partial disassembly may help. This procedure requires careful handling but can significantly improve stick behavior by cleaning oxidized or dirty contacts.
What You’ll Need:
- Small Phillips screwdriver (#00 size)
- Plastic pry tool or guitar pick
- Isopropyl alcohol (90% or higher)
- Cotton swabs or microfiber cloth
- Toothpick or plastic probe
- Latex or nitrile gloves (optional)
Disassembly Steps:
- Turn off the Switch and detach the Joy-Con.
- Remove the three screws on the back panel using the Phillips head.
- Gently insert the pry tool along the seam and separate the rear casing.
- Lift the casing away, being cautious of the battery connector underneath.
- Locate the analog stick assembly—it’s mounted on a small PCB near the top edge.
- Dip a cotton swab in isopropyl alcohol and carefully wipe around the base of the stick mechanism.
- Use a toothpick wrapped in an alcohol-dampened cloth to reach tight spaces.
- Let the area dry completely for at least 15 minutes before reassembling.
- Reattach the back cover and secure with screws.
The alcohol dissolves oils and residue on the potentiometer’s surface, restoring smoother electrical contact. Many users notice improved responsiveness immediately after drying.
Calibration and Software Adjustments
After physical cleaning, recalibrating the Joy-Con through the console can further reduce drift symptoms. This process resets the neutral point detected by the system.
How to Calibrate on Nintendo Switch:
- Go to System Settings > Controllers and Sensors > Disconnect Controllers.
- Press any button on the Joy-Con to reconnect it.
- Return to Controllers and Sensors > Update Control Sticks.
- Select “Update” and follow prompts to reset calibration data.
Note: This does not fix hardware issues but helps the system better interpret current stick behavior. Use this step after every deep clean.
| Method | Effectiveness | Risk Level | Duration of Fix |
|---|---|---|---|
| Compressed Air | Moderate | Very Low | Hours – 1 Week |
| Alcohol Cleaning | High | Medium | 1–4 Weeks |
| Calibration Only | Low | None | Minutes – Hours |
| Stick Cap Removal | Moderate | Low | Days |
Alternative Tricks That Help Reduce Drift Impact
If full disassembly feels too risky, try less invasive adjustments that still make a difference during gameplay.
Remove the Analog Stick Cap
The rubber caps can shift slightly over time, altering center alignment. Removing them allows you to inspect for debris and reset their seating. To do this:
- Grasp the cap firmly and pull straight upward.
- Clean both the cap and socket with a dry cloth.
- Reinsert the cap with firm, even pressure until it clicks.
This realignment sometimes reduces false inputs caused by mechanical misplacement rather than sensor wear.
Use In-Game Sensitivity Settings
Some games allow adjustment of analog stick sensitivity. Lowering dead zones—the range of motion ignored near the center—can mask mild drift. For example:
- In *Fortnite*, go to Settings > Controller > Controller Settings > Edit Preset > Input Dead Zone.
- Adjust left stick dead zone to 0.15 or higher to ignore minor drift.
While this doesn’t stop drift, it prevents small erroneous movements from affecting gameplay.
Rotate Controllers Regularly
If one Joy-Con shows worse drift than the other, swap roles frequently. Letting one controller rest reduces continuous wear on its analog stick. For instance, switch the left Joy-Con to right-hand mode in two-player sessions when possible.
Mini Case Study: Recovering Playability in Competitive Smash Bros.
Mark, a college student and avid *Super Smash Bros. Ultimate* player, began experiencing severe drift in his right Joy-Con during tournament season. His character would dash forward uncontrollably, costing him matches. Unable to afford a replacement before regionals, he researched temporary fixes.
He started with compressed air—minimal improvement. Then, following online guides, he performed an alcohol clean. After disassembling the unit and carefully applying 91% isopropyl alcohol to the analog sensor, he let it dry overnight. Upon reassembly, the drift was nearly gone. He calibrated the stick and adjusted in-game sensitivity. The controller lasted three full weeks of daily practice and two tournaments before drift returned.
Though not a permanent fix, Mark gained critical extra time to save for a replacement. “It felt like getting my old self back,” he said. “I didn’t have to explain why I kept losing because my character wouldn’t stop running.”
Checklist: How to Fix Joy-Con Drift Temporarily
Follow this sequence to maximize success without damaging your hardware:
- ✅ Power down the Switch and remove the affected Joy-Con
- ✅ Try compressed air first—non-destructive and quick
- ✅ Test functionality in-game
- ✅ If no improvement, remove stick cap and clean socket
- ✅ Recalibrate via System Settings
- ✅ If drift persists, proceed to alcohol cleaning (with proper tools)
- ✅ Allow full drying time before reassembly
- ✅ Recalibrate again post-cleaning
- ✅ Adjust in-game dead zones to minimize residual drift effects
- ✅ Monitor performance daily and rotate usage if possible
Frequently Asked Questions
Can I fix Joy-Con drift permanently at home?
No true permanent fix exists without replacing the analog stick module or the entire Joy-Con. Home methods clean or recalibrate existing parts but cannot reverse physical wear. Replacement modules are available online, but soldering skills are required for installation.
Will cleaning void my warranty?
Opening the Joy-Con typically voids the manufacturer warranty. If your device is still under warranty (one year from purchase), consider contacting Nintendo Support first. However, many users opt for DIY fixes due to repair delays and eligibility restrictions.
Are third-party repair kits worth it?
Yes, for technically inclined users. Kits that include replacement thumbsticks and tools cost $10–$20 and can extend life significantly. Brands like Gamertech and eReplacementParts offer reliable options. Just ensure compatibility with your Joy-Con model (HAC-013 or HAC-014).
Conclusion
Dealing with Joy-Con drift doesn’t have to mean immediate replacement. With careful cleaning, calibration, and smart usage habits, you can regain usable control and extend the lifespan of your current controllers. While these fixes are temporary, they provide real relief—especially when budgets are tight or replacements are unavailable. The key is acting early, using safe methods, and understanding the limitations of each approach. Whether you choose compressed air, alcohol cleaning, or software tweaks, taking proactive steps puts you back in control—literally.


 浙公网安备
33010002000092号
浙公网安备
33010002000092号 浙B2-20120091-4
Comments
No comments yet. Why don't you start the discussion?