
Waking up to a streaky, uneven self-tan can feel like a personal betrayal—especially after taking the time to prep, apply, and wait. But before you reach for the loofah or steel wool, reconsider: aggressive scrubbing damages your skin barrier, accelerates tan fade, and often makes patchiness worse. The good news? You don’t need to strip your skin to fix it. With smart, gentle techniques, you can correct uneven color, blend harsh lines, and extend the life of your tan—all while keeping your skin healthy.
Why Patchy Tan Happens (And Why Scrubbing Isn’t the Answer)
Fake tan fails usually stem from poor preparation or application—not necessarily user error. Dry elbows, knees, ankles, and cuticles absorb more product, creating darker spots. Meanwhile, areas with less sebum production—like shins or forearms—may appear lighter. Over time, natural exfoliation causes uneven fade, especially if moisturizing routines lapse.
Traditional fixes involve physical exfoliants—sugar scrubs, body brushes, or pumice stones—that remove the top layer of skin along with the tan. This might eliminate dark patches temporarily, but it also strips surrounding areas, leaving blotchy results. Dermatologists warn that over-scrubbing compromises the skin’s moisture barrier, increasing sensitivity and inflammation.
“Aggressive exfoliation disrupts the stratum corneum, which not only weakens skin integrity but can trigger rebound dryness—making future tans even patchier.” — Dr. Lena Torres, Cosmetic Dermatologist
The modern approach focuses on correction, not destruction. Instead of removing tan, you’re rebalancing tone through hydration, blending, and selective fading.
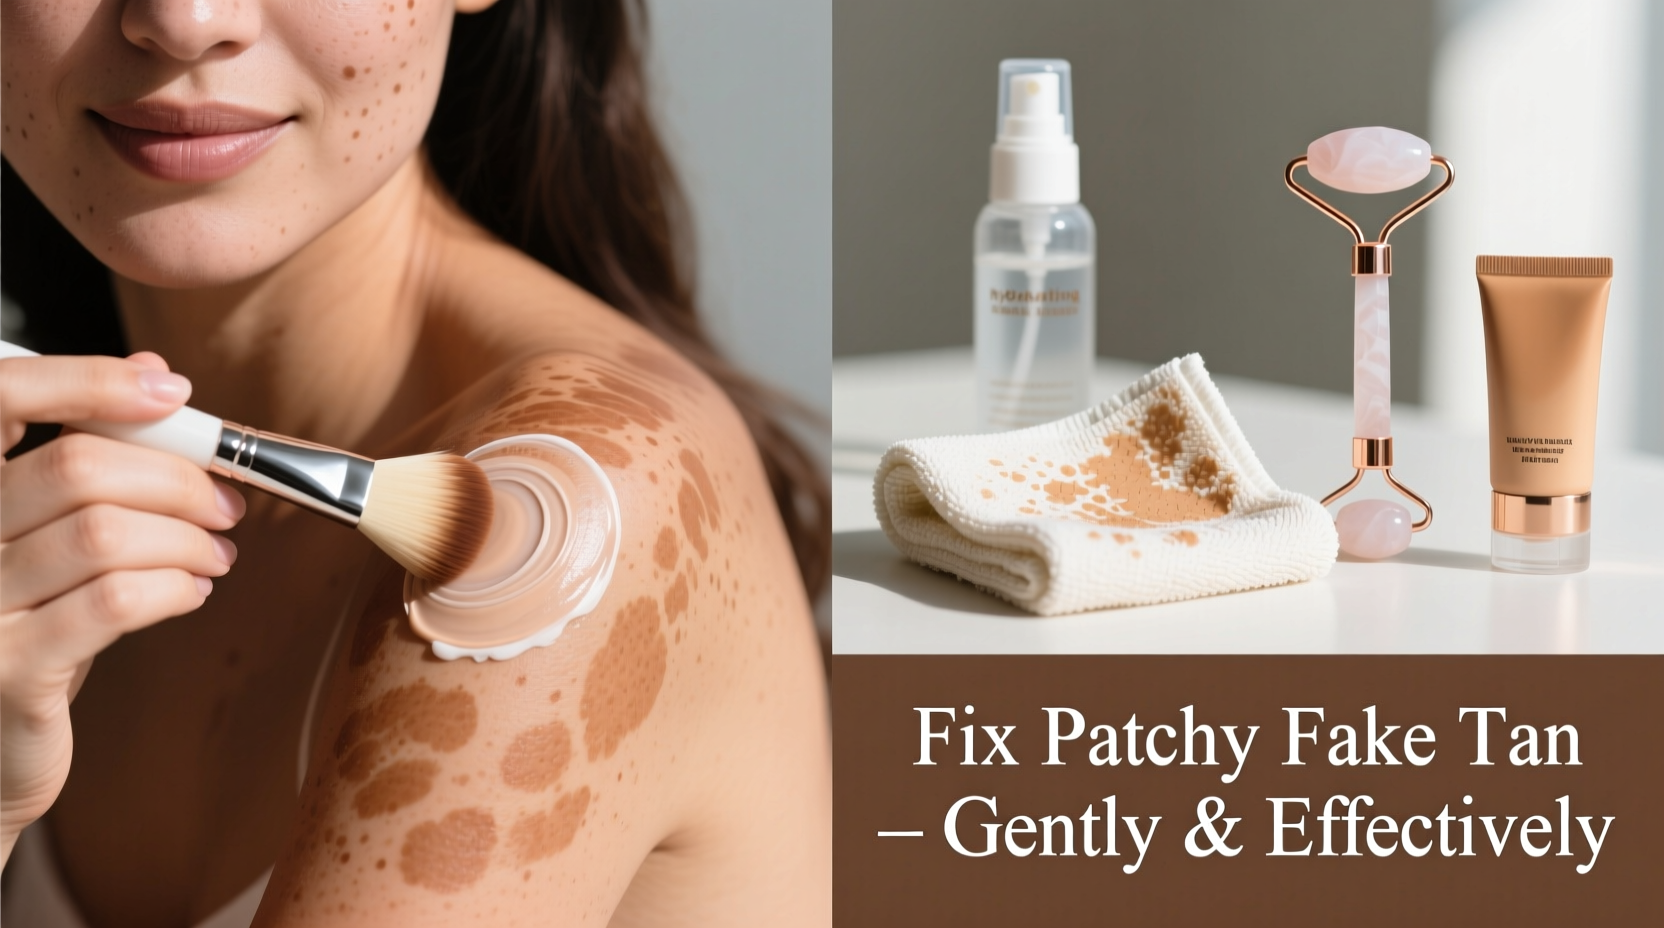
Step-by-Step Guide: Fixing Patchiness Without Damage
Follow this timeline-based method to restore even color within 24–48 hours. No scrubbing required.
- Assess the Damage (Day 0, Morning)
Identify problem zones: dark knees, streaked ankles, orange palms, or faded torso. Take note of contrast between areas. Avoid immediate action—give your skin time to settle. - Hydrate Deeply (Day 0, Afternoon & Night)
Apply a rich, fragrance-free moisturizer to dry patches twice daily. Focus on elbows, knees, and heels. Hydration plumps skin cells, diluting excess DHA (the active tanning ingredient) and softening dark spots. Use creams with hyaluronic acid or ceramides for best results. - Blend with Diluted Tan Remover (Day 1, Evening)
Using a cotton pad or reusable round, lightly apply a glycolic acid-based tan remover *only* to the darkest areas. Never rub—press gently for 10 seconds, then wipe clean. Rinse hands immediately. This selectively breaks down pigment without disturbing surrounding skin. - Reapply Strategically (Day 2, Morning)
If tone is still uneven, mix one pump of self-tanner with two pumps of moisturizer in your palm. Apply only to pale zones—avoid reapplying over dark areas. Use a damp sponge for feathered edges. - Maintain with Daily Moisture (Ongoing)
Switch to an oil-free, pH-balanced body lotion applied every 12 hours. This slows uneven exfoliation and prolongs tan life.
Do’s and Don’ts: What Works vs. What Worsens Patchiness
Not all fixes are created equal. Some popular hacks do more harm than good. Refer to this table before attempting any correction method.
| Action | Effect | Verdict |
|---|---|---|
| Applying coconut oil to dark knees | Oil lifts tan gradually; may cause greasiness | Avoid: Too unpredictable; can stain sheets |
| Using diluted lemon juice on streaks | Acid fades tan but increases sun sensitivity | Never: Risk of irritation and hyperpigmentation |
| Moisturizing dry patches before reapplying tan | Prevents over-absorption and evens surface texture | Do: Essential for seamless blending |
| Using a baby wipe to lighten palms | Gentle mechanical removal with minimal friction | Do (Carefully): Only on thick-skinned areas like palms |
| Soaking in a bath with Epsom salts | Accelerates overall tan fade, including good areas | Avoid: Leads to total color loss, not targeted fix |
Real Example: Recovering a Weekend Glow Gone Wrong
Sophie, a marketing executive, applied a popular mousse tan before a wedding. She skipped exfoliation, assuming her regular shower routine was enough. By morning, her knees were noticeably darker, and her ankles had vertical streaks. Panicked, she nearly reached for a body scrub—but remembered a skincare webinar advising against abrasion.
Instead, she followed a non-scrub protocol: she moisturized her knees hourly with CeraVe cream, then used a Q-tip dipped in a glycolic acid toner to dab at the streaks. After 24 hours, she mixed a drop of self-tanner with hand lotion and lightly brushed it over her shin—where the tan had faded. The result? A smooth, natural-looking glow that lasted four more days. The wedding photos showed no trace of the earlier flaw.
Her takeaway: patience and precision beat brute force every time.
Expert-Approved Methods for Long-Term Tan Evenness
Prevention is always better than correction. Skincare professionals emphasize consistency in both prep and maintenance.
- Prep with pH-Balanced Cleansers: Avoid bar soaps before tanning—they raise skin pH, causing DHA to react unevenly.
- Use a Light Exfoliant 24 Hours Before Application: Opt for a lactic acid body wash instead of physical scrubs. It removes dead cells gently and improves tan adhesion.
- Wear Gloves When Applying: Even with applicator mitts, fingers can transfer product. Disposable nitrile gloves prevent palm stains.
- Wait Before Dressing: Let the tan dry completely (15–30 minutes) to avoid transfer and rubbing.
- Sleep in Loose Clothing: Tight fabrics create friction, especially behind knees and under arms, leading to premature fade.
“A well-maintained tan isn’t about perfection on day one—it’s about even fade over time. That starts with intelligent skincare, not aggressive correction.” — Naomi Reed, Professional Makeup Artist & Tanning Consultant
Checklist: Fix Your Patchy Tan (No Scrubbing Required)
Print or save this checklist for quick reference when dealing with uneven color:
- ☐ Assess which areas are too dark, too light, or streaked
- ☐ Begin intensive moisturizing on dry or dark zones (2x daily)
- ☐ Use a cotton pad with glycolic-based tan remover on darkest spots only
- ☐ Wait 12 hours to evaluate improvement
- ☐ Mix self-tanner with moisturizer (1:2 ratio) for light reapplication
- ☐ Apply diluted formula only to pale areas using a damp sponge
- ☐ Resume daily moisturizing to maintain even fade
- ☐ Avoid hot showers, chlorine, and tight clothing for next 48 hours
Frequently Asked Questions
Can I use a facial toner to fix patchy tan?
Only if it contains alpha-hydroxy acids (AHAs) like glycolic or lactic acid—and only on small, localized areas. Avoid toners with alcohol, witch hazel, or high fragrance, as these dry the skin and worsen patchiness. Always patch-test first.
How long should I wait before reapplying tan?
Wait at least 12–24 hours after correcting dark spots. This gives your skin time to stabilize and prevents over-application. If you’ve used a tan remover, ensure the area is fully neutralized and hydrated before adding more color.
Is it safe to use a tan extender with fading patches?
Yes, but strategically. Tan extenders contain low levels of DHA and are designed to prolong color. However, apply them only to areas that are beginning to fade—not over dark patches. Using them everywhere can deepen already-dark zones and compound unevenness.
Conclusion: Work With Your Skin, Not Against It
Fake tan shouldn’t be a battle between you and your skin. The most effective corrections aren’t abrasive—they’re adaptive. By understanding how DHA develops and fades, you can manipulate tone with chemistry and care, not friction and force. Whether you're fixing last night’s mistake or planning your next flawless application, remember: gentle wins the glow.
Start viewing your skin as a canvas that evolves, not a surface to erase. With hydration, selective fading, and strategic blending, you can achieve a tan that looks naturally sun-kissed—even when things don’t go perfectly at first.


 浙公网安备
33010002000092号
浙公网安备
33010002000092号 浙B2-20120091-4
Comments
No comments yet. Why don't you start the discussion?