
Squeaky hardwood floors are more than just a nuisance—they can disrupt quiet mornings, interrupt conversations, and even make a home feel poorly maintained. While many assume the only solution is ripping up floorboards to access underlying joists, that approach is time-consuming, expensive, and often unnecessary. The truth is, most squeaks originate from friction between wood components caused by seasonal movement, loose fasteners, or shifting subfloors. With the right tools and methods, it’s entirely possible to silence those creaks permanently—without damaging your beautiful hardwood surface.
This guide walks through professional-grade solutions used by flooring experts and experienced homeowners alike. From identifying the root cause of a squeak to applying targeted fixes, you’ll learn practical, cost-effective strategies that preserve your floor’s finish and structural integrity.
Understanding Why Hardwood Floors Squeak
Hardwood floors expand and contract with changes in humidity and temperature. Over time, this movement can create small gaps between the floorboards and the subfloor or between the subfloor and the floor joists. When weight is applied—such as walking across a room—these components rub together, producing the familiar high-pitched squeak.
The most common causes include:
- Loose fasteners: Nails or staples holding the floor down may have loosened over time.
- Subfloor separation: The plywood or OSB subfloor has pulled away from the joists beneath.
- Dry wood friction: Seasonal drying causes wood to shrink, increasing rubbing at contact points.
- Improper installation: Inadequate nailing patterns or lack of adhesive during initial installation.
Before attempting any fix, it’s essential to pinpoint where the squeak occurs and whether it stems from the surface board or deeper structural layers.
Step-by-Step Guide to Locating and Fixing Squeaks
Successful repair starts with precise diagnosis. Follow this timeline to identify and resolve each squeak efficiently.
- Map the squeaky zones: Walk across the floor systematically, noting every spot that produces noise. Mark them lightly with masking tape.
- Determine the source: Have someone walk over the marked area while you listen from below (if accessible, such as in a basement or crawlspace). If the sound correlates with movement directly above, the issue likely lies between the subfloor and joists.
- Check for accessibility: If you have access to the underside of the floor, repairs become simpler and more effective. If not, surface-level fixes will be required.
- Select the appropriate method: Based on access and severity, choose one of the targeted solutions outlined below.
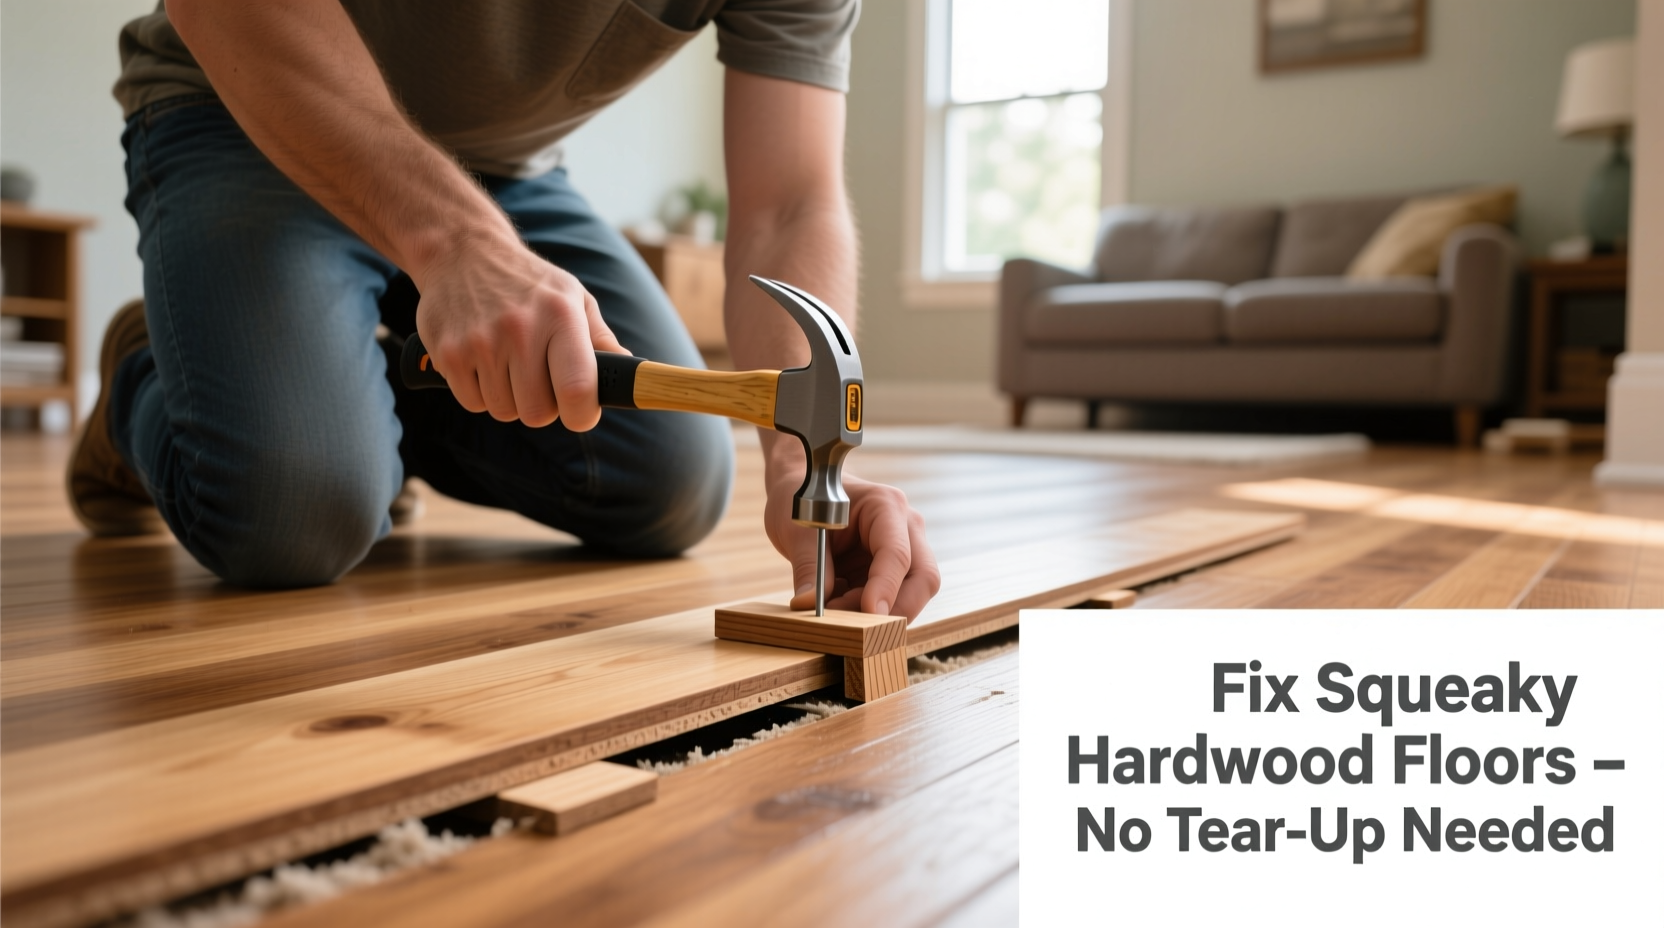
Method 1: Using Squeaky Floor Repair Kits (No Access Needed)
Designed specifically for finished floors, these kits feature a specialized screw driver bit and locator system that allows you to drive screws through the hardwood into the joist below—without guesswork.
The process works as follows:
- A pilot tool scans the floor to detect joist locations beneath.
- Once located, a specially angled screw is driven through the edge of two adjacent boards, penetrating the joist underneath.
- The screw pulls the subfloor tightly against the joist, eliminating movement.
- Excess screw heads are snapped off flush, leaving no visible hardware.
Brands like Squeeeeek No More and Silent Floor are popular choices. They’re ideal for mid-span squeaks where nails weren’t originally placed over joists.
Method 2: Applying Construction Adhesive Through Gaps
If there are visible gaps between floorboards—a common occurrence in older homes—you can inject construction adhesive into the space to bond the hardwood to the subfloor.
Steps:
- Clean the gap thoroughly using compressed air or a vacuum to remove dust.
- Insert a fine nozzle applicator into the gap above the suspected joist location.
- Slowly inject a high-quality wood-to-wood construction adhesive (e.g., PL Premium).
- Place a light weight over the area for 24 hours to press the boards together as the adhesive cures.
This method fills voids and prevents lateral movement, effectively silencing the squeak. It's minimally invasive and preserves the floor’s appearance.
Method 3: Reinforcing from Below (If Crawlspace or Basement Accessible)
When you can access the underside of the floor, the most reliable fix involves securing the subfloor directly to the joists.
Procedure:
- Locate the joist directly beneath the squeaky spot using a stud finder or visual alignment with floor cracks.
- Drive a 3-inch construction screw upward through the subfloor into the joist. Avoid overtightening, which can cause dimpling.
- If needed, add a thin wooden shim between the joist and subfloor before tightening to eliminate gaps.
- For persistent movement, install a metal joist tie or “screw brace” diagonally between the joist and subfloor for added stability.
“Over 80% of floor squeaks can be resolved from below with proper screw placement. It’s faster, cleaner, and more durable than surface treatments.” — Daniel Reyes, Master Carpenter & Flooring Contractor
Do’s and Don’ts of Squeaky Floor Repairs
| Do’s | Don’ts |
|---|---|
| Use finish-head screws designed for hardwood floors to minimize visibility. | Don’t use drywall screws—they’re brittle and prone to snapping. |
| Work in low-humidity conditions when possible to reduce wood expansion. | Don’t hammer random nails hoping to catch a joist—it can damage both floor and structure. |
| Test adhesive on a hidden area to ensure it won’t stain the wood. | Don’t apply excessive adhesive that could seep out and create a mess. |
| Label repaired areas with tape until fully cured or settled. | Don’t walk heavily on treated spots within 24 hours of adhesive application. |
Real Example: Restoring a Historic Home’s Quiet Charm
In a 1920s bungalow in Portland, Oregon, the living room floor had developed a loud squeak near the fireplace—an embarrassment whenever guests visited. The homeowner, wary of damaging the original oak flooring, refused to consider sanding or board replacement.
A local flooring specialist recommended a combination approach: first, using a Squeeeeek No More kit to secure the central squeak from above, then injecting Titebond 531 Ultimate Wood Glue into micro-gaps along the east-west seams. The entire process took under two hours, with zero surface damage. Within 48 hours, the floor was silent. Six months later, no recurrence was reported—even through winter humidity swings.
This case illustrates how modern tools allow preservation-minded homeowners to maintain historical integrity while solving functional issues.
Expert Tips for Long-Term Prevention
Fixing existing squeaks is valuable, but preventing future ones enhances comfort and longevity. Consider these proactive measures:
- Maintain stable indoor humidity: Keep levels between 35% and 55% using a humidifier in winter and dehumidifier in summer.
- Inspect periodically: Annually check high-traffic zones for early signs of movement.
- Use area rugs strategically: They reduce wear and dampen sound, though avoid rubber-backed mats that trap moisture.
- Reinforce during renovations: If replacing baseboards, consider adding bracing screws at joist intersections.
“Wood is alive. It moves, breathes, and settles. A squeak isn’t a failure—it’s feedback. Address it early, and your floor will last generations.” — Lila Nguyen, Sustainable Woodcraft Specialist
Frequently Asked Questions
Can I fix a squeaky floor if I don’t have basement access?
Yes. Surface-level solutions like squeak repair kits and gap injection are specifically designed for homes without crawlspaces. These methods target joist connections through the floor itself, making them ideal for upper-level rooms or slab-on-grade constructions.
Will fixing squeaks damage my floor’s finish?
Not if done correctly. Specialized tools use discreet entry points between boards or at seam edges, avoiding scratches or dents. Any minor marks can usually be touched up with matching wood putty or wax sticks.
How long do squeak repairs last?
Properly executed repairs—especially those involving screws or structural adhesives—can last decades. Factors like humidity control, foot traffic, and initial installation quality influence longevity. Most professionals guarantee their fixes for 5–10 years under normal conditions.
Final Checklist: How to Fix Squeaky Hardwood Floors Without Removing Boards
- Walk the floor barefoot to map all squeaky locations.
- Determine if you have access to the underside (basement/crawlspace).
- Gather tools: stud finder, construction adhesive, squeeze bottle with nozzle, specialty screw kit, or long screws (if accessing from below).
- For surface-only access: Use a squeak-finding kit to drive screws at angles into joists.
- For gapped floors: Inject wood adhesive into seams above joists.
- For accessible subfloors: Secure subfloor to joists with upward-driven screws.
- Allow 24 hours for adhesive curing; avoid heavy use during this period.
- Monitor results and re-treat only if necessary.
Conclusion: Silence Starts with Smart Action
Squeaky hardwood floors don’t require demolition to fix. With careful assessment and the right technique, you can restore peace and stability to your home without compromising aesthetics or investment. Whether you choose an innovative repair kit, precision adhesive application, or structural reinforcement from below, the key is acting with knowledge and care.
Millions of homeowners have successfully silenced their floors using these non-destructive methods. Now it’s your turn. Pick one squeak today, apply what you’ve learned, and take pride in a quieter, more comfortable living space.


 浙公网安备
33010002000092号
浙公网安备
33010002000092号 浙B2-20120091-4
Comments
No comments yet. Why don't you start the discussion?