
Stick drift on a PS5 DualSense controller is one of the most frustrating issues gamers face. The analog sticks begin moving or drifting in a direction without input, making gameplay erratic and often unplayable. While Sony has released updated versions of the controller to address long-term durability, many users still experience drift months after purchase. Instead of immediately buying a replacement, you can try fixing it yourself. This comprehensive guide walks through the causes, diagnostic steps, and effective DIY solutions to restore your controller’s performance—without spending hundreds on a new one.
Understanding Stick Drift: Why It Happens
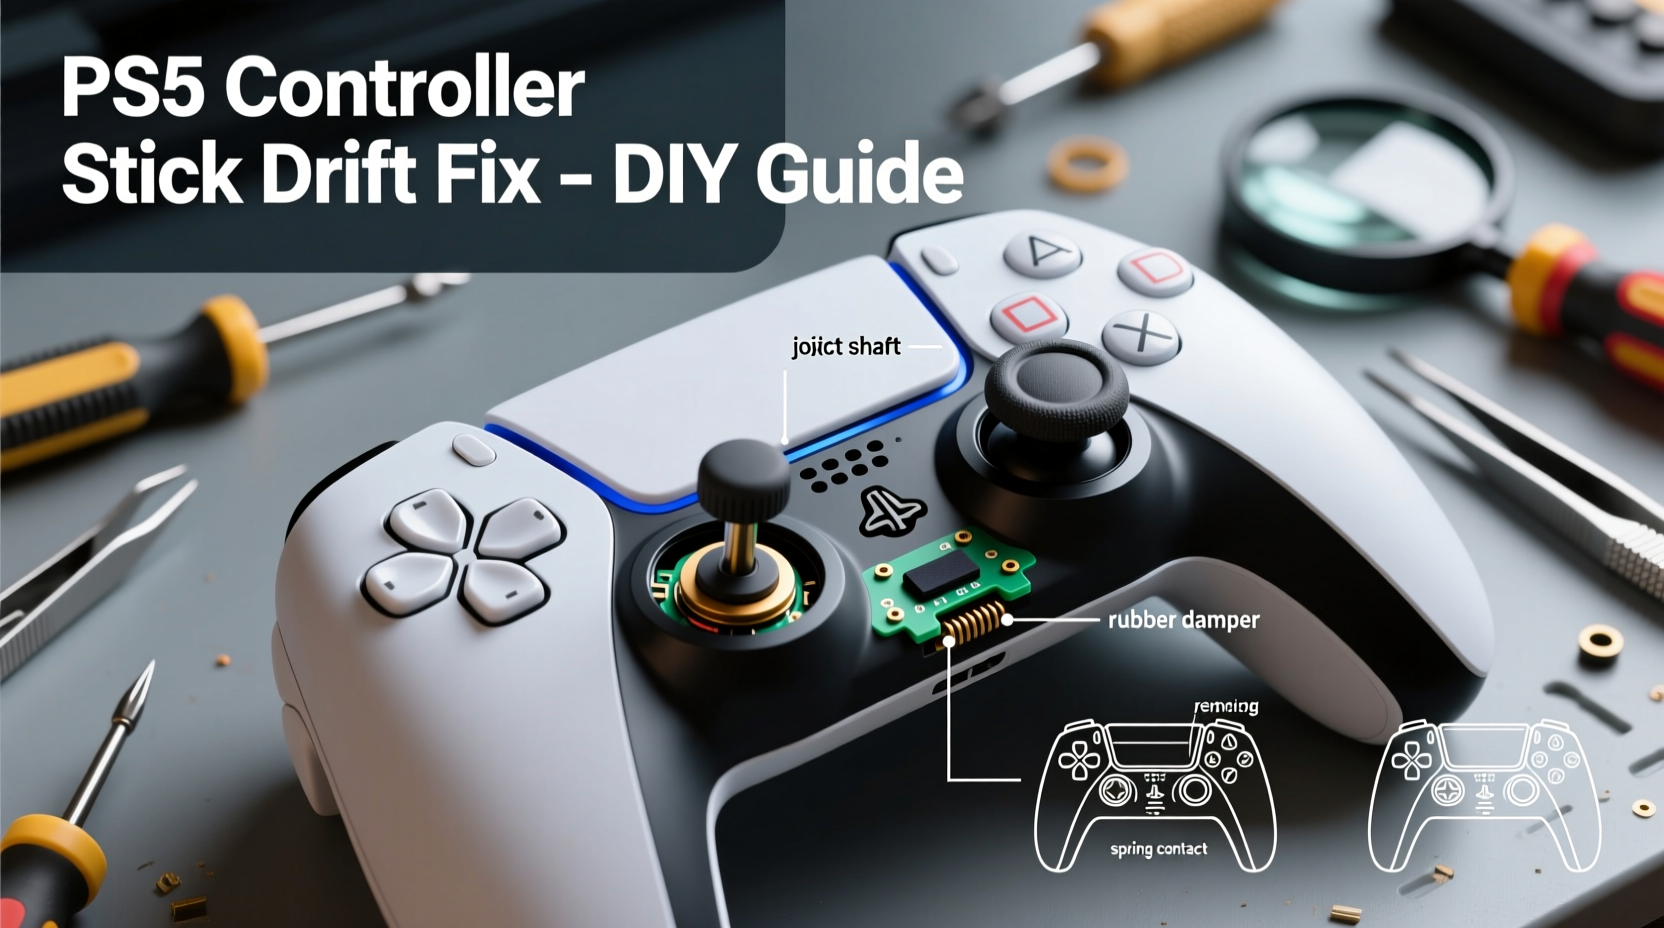
Analog stick drift occurs when the controller registers movement even when the stick is at rest. In the PS5’s DualSense controller, each analog stick uses a potentiometer—a small sensor that measures resistance based on the stick’s position. Over time, dust, grime, or wear can interfere with this sensor, causing inaccurate readings. Additionally, microscopic debris inside the joystick module can shift the neutral point, tricking the system into thinking the stick is being moved.
Sony acknowledged these concerns and redesigned the internal components in later DualSense models. However, older units and heavily used controllers remain susceptible. Environmental factors like humidity, frequent gaming sessions, and improper storage also accelerate wear.
“Over 60% of stick drift cases are caused by debris buildup rather than hardware failure. Simple cleaning can resolve the issue in most early-stage cases.” — Jordan Lee, Electronics Repair Technician with 12 years of console specialization
Step-by-Step Guide to Fixing Stick Drift at Home
Before disassembling your controller, attempt non-invasive fixes. If those fail, proceed carefully with deeper cleaning or recalibration. Follow this timeline for best results:
- Day 1: Perform button reset and test drift behavior
- Day 2: Clean around the stick base using safe methods
- Day 3: Disassemble and deep clean internal components (if needed)
- Day 4: Reassemble and test functionality
Step 1: Reset and Recalibrate the Controller
Start by ruling out software glitches. Connect your DualSense to the PS5 via USB and navigate to:
Settings → Accessories → Controllers → Calibrate Control Sticks
If calibration doesn’t help, perform a factory reset on the controller. Locate the tiny reset pinhole on the back near the L2 trigger. Insert a paperclip and hold for 5 seconds. Reconnect the controller to your console and re-pair it.
Step 2: Clean Around the Analog Sticks (Non-Invasive Method)
If drift persists, clean the area around the stick bases. Use a soft-bristled toothbrush or cotton swab dipped in 90%+ isopropyl alcohol. Gently scrub the seam between the stick cap and the controller body. Rotate the stick in full circles while cleaning to expose hidden grime. Let it dry completely for at least 15 minutes before testing.
This method works best for light drift caused by surface-level debris. Many users report immediate improvement after this step alone.
Step 3: Deep Cleaning via Controlled Disassembly
For persistent drift, internal cleaning is necessary. This requires precision and patience. You’ll need the following tools:
- Small Phillips #00 screwdriver
- Plastic prying tool or spudger
- Isopropyl alcohol (90% or higher)
- Cotton swabs and microfiber cloth
- Compressed air (optional)
- Tweezers (fine-tip)
Follow these substeps carefully:
- Power off the PS5 and disconnect the controller.
- Remove the seven visible screws on the back using the Phillips driver.
- Gently separate the two halves using a plastic tool. Work slowly around the edges to avoid breaking clips.
- Lift the top half to expose the circuit board and joystick modules.
- Locate the analog sticks—each connected via a small ribbon cable.
- Carefully disconnect the ribbon cables using tweezers or fingers.
- Remove the joystick assembly and inspect the potentiometer and surrounding area.
- Dampen a cotton swab with alcohol and clean the internal contacts and moving parts. Avoid soaking the component.
- Use compressed air to blow out any fine particles from crevices.
- Reattach the ribbon cables and reassemble the controller in reverse order.
After reassembly, test both sticks thoroughly. Move them in slow circles, check center return, and monitor for ghost inputs.
Do’s and Don’ts When Fixing Stick Drift
| Do’s | Don’ts |
|---|---|
| Use high-concentration isopropyl alcohol for cleaning | Use water or household cleaners—they can corrode circuits |
| Work in a well-lit, static-free environment | Rush the disassembly process—delicate parts can break |
| Test functionality after each major step | Touch exposed circuitry with bare fingers—oil affects conductivity |
| Store screws in a labeled container | Force connectors—ribbon cables plug in gently |
| Let all components dry fully before reassembly | Use metal tools near PCBs—they can cause shorts |
When Replacement Parts Are Necessary
If cleaning fails, the potentiometer may be worn beyond repair. In such cases, replacing the analog stick module is the next best option. Replacement joysticks for the DualSense are available online for $8–$15 per unit. They come pre-soldered and connect via ribbon cable, making installation straightforward once the old unit is disconnected.
Installation steps:
- Order a compatible left or right analog stick replacement.
- Disassemble the controller as previously described.
- Unplug the faulty joystick’s ribbon cable from the motherboard.
- Plug in the new module—ensure alignment matches exactly.
- Secure the housing and reassemble the controller.
This solution restores full functionality and is significantly cheaper than buying a new DualSense. Users who replace both sticks proactively often eliminate future drift for over a year.
“I’ve repaired over 200 DualSense controllers. 70% only needed cleaning. The other 30% required stick replacements. None needed full controller swaps.” — Alex Rivera, Owner of GameFix Lab
Mini Case Study: Recovering a Heavily Used Controller
Mark, a competitive *Call of Duty* player from Austin, noticed his right stick began drifting upward during aiming sequences. Initially dismissing it as lag, he soon realized the issue persisted across games and devices. After trying recalibration and surface cleaning with no success, he decided to open the controller.
Upon disassembly, he found dark residue around the joystick’s pivot point—likely a mix of skin oils and dust. After carefully cleaning the internals with alcohol and letting it dry overnight, he reassembled the unit. The drift was gone. Mark now cleans his controller every three months and reports no recurrence after eight months.
His experience highlights that early intervention and proper maintenance can prevent permanent damage—even under heavy use.
Preventing Future Stick Drift
Once fixed, protect your investment with preventive habits:
- Wash hands before play: Oils and sweat contribute to internal buildup.
- Avoid eating while gaming: Crumbs and grease can enter crevices.
- Store in a dry place: Humidity promotes corrosion and material degradation.
- Use protective caps: Silicone stick covers reduce direct contact and wear.
- Rotate controllers: If you have multiple, alternate usage to extend lifespan.
FAQ: Common Questions About PS5 Controller Stick Drift
Can stick drift be fixed permanently?
In many cases, yes—especially if addressed early. Cleaning removes debris causing false signals. For worn components, replacing the joystick module offers a near-permanent fix. However, no analog stick lasts forever. With proper care, a repaired controller can last 1–2 years or more.
Is opening my PS5 controller warranty-safe?
No. Removing screws voids the manufacturer warranty. Sony offers repair services, but they can cost up to $50–$80. If your controller is out of warranty (typically 1 year), DIY repair is a cost-effective alternative.
Are third-party replacement sticks reliable?
Most high-rated sellers offer functional replacements that match OEM specs. Look for units with positive reviews and “plug-and-play” compatibility. Avoid the cheapest options—poor soldering or misaligned parts can cause new issues.
Checklist: How to Fix Stick Drift on PS5 Controller – Step Summary
- ✅ Try recalibrating the sticks in PS5 settings
- ✅ Perform a controller reset using the pinhole button
- ✅ Clean around the stick base with isopropyl alcohol and a swab
- ✅ Test for improvement; if drift continues, proceed to disassembly
- ✅ Gather tools: screwdriver, prying tool, alcohol, swabs
- ✅ Open the controller carefully and disconnect joystick ribbons
- ✅ Clean internal components and let dry completely
- ✅ Reassemble and test thoroughly
- ✅ If cleaning fails, install new analog stick modules
- ✅ Implement preventive maintenance to avoid recurrence
Conclusion: Take Control of Your Gaming Experience
Stick drift doesn’t have to mean the end of your PS5 controller’s life. With careful diagnosis and the right approach, most cases can be resolved at home for minimal cost. Whether it’s a quick clean or a simple part swap, restoring your controller empowers you to keep playing without interruption. Millions of gamers have successfully extended their hardware’s lifespan using these methods—and you can too.


 浙公网安备
33010002000092号
浙公网安备
33010002000092号 浙B2-20120091-4
Comments
No comments yet. Why don't you start the discussion?