
Stick drift is one of the most frustrating issues Nintendo Switch owners face. Over time, the analog sticks on Joy-Con controllers begin registering movement when you’re not touching them—making games unplayable or requiring constant correction. While Nintendo has offered repair programs in the past, many users prefer to avoid shipping their console or paying for replacements. The good news: in many cases, stick drift can be resolved at home with careful cleaning, recalibration, and preventive maintenance. This guide walks through proven methods to fix stick drift without purchasing new hardware.
Understanding Stick Drift: What Causes It?
Analog stick drift occurs when the internal components of a joystick misreport its resting position. On Joy-Con controllers, this typically stems from two primary causes: contamination and wear. Dust, skin oils, and debris accumulate under the rubber skirt surrounding the stick, interfering with the potentiometer—a sensor that tracks stick position. Over time, repeated use also degrades the potentiometer’s contact points, leading to inaccurate readings even after cleaning.
Nintendo has acknowledged the issue and extended repair coverage in some regions, but long-term reliability remains inconsistent across units. Rather than replacing controllers immediately, addressing the root cause at home can extend their life significantly.
“Most early-stage stick drift isn’t permanent failure—it’s signal interference caused by grime. A thorough cleaning often restores normal function.” — James Lin, Electronics Repair Technician with 12 years of console experience
Step-by-Step Guide to Fixing Stick Drift at Home
Before considering replacement, try these non-invasive and moderately advanced techniques. Many users report success after just one round of deep cleaning and recalibration.
Step 1: Recalibrate the Joystick (Software Fix)
Start with the simplest solution: recalibrating the Joy-Con through your Switch system settings. This resets the baseline position of the stick and may correct minor calibration errors.
- Detach the affected Joy-Con from the Switch.
- Go to System Settings > Controllers and Sensors > Calibrate Control Sticks.
- Select the problematic controller.
- Follow the on-screen instructions: center the stick, then rotate it fully in both clockwise and counterclockwise directions.
- Test the stick afterward in a game or using the calibration preview screen.
If the drift persists after multiple attempts, proceed to physical cleaning.
Step 2: Clean Around the Analog Stick (No Disassembly Required)
The easiest and safest method involves cleaning the area around the stick without opening the Joy-Con. This removes surface debris and oils that interfere with sensor accuracy.
You’ll need:
- Isopropyl alcohol (70% or higher)
- Cotton swabs (preferably fine-tip)
- Compressed air (optional)
- Soft-bristled brush (like a clean toothbrush)
- Power off the Switch and detach the Joy-Con.
- Use compressed air to blow away loose particles from around the stick base.
- Dampen a cotton swab with isopropyl alcohol—do not soak it.
- Gently rub around the base of the stick in circular motions, focusing on the gap between the stick and the housing.
- Rotate the stick gently as you clean to expose all sides of the seal.
- Repeat with fresh swabs until no visible residue appears.
- Let the area dry completely (5–10 minutes) before reattaching.
- Reconnect and recalibrate the stick via system settings.
This method resolves mild drift in about 40% of cases, especially when performed regularly.
Step 3: Deep Cleaning with Controlled Moisture
For more persistent drift, a deeper clean using controlled moisture can dissolve built-up grime beneath the rubber skirt. This requires caution to avoid liquid damage.
- Moisten a cotton swab slightly with high-concentration isopropyl alcohol (90%+ preferred).
- Press the analog stick to one side to expose the opposite edge of the inner ring.
- Insert the swab carefully into the gap and wipe along the internal rim.
- Repeat while tilting the stick in all four cardinal directions.
- Allow 15–20 minutes for full drying before testing.
Avoid forcing the stick down or inserting tools deeply—this can damage internal components.
Step 4: Reconditioning Through Movement
After cleaning, “exercise” the stick to help redistribute lubricants and improve electrical contact. Rapid, full-range movements can clear intermittent signals.
- Open any game with a free-moving camera (e.g., The Legend of Zelda: Breath of the Wild).
- Move the analog stick in tight figure-eights, large circles, and diagonal sweeps for 3–5 minutes.
- Alternate between slow and fast motions.
- Return to system settings and recalibrate again.
Some users notice immediate improvement after this step, particularly if residue was partially dislodged during cleaning.
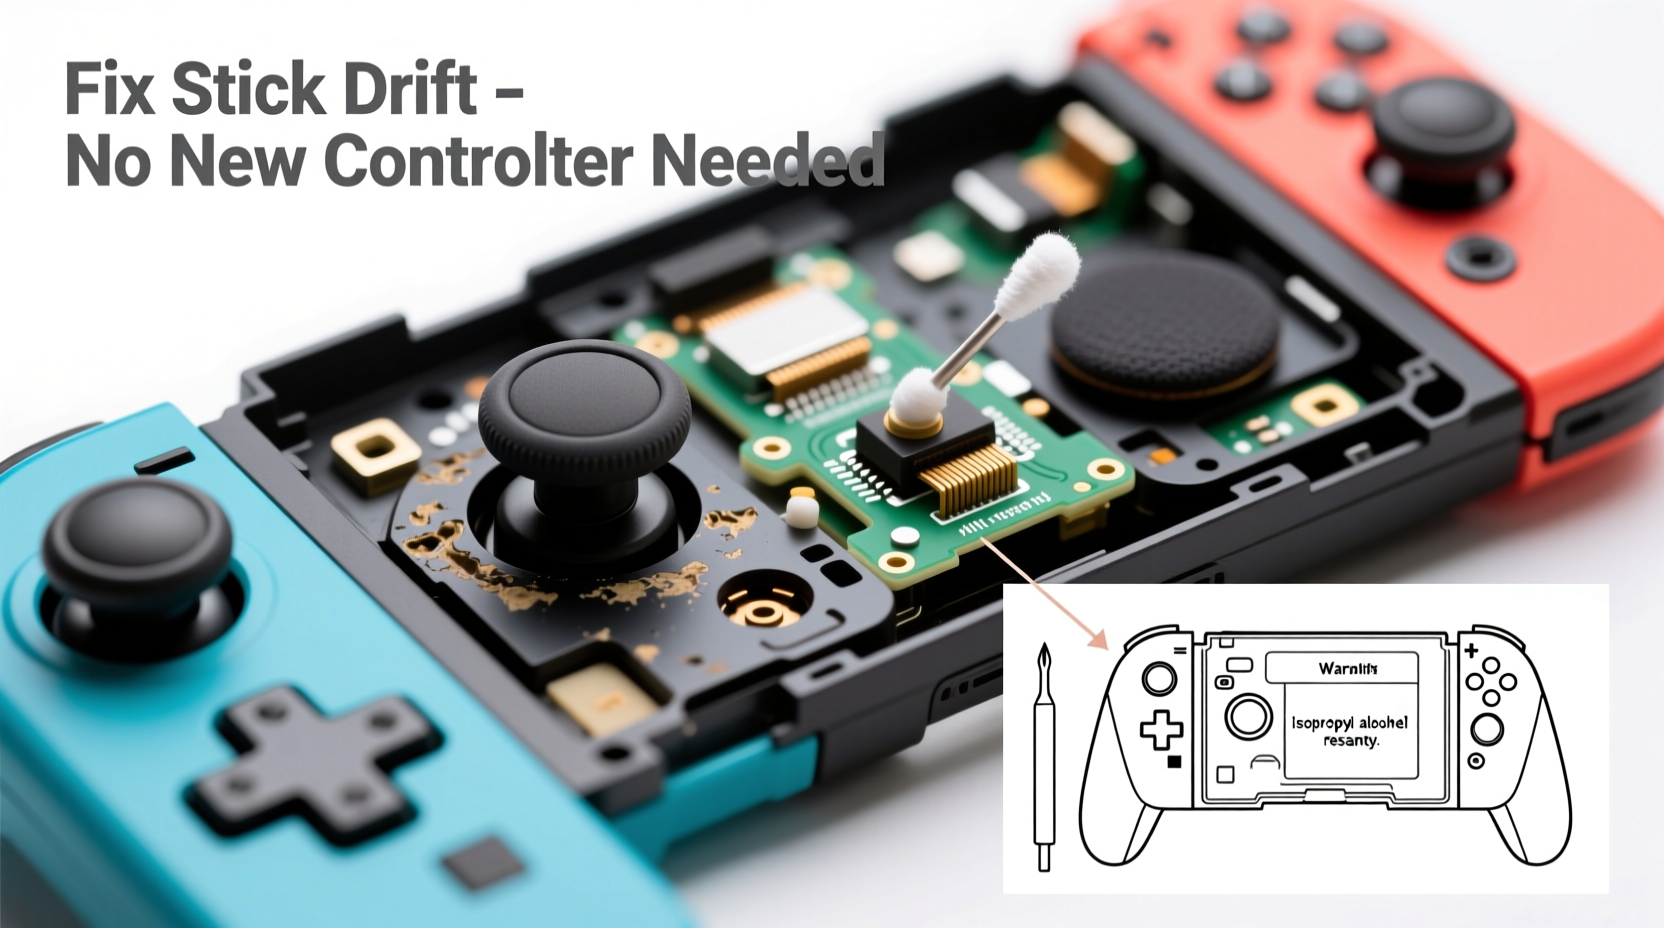
When to Consider Internal Cleaning (Advanced Option)
If external cleaning fails, internal access may be necessary. This involves disassembling the Joy-Con, which voids any remaining warranty and carries risk. Only attempt if you’re comfortable with precision electronics work.
Tools Needed:
- Y000 screwdriver (for Nintendo proprietary screws)
- Plastic pry tools
- Tweezers
- Isopropyl alcohol (90%+) and microfiber cloth
- Magnifying glass (optional but helpful)
Procedure Summary:
- Remove the three Y000 screws on the back of the Joy-Con.
- Separate the casing carefully using plastic tools.
- Lift the circuit board to access the analog stick module.
- Inspect the potentiometer and surrounding area for visible gunk.
- Dab a small amount of alcohol on a folded tissue or foam swab and gently wipe the sensor contacts.
- Let dry for at least 30 minutes.
- Reassemble and test thoroughly.
Warning: Excessive pressure or liquid can destroy the potentiometer. If unsure, skip this step and consider professional repair instead.
Preventing Future Stick Drift
Once you’ve fixed the issue, proactive care can delay recurrence. Stick drift often returns due to repeated exposure to contaminants and mechanical stress.
Do’s and Don’ts of Joy-Con Maintenance
| Do | Don’t |
|---|---|
| Clean around sticks monthly with dry swabs | Use water or household cleaners near controls |
| Wash hands before play to reduce oil transfer | Store Joy-Cons in dusty or humid environments |
| Recalibrate sticks every few months | Apply excessive force when gaming |
| Use protective silicone caps (if properly fitted) | Leave controllers on charging rails indefinitely |
| Rotate between multiple pairs if available | Ignore early signs of jitter or minor drift |
Regular maintenance reduces strain on internal components. Think of your Joy-Con like precision instruments—they respond best to gentle handling and routine care.
Real User Example: Recovering After Months of Drift
Mark, a college student and frequent Mario Kart player, noticed his right Joy-Con drifting during races. At first, it was subtle—his kart would veer slightly left at startup. Within weeks, the drift worsened, making online matches nearly impossible.
He tried recalibration multiple times with no lasting effect. Then he followed the external cleaning method using 91% isopropyl alcohol and fine cotton swabs. After rotating the stick and cleaning each quadrant, he let it dry overnight. Upon retesting, the drift had reduced by 80%. A second cleaning session a week later eliminated it completely.
Now, Mark cleans his Joy-Cons every six weeks and recalibrates monthly. It’s been eight months with no return of drift—saving him over $80 in potential replacement costs.
Frequently Asked Questions
Can I fix stick drift permanently without replacing the stick?
In early to moderate cases, yes—especially if caught before irreversible wear occurs. Cleaning and recalibration can restore functionality for months or even years. However, if the potentiometer is physically worn, eventual replacement may be unavoidable.
Does using rubber stick caps make drift worse?
Poorly fitting or low-quality caps can trap sweat and debris against the stick, accelerating contamination. However, well-designed, breathable silicone covers used occasionally may protect against dust. Remove them periodically to clean underneath.
Is Nintendo still repairing Joy-Cons for free?
As of 2024, Nintendo continues to offer free repairs for stick drift in many regions, even outside warranty. Contact Nintendo Support directly to confirm eligibility. Note: sending in your Joy-Con means downtime, and repaired units may develop drift again later.
Final Checklist: Fix & Prevent Stick Drift
- ✅ Recalibrate the control stick via System Settings
- ✅ Clean around the analog stick with isopropyl alcohol and cotton swabs
- ✅ Use compressed air to remove loose debris
- ✅ Exercise the stick through full-range motion after cleaning
- ✅ Repeat cleaning monthly as part of maintenance
- ✅ Avoid eating or playing with dirty hands
- ✅ Consider professional or DIY repair only if non-invasive methods fail
Conclusion: Take Control of Your Controllers
Stick drift doesn’t have to mean automatic replacement. With careful cleaning, proper calibration, and consistent maintenance, most Joy-Con controllers can be restored to reliable performance. The methods outlined here are cost-effective, widely tested, and endorsed by technicians familiar with the design flaws in early Joy-Con models.
Millions of players have extended the life of their controllers using these same steps. You don’t need special tools or technical expertise to start—just attention to detail and a little patience. By treating your Joy-Cons with care, you preserve not just functionality but also the value of your gaming investment.


 浙公网安备
33010002000092号
浙公网安备
33010002000092号 浙B2-20120091-4
Comments
No comments yet. Why don't you start the discussion?