
Kitchen drawers that stick or jam are more than just a minor annoyance—they disrupt daily routines and can damage cabinetry over time. Sticky drawer slides often result from misalignment, debris buildup, worn components, or inadequate lubrication. The good news is that most issues can be resolved without replacing the entire slide mechanism. With basic tools and a methodical approach, you can restore smooth functionality to your kitchen drawers quickly and affordably.
This guide walks through diagnosing common causes of sticking, step-by-step repair procedures, maintenance best practices, and real-world examples to help you get results fast. Whether you're dealing with undermount, side-mount, or center-mount slides, these techniques apply universally across standard hardware types.
Understanding Drawer Slide Types and Common Issues
Before attempting repairs, it’s essential to identify the type of drawer slide installed in your cabinets. The three most common types are:
- Side-mount slides: Attached along the sides of the drawer and cabinet; visible when the drawer is open.
- Undermount slides: Mounted underneath the drawer, hidden from view when closed.
- Center-mount (concealed) slides: Less common today, installed beneath the drawer on a central rail system.
Each has unique advantages and failure points. Side-mount slides are prone to lateral misalignment and dust accumulation. Undermount systems often suffer from tension imbalance or track warping due to moisture exposure. Center-mount slides may bind if the central arm becomes bent or obstructed.
Regardless of type, all slides rely on precise alignment between inner, middle, and outer rails. Even a millimeter of deviation can cause friction, binding, or complete lockup. Over time, repeated use, temperature changes, and wood expansion contribute to wear and instability.
“Over 70% of drawer problems stem from misalignment rather than mechanical failure.” — James Ralston, Cabinet Hardware Technician, 15+ years experience
Step-by-Step Guide: Diagnose and Fix Sticky Drawer Slides
Follow this comprehensive process to troubleshoot and resolve sticking issues efficiently.
- Remove the drawer safely. Pull the drawer fully open. Look for release levers—usually small tabs near the front of each slide. Press both simultaneously while pulling forward to disengage. For undermount models, the release may require upward pressure after pressing the tab.
- Inspect for obstructions. Examine both the drawer and cabinet-mounted portions of the slide. Remove crumbs, food residue, pet hair, or splinters using a soft brush or vacuum nozzle. Check for warped wood, loose screws, or foreign objects blocking movement.
- Check alignment. Reinsert the drawer slightly and observe how it engages with the tracks. Does one side catch before the other? Is there noticeable wobble? Misalignment often occurs when mounting screws loosen over time.
- Tighten all mounting hardware. Use a screwdriver or hex key to secure any loose screws on both the drawer side and cabinet side of the slide. Do not overtighten, as this can warp metal components.
- Test partial reinsertion. Slide the drawer halfway in and out. If it moves smoothly until a certain point, note where resistance begins. This helps isolate problem areas—such as a bent rail segment or dried lubricant buildup.
- Clean the rails thoroughly. Wipe down all moving parts with a lint-free cloth dampened with isopropyl alcohol. Avoid water, which can promote rust on steel components. Allow surfaces to dry completely before proceeding.
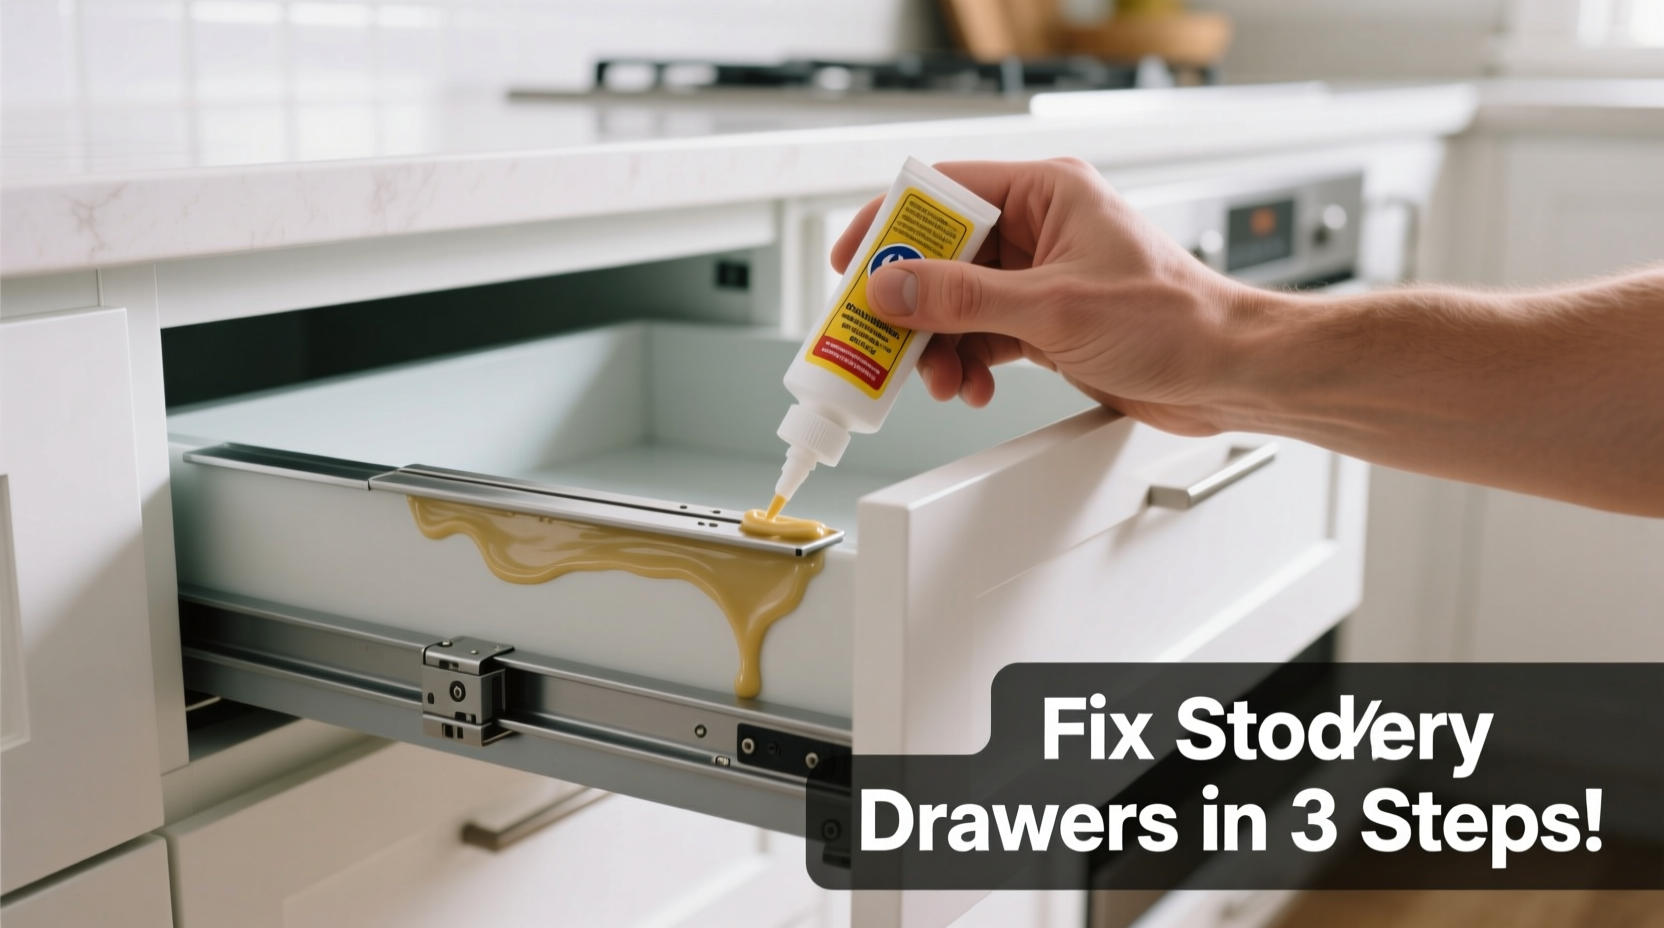
- Lubricate the mechanism. Apply a light coating of silicone-based lubricant or white lithium grease to contact points. Never use WD-40 as a long-term solution—it displaces moisture initially but evaporates quickly and attracts dirt.
- Reinstall and test. Engage the drawer by aligning the rails and pushing firmly until the locking mechanism clicks. Open and close multiple times to distribute lubricant evenly and confirm smooth motion.
Do’s and Don’ts When Repairing Drawer Slides
| Do’s | Don’ts |
|---|---|
| Use silicone spray or white lithium grease for lubrication | Use oil-based lubes like motor oil or cooking spray |
| Check and tighten screws every 6 months | Ignore early signs of grinding or resistance |
| Keep drawer contents balanced to prevent tilt | Overload drawers beyond their weight rating |
| Clean slides during seasonal deep-cleaning routines | Force a stuck drawer open or closed |
| Replace damaged rollers or worn nylon glides promptly | Assume replacement is needed without checking alignment first |
Real-World Example: Restoring Functionality in an Older Kitchen
Sarah, a homeowner in Portland, noticed her spice drawer had become increasingly difficult to open. It would stick about halfway out, requiring a sharp tug to free it. Initially, she assumed the slide was broken and budgeted for replacement parts. Instead, she decided to investigate further.
She removed the drawer and found no visible damage. However, upon closer inspection, the left-side mounting screws were loose, causing the rail to angle inward. She tightened them carefully, cleaned accumulated flour and spice dust from the track with rubbing alcohol, then applied a thin layer of silicone lubricant. Upon reinstallation, the drawer glided smoothly with no resistance.
The entire fix took less than 20 minutes and cost nothing. Sarah now checks all her kitchen drawers twice a year during cleaning cycles, preventing recurrence. Her experience underscores how simple maintenance can avoid unnecessary replacements.
Maintenance Checklist for Long-Term Smooth Operation
To keep your kitchen drawer slides functioning optimally, follow this quarterly maintenance checklist:
- ✅ Visually inspect each drawer for uneven closing or dragging
- ✅ Listen for scraping, clicking, or grinding noises during operation
- ✅ Remove drawer and check for debris in slide tracks
- ✅ Tighten all mounting screws on both drawer and frame sides
- ✅ Wipe rails clean with alcohol-dampened cloth
- ✅ Reapply lubricant sparingly to moving joints and rollers
- ✅ Test full range of motion after reassembly
- ✅ Replace worn plastic glides or ball-bearing housings as needed
Frequently Asked Questions
Can I fix sticky drawer slides without removing the drawer?
In some cases, yes. If the issue is minor friction or light grime, you can apply a precision-tip lubricant (like silicone in a straw applicator) directly into the slide gap while operating the drawer back and forth. However, full access requires removal for thorough cleaning and alignment correction.
What should I do if only one side sticks?
Asymmetrical sticking almost always indicates misalignment. Focus on the problematic side: check for loose screws, bent rails, or physical obstruction. Compare both sides visually and manually move the detached drawer along each track to feel for differences in resistance.
When should I replace instead of repair?
Replacement is necessary if the rail is visibly bent, the ball-bearing retainer is cracked, or the glide mechanism shows excessive play. Also consider upgrading if your slides lack soft-close features and you desire improved performance. Modern full-extension soft-close slides cost $15–$30 per pair and dramatically improve usability.
Expert Tips for Preventing Future Sticking
Prevention is far more efficient than repair. Incorporate these habits into your home care routine:
- Balance drawer loads: Heavy items placed off-center create torque that stresses slides unevenly.
- Avoid moisture exposure: Steam from dishwashers or sinks can corrode metal components over time. Ensure proper ventilation.
- Install stoppers: Small rubber bumpers inside the cabinet prevent drawers from slamming shut, reducing impact stress.
- Upgrade older models: If your slides are over 10 years old, consider proactive replacement with modern soft-close versions for smoother, quieter operation.
“Most drawer failures are cumulative—not sudden. Regular attention extends hardware life by 3–5 years on average.” — National Kitchen & Bath Association (NKBA) Maintenance Guidelines
Conclusion: Take Action Before Small Issues Become Big Problems
Sticky drawer slides are a common household issue, but they don’t have to persist. With basic tools and a few minutes of focused effort, most problems can be corrected immediately. Understanding the mechanics behind drawer movement empowers you to diagnose accurately and act confidently.
Start with the simplest fixes—cleaning, tightening, and lubricating—before considering part replacement. Establish a habit of periodic inspection to catch developing issues early. Not only does this preserve your cabinetry, but it also enhances kitchen efficiency and comfort.


 浙公网安备
33010002000092号
浙公网安备
33010002000092号 浙B2-20120091-4
Comments
No comments yet. Why don't you start the discussion?