
Uneven eyeliner is one of the most common makeup frustrations—even experienced wearers struggle with it. Whether your lines are too thick on one side, one wing curves higher than the other, or the liner smudged midday, fixing it doesn’t mean starting over. With the right tools, mindset, and technique, you can correct and refine your eyeliner in minutes. This guide breaks down professional-level strategies used by makeup artists to salvage, balance, and perfect eyeliner—no mirror shame required.
The Anatomy of Uneven Eyeliner
Before jumping into fixes, it helps to understand why eyeliner goes wrong. The eyes are rarely perfectly symmetrical. One may sit slightly higher, be more hooded, or have different lid space than the other. These natural variations make matching both sides challenging. Add in shaky hands, fast application, or subpar products, and imbalance becomes inevitable.
Common types of unevenness include:
- Asymmetrical wings: One flick extends further or angles differently.
- Differing thickness: One line is bolder or heavier than its counterpart.
- Smudging or feathering: Liner has blurred on one eye due to oil or movement.
- Misaligned start or end points: One line begins closer to the tear duct or ends short of the outer corner.
Recognizing the specific issue allows for targeted correction rather than wiping everything off—a habit that wastes time and strips the skin of natural oils.
Step-by-Step Guide to Fixing Uneven Eyeliner
Correcting eyeliner doesn’t require artistic talent—just patience and precision. Follow this five-step process to refine your look without removing all your work.
- Pause and Assess
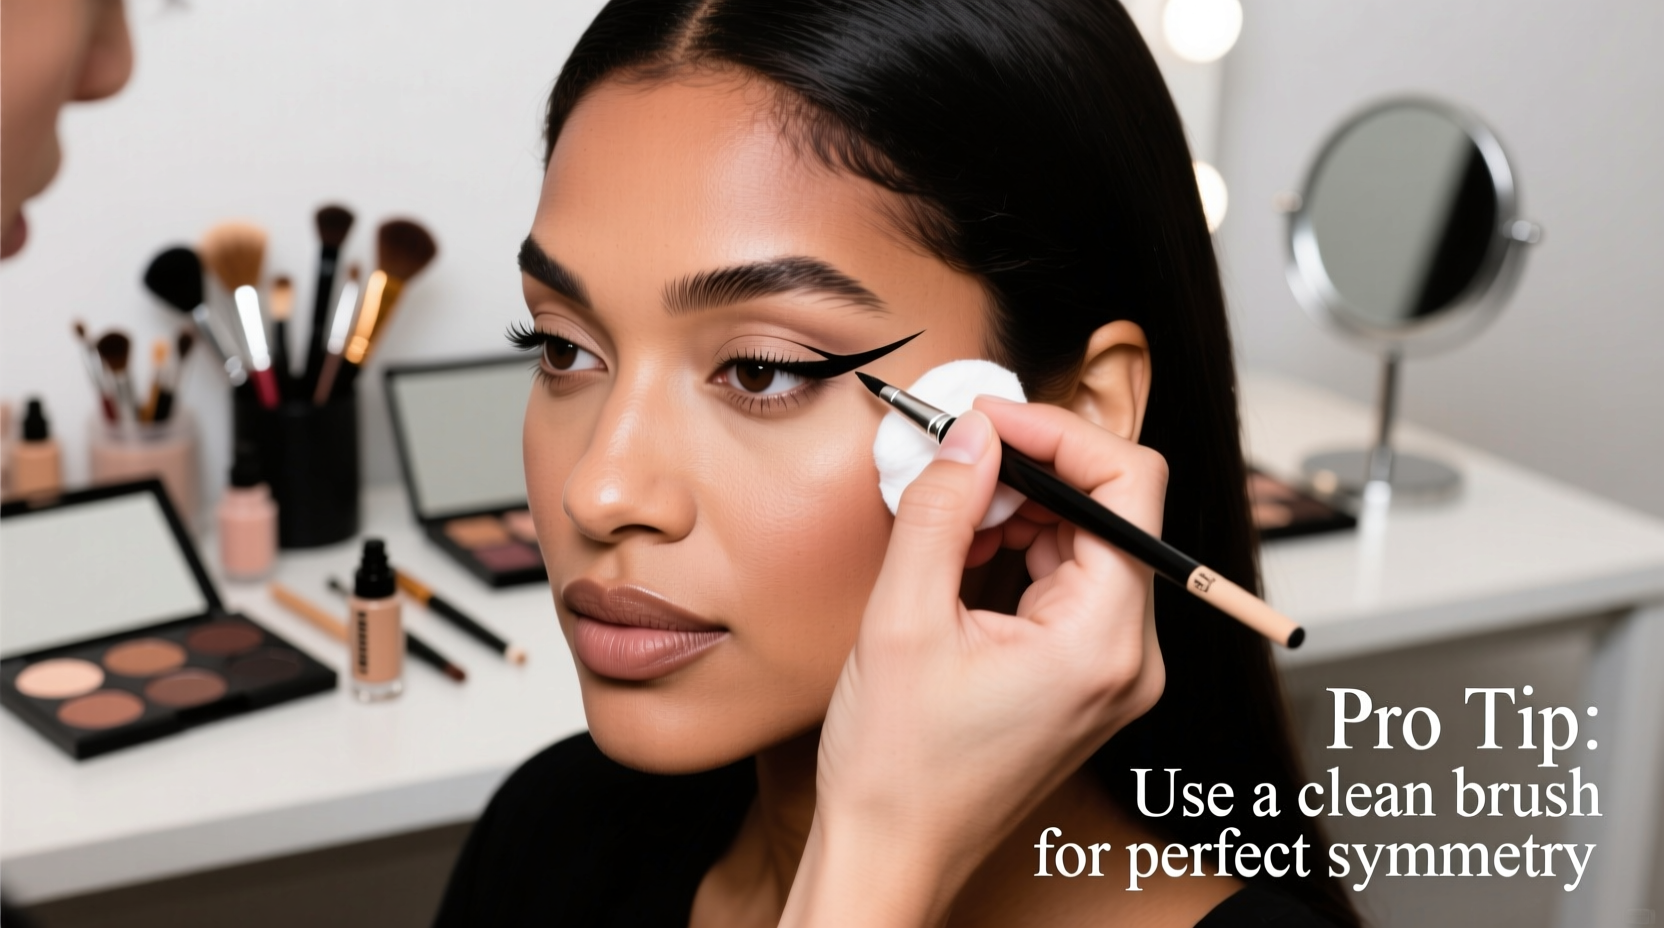
Stop applying liner the moment you notice a mismatch. Close one eye at a time in the mirror to compare shape, length, and angle. Note which side needs adjustment. - Gather Precision Tools
Use a pointed cotton swab, a clean angled brush, or a makeup wipe cut into a fine tip. Dip it in micellar water or makeup remover for controlled cleanup. For adding product, use a steady hand and a gel or liquid liner with a fine tip. - Correct the Heavier Side First
If one line is thicker or longer, gently soften the edge using a dampened cotton swab. Wipe inward from the outer edge to shorten a wing or reduce bulk. Do not drag across the entire line—this spreads pigment and worsens smudging. - Match the Other Side
Now adjust the lighter or shorter side to mirror the corrected version. Use tiny strokes to extend a wing or thicken the line gradually. Hold the brush like a pencil and pivot from the wrist for better control. - Blend and Set
Once both sides appear balanced, lightly go over any sharp edges with a clean smudging brush if aiming for a soft look. For sharper definition, let the liner dry completely, then apply a thin coat of clear setting powder over the line using a flat brush to prevent transfer.
This method saves time and preserves your base makeup. It also trains your muscle memory for future applications.
Pro Tips for Long-Term Symmetry
While fixing mistakes is essential, preventing them is the mark of a true pro. Makeup artists rely on preparation and technique—not just skill—to achieve flawless symmetry.
Consider these advanced practices:
- Use tape or stencils as guides: Place a small piece of scotch tape from the outer corner of your eye toward the end of your eyebrow to create a crisp wing template. Remove carefully after lining.
- Prime the lids: An oily lid causes liner to slide. Apply an eyeshadow primer or translucent powder before starting to create a smooth, grippy surface.
- Work with your eye shape: Hooded eyes benefit from tightlining and floating liner; monolids can carry bold wings. Adjust expectations based on anatomy, not Instagram trends.
- Check symmetry in natural light: Artificial lighting distorts color and depth. Final adjustments should be made near a window to ensure evenness under real conditions.
“Symmetry isn’t about perfection—it’s about balance. A well-corrected eyeliner tells a story of intention, not flawlessness.” — Lena Torres, Celebrity Makeup Artist
Do’s and Don’ts When Fixing Eyeliner
| Do’s | Don’ts |
|---|---|
| Use a magnifying mirror for precision work | Wipe off both eyes because one is uneven |
| Build liner slowly with small strokes | Apply heavy pressure—this causes skips and blobs |
| Keep a spoolie handy to blend harsh edges | Use expired or dried-out liners—they skip and pull |
| Set liner with a matching shadow for longevity | Rub back and forth when correcting—this spreads pigment |
| Practice on weekends to build confidence | Compare your eyes to influencers’ edited photos |
Real Example: From Frustration to Flawless
Sophia, a marketing executive, had been avoiding winged liner for years. She loved the look but dreaded the asymmetry that always followed. During a morning meeting prep, she applied her usual liquid liner, only to realize the left wing soared upward while the right sagged downward. Instead of restarting, she paused, assessed, and reached for a pointed cotton swab dipped in micellar water.
She softened the lifted wing by gently wiping its outer edge inward, reducing its length by 2mm. Then, using the now-corrected left side as a reference, she extended the right wing in two tiny strokes, aligning it with the lower lash line’s natural angle. A quick dusting of black eyeshadow over both lines locked them in place. The result? Balanced, confident wings that lasted through her presentation and lunch outside in mild humidity.
That evening, Sophia practiced the same technique three times, timing herself. Within a week, her application became faster and more consistent. Her breakthrough wasn’t talent—it was learning how to fix, not fear, imperfection.
Essential Tools Checklist
To fix uneven eyeliner efficiently, keep these items in your makeup kit:
- ✔️ Pointed cotton swabs (or foam applicators)
- ✔️ Micellar water or gentle eye makeup remover
- ✔️ Fine-tipped liquid or gel eyeliner (waterproof preferred)
- ✔️ Small angled brush for precise application
- ✔️ Clean spoolie or smudging brush
- ✔️ Translucent setting powder and a flat shader brush
- ✔️ Scotch tape or eyeliner stencils (optional but helpful)
- ✔️ Hand mirror with magnification
Store these in a dedicated “correction kit” pouch for quick access during touch-ups. Having the right tools ready eliminates frustration and makes fixes feel routine, not overwhelming.
Frequently Asked Questions
Can I fix smudged eyeliner without removing my mascara?
Absolutely. Use a tightly rolled tissue corner or micro brush dipped in micellar water to dab—never swipe—at the smudged area. Avoid tugging the delicate under-eye skin. Once cleaned, reinforce the line with a waterproof pencil or set with shadow.
How do I match wings if my eyes are very different in shape?
Instead of mirroring measurements, mirror the effect. If one eye is more hooded, create a subtle lift with liner only visible when the eye is open. For the less hooded eye, extend slightly more. The goal is visual harmony, not mathematical symmetry.
Is it okay to use concealer to sharpen eyeliner edges?
Yes—once the liner is fully dry, dip a small angled brush in creamy concealer and trace along the outer edge of the liner. This creates a crisp, graphic look often seen on runways. Just ensure the concealer matches your skin tone and won’t crease.
Mastery Through Mindset
Fixing uneven eyeliner isn’t just about technique—it’s about shifting your relationship with imperfection. Professional makeup artists don’t get it right every time. What sets them apart is their ability to adapt, correct, and finish strong. Every smudge, wobble, or mismatch is a chance to refine your approach.
Embrace the process. Practice corrections weekly. Film your application to spot patterns—maybe you rush the second eye or tilt your head differently. Over time, your hands grow steadier, your vision sharper, and your confidence unshakable.


 浙公网安备
33010002000092号
浙公网安备
33010002000092号 浙B2-20120091-4
Comments
No comments yet. Why don't you start the discussion?