
Creating the perfect winged eyeliner is one of the most sought-after skills in makeup artistry. Yet, even experienced users often struggle with symmetry. While many rely on tape or stencils for precision, mastering a tape-free approach offers greater flexibility, speed, and authenticity—especially when you're on the go. The truth is, perfectly balanced wings aren't about perfectionism; they’re about technique, muscle memory, and smart corrections. This guide breaks down practical, tape-free methods to fix and refine uneven eyeliner wings using only your hand, eyes, and a few strategic adjustments.
Understanding Why Eyeliner Wings Go Uneven
Symmetry in makeup is an illusion. No two eyes are exactly alike in shape, size, or position. One may sit slightly higher, have a wider lid, or a more pronounced crease. These natural variations make it nearly impossible to draw identical wings without some form of correction. Additionally, hand tremors, lighting conditions, and product consistency play roles in asymmetry.
The goal isn’t robotic uniformity but visual harmony. A well-balanced look tricks the eye into perceiving symmetry, even if measurements differ slightly. Recognizing this principle is the first step toward fixing uneven wings without relying on external aids like tape.
“Makeup should enhance your features, not fight them. Learning to adapt your wing to each eye’s unique structure builds true skill.” — Lila Monroe, Professional Makeup Artist & Educator
Step-by-Step Guide: Correcting Uneven Wings Without Tape
Fixing eyeliner imbalances by hand requires patience, observation, and subtle adjustments. Follow this structured process to achieve polished results every time.
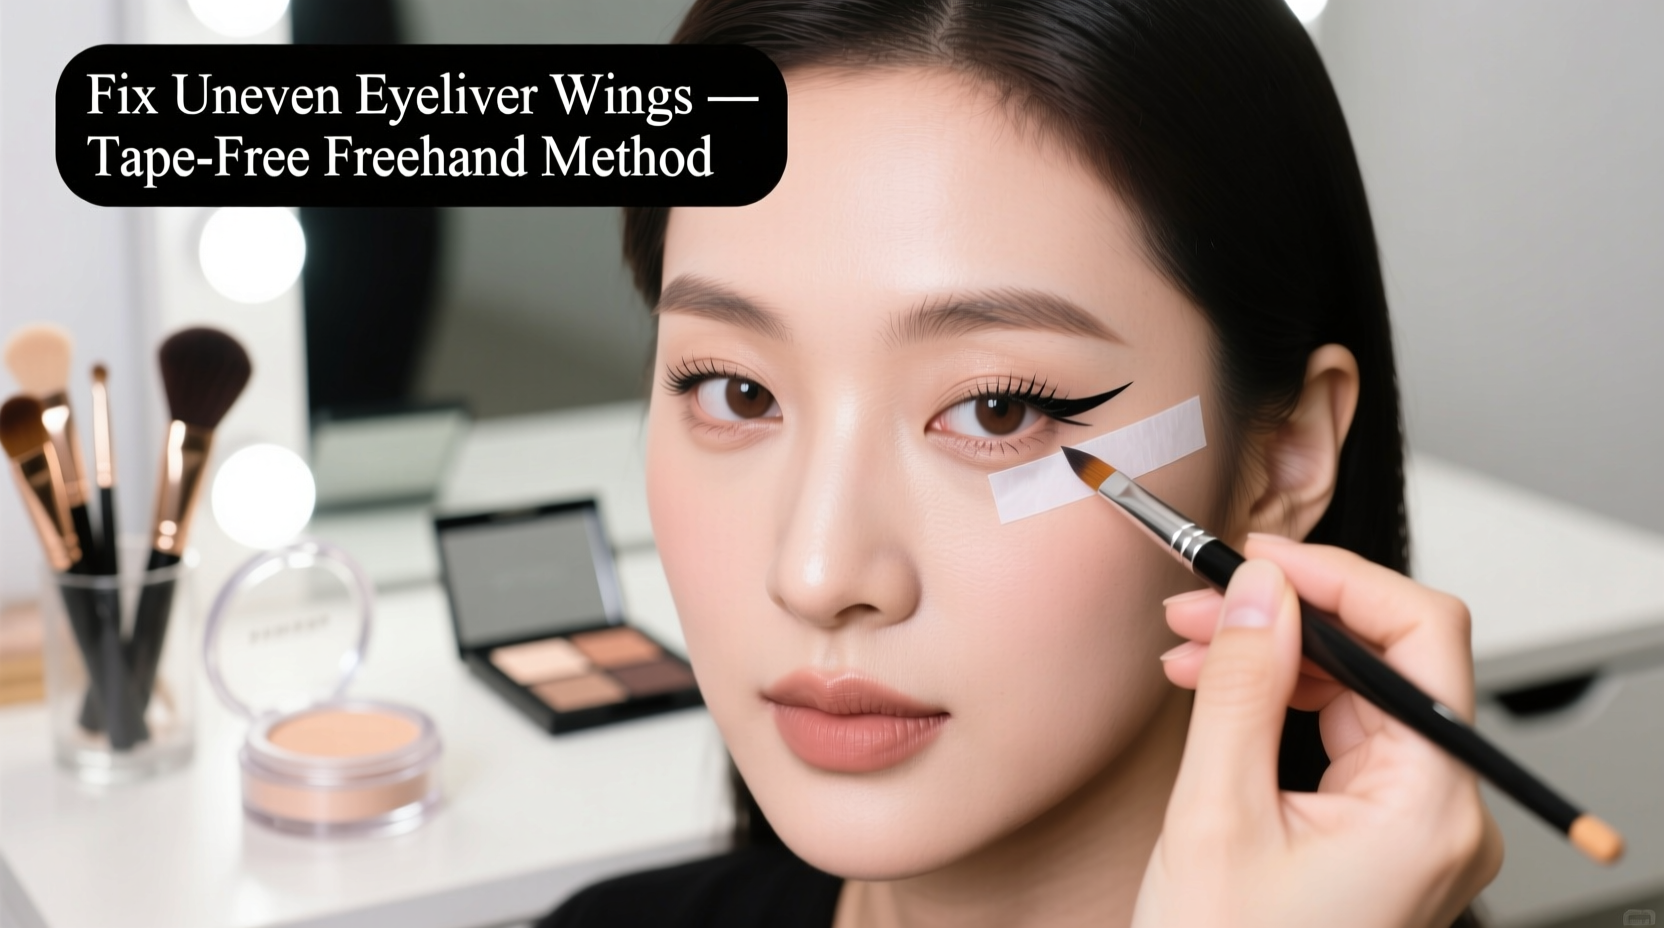
- Assess Both Eyes Side-by-Side
After applying your initial liner, close your eyes gently and reopen them slowly. Look straight ahead in the mirror without tilting your head. Compare the angle, length, and thickness of both wings. Identify which side appears shorter, lower, or thicker. - Use Your Fingers as Guides
Place your ring finger at the outer corner of each eye and lightly trace along the direction of the wing. This helps visualize alignment. If one wing points downward while the other lifts upward, adjust the lower one to match the upward trajectory. - Extend the Shorter Wing First
Take your eyeliner pencil or gel brush and extend the shorter wing gradually. Move in tiny strokes rather than one long drag. Stop frequently to check alignment. Remember: it’s easier to add than to remove. - Thicken the Thinner Line Slightly
If one wing looks weaker due to thinness, build it up from the base outward. Apply additional pigment along the inner edge of the existing line to maintain its original angle while increasing volume. - Blend and Sharpen the Tip
Use a clean, angled brush with micellar water or makeup remover to soften any harsh edges that disrupt balance. Then, re-sharpen the tip with your liner for definition. - Final Symmetry Check in Natural Light
Move near a window or step outside briefly. Artificial lighting can distort color and shape perception. Natural light reveals true balance.
Pro Techniques for Preventing Asymmetry Before It Happens
Prevention is more effective than correction. Incorporate these professional habits into your routine to minimize imbalance from the start.
- Anchor Your Hand: Rest your pinky finger on your cheekbone before drawing. This stabilizes your wrist and reduces shaking.
- Draw Toward You, Not Away: Start the wing from the outer corner and draw inward toward the lash line. Pulling the line back gives better control than pushing forward blindly.
- Use the “Three-Point Method”: Mentally mark three anchor points—the outer corner of the eye, the end point of the desired wing, and where the wing meets the lash line. Connect them lightly before committing with pigment.
- Practice With Pencil First: Use a brown or gray kohl pencil to sketch the wing shape. Once satisfied, trace over it with liquid liner for precision.
- Follow the Lower Lash Line Extension: Align the wing with the natural upward sweep of your lower lashes. This creates a personalized, flattering angle unique to your eye shape.
Mini Case Study: Evening Event Touch-Up
Sophia was getting ready for a dinner party and applied her usual winged liner. When she stepped back to check, she noticed the left wing extended further and sat higher than the right. Instead of wiping everything off, she used a pointed cotton swab dipped in micellar water to shorten the left wing slightly. She then rebuilt the right wing in micro-strokes, aligning its tip with the corrected left side. By focusing on gradual adjustment and using her facial bone as a guide, she achieved balanced wings in under four minutes—without tape or redoing her entire eye.
Do’s and Don’ts of Freehand Wing Correction
| Do’s | Don’ts |
|---|---|
| Use a magnifying mirror for detail work | Rely solely on overhead bathroom lighting |
| Correct with a fine-tip brush and remover | Scrape aggressively with a cotton bud |
| Compare eyes every 10 seconds during application | Complete one eye fully before starting the other |
| Build liner gradually in short dashes | Try to fix thick smudges with more liner on top |
| Let the wing dry slightly before adjusting | Touch the wet line repeatedly with shaky hands |
Essential Tools for Tape-Free Precision
You don’t need tape, but having the right tools makes all the difference. Choose products that support control and easy correction.
- Felt-Tip Liquid Liners: Offer sharp precision and consistent flow. Brands like KVD Beauty and NYX provide excellent beginner-friendly options.
- Angled Detail Brushes: Ideal for applying gel liner or cleaning up edges with concealer.
- Micellar Water and Pointed Swabs: For pinpoint corrections without disturbing surrounding makeup.
- Concealer (One Shade Lighter Than Skin): Use to sharpen and frame the wing after application, enhancing crispness and symmetry.
Checklist: Fixing Uneven Eyeliner Wings (Tape-Free)
- Apply initial liner to both eyes using light, tentative strokes.
- Pause and assess symmetry in direct, front-facing light.
- Identify which wing is shorter, lower, or misaligned.
- Use a pointed cotton swab with micellar water to gently shorten or reshape the longer/misplaced wing.
- Reinforce the shorter wing in small extensions until aligned.
- Adjust thickness by adding liner along the inner edge—not the outer tip.
- Clean up edges with concealer and a fine brush for sharp definition.
- Verify balance by blinking, smiling, and viewing from multiple angles.
FAQ
Can I fix a wing that’s too long without removing all my liner?
Absolutely. Dampen the tip of a pointed cotton swab with micellar water and gently roll it along the excess length. Let the area dry completely before reinforcing the opposing wing for balance.
How do I know when wings are “even enough”?
If both wings follow the same angle relative to your lower lash line and appear harmonious when you look straight ahead, they’re functionally even. Perfect mathematical symmetry isn’t necessary—or always flattering.
Is it better to fix liner immediately or wait until it dries?
Wait 10–15 seconds for liquid liner to set slightly before correcting. Wet liner smears easily, but fully dried liner is harder to modify. A semi-dry state allows clean removal and precise rebuilding.
Expert Insight: The Psychology of Perfection
Many people obsess over eyeliner symmetry because they believe flawlessness equals professionalism. However, industry veterans emphasize adaptability over exact replication.
“The most polished makeup artists don’t draw identical wings—they draw wings that look right on the face. That means respecting asymmetry, not erasing it.” — Marcus Tran, Lead MUA at Glow Studio NYC
This mindset shift frees you from frustration. Instead of forcing both eyes to conform to a rigid template, allow slight variations that honor your natural anatomy. Often, what feels “off” is actually correct—it just doesn’t match an unrealistic standard.
Conclusion: Mastery Through Mindful Practice
Fixing uneven eyeliner wings without tape isn’t about achieving instant perfection—it’s about developing awareness, control, and confidence in your hand. By learning to assess, adjust, and refine freehand, you gain deeper mastery over your makeup routine. Over time, these corrective techniques become second nature, reducing mistakes before they happen.
Start incorporating one strategy at a time: anchor your hand, compare early and often, use micro-strokes, and embrace asymmetry as part of your uniqueness. With consistent practice, you’ll spend less time fixing and more time enjoying a flawless-looking wing—every single day.


 浙公网安备
33010002000092号
浙公网安备
33010002000092号 浙B2-20120091-4
Comments
No comments yet. Why don't you start the discussion?