
Folding a fitted sheet has long been considered one of the great household challenges. Unlike flat sheets, their elastic edges and curved corners make them prone to twisting, bunching, and ending up in an unrecognizable heap. But mastering this skill isn’t just about neatness—it’s about efficiency, space-saving, and maintaining the longevity of your linens. A properly folded fitted sheet takes less space, resists creasing, and stacks cleanly in your closet. The good news? It’s not magic, nor is it reserved for professional organizers. With the right technique, anyone can learn to fold a fitted sheet perfectly—every single time.
The Science Behind the Struggle
The difficulty in folding a fitted sheet stems from its design. Traditional flat sheets have straight edges and predictable geometry, making them easy to align and fold symmetrically. Fitted sheets, however, are engineered to stretch over mattress corners, thanks to elasticized hems. This very feature that makes them functional on the bed also makes them resistant to order off of it.
When tossed loosely into a drawer, fitted sheets trap air, twist upon themselves, and often end up larger than when they started. Over time, this leads to deep frustration and a tendency to simply shove them into storage spaces. But understanding the root of the problem is the first step toward solving it: control the corners, eliminate the elasticity's chaos, and restore symmetry.
“Folding a fitted sheet is less about brute force and more about precision and patience. It’s a small act of organization that pays dividends in daily life.” — Sarah Lin, Home Organization Consultant
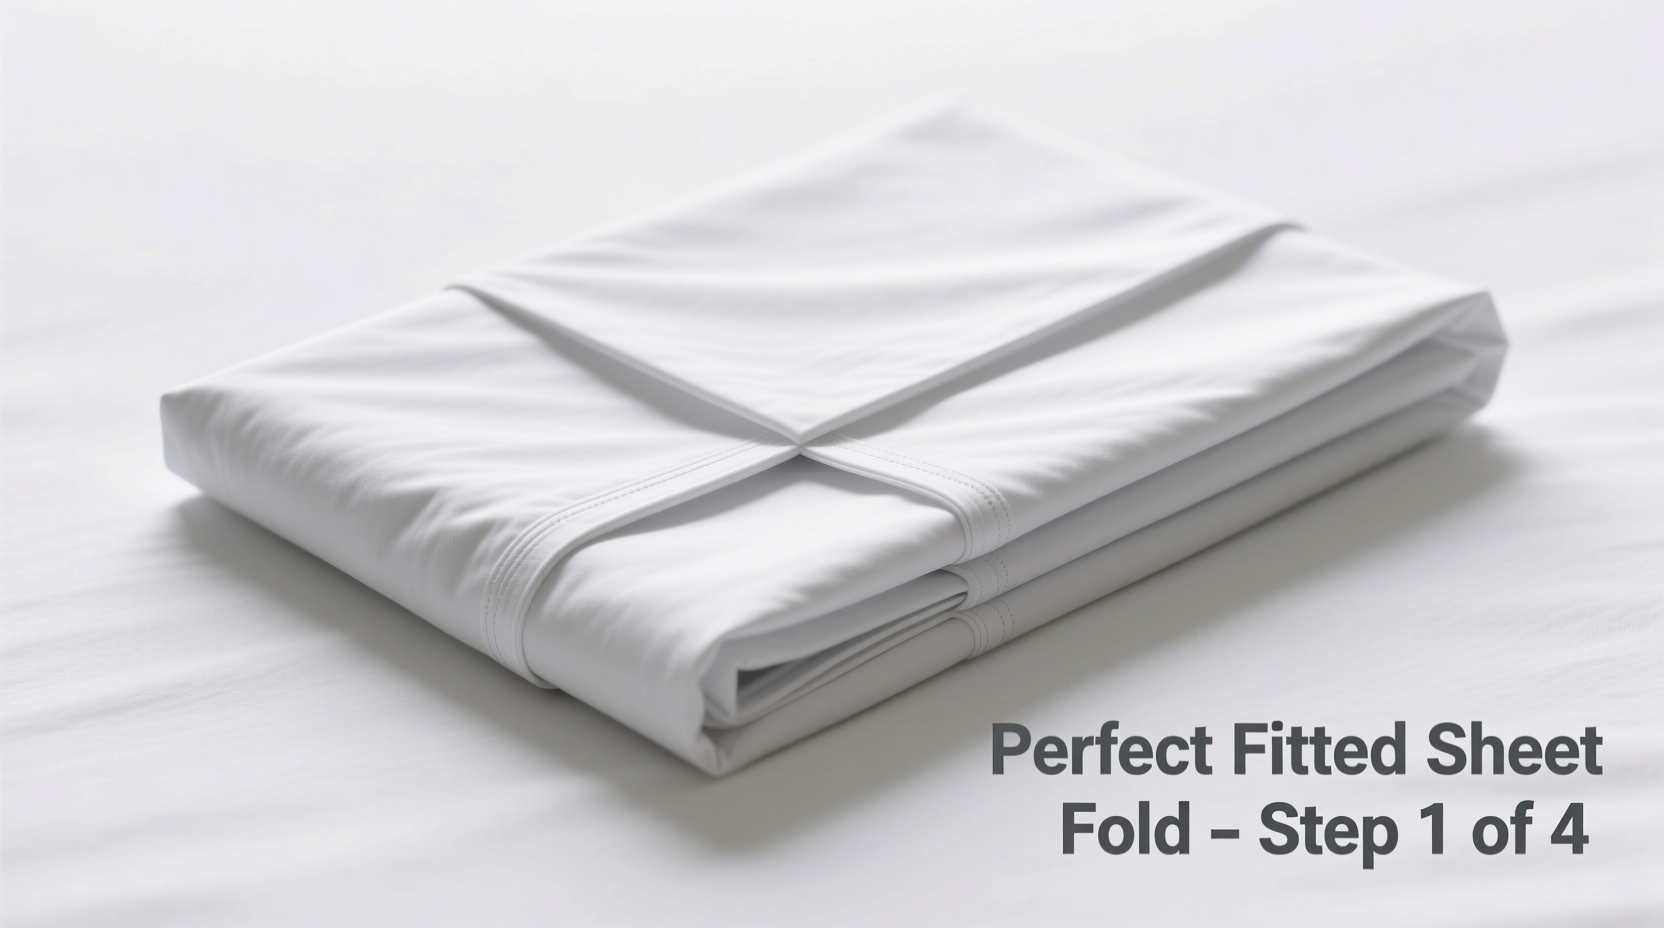
Step-by-Step Guide to Folding a Fitted Sheet Perfectly
The method described here is widely endorsed by linen experts, hotel housekeeping staff, and minimalist lifestyle advocates. It transforms the chaotic shape into a compact, rectangular bundle that stacks neatly with other linens. Follow these steps carefully:
- Start with the sheet inside out. Hold the sheet so the elastic edges are facing you and the fabric that touches the mattress is visible. This ensures that when you finish, the “dirty” side (the one exposed during use) will be tucked inside, protecting the clean surface.
- Locate two adjacent corners. Take one hand and grab a corner of the shorter edge. With your other hand, reach for the corner directly next to it—forming a pair on one side of the sheet.
- Pinch and tuck the corners together. Place one corner inside the other so they nest snugly. Use your fingers to hold them firmly between your thumb and forefinger. The elastic should now be doubled up, but contained.
- Repeat with the opposite side. Turn the sheet around and locate the two remaining corners on the other short edge. Repeat the pinching and tucking process until both corners are nested together.
- Bring the paired corners together. Now, take the two sets of tucked corners and bring them toward each other. Drape one set over the other so all four corners are now grouped in one hand. At this point, the sheet should resemble a loose bundle with all elastic edges centralized.
- Flip the sheet right-side out. While still holding the corners, gently flip the entire bundle so the outer fabric—the side that faces outward on the bed—now covers the clump of corners. This hides the elastic and creates a smooth exterior.
- Lay the sheet flat and smooth. Place the bundled sheet on a clean, flat surface like a bed or table. Gently spread it out, ensuring the top layer is wrinkle-free and aligned into a rough rectangle.
- Fold lengthwise once. Fold one long edge toward the center, then repeat with the opposite side. You now have a long, narrow rectangle.
- Fold into thirds or quarters. Depending on the size of the sheet, fold it crosswise into equal sections—either three or four—until you achieve a compact square or rectangle that matches the dimensions of your other linens.
- Store immediately. Slide the folded sheet into your linen closet or drawer, ideally stacked with its matching flat sheet and pillowcases.
Common Mistakes That Ruin the Fold
Even with instructions, many people fall into familiar traps that undo their efforts. Avoid these common errors:
- Folding while distracted. Trying to fold a fitted sheet while multitasking often leads to misaligned corners and half-hearted smoothing. Give it your full attention for best results.
- Skipping the inside-out step. Starting with the wrong side out means the final product will expose the used fabric, which collects dust and looks disheveled.
- Forcing the fabric. Yanking or pulling the sheet aggressively stretches the elastic and distorts the shape. Work gently and deliberately.
- Not smoothing before final folds. Skipping the flattening stage results in a lumpy, bulky package that doesn’t stack well.
- Storing while damp. Even slight moisture encourages mildew and weakens fibers. Always ensure sheets are completely dry before folding.
Do’s and Don’ts of Fitted Sheet Folding
| Do | Don’t |
|---|---|
| Start with the sheet inside out | Begin folding without checking the orientation |
| Tuck corners precisely and securely | Leave corners loose or dangling |
| Smooth the fabric before final folds | Fold over wrinkles or bunches |
| Use a flat, clean surface | Fold on an uneven or cluttered surface |
| Store folded sheets vertically or stacked | Crumple and stuff into overcrowded drawers |
A Real-Life Example: From Chaos to Calm
Jamie, a working parent of two, used to dread laundry day—not because of the washing, but because of the folding. Her linen closet looked like a tornado had hit: balled-up fitted sheets, mismatched sets, and stacks that toppled over when she pulled one out. After watching several failed tutorial videos, she tried the method outlined above during a quiet Sunday morning.
Her first attempt took nearly ten minutes. She fumbled with corners and accidentally flipped the sheet too early. But by the third try, she had it. She folded her queen-sized cotton sheet into a tidy rectangle that matched the dimensions of her flat sheet. She repeated the process with her other sets and arranged them all in labeled bins—one per bedding set.
Three months later, her closet remains orderly. “It’s not just about looking nice,” she says. “Now I can find a clean sheet fast when someone spills something. And I actually enjoy putting laundry away now.”
Expert Tips for Long-Term Linen Care
Folding is only one part of a broader linen maintenance routine. To keep your sheets looking fresh and lasting longer, consider these additional strategies:
- Wash in cool water. High temperatures can degrade cotton fibers and weaken elastic over time. Unless heavily soiled, cold or warm cycles are sufficient.
- Avoid over-drying. Remove sheets from the dryer while slightly damp and finish air-drying if needed. Over-drying causes stiffness and shrinkage.
- Rotate your sets. Using the same sheet set continuously leads to uneven wear. Rotate through all your sets to extend overall lifespan.
- Store in breathable containers. Avoid plastic bins unless they’re ventilated. Cotton storage bags or open shelves allow airflow and prevent musty odors.
- Refold periodically. If stored for months, sheets can develop permanent creases. Unfold, refold, and refresh them seasonally.
Frequently Asked Questions
Can this method work with deep-pocket sheets?
Absolutely. Deep-pocket sheets have extra fabric, but the folding principle remains the same. After tucking the corners, you may need to smooth out additional material before the final folds. Take care to flatten any excess to maintain a neat profile.
What if my hands aren’t big enough to hold all four corners?
This is common, especially with king-sized sheets. Instead of holding all corners in one hand, lay the paired corners down after bringing them together. Then flip and smooth the fabric from there. You don’t need to grip everything at once—precision matters more than grip strength.
Is there a faster way for rushed days?
If time is tight, aim for “good enough.” Tuck opposite corners together and fold loosely into a square. It won’t be perfect, but it’s better than a crumpled ball. Save the precise fold for low-stress moments when you can focus.
Final Checklist: Master the Fold in 10 Steps
- Turn the fitted sheet inside out
- Grasp two adjacent corners on one short edge
- Tuck one corner inside the other
- Repeat with the two corners on the opposite edge
- Bring both sets of corners together
- Drape one set over the other to group all four
- Flip the bundle so the right side is out
- Lay flat and smooth out wrinkles
- Fold lengthwise, then crosswise into a rectangle
- Store with matching linens in a cool, dry place
Conclusion: Transform Your Linen Routine Today
Folding a fitted sheet perfectly isn’t a party trick—it’s a practical life skill that brings order, saves space, and reduces daily friction. Once mastered, the process takes less than two minutes and becomes second nature. No more wrestling with tangled fabric or avoiding the linen closet. You gain not just a neatly folded sheet, but a small victory in the ongoing effort to create a more organized, peaceful home.


 浙公网安备
33010002000092号
浙公网安备
33010002000092号 浙B2-20120091-4
Comments
No comments yet. Why don't you start the discussion?