
Live streaming has transformed how people share experiences, teach skills, host events, and grow audiences. Whether you're broadcasting from your living room, a remote location, or on the move, the ability to go live in real time opens doors to global engagement. With minimal investment and the right know-how, anyone can start streaming effectively. This guide walks through every essential step—from gear selection to platform choice and broadcast execution—so you can stream confidently from any location.
Choosing the Right Equipment
The foundation of a high-quality stream lies in reliable equipment. While smartphones are sufficient for casual broadcasts, dedicated tools significantly improve audio, video, and stability.
- Camera: Use a smartphone with at least 1080p resolution, a DSLR, or a webcam like Logitech C920 or Elgato Facecam for sharper visuals.
- Audio: Built-in microphones often pick up background noise. A lavalier mic (e.g., Rode SmartLav+) or shotgun mic (e.g., Rode VideoMic) delivers clearer sound.
- Internet Connection: Upload speed is critical. Aim for at least 5 Mbps for HD streaming. Wired Ethernet is best; if using Wi-Fi, minimize interference and avoid crowded networks.
- Streaming Device: For advanced control, use an encoder like OBS Studio (free), Teradek VidiU, or Epiphan Pearl Mini.
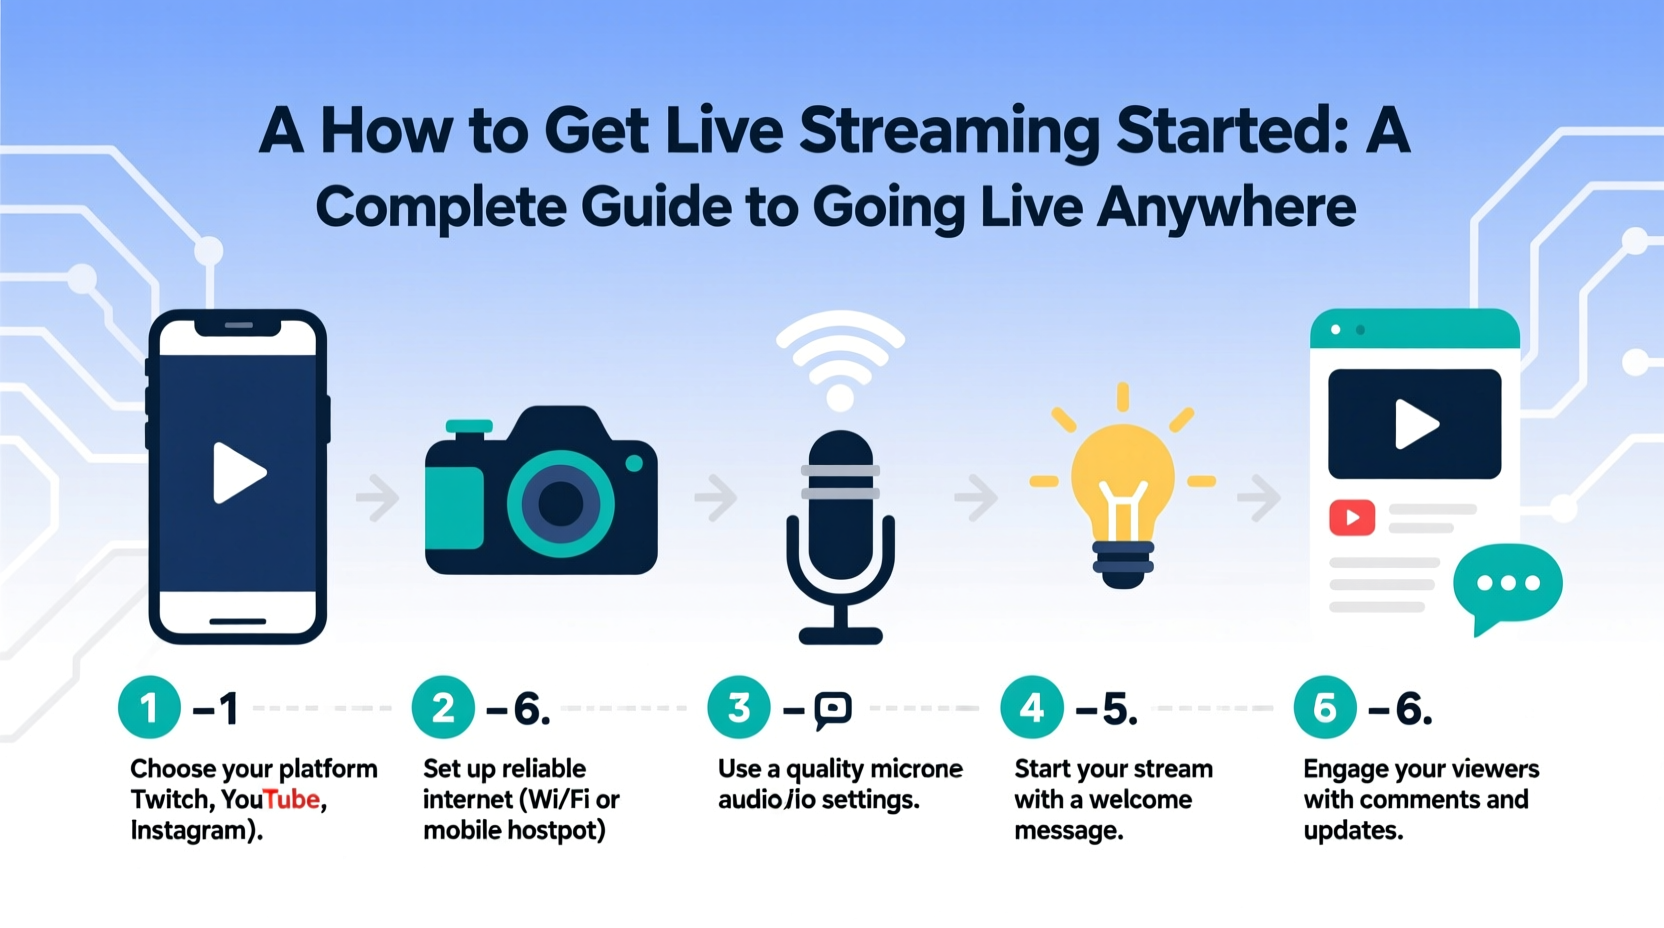
Step-by-Step Guide to Going Live
Follow this sequence to ensure smooth setup and broadcast:
- Define Your Purpose: Determine whether you’re streaming a concert, tutorial, podcast, or event. This shapes your setup and platform choice.
- Select a Streaming Platform: Choose based on audience reach and features. YouTube and Facebook allow broad visibility; Twitch suits gamers; LinkedIn Live works for professionals.
- Set Up Your Gear: Mount your camera securely, connect your microphone, and position lighting to eliminate shadows.
- Configure Streaming Software: In OBS or StreamYard, input your stream key from the platform, adjust resolution (720p or 1080p), and set bitrate (2,500–6,000 kbps).
- Do a Test Run: Broadcast privately or to a small group to check audio levels, video framing, and internet stability.
- Go Live: Start the stream, engage viewers early, and monitor chat or comments throughout.
- End Gracefully: Thank your audience, announce future streams, and save a local recording if possible.
Platform Comparison: Where to Stream
| Platform | Best For | Max Resolution | Moderation Tools | Monetization |
|---|---|---|---|---|
| YouTube Live | Tutorials, concerts, long-form content | 4K | Yes (chat filters, bans) | Super Chats, Memberships |
| Facebook Live | Community events, Q&As, short updates | 1080p | Yes (comment approval) | Stars, Subscriptions |
| Twitch | Gaming, creative streams, live chats | 1080p60 | Advanced (bots, timeouts) | Bits, Subs, Donations |
| LinkedIn Live | Professional talks, webinars, industry insights | 1080p | Limited | No direct monetization |
| Instagram Live | Behind-the-scenes, quick updates, influencer content | 720p | Basic (mute users) | Gifts (in select regions) |
Real Example: Streaming a Remote Music Gig
Sophie, an indie musician based in Portland, wanted to perform live for fans during a tour cancellation. She used her iPhone mounted on a tripod, connected a Shure MV88 microphone via Lightning port, and positioned two LED panels for even lighting. Using StreamYard, she linked her YouTube channel and streamed a 45-minute acoustic set. She promoted the event via email and Instagram Stories two days prior. Over 800 viewers tuned in, and she received $320 in Super Chats. The stream was later repurposed as a video-on-demand piece, extending its value.
This example shows that even without studio-grade gear, thoughtful preparation leads to professional results.
Essential Tips for Reliable On-the-Go Streaming
Streaming outside a controlled environment introduces variables like power loss, weak signals, and ambient noise. These strategies help maintain quality anywhere.
- Use a mobile hotspot with a dedicated data plan for more stable connectivity than public Wi-Fi.
- Enable “Airplane Mode” and connect only to your hotspot to prevent call interruptions.
- Frame your shot with a neutral background or use virtual backgrounds in OBS or StreamYard.
- Speak clearly into the mic and avoid windy outdoor locations unless using a windscreen.
- Have a backup stream option—switch to phone-only mode if your main camera fails.
“Reliability beats resolution. A stable 720p stream with clear audio will retain viewers longer than a shaky 4K broadcast.” — Marcus Tran, Live Production Director at StreamWell Studios
Checklist: Before You Go Live
Run through this checklist to avoid last-minute issues:
- ✅ Confirm internet upload speed is above 3 Mbps
- ✅ Charge all devices and bring backup power
- ✅ Test microphone and camera feed
- ✅ Set up proper lighting (natural or artificial)
- ✅ Copy and paste stream key into your software
- ✅ Close unnecessary apps to free up system resources
- ✅ Notify audience in advance via social media or email
- ✅ Prepare a brief intro script to start smoothly
Frequently Asked Questions
Can I stream without a computer?
Yes. Most smartphones support direct streaming to YouTube, Facebook, and Instagram. Apps like Switcher Studio or BeLive also enable multi-camera mobile streaming without a PC.
How do I reduce lag or delay during my stream?
Use a lower latency setting in your streaming software. Platforms like YouTube offer “Low Latency” mode. Also, reduce video bitrate slightly and ensure strong upload speeds.
Is it legal to stream music or copyrighted content live?
Generally, no—unless you have licenses or permissions. Streaming copyrighted music can trigger takedowns or account strikes. Use royalty-free tracks from platforms like Epidemic Sound or Artlist during your broadcast.
Final Thoughts: Start Simple, Scale Smart
Live streaming doesn’t require expensive gear or technical mastery. What matters most is consistency, authenticity, and preparation. Begin with what you have—a phone and a message to share—and refine your setup over time. The goal isn’t perfection but connection. As platforms evolve and tools become more accessible, the barrier to entry continues to fall. Whether you're teaching, performing, or sharing daily insights, going live empowers you to reach people wherever they are.


 浙公网安备
33010002000092号
浙公网安备
33010002000092号 浙B2-20120091-4
Comments
No comments yet. Why don't you start the discussion?