
Moisture in a phone’s charging port is more common than many realize. Whether from rain, humidity, handwashing, or accidental spills, water exposure can trigger warning messages, prevent charging, or even cause long-term corrosion. The good news: with the right approach, you can safely remove moisture without risking further harm to your device. This guide covers proven techniques, expert-backed advice, and practical steps that prioritize safety and effectiveness—no rice myths, no guesswork.
Why Moisture in the Charging Port Is a Real Concern
The charging port on modern smartphones is a complex interface of tiny metal contacts and circuitry. When moisture enters—even in small amounts—it can create a conductive path where electricity shouldn’t flow. This leads to short circuits, corrosion over time, or false moisture detection alerts that disable charging for safety.
Apple and Samsung devices, for example, include moisture detection systems that halt charging when liquid is sensed. While this protects internal components, it also means users must resolve the issue before normal function resumes. Ignoring the problem or using improper drying methods can result in permanent damage, reduced battery life, or costly repairs.
“Even a few droplets trapped in the port can lead to oxidation within hours. Immediate, gentle intervention is key.” — Dr. Lena Torres, Electronics Reliability Engineer at MobileTest Labs
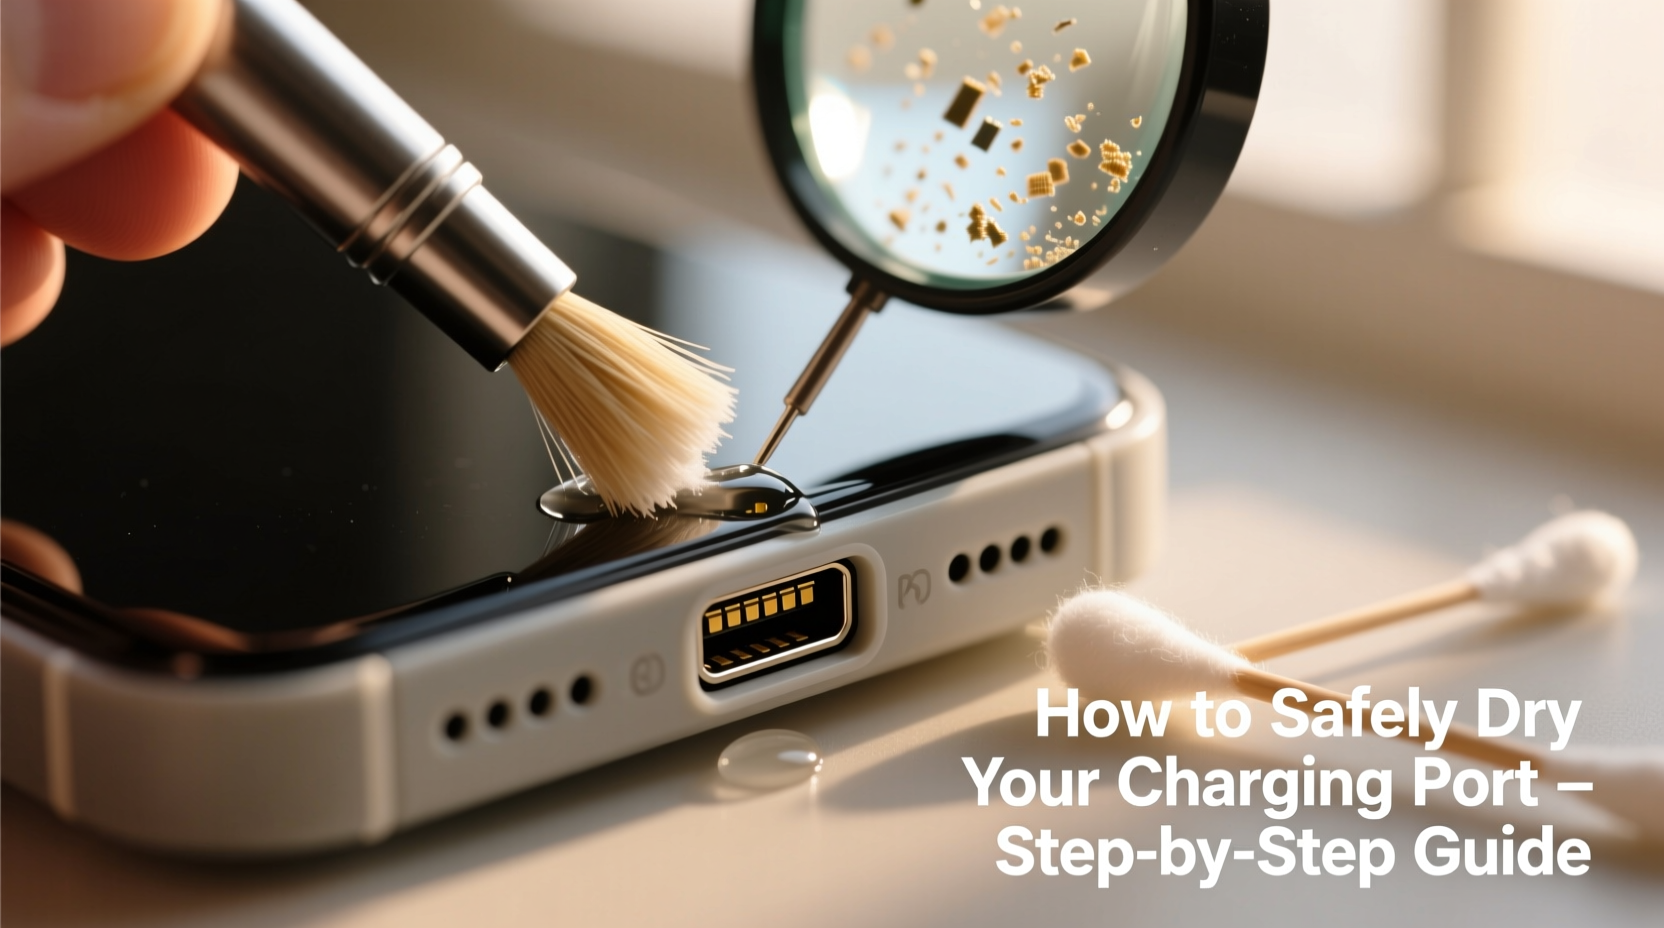
Step-by-Step Guide to Safely Remove Moisture
Follow this logical sequence to address moisture safely and effectively. Each step minimizes risk while maximizing drying efficiency.
- Power Off or Enable Airplane Mode
If your phone allows it, turn it off completely. If not, enable Airplane Mode to disable wireless signals and reduce electrical activity near the port. - Gently Shake or Tap the Phone
Holding the phone with the charging port facing down, give it a few soft taps against your palm or a dry surface. This dislodges visible droplets without forcing water deeper into the device. - Dab with a Lint-Free Cloth or Paper Towel
Use a soft, absorbent cloth to gently blot the outside of the port. Do not insert anything into the port at this stage. - Use Compressed Air (Canned Air) Carefully
Hold the can upright and use short bursts to blow air across—not directly into—the port. This helps evaporate moisture without pushing debris further inside. - Allow Natural Air Drying for 2–4 Hours
Place the phone in a dry, well-ventilated area away from direct sunlight or heat sources. Let passive evaporation do the work. - Test Charging After Drying
After waiting, attempt to charge the phone. If the moisture alert persists, repeat the process or try silica gel exposure (next section).
Do’s and Don’ts: What Actually Works (and What Doesn’t)
Many popular home remedies do more harm than good. Below is a clear comparison of recommended versus risky practices.
| Do’s | Don’ts |
|---|---|
| Use silica gel packets – Place the phone in a sealed container with desiccants for 6–12 hours. | Put the phone in rice – Rice is ineffective, can leave starch residue, and attracts pests. |
| Blow air gently with a hairdryer on cool setting – Keep it at least 30 cm away and move constantly. | Use high heat or hot air – Heat can warp plastic, damage adhesives, and degrade battery performance. |
| Wait patiently for natural evaporation – Time is often the safest ally. | Insert cotton swabs or metal objects – These can scratch contacts or push moisture deeper. |
| Use a vacuum with low suction – A handheld vacuum held near the port may draw out moisture vapor. | Plug in a charger immediately – Charging a wet port risks short circuits and component failure. |
Better Than Rice: The Silica Gel Method That Works
Silica gel is a scientifically supported desiccant used in electronics packaging for moisture control. Unlike rice, which has minimal absorption capacity, silica gel actively pulls moisture from the air and surrounding surfaces.
To use it effectively:
- Collect 3–5 silica gel packets (often found in shoeboxes, supplement bottles, or purchased online).
- Place them in an airtight container with your phone, ensuring the charging port faces down.
- Seal the container and leave it undisturbed for 6 to 12 hours.
- Remove and test charging functionality.
In a real-world test conducted by a consumer tech blog, phones exposed to simulated splash scenarios recovered charging capability in 88% of cases after 8 hours with silica gel, compared to only 14% with rice.
“We’ve seen phones come back from moisture alerts using nothing but patience and silica gel. It’s low-tech but highly effective.” — Mark Rivera, Senior Technician at UrbanFix Repair
Mini Case Study: Recovering a Water-Exposed iPhone
Jessica, a nurse in Chicago, accidentally dropped her iPhone 13 in a sink while washing her hands. She retrieved it within seconds, but the “Moisture Detected” warning appeared immediately. Panicked, she nearly put it in rice—but remembered reading about silica gel.
She placed the phone in a Tupperware container with four silica gel packs from old electronics packaging, left it overnight, and checked it the next morning. The warning was gone, and the phone charged normally. She continued monitoring for two weeks and reported no performance issues.
This case illustrates how quick action combined with the right method prevents unnecessary panic and potential damage.
When to Seek Professional Help
Some situations require expert attention. If any of the following apply, stop DIY attempts and consult a certified repair technician:
- The phone was submerged, not just splashed.
- There are signs of corrosion (white or greenish residue in the port).
- The moisture warning persists after 24 hours of proper drying.
- The screen flickers, battery drains abnormally, or audio sounds distorted.
Professionals use specialized tools like isopropyl alcohol cleaning (for corrosion), thermal imaging, and vacuum chambers to extract trapped moisture. Attempting these at home without training can void warranties or worsen damage.
Prevention: Avoiding Future Moisture Exposure
Prevention is always better than repair. Consider these habits to minimize risk:
- Keep your phone away from sinks, bathtubs, and kitchen counters during food prep.
- Use a waterproof pouch when near pools or beaches—even IP68-rated phones have limits.
- Wipe your hands thoroughly before handling your phone after washing.
- Invest in a rugged case with port covers if you live in a humid climate.
While most modern phones carry some level of water resistance (e.g., IP67 or IP68 ratings), these ratings apply to controlled lab conditions with fresh water—not repeated exposure or liquids like soda, coffee, or saltwater, which are more corrosive.
Frequently Asked Questions
Can I use a hairdryer to dry my charging port?
You can, but only on the coolest setting and at a distance of at least 30 cm. Hold it at an angle and never focus heat directly on the port. Excessive heat damages internal components and adhesive seals. Safer alternatives include air drying or silica gel.
How long does it take for moisture to evaporate naturally?
Surface moisture typically evaporates within 1–2 hours in a dry environment. However, trapped moisture in crevices may take 6–24 hours. If the moisture alert remains after 12 hours despite drying efforts, consider using desiccants or professional help.
Is it safe to charge my phone if the moisture warning appears?
No. Charging while moisture is present increases the risk of electrical shorts and long-term corrosion. Wait until the alert disappears and the port feels completely dry. Forcing a charge can permanently damage the charging circuit.
Expert Checklist: What to Do When Water Hits Your Charging Port
Print or save this checklist for quick reference during emergencies:
- ✅ Turn off the phone or enable Airplane Mode
- ✅ Gently tap the phone (port down) to dislodge water
- ✅ Blot the exterior with a lint-free cloth
- ✅ Use canned air (short bursts, angled flow)
- ✅ Place in a dry, ventilated area for 2+ hours
- ✅ Try silica gel in a sealed container for 6–12 hours
- ✅ Test charging only after full drying
- ✅ Avoid heat, rice, and inserting objects
- ✅ Visit a repair shop if issues persist beyond 24 hours
Final Thoughts: Patience and Precision Prevent Damage
Dealing with moisture in a charging port doesn’t require drastic measures. The most effective solutions are often the simplest: time, airflow, and smart use of desiccants. By avoiding common myths like the rice trick and resisting the urge to rush charging, you protect your investment and extend your phone’s lifespan.
Technology is resilient when treated with care. A moment of caution today can prevent hundreds in repair costs tomorrow. Apply these methods calmly and systematically, and your phone will likely recover without a trace of the incident.


 浙公网安备
33010002000092号
浙公网安备
33010002000092号 浙B2-20120091-4
Comments
No comments yet. Why don't you start the discussion?