
Grilling steak over charcoal delivers a depth of flavor gas grills can't match. The smoky char, the crisp sear, and the rich aroma of meat kissed by real fire—these are the hallmarks of a perfectly grilled steak. Yet many home cooks hesitate at the idea, fearing flare-ups, uneven cooking, or dry results. With the right approach, grilling steak on charcoal is not only achievable but repeatable, even for beginners. This guide breaks down the process into clear, manageable steps so you can serve restaurant-quality steaks from your backyard.
Choose the Right Cut for Charcoal Grilling
Not all steaks respond equally to high-heat grilling. Thicker cuts with good marbling stand up best to the intense heat of charcoal. Ribeye, strip (New York), and filet mignon are top choices because fat renders slowly, basting the meat from within and preventing dryness. Sirloin and flank work well too, especially when marinated, though they benefit from slightly shorter cook times.
Aim for steaks at least 1 to 1.5 inches thick. Thin steaks overcook before a proper crust develops. Avoid pre-marinated steaks if you want full control—seasoning your own ensures better texture and flavor balance.
Build and Control Your Charcoal Fire
The foundation of great charcoal grilling is fire management. You need two zones: a hot side for searing and a cooler side for indirect cooking. This allows you to develop a crust without burning the exterior while ensuring the center reaches the desired doneness.
- Arrange charcoal in a two-zone setup: pile lit coals on one half of the grill, leaving the other half empty.
- Use a chimney starter instead of lighter fluid—it’s safer, faster, and avoids chemical taste.
- Wait until coals are covered with gray ash, indicating they’ve reached optimal temperature (about 450–550°F).
- Spread coals evenly on the hot side; leave the cool side free for moving steaks as needed.
This method gives you control. Sear over direct heat, then shift to indirect to finish cooking without charring.
Step-by-Step Guide: From Prep to Plate
Follow this sequence for consistent, flavorful results every time.
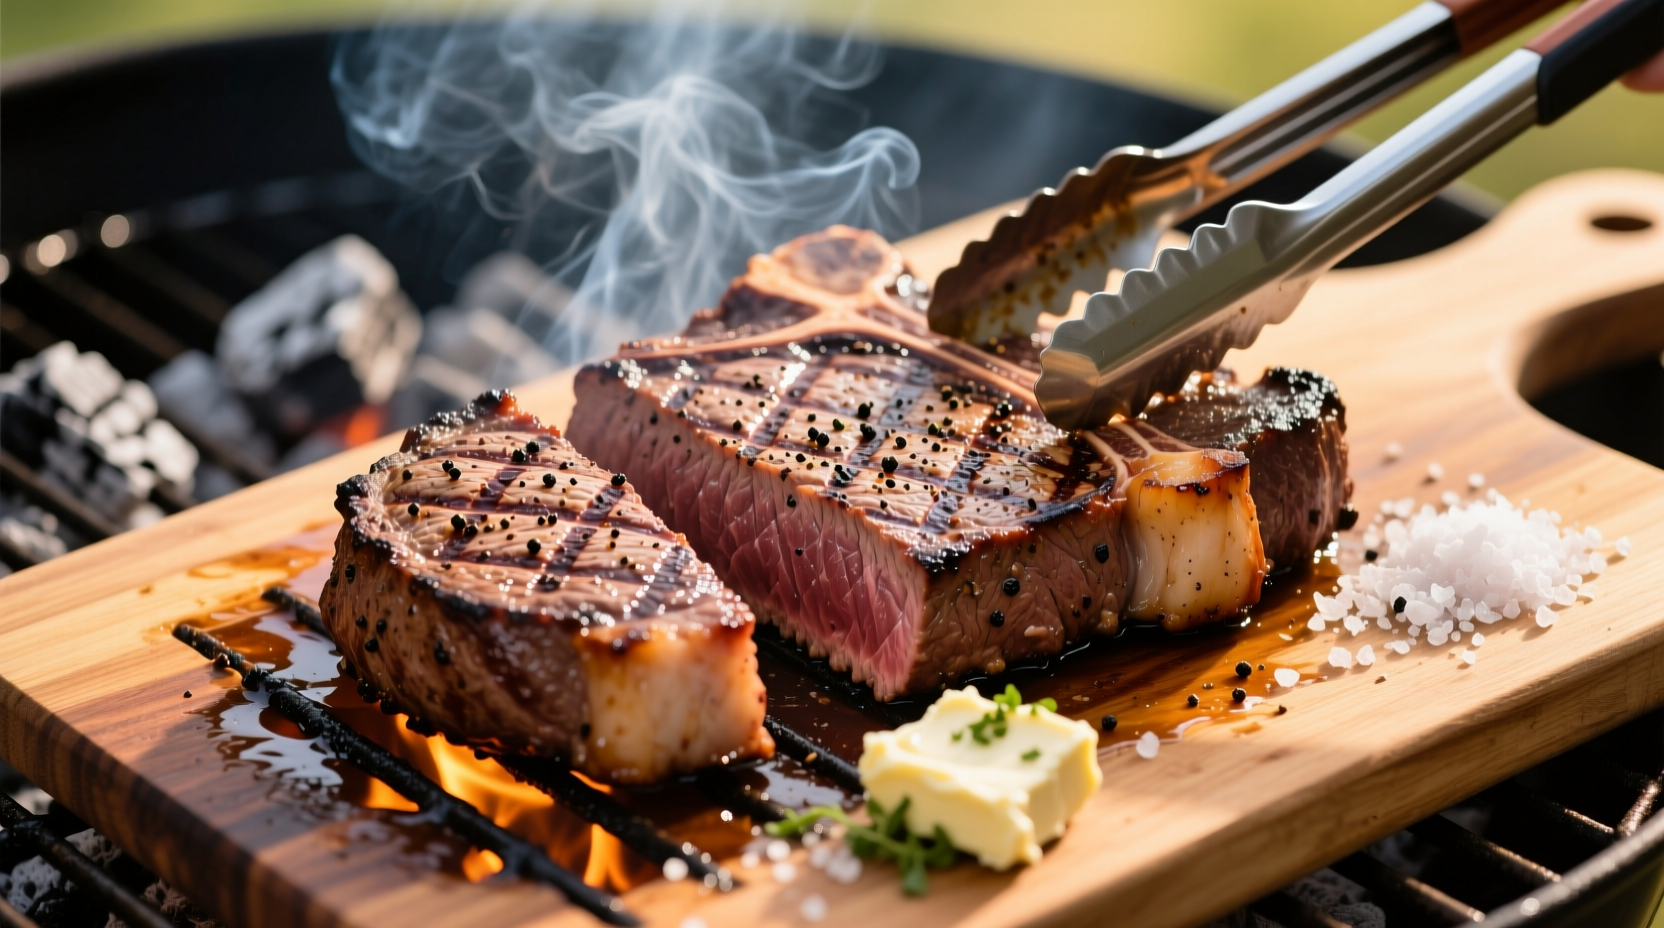
- Season simply: Pat steaks dry with paper towels. Apply coarse kosher salt and freshly ground black pepper on both sides. A light coat of high-smoke-point oil (like avocado or grapeseed) helps prevent sticking.
- Preheat the grill: Clean grates with a brass brush. Place steaks on the hot side and close the lid.
- Sear for crust: Grill 2–4 minutes per side, depending on thickness, until deeply browned. Use tongs to flip—never pierce with a fork.
- Move to indirect heat: After searing, transfer steaks to the cooler side. Close the lid and let them cook through gently.
- Check internal temperature: Insert an instant-read thermometer sideways into the thickest part. Remove steaks 5°F below target (they’ll rise during rest).
- Rest before slicing: Tent loosely with foil and rest for 5–10 minutes. This allows juices to redistribute.
Overcooking is the most common mistake. Rely on a thermometer, not timing alone. Carryover cooking adds 5–10 degrees after removal from heat.
| Doneness | Internal Temp (°F) | Color & Texture |
|---|---|---|
| Rare | 120–125 | Red center, very soft to touch |
| Medium Rare | 130–135 | Warm red center, tender |
| Medium | 140–145 | Pink center, slightly firm |
| Medium Well | 150–155 | Light pink, firm |
| Well Done | 160+ | Little to no pink, very firm |
Flavor Boosts and Common Pitfalls
Charcoal naturally enhances flavor, but small additions elevate it further. Add wood chunks like hickory, oak, or cherry for subtle smoke complexity. Soak them for 30 minutes, then place directly on coals. Avoid mesquite for long cooks—it can overpower.
Baste during the last minute with herb butter (garlic, rosemary, thyme) for a glossy, aromatic finish. But never baste early—sugars in marinades or sauces burn quickly over open flame.
“Temperature control separates good grilling from great. Master the two-zone fire, and you’ll never undercook or char a steak again.” — James Rivera, BBQ Pitmaster & Culinary Instructor
Real Example: First-Time Success
Mark, a home cook in Austin, had always avoided charcoal, worried about inconsistency. He followed the two-zone method with a 1.25-inch ribeye, seasoned simply with salt and pepper. After preheating his kettle grill with a chimney starter, he seared each side for 3 minutes, moved the steak to indirect heat, and monitored with a thermometer. At 128°F, he removed it, rested for 7 minutes, and sliced. The result: a medium-rare steak with a dark, crackling crust and rosy interior. “I didn’t think I could do it at home,” he said. “Now I grill steaks weekly.”
Essential Checklist for Perfect Charcoal Steak
- ☑ Select a thick-cut, well-marbled steak (ribeye, strip, or filet)
- ☑ Bring steak to room temperature before grilling
- ☑ Use a chimney starter for clean, even ignition
- ☑ Set up a two-zone fire (hot + cool sides)
- ☑ Preheat grill and clean grates thoroughly
- ☑ Season with salt, pepper, and optional oil
- ☑ Sear over direct heat for 2–4 minutes per side
- ☑ Move to indirect heat to finish cooking
- ☑ Monitor internal temperature with a reliable thermometer
- ☑ Rest steak 5–10 minutes before serving
Frequently Asked Questions
Can I use a gas grill instead?
While possible, charcoal imparts a distinct smokiness that gas cannot replicate. If using gas, add a smoker box with wood chips to mimic some flavor, but expect differences in char and aroma.
Why did my steak stick to the grill?
Likely causes: grates weren’t hot enough, were dirty, or the steak was flipped too early. Ensure grates are clean, preheated, and lightly oiled. Wait until the steak releases naturally before turning.
How long should I let charcoal burn before cooking?
Allow 15–20 minutes after lighting for coals to become fully ashed over. They should glow red-orange with a thin layer of gray ash—this signals peak heat for searing.
Final Thoughts: Confidence Over Charcoal
Grilling steak on charcoal isn’t about brute force—it’s about precision, patience, and understanding heat. Once you master the rhythm of searing, shifting, and resting, the process becomes intuitive. The reward is more than a meal; it’s the satisfaction of creating something deeply flavorful with your own hands. Whether it’s a weeknight dinner or a weekend gathering, a perfectly grilled steak commands attention and delight.


 浙公网安备
33010002000092号
浙公网安备
33010002000092号 浙B2-20120091-4
Comments
No comments yet. Why don't you start the discussion?