
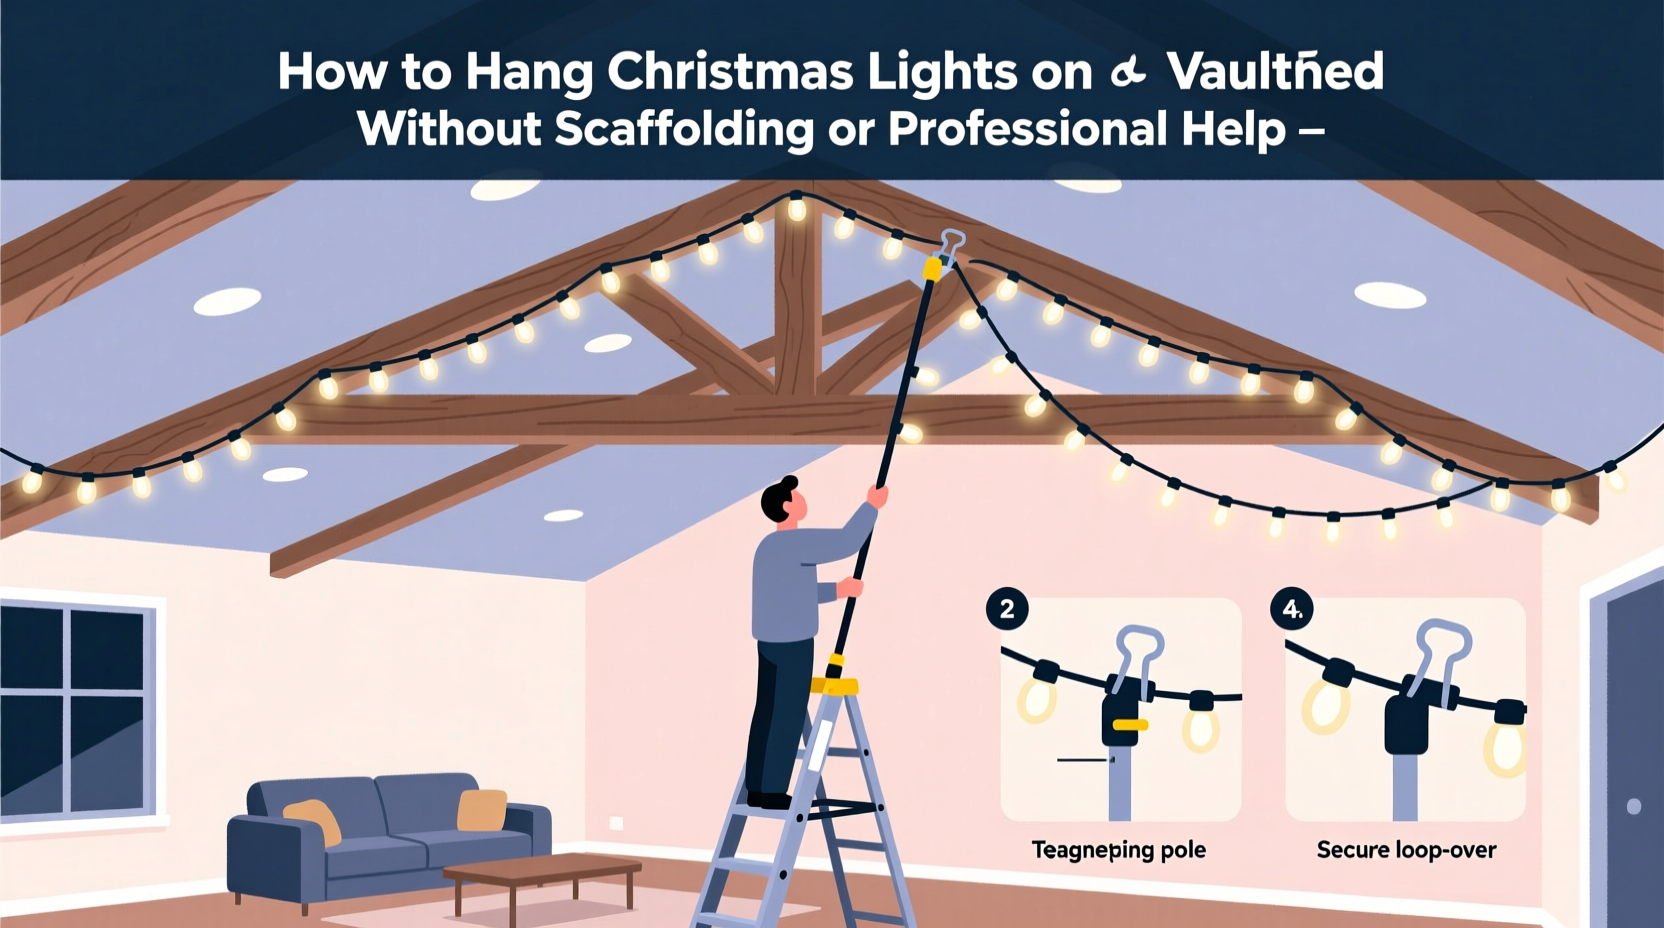
Hanging Christmas lights on a vaulted ceiling can transform your home into a winter wonderland, but the steep angles and height often make it seem like a job for professionals—or at least a risky DIY adventure. The good news is that with the right tools, techniques, and a bit of planning, you can achieve a stunning display without renting scaffolding or calling in an expert.
Vaulted ceilings add architectural beauty to a space, but they also present unique challenges when decorating. The key is working smart: using extension tools, understanding weight distribution, and prioritizing safety at every step. This guide walks you through a proven method that homeowners across North America have used successfully to drape lights across cathedral-style ceilings, A-frames, and great rooms with dramatic pitch.
Assess Your Ceiling and Plan the Layout
Before touching a single strand of lights, take time to study your ceiling’s structure. Vaulted ceilings vary—some are gently sloped, others sharply peaked. Some have exposed beams; others are smooth drywall. Knowing what you're working with determines which hanging method will work best.
Start by measuring the span from one side of the ceiling to the other at its highest point. Note any obstacles: smoke detectors, ceiling fans, skylights, or chandeliers. These will affect where you can and cannot place clips or hooks.
Next, decide on your lighting pattern. Common options include:
- Parallel runs: Lights run horizontally across the slope, creating a cascading effect.
- Central draping: Lights follow the peak down both sides, emphasizing the centerline.
- Crisscross grid: Diagonal lines form a diamond pattern (best for larger spaces).
Sketch a rough diagram on paper or use a room-planning app to visualize coverage. This prevents overbuying lights and ensures even spacing.
Essential Tools and Materials
You don’t need heavy equipment, but having the right handheld tools makes all the difference. Most items are affordable and reusable year after year.
| Tool/Material | Purpose | Recommended Type |
|---|---|---|
| Extension pole (painter’s pole) | Reach high areas without ladders | Telescoping, 10–18 ft, compatible with attachments |
| Light clip applicator | Attach clips to ceiling while standing below | Universal adapter that fits pole threads |
| Plastic light clips | Secure lights to surface without damage | Self-adhesive or nail-in (choose based on material) |
| String lights | Primary decoration | LED, pre-lit connector ends, 25–50 ft per strand |
| Tape measure & laser pointer | Ensure even spacing | Laser helps mark alignment from floor |
| Work gloves & safety glasses | Protect hands and eyes during installation | Lightweight, flexible grip |
“The biggest mistake people make is rushing setup without proper tool prep. Ten minutes of planning saves hours—and potential falls.” — Mark Reynolds, Residential Lighting Installer with 18 years of experience
Step-by-Step Installation Process
Follow this timeline-based approach to install lights efficiently and safely over one weekend.
- Day 1 – Planning & Prep (2–3 hours)
Measure the ceiling, sketch your layout, and purchase materials. Test all light strands for functionality. Charge any battery-powered tools. - Mark Alignment Points (1 hour)
Use a laser level or chalk line snapped from floor to peak to mark vertical centerlines. For horizontal rows, measure from wall up at multiple points and connect with a straight edge or string line. - Attach Clips Using Extension Pole (3–5 hours)
Fit the clip applicator onto the painter’s pole. If using adhesive clips, press firmly for 10 seconds per clip. For nail-in types, pre-load nails into the applicator tip and tap gently with a mallet attachment. Space clips 12–18 inches apart depending on light density desired. - Drape and Secure Lights (2–4 hours)
Begin at one end, feeding the light strand into the first clip. Work downward along the slope, ensuring no tension or sagging. Use zip ties or twist ties to secure excess cord at connection points. - Test and Adjust (1 hour)
Plug in the system and inspect for dark sections or loose connections. Adjust spacing if needed. Conceal cords along baseboards or under rugs using cord covers.
Real Example: Sarah’s Great Room Makeover
Sarah Thompson, a homeowner in Asheville, NC, wanted to decorate her 20-foot-tall great room for her family’s annual holiday gathering. She had previously avoided the task due to fear of heights and lack of equipment.
Instead of hiring someone, she invested $75 in a telescoping painter’s pole and a universal clip applicator from a local hardware store. Over two afternoons, she mapped out parallel light runs across the ceiling’s pitch, using self-adhesive clips rated for textured drywall.
She started by marking every 16 inches along the laser-guided line. With her son holding the base of the pole for stability, she applied each clip steadily. On day two, she strung three 40-foot LED strands, connecting them via inline plugs.
The result? A glowing canopy effect that became the centerpiece of their celebration. Neighbors later asked how she did it—she now hosts a small workshop each December teaching others the same method.
Do’s and Don’ts When Hanging Lights on High Ceilings
| Do | Don’t |
|---|---|
| Use lightweight LED strings to reduce strain on clips and wiring. | Overload circuits—check total wattage before plugging in multiple strands. |
| Inspect poles and attachments for cracks or wobbling before use. | Stand on unstable surfaces like stacked chairs or tables. |
| Use clips designed for your ceiling type (e.g., adhesive for drywall, screw-in for wood beams). | Use staples or nails directly into wires—this creates fire hazards. |
| Label plug ends so removal and storage are easier post-holiday. | Leave lights up year-round—UV exposure and dust degrade materials. |
| Unplug lights when leaving home or sleeping as a fire prevention measure. | Ignore manufacturer instructions—especially regarding outdoor vs indoor use. |
Checklist: Hang Vaulted Ceiling Lights Safely Without Scaffolding
- ☐ Measure ceiling dimensions and sketch lighting layout
- ☐ Choose LED string lights with connector ends
- ☐ Purchase a telescoping painter’s pole (10–18 ft)
- ☐ Get a clip applicator attachment compatible with your pole
- ☐ Select appropriate clips (adhesive or nail-in) for ceiling material
- ☐ Mark alignment lines using laser level or string
- ☐ Attach clips evenly spaced (12–18 inches apart)
- ☐ Drape lights carefully, avoiding tension or pinching
- ☐ Test all strands before final mounting
- ☐ Secure cords safely and unplug when not in use
Frequently Asked Questions
Can I use command strips instead of clips?
Yes, but only for very lightweight mini lights. Command Picture Hanging Strips can support up to 1–3 pounds per strip, making them suitable for short runs. However, they may fail over time due to temperature changes or ceiling texture. For long-term or full-coverage displays, dedicated light clips are more reliable.
How do I remove adhesive residue after the holidays?
Warm, soapy water and a microfiber cloth usually suffice. For stubborn residue, use a small amount of rubbing alcohol on a cloth—test on a hidden area first. Avoid scraping, which can damage paint or finish.
What if my ceiling has wooden beams?
Wooden beams are actually ideal for mounting. Use screw-in light clips designed for wood. Pre-drill tiny pilot holes to avoid splitting. These provide the most secure hold and allow for heavier light sets or icicle strands.
Conclusion: Bring the Magic Home—Safely and Smartly
Hanging Christmas lights on a vaulted ceiling doesn’t require professional gear or dangerous climbs. With thoughtful preparation, the right extension tools, and attention to detail, you can create a breathtaking holiday display that draws admiration from guests and warms your family’s spirit.
The methods outlined here have been tested by thousands of homeowners who once thought their ceilings were too high to reach. By leveraging simple physics—extending your reach rather than your risk—you gain control, safety, and pride in a job well done.


 浙公网安备
33010002000092号
浙公网安备
33010002000092号 浙B2-20120091-4
Comments
No comments yet. Why don't you start the discussion?