
Fairy lights bring charm, warmth, and a touch of magic to any space. Whether draped over a bed frame, wrapped around a mirror, or strung across a living room wall, they elevate the ambiance with soft, inviting glow. But many people hesitate to install them—especially in rentals or freshly painted rooms—because of the fear of damaging walls. Nails leave holes, tape peels paint, and command strips sometimes fail. The good news is that you can enjoy fairy lights without compromising your walls. With the right tools, techniques, and a bit of planning, it’s entirely possible to create a dreamy lighting display that’s both beautiful and completely reversible.
Why Wall Safety Matters
Wall damage isn’t just an aesthetic concern—it can have financial consequences, especially for renters. Many landlords charge repair fees for nail holes or paint damage, even if minor. Homeowners may also want to preserve fresh paint jobs or delicate wall surfaces like plaster or wallpaper. Traditional hanging methods often overlook long-term impact, but modern solutions make it easy to decorate responsibly.
The key lies in understanding wall types and choosing attachment methods that distribute weight safely. Fairy lights are lightweight, which makes them ideal candidates for non-invasive mounting. By focusing on adhesives designed for temporary use and leveraging structural features like trim or furniture, you can achieve a secure, damage-free installation.
Best Removable Adhesive Options
Not all adhesives are created equal. Some leave residue, others lose grip over time, and a few can still pull paint off walls. The following options are tested, reliable, and specifically suited for lightweight décor like fairy lights:
- Fabric-based double-sided tape – Unlike plastic tapes, fabric tape conforms to slight surface irregularities and releases cleanly. Look for brands marketed as “paint-safe” or “removable.”
- Reusable adhesive putty – Products like Blu Tack or Poster Putty mold easily and hold small wire ends securely. They’re ideal for corners and light-duty anchoring.
- Micro-suction mounts – These tiny pads use vacuum-like adhesion on smooth surfaces (glass, tile, lacquered walls) and release without residue when gently peeled.
- Hook-and-loop adhesive dots – Small Velcro-style dots with removable backing offer strong grip with minimal footprint. One side sticks to the wall, the other to a zip tie or light strand.
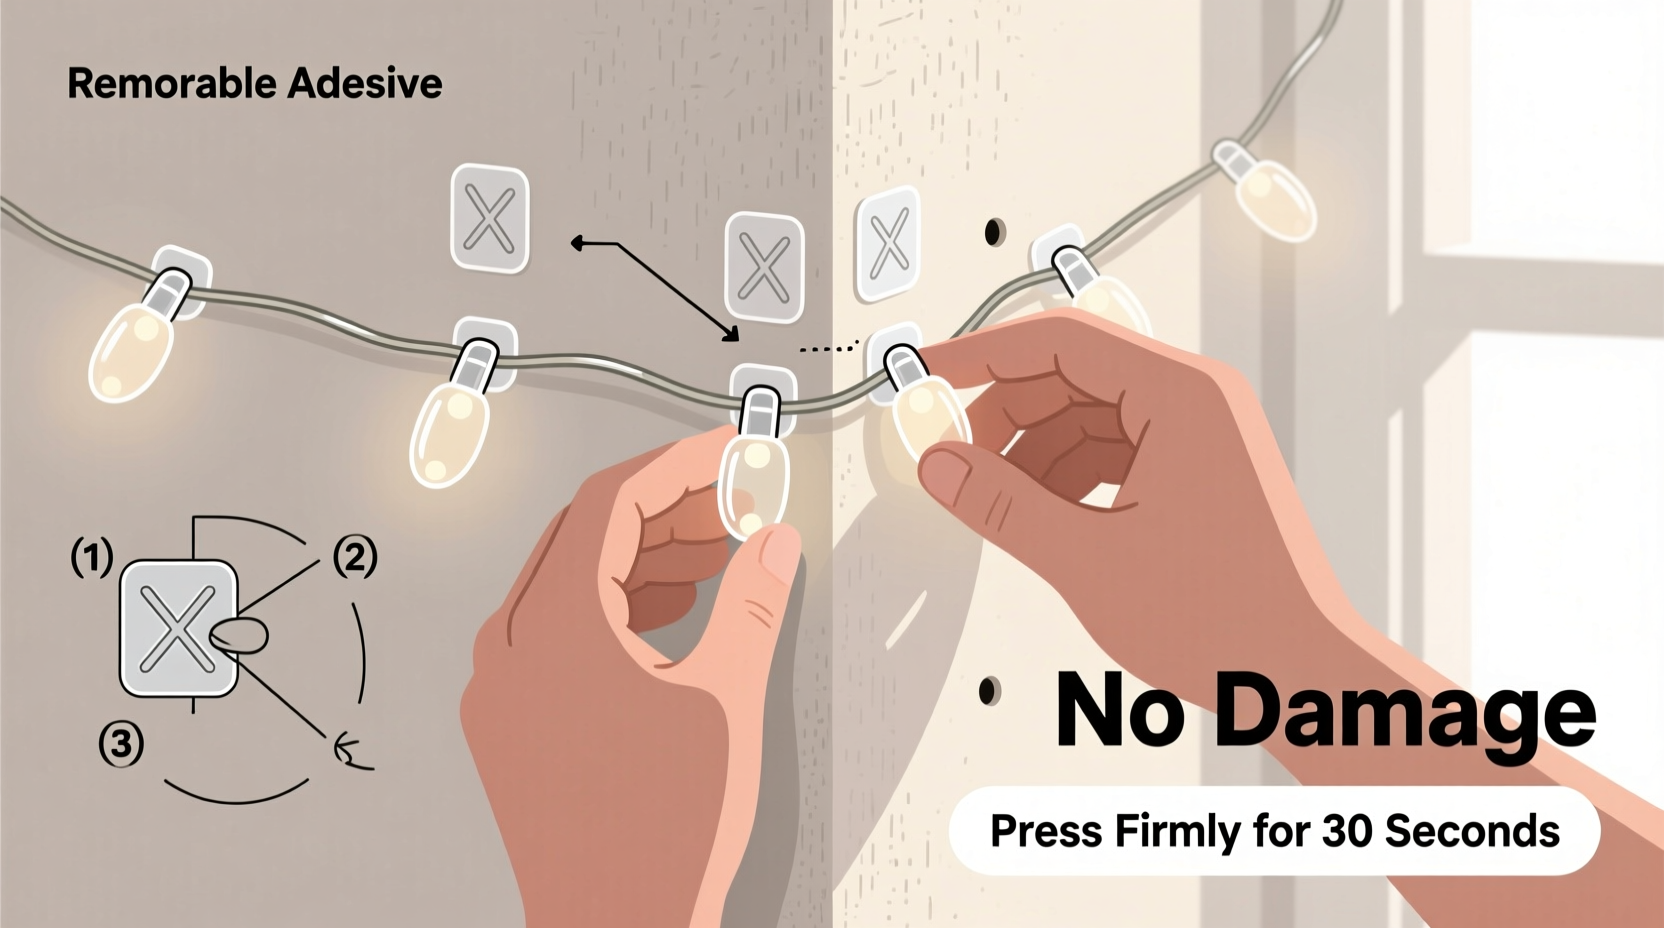
- Removable wall clips with adhesive backing – Designed specifically for string lights, these clips feature a strong yet removable bond and a channel to slide the wire into.
Step-by-Step Guide: Installing Fairy Lights Safely
Follow this proven method to hang fairy lights without damaging walls. This process ensures clean lines, secure placement, and easy removal later.
- Plan your layout – Before applying anything, drape the lights loosely to visualize the path. Use a measuring tape to estimate spacing between anchor points.
- Clean the wall surface – Wipe areas with rubbing alcohol or a mild cleaner to remove dust and oils. Let dry completely—adhesives need a clean surface to bond properly.
- Choose anchor points every 12–18 inches – For most fairy lights, this spacing prevents sagging. Focus on spots where bulbs won’t be covered by the mount.
- Apply adhesive mounts – Press each clip, dot, or tape strip firmly for 30 seconds. Avoid touching the sticky side with fingers to prevent oil transfer.
- Wait one hour before loading – Most removable adhesives reach full strength after curing. Rushing this step risks early detachment.
- Thread the lights into clips or attach with putty – Gently guide the wire into place. Don’t stretch or pull tightly—allow slight slack for natural draping.
- Plug in and adjust – Turn on the lights and fine-tune positioning. Reattach any loose sections with additional putty if needed.
“With proper prep and the right adhesive, fairy lights can stay up for months without harming walls—even on delicate finishes.” — Jordan Lee, Interior Stylist & Rental Design Consultant
Smart Alternatives to Wall Mounting
Sometimes, avoiding the wall altogether is the safest and most creative solution. Consider these alternative methods that eliminate wall contact entirely:
- Use furniture edges – Drape lights along bookshelves, headboards, or mantels. Secure ends with clear cord clips or discreet putty.
- Hang from ceiling molding or crown trim – These areas are often more durable and less visible. Removable clips work well here, especially if the trim is wood or MDF.
- Attach to curtains or rods – Clip lights onto curtain hooks or weave through grommets. This adds sparkle without touching walls.
- Wrap around mirrors or picture frames – Use adhesive-backed hooks on the frame itself, not the wall behind it.
- Float with clear fishing line – Tie small loops of fishing line to ceiling beams or hooks and suspend lights mid-air for a floating effect.
Mini Case Study: Apartment Balcony Makeover
Maria, a tenant in a historic Boston brownstone, wanted to transform her narrow balcony into a cozy evening retreat. She loved the idea of fairy lights but was warned by her landlord about paint damage. Instead of nails, she used micro-suction mounts on the glass railing and removable adhesive clips on the wooden ceiling trim. She wove 15 feet of warm-white LED string lights in a zigzag pattern, anchoring each turn with a tiny pad. The result? A glowing oasis that lasted through fall and winter. When she removed the lights in spring, no residue or marks remained. Her landlord complimented the tasteful decor—and Maria avoided a $75 repainting fee.
Do’s and Don’ts of Removable Hanging
| Do | Don’t |
|---|---|
| Use adhesive products rated for your wall type (e.g., matte paint vs. glossy) | Use duct tape, masking tape, or packing tape—they often peel paint |
| Space mounts evenly to prevent sagging | Overload a single adhesive point; distribute weight |
| Remove slowly at a 180-degree angle to minimize stress | Pull sharply downward, which increases risk of paint lifting |
| Store reusable putty or clips for future use | Leave lights up indefinitely in high-humidity areas like bathrooms |
| Check manufacturer guidelines for temperature limits (some adhesives weaken in cold) | Install near heat sources like radiators or vents, which degrade adhesive bonds |
How to Remove Adhesives Without Damage
Even the best products require proper removal to avoid issues. Follow these steps to take down fairy lights cleanly:
- Unplug and gently loosen the lights from each mount.
- For adhesive clips or tape, grip the edge and pull parallel to the wall (not outward).
- If residue remains, use a small amount of rubbing alcohol on a cotton swab—test first on hidden area.
- For stubborn putty, roll it gently with your fingers to lift it off in one piece.
- Wipe the surface with a damp cloth and let dry.
Never use sharp tools like razors or scrapers unless absolutely necessary. If you do, use extreme caution and only on non-porous surfaces like tile or glass.
FAQ
Can I use Command Strips for fairy lights?
Yes, but choose the smallest size appropriate for lightweight items. Command Clear Refill Strips (mini) are ideal—they hold up to 1 pound per strip and remove cleanly when pulled slowly. Avoid large strips unless necessary, as their stronger adhesive increases removal risk on fragile surfaces.
Will adhesive damage textured walls?
Textured walls (like orange peel or knockdown) are more vulnerable because adhesives bond unevenly. Test first in a hidden spot. Fabric tape and putty tend to work better than flat strips, as they conform to bumps. Alternatively, use tension rods or lean lights against baseboards instead.
How long can I leave removable-mounted fairy lights up?
Most quality adhesives last 3–6 months indoors under normal conditions. Humidity, direct sunlight, and temperature fluctuations shorten lifespan. Check mounts monthly for loosening. For seasonal displays, consider taking them down when not in regular use.
Essential Checklist for Damage-Free Installation
- ✔ Survey your wall type and condition
- ✔ Choose adhesive method based on weight and surface
- ✔ Clean wall thoroughly before application
- ✔ Plan and mark light path with chalk or low-tack tape
- ✔ Apply mounts with firm pressure and allow cure time
- ✔ Install lights with gentle tension
- ✔ Inspect monthly for shifting or wear
- ✔ Remove carefully using slow, horizontal pull
Conclusion
Hanging fairy lights doesn’t have to mean sacrificing wall integrity. With thoughtful preparation and the right removable adhesive tricks, you can create enchanting displays that last for seasons—without leaving a trace. Whether you're in a rental, preserving a fresh paint job, or simply decorating with care, these methods empower you to express your style responsibly. The beauty of fairy lights lies not just in their glow, but in the atmosphere they create. Now, you can let that magic shine without compromise.


 浙公网安备
33010002000092号
浙公网安备
33010002000092号 浙B2-20120091-4
Comments
No comments yet. Why don't you start the discussion?