
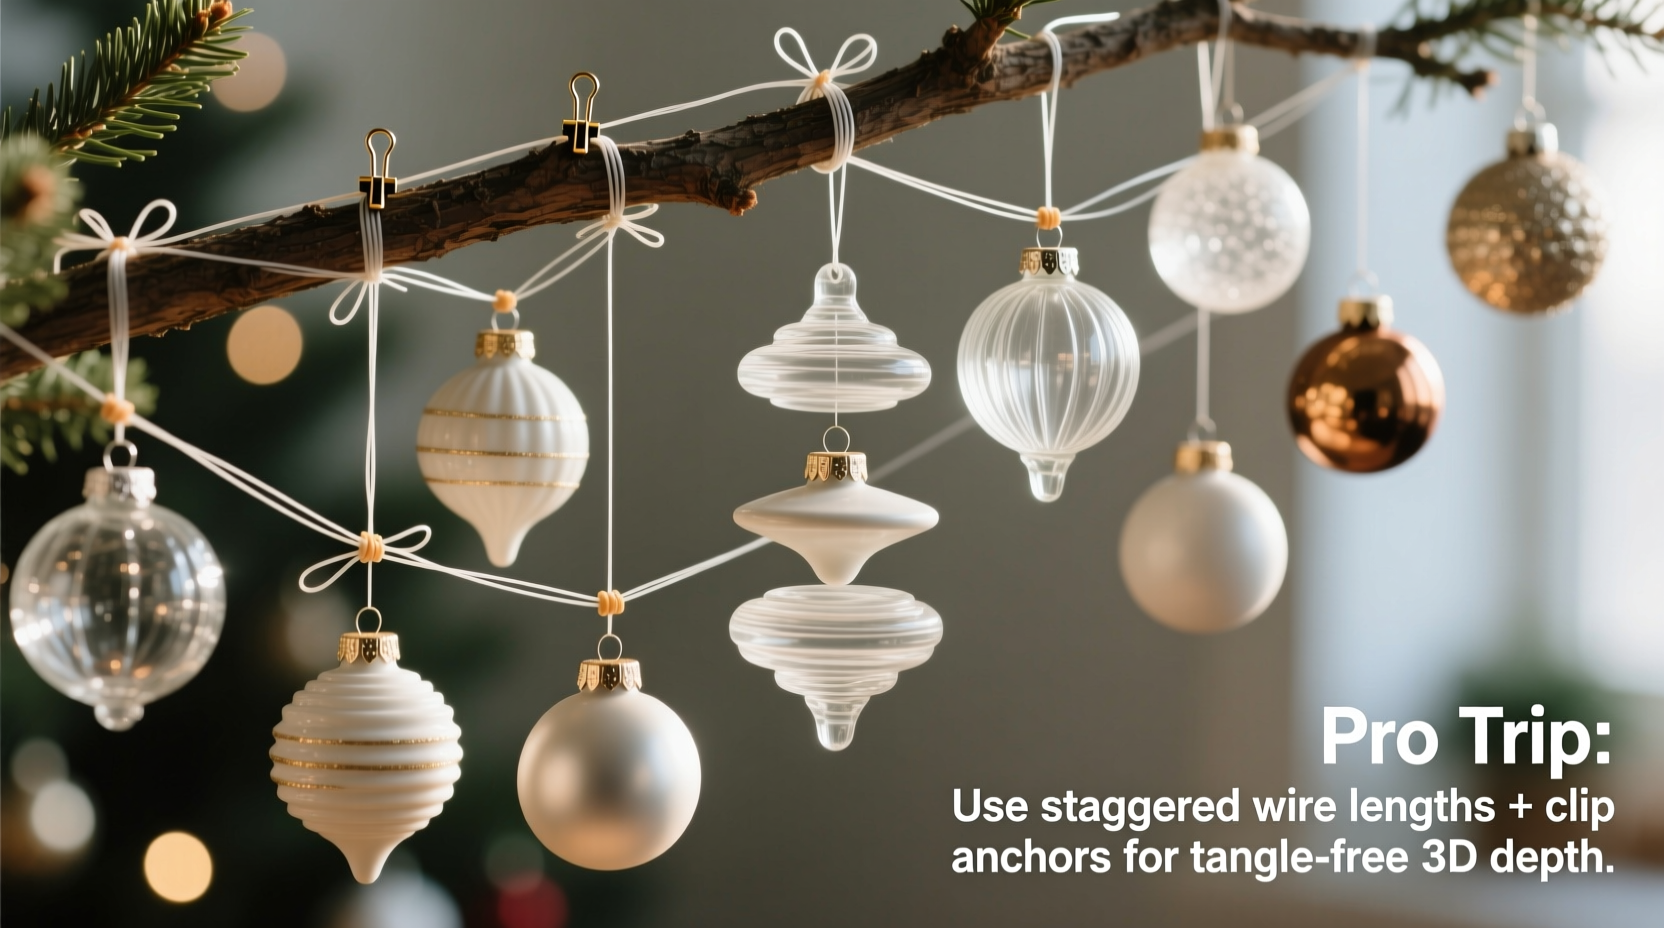
A well-decorated tree or display should feel alive—dynamic, layered, and full of visual interest. One of the most effective ways to achieve this is by hanging ornaments at varying depths to create a three-dimensional effect. But too often, this technique leads to a frustrating tangle of wires, especially when using lightweight or delicate pieces. The solution lies not in avoiding depth variation, but in mastering it with intention and structure.
The illusion of depth transforms flat arrangements into immersive experiences. Whether you're decorating a Christmas tree, a mantel garland, or a festive window display, placing ornaments forward, back, and in between adds realism and elegance. However, doing so without creating chaos requires planning, the right materials, and smart hanging techniques. This guide walks through proven methods to layer your decor beautifully—without sacrificing order.
Why Depth Matters in Ornament Display
Flat ornament placement makes a display look static and artificial. When all decorations sit flush against the surface or branch, the eye has no reason to linger. Varying the depth engages viewers, mimicking how light and shadow interact in nature. A bulb that juts slightly forward catches the light differently than one nestled deep within foliage, creating contrast and movement.
This principle applies beyond trees. Garlands benefit from front-protruding pendants; wreaths gain dimension when some elements extend outward. The challenge arises when attempting to suspend these items with wires, ribbons, or hooks—materials prone to twisting, overlapping, and knotting if not managed carefully.
“Depth isn’t just decorative—it’s psychological. It draws people in, making them want to look closer.” — Daniel Reyes, Interior Stylist & Holiday Display Consultant
Step-by-Step Guide to Layering Ornaments Without Tangles
Creating a 3D effect without tangled wires starts long before you pick up the first ornament. It begins with preparation, continues through strategic placement, and ends with subtle adjustments. Follow this sequence to maintain control while maximizing visual impact.
- Sort ornaments by size, weight, and attachment type. Group heavy glass balls separately from lightweight foam snowflakes. Note which ones have built-in hooks, loops, or require wire.
- Select varied-length hangers. Use pre-cut floral wire, ribbon strands, or ornament hooks in multiple lengths (3”, 6”, 9”, 12”) to establish depth tiers.
- Plan anchor points. On a tree, identify sturdy branches facing different directions. For garlands, mark intervals every 6–8 inches where depth changes will occur.
- Start with background ornaments. Place deeper-set pieces first using shorter hangers. These form the base layer and are less likely to interfere with later additions.
- Add mid-layer ornaments with medium extensions. Use flexible wire or twist ties to gently push or pull the ornament into position, securing only after achieving desired protrusion.
- Finish with forward-facing pieces. Attach longer hangers to ornaments meant to hover ahead of the surface. Ensure they don’t drape over others.
- Check spacing and clearance. Step back every few minutes. Rotate the display if possible. Adjust any wires crossing paths.
- Secure loose ends discreetly. Tuck excess wire under foliage or behind frames. Avoid leaving dangling ends that can catch on adjacent ornaments.
Choosing the Right Hanging Materials
Not all hangers behave the same. Some coil tightly, others stretch, and many resist manipulation once bent. Selecting the appropriate material reduces friction and increases precision.
| Material | Best For | Pros | Cons |
|---|---|---|---|
| Floral Wire (22-gauge) | Heavy ornaments, precise angling | Stiff yet bendable, holds shape well | Can scratch delicate finishes if not wrapped |
| Satin Ribbon | Lightweight pieces, elegant look | Smooth, tangle-resistant, decorative | Limited support for heavier items |
| Clear Monofilament (Fishing Line) | Invisible suspension, floating effect | Nearly invisible, strong tensile strength | Hard to see when adjusting; knots slip easily |
| Metal Ornament Hooks | Quick hanging, temporary setups | Reusable, easy to install | Limited depth control, can deform soft branches |
| Foam-Tipped Pins | Foam or fabric-based ornaments | Gentle on surfaces, secure hold | Not suitable for hanging, only anchoring |
For maximum control, combine materials. Use monofilament for forward-floating ornaments where visibility matters, and floral wire for structural support on heavier pieces. Wrap wire ends with masking tape or dip in clear nail polish to prevent snagging.
Real Example: Decorating a Curved Mantel Garland
Jessica M., a home stylist in Portland, faced a challenge when tasked with dressing a 14-foot curved mantel for a client’s holiday open house. The garland was lush but flat in appearance. She wanted to highlight artisan glass icicles and hand-painted wooden stars without creating a web of visible wires.
Her solution: She assigned each ornament type a depth zone. Stars were set to protrude 4–5 inches forward using 10-inch monofilament lines anchored to hidden U-pins beneath pine boughs. Icicles hung vertically at two depths—some flush, others extending 3 inches out using twisted green floral wire painted to match the foliage.
To avoid tangles, she worked in 2-foot sections, completing one zone before moving on. After finishing, she used a hairdryer on cool setting to blow lightly across the display—if wires shifted or touched, she repositioned them. The result was a dynamic, professional-grade arrangement that guests described as “magical” and “effortless,” despite the meticulous behind-the-scenes work.
Checklist: Tangle-Free 3D Ornament Setup
- ☐ Sort ornaments by weight and hanging method
- ☐ Prepare hangers in at least three different lengths
- ☐ Identify secure anchor points on tree, garland, or frame
- ☐ Begin with deepest layer, working forward
- ☐ Use temporary color-coding for hangers during setup
- ☐ Maintain at least 1 inch of clearance between adjacent wires
- ☐ Secure loose ends with tape or tucking
- ☐ Step back frequently to assess balance and depth
- ☐ Test stability with gentle air movement (fan or hairdryer on cool)
- ☐ Replace temporary materials with final hangers before finalizing
Common Mistakes That Cause Tangles
Even experienced decorators fall into traps that lead to snarled wires. Awareness of these pitfalls prevents frustration later.
- Hanging all ornaments at once without layering. Mixing front and back pieces simultaneously increases wire overlap.
- Using hangers that are too long. Excess length flops around, increasing contact points with other wires.
- Ignoring weight distribution. Heavy ornaments on thin wires can sag, dragging others down with them.
- Skipping test placements. Placing an ornament permanently without checking its spatial relationship invites collisions.
- Overcrowding. Too many protruding ornaments in a small area inevitably leads to entanglement, regardless of care.
One overlooked factor is static electricity, especially in dry indoor environments. Lightweight wires and synthetic ornaments can attract each other unexpectedly. Lightly misting hands (not decorations) with water before handling can reduce static buildup.
Frequently Asked Questions
Can I reuse wired ornaments year after year without tangling?
Yes, but proper storage is key. Remove excess wire after use and store ornaments in compartmentalized boxes. Wrap individual pieces in tissue paper and label each with its intended depth zone for next season.
What’s the best way to untangle fine wires without breaking them?
Place the tangle on a flat surface. Use two fingers to isolate one loop at a time, gently pulling slack outward. Never yank. For persistent knots, use a seam ripper or fine crochet hook to tease fibers apart. Work under good lighting to see crossings clearly.
Are there alternatives to wire for achieving depth?
Absolutely. Consider using mini suction cups with clear line for windows, adhesive-backed clips for walls, or even repurposed earring hooks for ultra-light pieces. For trees, strategically bending outer branches slightly forward can hold ornaments at natural protrusions.
Final Tips for Lasting Success
Mastering depth in ornamentation is about balancing creativity with discipline. The most striking displays aren’t those with the most decorations, but those where every piece has purpose and space. By treating each hanger as part of a larger system—not an isolated thread—you maintain control even in complex arrangements.
Document your process. Take photos at each stage or sketch a simple depth map for large installations. This becomes invaluable when reassembling next year. Many professionals keep a “display journal” noting what worked, what didn’t, and where tangles occurred.
“The secret to a flawless 3D display is patience disguised as precision.” — Lena Cho, Award-Winning Holiday Designer
Conclusion: Bring Your Decorations to Life
Hanging ornaments at varying depths doesn’t have to mean wrestling with knots every time you adjust a single bulb. With the right approach—structured layering, thoughtful materials, and attention to spacing—you can achieve breathtaking dimension while keeping everything orderly. The effort pays off in richer visuals, longer-lasting setups, and far less stress during and after decoration.
Whether you’re styling a family heirloom tree or designing a showpiece for an event, apply these techniques to elevate your work from ordinary to exceptional. Start small, refine your method, and soon, creating depth without tangles will become second nature.


 浙公网安备
33010002000092号
浙公网安备
33010002000092号 浙B2-20120091-4
Comments
No comments yet. Why don't you start the discussion?