
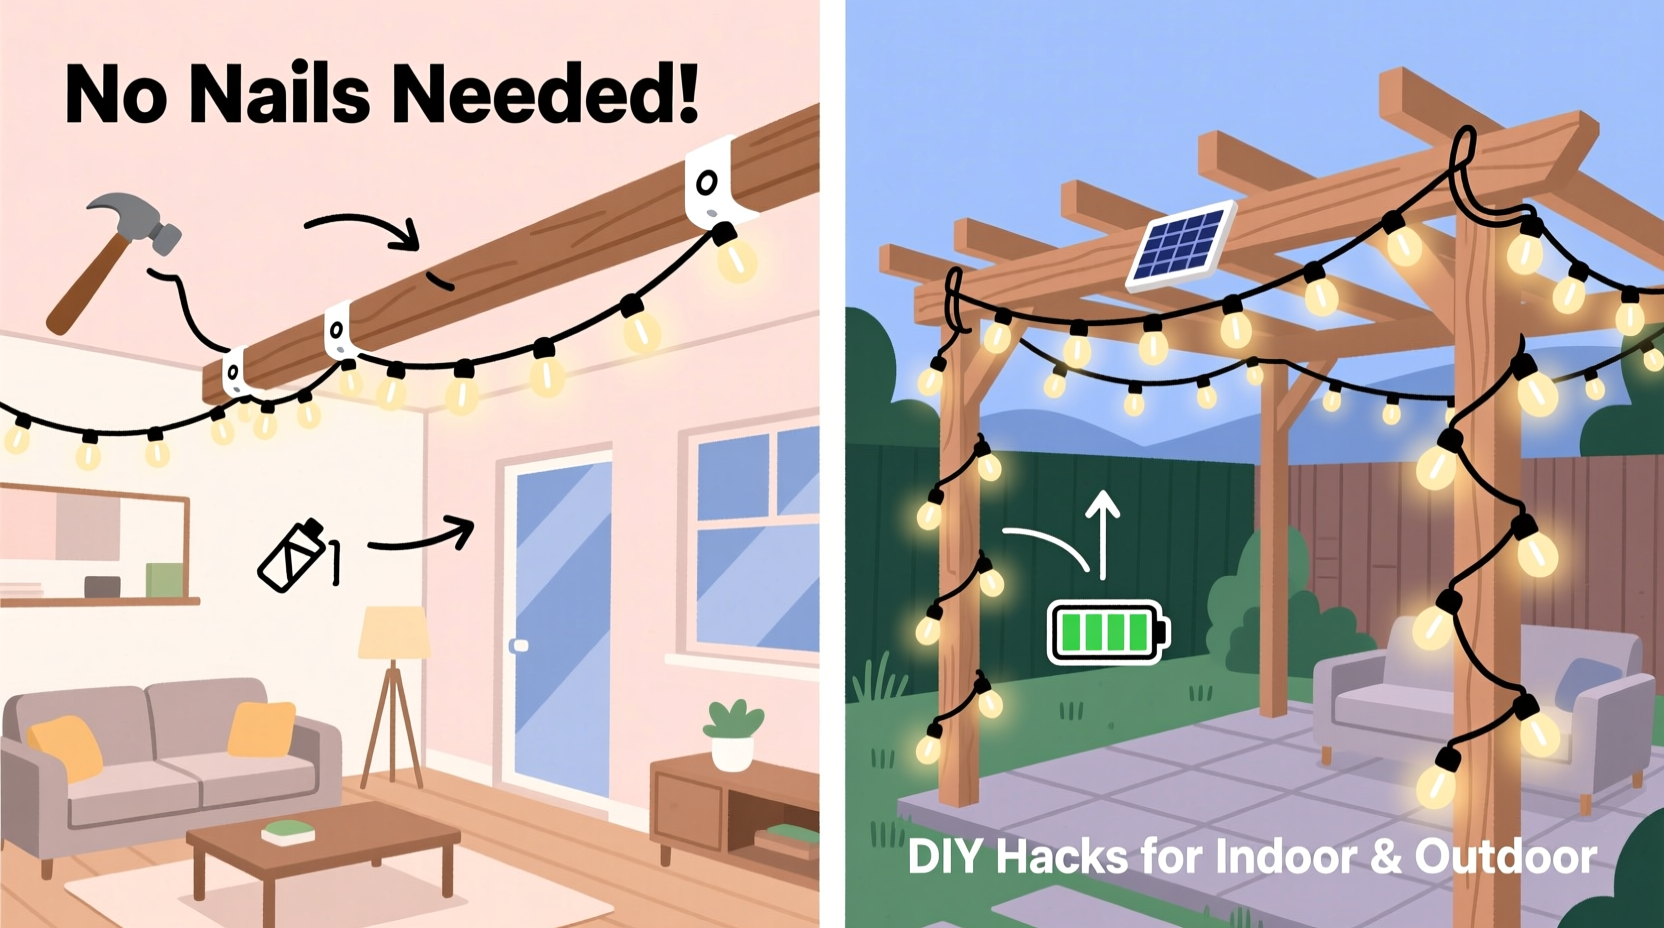
String lights add charm, ambiance, and warmth to both indoor spaces and outdoor areas. Whether you're decorating for a party, enhancing your patio, or creating a cozy bedroom nook, the soft glow of string lights can transform any environment. But many people hesitate to install them because they don’t want to damage walls, ceilings, or siding with nails or screws. The good news is that there are numerous effective, nail-free methods to hang string lights—methods that are secure, affordable, and easy to implement.
This guide explores practical, tested techniques for hanging string lights in homes, backyards, balconies, and event spaces—all without driving a single nail. From adhesive solutions to tension-based systems and natural anchoring, these hacks preserve surfaces while delivering professional-looking results.
Why Avoid Nails? The Case for Damage-Free Installation
Nails may seem like the simplest solution, but they come with drawbacks. Indoors, hammering nails into drywall or trim can cause cracks, require patching later, and complicate future redecorating. Outdoors, nails driven into wood siding, stucco, or brick can lead to moisture intrusion, rot, or pest entry points. In rental properties, landlords often prohibit permanent alterations, making traditional mounting risky.
Damage-free installation also offers flexibility. You can reposition lights seasonally or for different events without leaving behind holes or residue. Many modern alternatives are reusable, weather-resistant, and designed specifically for temporary or semi-permanent lighting setups.
“With today’s adhesive and tension technologies, there’s rarely a need to use nails for decorative lighting—especially when aesthetics and preservation matter.” — Jordan Lee, Residential Lighting Designer
Creative Indoor Methods to Hang String Lights Without Nails
Indoor environments demand subtlety and surface protection. Walls, ceilings, and furniture should remain unscathed while still supporting lightweight lighting fixtures. Here are several proven indoor solutions:
1. Adhesive Hooks and Clips
Clear plastic adhesive hooks are among the most popular choices for indoor string light installations. They support moderate weight (typically up to 5–10 lbs), are nearly invisible, and remove cleanly when needed.
- Command™ Brand Hooks: These are ideal for smooth surfaces like painted walls, tile, and glass. Choose small J-hooks or specialty light clips designed for cord management.
- Reusable Silicone Hooks: Made from strong, grippy silicone, these work well on textured walls and windows where traditional adhesives fail.
- Over-the-Door Hooks: Perfect for draping lights across door frames or along hallways without touching walls at all.
2. Tension Rods for Draped Effects
Tension rods offer an excellent way to span curtains, shower enclosures, or between two walls without tools. Use them horizontally across a bedroom ceiling or vertically along a bookshelf to anchor string lights.
To install:
- Measure the distance between two stable vertical surfaces.
- Select a telescoping rod with rubber-tipped ends to prevent slipping.
- Extend and twist the rod into place until snug.
- Clip or wrap string lights around the rod using mini clothespins or clear zip ties.
3. Ceiling Fan or Fixture Wrapping
If you have a ceiling fan, chandelier, or flush mount light, wrap string lights around its base or blades. This works especially well in bedrooms or covered porches.
Ensure the lights do not obstruct moving parts or cover heat-emitting bulbs. LED string lights generate minimal heat, making them safer for this method than older incandescent types.
4. Furniture Anchoring
Use tall furniture pieces as anchors. Drape lights from a bookshelf, headboard, or curtain rod. Secure the ends with removable putty or Velcro strips.
This approach is ideal for renters who can't modify walls but still want a dramatic lighting effect above a bed or behind a sofa.
Outdoor Hacks That Skip the Hammer
Outdoor installations present unique challenges: weather exposure, uneven surfaces, and varying materials like vinyl, stucco, or brick. However, many non-invasive solutions exist.
1. Garden Stakes and Plant Supports
For patios or garden areas, insert flexible garden stakes into the ground and drape string lights over them. Available in spiral or straight designs, these stakes are inexpensive and blend naturally into landscaping.
You can also repurpose bamboo poles or tomato cages as structural supports. Wrap lights around their curves for a whimsical look.
2. Fence Clips and Rail Attachments
If you have a wooden or composite fence, deck railing, or balcony rail, use adjustable clamp-style clips or expandable rail hooks.
These devices grip securely without drilling and can be tightened with a screwdriver or by hand. Look for UV-resistant models made from durable plastics or coated metals to withstand sun and rain.
3. Zip Ties and Reusable Cable Management
Heavy-duty zip ties (also known as cable ties) are excellent for securing lights to posts, railings, or tree branches. For a reusable option, choose nylon-reinforced hook-and-loop straps.
| Solution | Best For | Max Wind Resistance | Removal Ease |
|---|---|---|---|
| Adhesive Hooks | Smooth walls, windows | Low to Moderate | Easy, residue-free |
| Fence Clips | Decks, railings, fences | High | Moderate (tool-assisted) |
| Garden Stakes | Lawns, gardens, soft soil | Moderate | Very Easy |
| Zip Ties | Posts, trees, structures | High | Difficult (cut required) |
| Tension Wires | Between trees or posts | Very High | Moderate |
4. Natural Anchors: Trees and Shrubs
Branches and thick shrubs make excellent natural anchors. Gently weave lights through foliage or loop them around sturdy limbs. Avoid tying too tightly to prevent bark damage.
Use soft fabric ties or green twist ties instead of metal wire to protect plant health. This method creates a magical forest-like atmosphere in yards or courtyards.
Step-by-Step Guide: Installing String Lights with Adhesive Hooks
Follow this detailed process to achieve a clean, professional look using only adhesive hardware.
- Plan Your Layout: Measure the area and decide whether you want a straight line, zigzag pattern, or cascading effect. Unroll the lights first to check length and bulb spacing.
- Choose the Right Hook: For indoor use, select Command™ Light Clip or Small Clear Hooks. Outdoors, opt for weatherproof versions rated for humidity and temperature changes.
- Mark Spacing Points: Use a level and measuring tape to mark hook positions every 12–24 inches, depending on light weight and desired sag.
- Prepare Surfaces: Wipe each spot with rubbing alcohol and let dry completely. Dust, grease, or moisture reduces adhesion.
- Apply Hooks: Press each hook firmly onto the surface for 30 seconds. Wait one hour before loading for best bond strength.
- Hang the Lights: Starting at the power source, clip each bulb socket or cord segment into the hooks. Avoid pulling taut—allow slight droop for visual appeal.
- Test and Adjust: Plug in the lights and inspect alignment. Reposition if needed before finalizing placement.
This method works equally well on interior walls, ceilings, mirrors, and even inside cabinets or closets for accent lighting.
Mini Case Study: Backyard Wedding Decor Without Permanent Fixtures
A couple planning a backyard wedding wanted romantic lighting over their dining area but couldn’t drill into their rented home’s stucco exterior. They used a combination of deck rail clips and tension wires stretched between tree trunks.
They installed two parallel steel cables using tree-friendly arborist straps, then hung string lights from the cables with S-shaped shower curtain hooks. Additional lights were draped over potted plants using garden stakes. The entire setup took three hours, cost under $75, and was removed the next day with zero damage.
Guests commented on the elegant ambiance, and the homeowners praised the couple for preserving the property. This real-world example shows how thoughtful planning and the right tools eliminate the need for nails entirely.
Checklist: Nail-Free String Light Installation
Before starting your project, go through this essential checklist:
- ☐ Measure total length needed (add 20% extra for slack and routing)
- ☐ Confirm power source location and extension cord requirements
- ☐ Choose appropriate mounting method based on surface type (indoor/outdoor)
- ☐ Purchase weather-rated lights for outdoor use (look for UL-listed, IP44 or higher)
- ☐ Gather necessary tools: scissors, zip ties, level, tape measure, rubbing alcohol wipes
- ☐ Test lights before installation to identify dead bulbs or wiring issues
- ☐ Plan removal strategy—label cords and store components together
Common Mistakes to Avoid
Even simple installations can go wrong without attention to detail. Watch out for these pitfalls:
- Overloading adhesive hooks: Each hook has a weight limit. Distribute load evenly and use multiple hooks per strand if needed.
- Ignoring weather ratings: Indoor-only lights exposed to rain can short-circuit or become hazardous.
- Stretching lights too tight: A slight curve looks more inviting and reduces strain on connections.
- Using flammable materials near bulbs: Keep lights away from curtains, paper lanterns, or dry vegetation.
- Forgetting timer or dimmer options: Automate your display for convenience and energy savings.
“The key to successful no-nail lighting is matching the mounting method to the environment—not just the aesthetic.” — Carla Mendez, Outdoor Living Consultant
Frequently Asked Questions
Can I reuse adhesive hooks after removing string lights?
Most adhesive hooks are designed for one-time use. While the hook itself may remain intact, the adhesive strip loses effectiveness once removed. Replacement strips are available for some brands, but it's usually more economical to replace the entire unit.
Are zip ties safe for outdoor use?
Yes, UV-resistant black nylon zip ties are commonly used in outdoor electrical and landscaping applications. Avoid cheap white ties, which degrade faster in sunlight. For temporary setups, consider reusable hook-and-loop ties instead.
How do I prevent string lights from swaying in the wind?
To reduce movement, shorten spans between anchor points, use heavier-gauge wire, or add intermediate supports. Tension cables with turnbuckles allow fine-tuning of tightness. Also, avoid installing during windy conditions to ensure accurate positioning.
Final Thoughts: Light Up Your Space—Safely and Smartly
Hanging string lights without nails isn’t just possible—it’s often preferable. Modern solutions offer greater flexibility, lower risk, and easier maintenance than traditional methods. Whether you're enhancing a cozy reading corner or transforming an outdoor gathering space, these hacks empower you to decorate freely, regardless of your living situation or surface constraints.
The right technique depends on your environment, budget, and desired permanence. Experiment with combinations—like adhesive hooks indoors and tension lines outdoors—to create layered, dynamic lighting effects. Always prioritize safety by using grounded outlets, surge protectors, and outdoor-rated components when applicable.


 浙公网安备
33010002000092号
浙公网安备
33010002000092号 浙B2-20120091-4
Comments
No comments yet. Why don't you start the discussion?