
Christmas lights bring warmth and cheer to any home, but tangled, exposed cords can quickly turn festive charm into visual clutter. One of the most effective ways to maintain a polished holiday display is by concealing light cords along baseboards. Done correctly, this technique keeps power lines out of sight while ensuring safety, accessibility, and ease of maintenance. Whether you're decorating a single room or illuminating an entire house, mastering cord concealment transforms your setup from amateur to expert-level in minutes.
The key isn’t just hiding the wires—it’s doing so in a way that respects your home’s interior, avoids damage, and allows for quick disassembly after the holidays. With the right tools, techniques, and a bit of planning, you can achieve a seamless look that impresses guests and simplifies your seasonal routine.
Why Baseboard Cord Routing Works Best
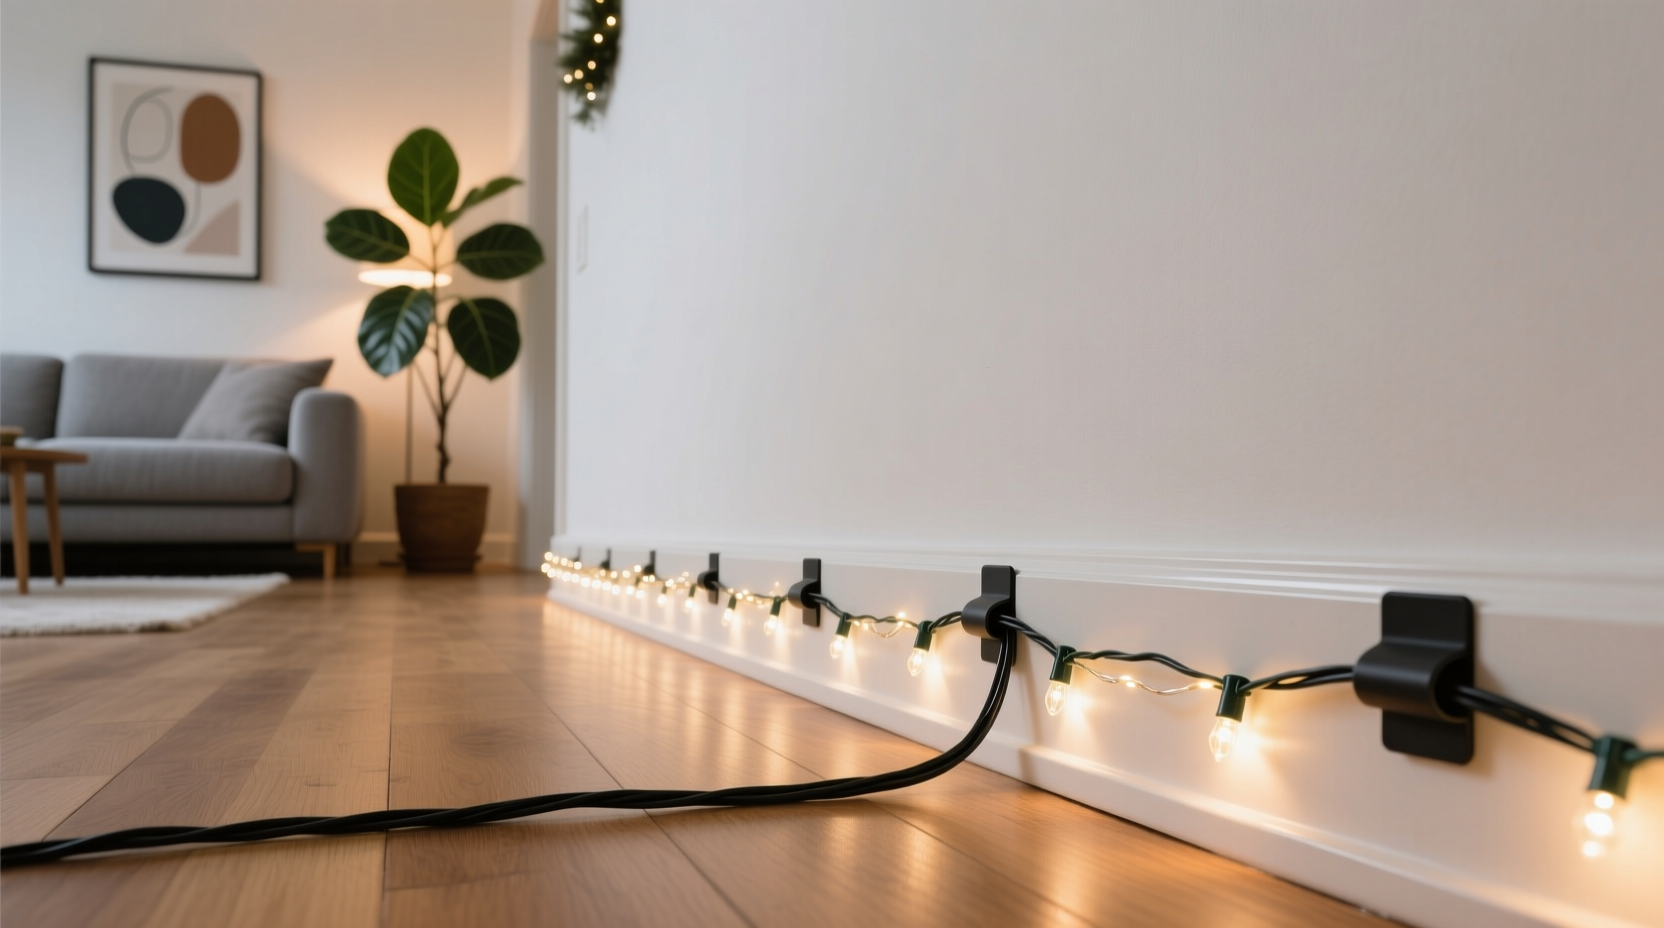
Routing Christmas light cords along baseboards offers several advantages over other concealment methods. Unlike running cords across floors—where they pose tripping hazards or get stepped on—baseboards provide a natural, low-profile path that follows the perimeter of rooms. This alignment keeps wiring hidden in plain sight: visible only upon close inspection, yet easily accessible when needed.
Baseboards also serve as structural dividers between walls and flooring, making them ideal transition zones for discreet cable management. Most are made of paintable wood or composite materials, allowing minor modifications like notching or adhesive attachment without compromising aesthetics. Plus, since baseboards typically run uninterrupted around rooms, they enable continuous cord runs with minimal splices or visible jumps.
“Professional decorators spend 60% of their time on wire management—not bulb placement. The magic is in the details.” — Daniel Reeves, Residential Lighting Designer
Essential Tools and Materials
Before starting, gather the right supplies. Using improper materials may lead to paint damage, poor adhesion, or unsafe installations. Below is a checklist of recommended items:
- Cord clips (plastic or adhesive) – Small, U-shaped holders that secure cords to surfaces without nails.
- Cable raceways (paintable plastic channels) – Ideal for longer runs; blend into baseboards when painted.
- Double-sided mounting tape (heavy-duty) – For securing raceways or flat cables; choose UV-resistant if near windows.
- Hook-and-loop tape (Velcro strips) – Reusable and gentle on surfaces; great for temporary setups.
- Cord covers with adhesive backing – Flat, low-profile solutions that snap shut over wires.
- Utility knife or small saw – For creating subtle notches in baseboard corners if necessary.
- Paint-matching kit – To touch up any scuffs or modify raceway color for invisibility.
- Measuring tape and pencil – For planning layout and marking clip positions.
Step-by-Step Guide to Neatly Hide Cords Along Baseboards
Follow this sequence to install hidden cords efficiently and safely.
- Plan Your Route
Walk the perimeter of each room and sketch a rough path for your cords. Identify outlets, light endpoints, and obstacles like doorways or furniture. Aim to minimize cross-room transitions. Mark outlet locations and total linear feet needed. - Measure and Cut Accessories
Based on your route, cut raceways or determine how many cord clips you’ll need. Space clips every 12–18 inches for stability. If using a continuous raceway, measure precisely and trim with a fine-tooth saw for clean edges. - Prepare the Surface
Wipe baseboards with a dry cloth to remove dust and grease. Avoid water or cleaners unless specified by adhesive manufacturers. A clean surface ensures strong bonding. - Install Clips or Raceways
Peel backing from adhesive products and press firmly into place. Hold each piece for 10 seconds to activate the bond. For raceways, start near the outlet and work outward. Use a level to keep lines straight, especially on uneven walls. - Thread the Cords
Lay cords into clips or snap them into open raceways. Avoid overstuffing—only one standard-gauge Christmas cord should occupy each channel. Keep connections (like plug adapters) outside enclosed spaces for ventilation. - Manage Corners and Transitions
At inside corners, bend cords gently with a 1-inch radius to prevent kinking. For outside corners or gaps between baseboards and flooring, use flexible corner bends or L-shaped raceway fittings. Alternatively, notch the back edge of the baseboard slightly to recess the cord—a technique best done with a chisel and light sanding. - Paint and Blend (Optional)
If using white plastic raceways on darker baseboards, apply matching paint with a small brush. Allow 24 hours to cure before final inspection. - Test and Adjust
Plug in lights to ensure all sections function. Check for tension, sagging, or loose clips. Make micro-adjustments as needed.
Comparison of Cord Concealment Methods
Not all solutions are equal. The table below compares common options based on effectiveness, cost, reusability, and surface safety.
| Method | Ease of Use | Surface Safety | Cost (per 10 ft) | Reusability |
|---|---|---|---|---|
| Adhesive Cord Clips | High | High (removable) | $3–$5 | Medium |
| Paintable Cable Raceway | Medium | Medium (may lift paint) | $10–$15 | High |
| Hook-and-Loop Tape | High | Very High | $4–$7 | High |
| Cord Covers (Snap-On) | Medium | High | $8–$12 | Medium |
| Baseboard Notching (DIY Recess) | Low | Low (permanent) | $1–$3 (tools required) | None |
For renters or those avoiding permanent changes, adhesive clips and hook-and-loop systems offer the best balance. Homeowners seeking long-term solutions may prefer installed raceways or even integrated wiring during renovations.
A Real-World Example: The Johnson Family Living Room
The Johnsons decorate their two-story home annually with over 1,200 lights. In past years, cords ran haphazardly across hardwood floors, leading to tripping incidents and damaged plugs. Last season, they decided to re-route everything along baseboards.
They began by measuring 86 linear feet of baseboard in the living room and dining area. They purchased paintable PVC raceways and used a miter box to cut precise 45-degree angles at corners. After cleaning the surface with alcohol wipes, they applied industrial-strength double-sided tape and pressed the raceways into place.
Cords were fed through each section, with extension cords grouped separately from light strings. At the staircase landing, where no baseboard existed, they used low-profile cord clips on the wall just above floor level, painting them to match the trim. The result? A gallery-like display where lights appeared to float, with zero visible wiring.
“It took three hours the first time,” said Sarah Johnson, “but now we label and coil everything. We’re down to 45 minutes for teardown and storage.”
Common Mistakes to Avoid
Even careful planners make errors. These pitfalls compromise safety, appearance, or longevity:
- Overloading one outlet – Daisychaining too many strands stresses circuits. Use multiple outlets or heavy-duty extension cords rated for indoor use.
- Ignoring heat buildup – Never enclose hot-running transformers or power bricks inside sealed raceways. Allow airflow to prevent overheating.
- Using duct tape or staples – These damage paint and baseboards. Staples can pierce insulation, creating shock risks.
- Skipping expansion gaps – Plastic expands in heat. Leave 1/8-inch space between raceway segments to prevent warping.
- Forgetting post-season removal – Leaving cords up year-round leads to yellowing, brittleness, and insect nesting. Schedule disassembly within two weeks of New Year’s.
Frequently Asked Questions
Can I paint plastic cord covers to match my baseboards?
Yes. Use a primer designed for plastics (such as Krylon Fusion Primer), then apply latex paint in your baseboard color. Lightly sand the surface first for better adhesion. Allow 48 hours to fully cure before installation.
Will removing adhesive raceways damage the paint?
Most modern adhesive-backed products use removable technology. To minimize risk, warm the bond with a hairdryer and peel slowly at a 180-degree angle. Any residue can be removed with rubbing alcohol or Goo Gone.
What’s the safest way to go under a rug near the baseboard?
Avoid it if possible. If unavoidable, use a flat, low-profile cord cover rated for foot traffic. Do not run standard cords under rugs—they overheat and are fire hazards. Better alternatives include relocating the outlet point or using wireless LED strips powered by batteries.
Final Tips for a Flawless Finish
Professional results come from attention to detail. Here’s a concise checklist to ensure success:
- ✅ Measure total linear footage of baseboard route
- ✅ Choose concealment method based on permanence and budget
- ✅ Clean baseboard surface before applying adhesives
- ✅ Install clips or raceways every 12–18 inches
- ✅ Maintain separation between power sources and light strings
- ✅ Test all lights before finalizing placement
- ✅ Label cords for easy disassembly
- ✅ Schedule post-holiday removal and storage
Conclusion: Elevate Your Holiday Display Today
Hiding Christmas light cords along baseboards isn’t just about tidiness—it’s about respect for your space, your time, and your safety. With thoughtful planning and the right materials, you can create a display that looks professionally installed, lasts for seasons, and comes down without stress. The effort you invest now pays off in admiration from guests and peace of mind throughout the holidays.


 浙公网安备
33010002000092号
浙公网安备
33010002000092号 浙B2-20120091-4
Comments
No comments yet. Why don't you start the discussion?