
A beautifully curated indoor Christmas display—whether it’s a mantel draped in garlands, a tabletop village glowing under miniature lights, or a towering tree wrapped in delicate stringers—can instantly elevate holiday ambiance. Yet one detail consistently undermines that magic: exposed cords. Snaking black wires, clustered power strips, and dangling extension cords fracture visual continuity, introduce tripping hazards, and suggest haste rather than intention. Hiding them isn’t about deception—it’s about design discipline, electrical safety, and honoring the craftsmanship of your decorations. This guide distills field-tested strategies used by professional holiday stylists, interior designers, and certified electricians into actionable, scalable solutions. No gimmicks. No unsafe shortcuts. Just clear, responsible methods that preserve both beauty and code compliance.
Why Cord Management Matters Beyond Aesthetics
Most people prioritize appearance when concealing cords—but overlooking the underlying functional and regulatory stakes invites real consequences. Exposed wiring increases trip risk, especially near high-traffic areas like hallways or stair landings. Taped-down cords degrade over time, exposing copper strands; frayed insulation can spark, particularly when coiled tightly or pressed beneath furniture legs. The National Fire Protection Association (NFPA) reports that 38% of home decoration–related fires between 2017–2021 involved electrical distribution or lighting equipment—often due to overloaded circuits or damaged cords hidden beneath rugs or inside walls.
Equally important is circuit integrity. Daisychaining multiple power strips or using undersized extension cords creates voltage drop, dimming lights unevenly and shortening LED lifespan. Worse, it risks thermal buildup behind baseboards or inside hollow furniture—spaces with poor airflow where heat accumulates silently. Professional holiday installers never treat cord concealment as an afterthought. They plan power routing during layout design, matching load capacity to fixture wattage and verifying outlet spacing before a single bulb is hung.
“Cord concealment begins at the breaker panel—not at the tree. If you’re adding more than five 100-light LED strings to one circuit, you’ve already exceeded safe loading for most residential 15-amp circuits. Measure first, decorate second.” — Javier Mendez, Certified Residential Electrician & Holiday Lighting Consultant, 12+ years with the National Electrical Contractors Association (NECA)
Five Proven Cord-Hiding Strategies (With Real-World Application)
1. Baseboard Integration Using Low-Profile Raceways
Baseboard raceways are slim, paintable plastic or aluminum channels (typically 0.75”–1.25” tall) installed directly over existing baseboards or along wall edges. Unlike bulky cord covers, they blend seamlessly when painted to match trim. Install them *before* hanging decorations—use double-sided tape for temporary placement or finish nails for permanent mounting. Feed cords through the open top, then snap on the cover. For corners, use pre-bent elbows or cut miters with a fine-toothed saw.
2. Furniture as Functional Conduits
Leverage existing furniture not just as display surfaces but as structural cord pathways. Run cords vertically inside hollow table legs (drill discreet 3/8” entry holes at top and bottom), thread them through the cavity, and exit at the base into a floor-level power strip. For bookshelves, route cords behind back panels using adhesive cable clips spaced every 12 inches. On sofas or armchairs, tuck cords beneath cushions and feed them through grommeted openings in the frame—many modern pieces include these intentionally for tech integration.
3. Decorative Fabric Wraps & Textile Solutions
For visible horizontal runs—like across mantels or tabletops—fabric wraps offer instant camouflage. Use wide, non-stretch velvet ribbon (2”–3” wide), burlap twine, or faux-fur garland. Wrap tightly around grouped cords with a 50% overlap, securing ends with fabric glue or discreet hot-glue dabs. Avoid elastic or synthetic fabrics near heat sources; LEDs run cool, but incandescent mini-lights or transformer housings can reach 140°F.
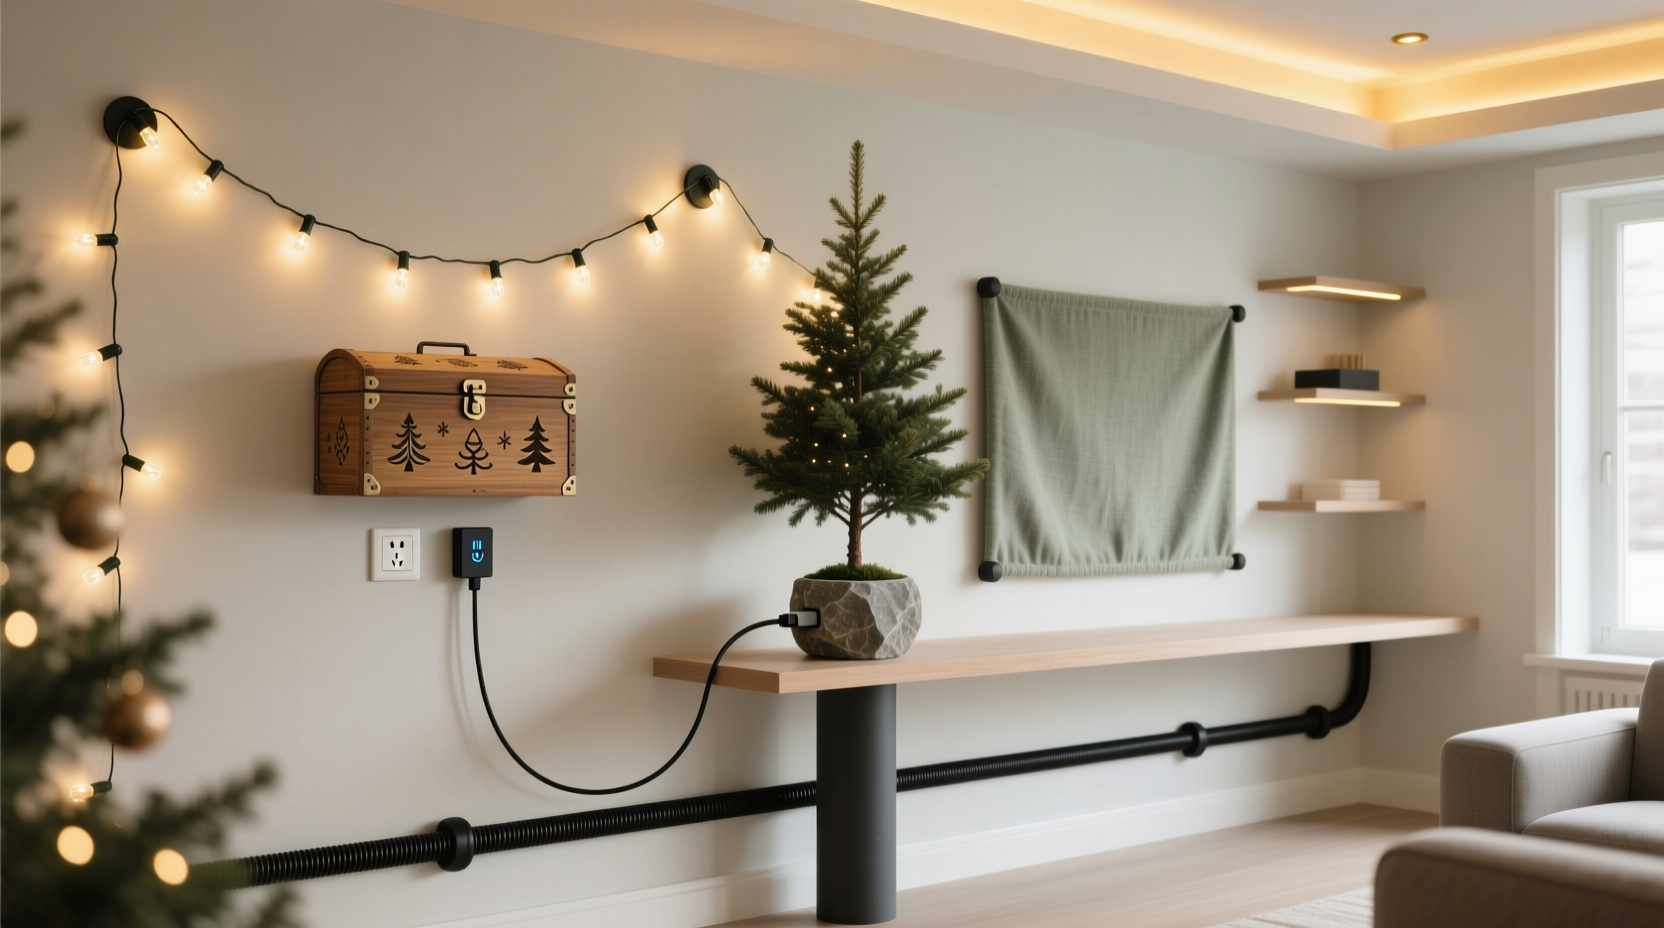
4. Strategic Power Strip Placement
Instead of clustering power strips on the floor, embed them *within* the display architecture. Mount a UL-listed, heavy-duty power strip (e.g., Belkin 12-Outlet Pivot Plug) inside a hollow decorative box—think a vintage wooden crate, a ceramic planter (with ventilation holes drilled in the base), or a faux-stone resin urn. Conceal the unit completely, running only the output cords upward through pre-drilled holes in the lid or side. Label each outlet clearly (“Tree Topper,” “Mantel Left,” etc.) using removable vinyl labels.
5. In-Wall Solutions for Permanent Displays
For homeowners who install the same display annually—or rent a space long-term—in-wall conduit offers the cleanest result. Hire a licensed electrician to install a surface-mount metal raceway (like Wiremold 500 Series) along the wall’s edge, terminating at a dedicated GFCI-protected outlet. Feed all cords through the raceway, then cap with a matching cover plate. This meets NEC Article 386 requirements for exposed wiring and allows easy cord swaps year after year without drywall repair.
Do’s and Don’ts of Safe Indoor Cord Management
| Action | Do | Don’t |
|---|---|---|
| Cord Selection | Use only UL-listed, 16-gauge or heavier extension cords rated for indoor use. Prioritize flat, low-profile cords (e.g., GE Flat Cord) for under-rug routing. | Use outdoor-rated cords indoors (they’re bulkier and harder to conceal) or repurpose old, cracked, or frayed cords—even if they “still work.” |
| Load Management | Calculate total wattage: Multiply each string’s listed watts (e.g., 4.8W per 100-LED string) × number of strings. Keep total under 1,440W per 15-amp circuit (80% safety margin). | Daisy-chain power strips or plug multiple high-wattage items (tree lights + projector + fog machine) into one outlet without verification. |
| Routing Path | Route cords along natural architectural lines: baseboards, door frames, crown molding, or behind furniture legs. Use adhesive-backed cord clips (not tape) for temporary holds. | Run cords under area rugs unless using flat, UL-listed “rug-safe” cords—and even then, avoid placing furniture on top of covered sections. |
| Concealment Materials | Choose breathable, flame-retardant materials: cotton duck cloth, wool felt, or woven jute. Ensure ventilation around transformers and power supplies. | Wrap cords in plastic wrap, aluminum foil, or insulating foam—these trap heat and violate fire codes. |
| Storage & Reuse | Wind cords using the “over-under” method (alternating loops) to prevent kinks. Store in labeled, ventilated bins—not vacuum-sealed bags. | Throw cords in a drawer haphazardly or coil tightly with rubber bands, which degrade insulation over time. |
Real-World Case Study: The Apartment Mantel Makeover
Maya R., a graphic designer in Chicago, faced a common urban challenge: her 36-inch marble mantel hosted a layered display—vintage mercury glass ornaments, pinecones, battery-operated pillar candles, and two 6-foot garlands with warm-white micro-LEDs. But seven separate cords snaked down the brick fireplace surround, ending in a tangled knot beside her sofa. Her landlord prohibited wall modifications, and her cat loved chewing exposed wires.
She implemented a three-phase solution over one weekend. First, she replaced all battery-operated candles with USB-rechargeable models (eliminating four cords). Second, she mounted a 6-outlet power strip inside a reclaimed wood box (24”L × 8”W × 6”H), painting it matte black to match her mantel’s iron brackets. She drilled two ½” holes in the box’s back panel, feeding cords upward through them to connect garlands and ornaments. Third, she ran the remaining two cords vertically down the left side of the fireplace using black adhesive cable clips, then concealed them with a 1.5”-wide strip of charcoal-gray velvet ribbon glued directly over the clips and cords. Total cost: $42. Total time: 3.5 hours. The result? A seamless, gallery-worthy mantel where no cord is visible—even from a seated position.
Step-by-Step: Building a Concealed Power Hub for Your Tree
- Measure & Map: Sketch your tree’s footprint and note locations of outlets. Identify the shortest path from outlet to tree base.
- Select Hardware: Choose a UL-listed, 10-outlet power strip with rotating plugs (e.g., Tripp Lite TLP1008TEL). Avoid models with bulky transformers.
- Build the Hub: Place the power strip inside a sturdy, ventilated decorative box (minimum 12”W × 8”D × 6”H). Drill ¾” holes in the box’s back and top panels. Thread cords through the back hole; route output cords upward through the top hole.
- Secure & Conceal: Mount the box flush against the wall behind the tree skirt using heavy-duty picture-hanging wire and wall anchors. Cover the box’s front with a removable fabric panel (velvet or burlap) secured with hook-and-loop tape.
- Test & Tidy: Plug in all lights, verify full brightness and no flickering. Use twist-ties to bundle excess cord length inside the box. Tuck the tree skirt fully over the box’s base.
FAQ
Can I safely run cords under my carpet?
Only if using a UL-listed, flat, low-voltage cord specifically rated for “under-carpet” use (look for “CSA FT1” or “UL 817” markings). Never run standard extension cords under rugs—they overheat, create tripping hazards, and void insurance coverage in case of fire. If your flooring is hard-surface (wood, tile), use a rigid cord cover rated for foot traffic instead.
Are battery-powered lights truly safer for cord-free displays?
Battery operation eliminates cord hazards—but introduces new considerations. Alkaline batteries leak corrosive potassium hydroxide over time, damaging circuitry. Lithium coin cells last longer but require careful disposal. For large displays, rechargeable AA/AAA packs with built-in USB-C charging are more sustainable and reliable. Always check manufacturer specs: some “battery” lights still require a 5V DC adapter plugged into an outlet.
How do I hide the transformer for my LED rope lights?
Transformers generate heat and must remain accessible and ventilated. Never bury them in insulation, behind drywall, or inside sealed containers. Instead, mount them inside a ventilated, paintable junction box mounted low on a wall or inside a hollow decorative object (e.g., a ceramic lantern with drilled ventilation holes). Paint the box to match surroundings and route the low-voltage output cord upward through a discreet hole.
Conclusion: Design with Intention, Not Afterthought
Hiding cords isn’t about erasing infrastructure—it’s about honoring the viewer’s experience. When every element of your indoor Christmas display serves both function and form, the result feels intentional, serene, and deeply personal. You don’t need expensive gear or construction permits to achieve this. Start small: replace one tangled power strip with a ventilated decorative box. Swap tape for adhesive clips. Measure your circuit load before plugging in that fifth stringer. These aren’t chores; they’re acts of care—for your home, your family, and the quiet joy of a space that breathes with seasonal grace.
Remember: the most memorable holiday displays aren’t defined by scale or sparkle alone. They’re remembered for their calm. Their cohesion. The effortless way light falls, unbroken by visual noise. That calm begins where the cord ends—and ends where thoughtful planning begins.


 浙公网安备
33010002000092号
浙公网安备
33010002000092号 浙B2-20120091-4
Comments
No comments yet. Why don't you start the discussion?