
A cluttered desk with tangled cords is more than just an eyesore—it can disrupt focus, reduce productivity, and make your workspace feel chaotic. While commercial cable management systems can cost anywhere from $20 to over $100, you don’t need to spend a dime to achieve a clean, organized setup. With everyday household items and a few smart techniques, you can effectively conceal and manage cords in a way that’s both functional and visually pleasing.
The goal isn’t perfection; it’s practicality. You want power access where you need it, devices charged and connected, and the mess kept out of sight. This guide walks through proven, budget-friendly methods to tame cord chaos—no special tools or purchases required.
Assess Your Cord Situation First
Before hiding anything, take stock of what you’re working with. Unplug everything and lay your cords out on the floor. Identify which ones are essential (monitor, laptop charger, lamp) and which are rarely used (old phone chargers, unused peripherals). Label each cord with masking tape and a pen if needed—this prevents confusion later when reconnecting.
Next, trace the path each cord takes from device to outlet. Note where tangles occur and where slack pools under the desk. This audit helps you plan the most efficient routing strategy and avoid creating new problems while solving old ones.
DIY Cord Bundling Techniques
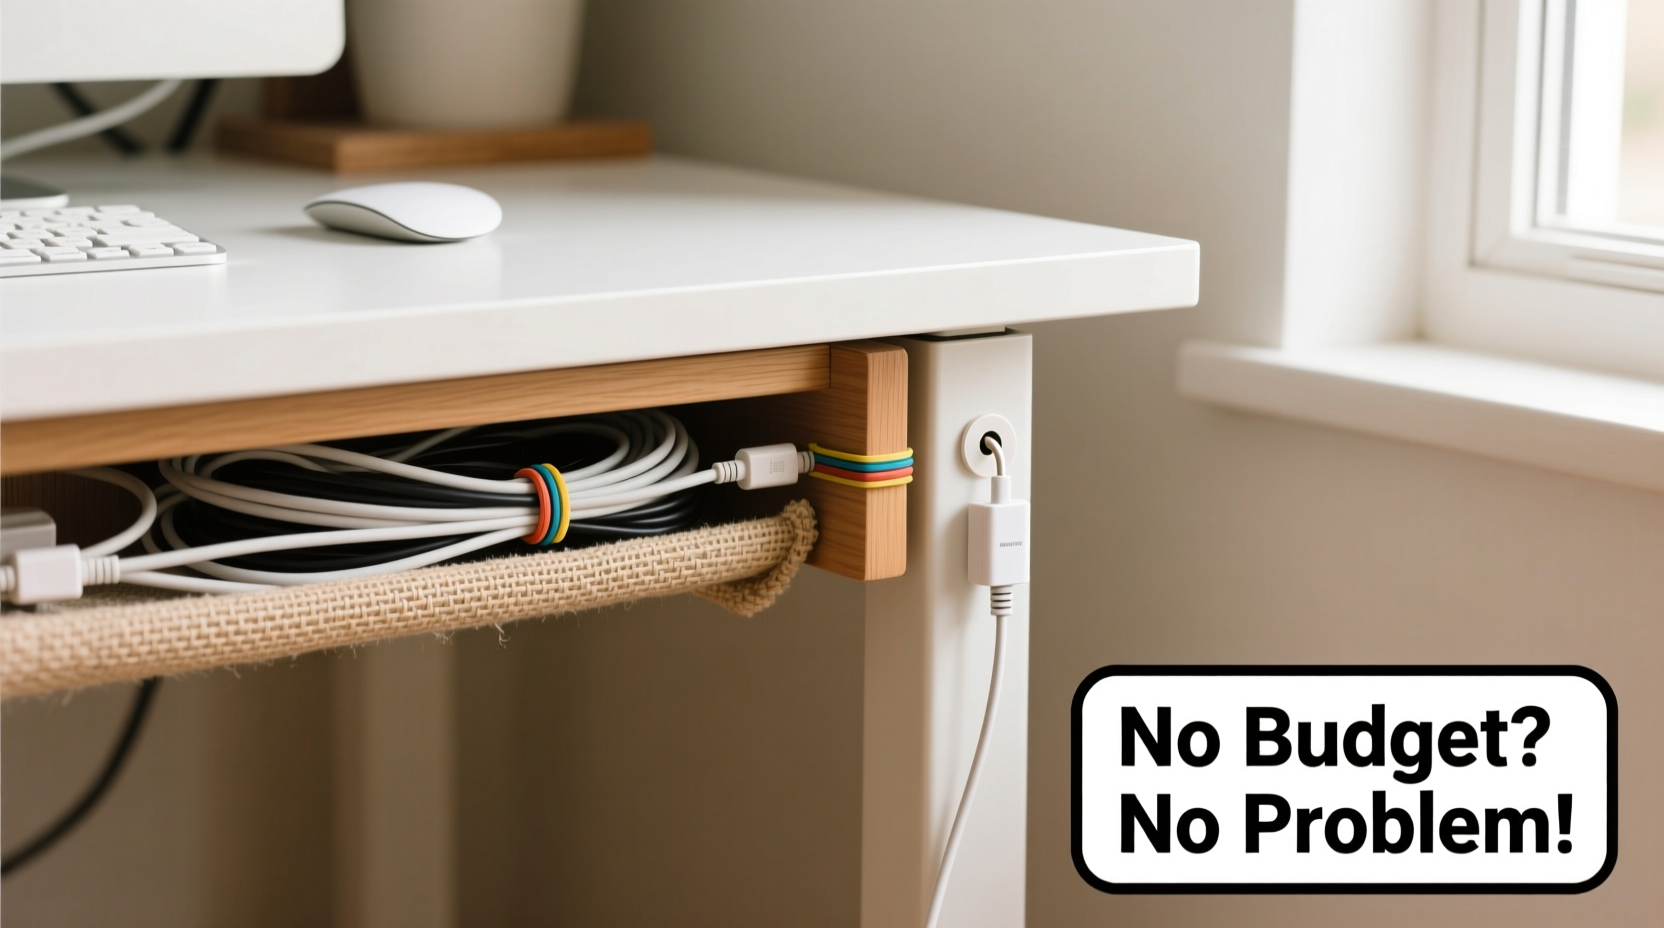
One of the fastest ways to reduce visual clutter is bundling loose cords together. Instead of buying Velcro straps or zip ties, use materials already in your home.
- Old shoelaces: Cut them to size and tie cords into neat bundles. The fabric grip holds well without damaging insulation.
- Binder clips: Clip multiple cords together along the edge of your desk. They act as both anchor and organizer.
- Rubber bands: Reuse thick rubber bands from produce or office supplies to group similar cables. Avoid thin ones that degrade quickly.
- Twist ties from bread bags: These are perfect for small adjustments and temporary bundling behind monitors or printers.
When bundling, avoid wrapping too tightly. Over-tightening can stress wires and reduce lifespan. Leave a little slack to allow for movement and prevent strain on connectors.
Step-by-Step: Create a Cord Sleeve from a Pool Noodle
A pool noodle isn’t just for swimming—it’s one of the most effective, low-cost cord concealers available. Here's how to repurpose one:
- Cut a pool noodle lengthwise using scissors or a utility knife. Make the slit wide enough to open it like a book.
- Lay your grouped cords inside the open noodle.
- Close the noodle around the cords. It will hold them snugly and protect them from damage.
- Use double-sided tape or removable adhesive dots to secure the noodle to the underside of your desk.
The foam insulates the cords and creates a clean, industrial look. Choose a black noodle for discretion, or paint it to match your desk color.
Use Furniture and Architecture to Your Advantage
Your desk and room layout can naturally hide cords if used strategically. Most people overlook structural features that double as cable pathways.
If your desk has a back panel or modesty board, route cords behind it. Tuck them into the gap between the desktop and the vertical panel. For desks without backs, position the unit against a wall and run cords down the backside, keeping them flush against the surface.
Floor-to-ceiling gaps between the desk and wall are ideal for vertical cable runs. Slide cords into this space—they’ll be invisible from the front and protected from foot traffic.
For wall outlets located behind the desk, plug devices directly instead of using extension cords whenever possible. This minimizes slack and reduces the need for complex management.
Real Example: Sarah’s Home Office Transformation
Sarah, a freelance writer, worked at a secondhand wooden desk pushed against her bedroom wall. Her monitor, lamp, laptop charger, and Wi-Fi router created a “spaghetti junction” beneath the desk. She didn’t want to spend money on organizers but needed a cleaner look for video calls.
She used two binder clips to gather cords near her monitor and clipped them to the desk edge. Then, she ran all cables down the narrow gap between the desk and wall, securing them with small pieces of masking tape every 12 inches. A cut-open pool noodle bundled the cords at the base, tucked beside the leg. Finally, she labeled each plug with tape so disconnection was easy.
The entire process took 20 minutes and cost nothing. On camera, her workspace looked tidy and professional—exactly what she needed.
Repurpose Household Items as Hidden Anchors
Many common objects function as excellent cord holders. The key is reimagining their purpose.
| Household Item | How to Use | Best For |
|---|---|---|
| Cardboard toilet paper rolls | Slide over grouped cords to create a sleeve; paint or wrap in washi tape for aesthetics | Short runs behind monitors or speakers |
| Plastic forks | Cut off tines and use the handle to clip cords to desk edges with a screw or tape | Securing single cords temporarily |
| Old belt or leather strap | Loop around legs or desk frame to bundle cords | Heavy-duty anchoring under desks |
| Mailing envelopes (clipped open) | Adhere to desk underside; slide cords inside like a channel | Routing multiple cords neatly |
These solutions are not only free but often more customizable than store-bought options. A toilet paper roll can be cut to exact lengths, painted, or stacked for modular organization.
“Cable management isn’t about eliminating cords—it’s about controlling their visibility and movement. Often, the simplest tools offer the most elegant solutions.” — David Lin, Workspace Ergonomics Consultant
Effective Routing Strategies Without Drilling Holes
Many guides suggest drilling holes in desks for cord passthroughs, but that’s permanent and risky. If you rent or aren’t handy, try these non-invasive alternatives:
- Side grommet hack: If your desk has a pre-drilled hole (even if unused), feed cords through it. Cover the opening with a folded cloth or felt pad to prevent scratches.
- Under-desk shelf trick: Place a flat tray or cutting board underneath the desk and rest coiled excess cords on it. Keeps them off the floor and contained.
- Door-mounted file organizer: Hang a hanging file folder on the side of your desk (using over-the-door hooks). Assign each pocket to a device’s cord for quick access and storage.
For standing desks that move up and down, avoid fixed attachments. Instead, loosely group cords with soft ties and let them drape in a loop. This allows flexibility without tension during height changes.
Checklist: Quick Cord-Hiding Actions You Can Do Today
Complete these steps in under 30 minutes to see immediate improvement:
- Unplug all devices and sort cords by necessity.
- Label each cord with tape or tags.
- Bundle related cords with shoelaces, rubber bands, or twist ties.
- Route cables behind the desk or along walls.
- Use a cut pool noodle or cardboard tube to cover bundles.
- Secure with removable adhesive, tape, or binder clips.
- Coil excess and store in a drawer or under-desk pouch.
Common Mistakes to Avoid
Even well-intentioned efforts can backfire. Watch out for these pitfalls:
- Over-bundling: Jamming unrelated cords together makes troubleshooting harder. Group only those going to nearby devices.
- Blocking ventilation: Never trap cords under heavy books or in sealed containers where heat can build up.
- Using permanent adhesives: Duct tape leaves residue. Opt for painter’s tape or reusable adhesive putty.
- Ignoring future access: Don’t wrap cords so tightly that unplugging requires untying everything.
Remember, the system should serve you—not become a chore to maintain.
Frequently Asked Questions
Can I use tape to secure cords under my desk?
Yes, but choose wisely. Painter’s tape or washi tape is safe for wood and removes cleanly. Avoid duct tape or packing tape, which can stain or leave sticky residue. Test a small area first if unsure.
What if my desk is glass or fragile?
On delicate surfaces, avoid adhesives entirely. Use weighted clips, fabric sleeves, or let cords run behind the desk where they’re less visible. A floor basket near the base can collect and conceal all cords safely.
How do I hide cords for a dual-monitor setup?
Group each monitor’s power and data cables separately using twist ties or fabric strips. Run both bundles down the same side of the desk, then merge them into a pool noodle or cardboard tube near the floor. Label inputs clearly to avoid confusion.
Final Thoughts: Simplicity Wins
You don’t need a sleek aluminum cable box or magnetic wire clips to achieve a clean desk. In fact, the most durable solutions are often the simplest—ones adapted from what you already own. The goal is functionality disguised as order, not perfection hidden behind expensive gear.
By assessing your setup, using smart routing, and repurposing everyday items, you can eliminate cord clutter without spending a cent. A tidy workspace doesn’t come from buying more things—it comes from thinking differently about the ones you already have.


 浙公网安备
33010002000092号
浙公网安备
33010002000092号 浙B2-20120091-4
Comments
No comments yet. Why don't you start the discussion?