
A cluttered desk with tangled cords is more than just an eyesore—it can disrupt focus, reduce productivity, and create unnecessary stress. Many people assume that hiding cables requires permanent modifications like drilling into furniture or sticking tape everywhere. But what if you're renting, not allowed to make alterations, or simply want to avoid damaging your desk? The good news is that there are multiple effective, non-invasive ways to manage cords neatly. From clever cord routing tricks to affordable accessories, you can achieve a clean, minimalist workspace without a single hole or strip of tape.
Why Cable Management Matters
Effective cable management isn’t just about aesthetics. Disorganized cords can lead to accidental disconnections, tripping hazards, dust buildup, and even equipment damage over time. A tidy desk also contributes to mental clarity—studies have shown that physical clutter increases cognitive load and reduces concentration. By organizing your cords, you’re not only improving the look of your workspace but also enhancing its functionality and safety.
For remote workers, students, or anyone who spends hours at a desk, investing time in cord organization pays off quickly. And with today’s tech-heavy setups—laptops, monitors, docking stations, chargers, lamps, speakers, and more—the need for smart cable solutions has never been greater.
1. Use Adhesive Cord Clips (The Right Way)
Most people associate adhesives with tape, but modern cord clips use advanced mounting systems that are residue-free and removable. These aren’t your average sticky tapes—they use strong yet gentle adhesive pads designed to hold lightweight cords in place without damaging surfaces.
Choose clips made with 3M Command™-style technology. These attach securely but come off cleanly when pulled correctly. They’re ideal for guiding cords along the back edge of your desk, down the leg, or around monitor bases.
Arrange the clips in a logical path from each device to your power strip or outlet. Route USB, HDMI, and power cables separately to prevent tangling. For best results, group similar cords together using twist ties or Velcro straps before clipping them in place.
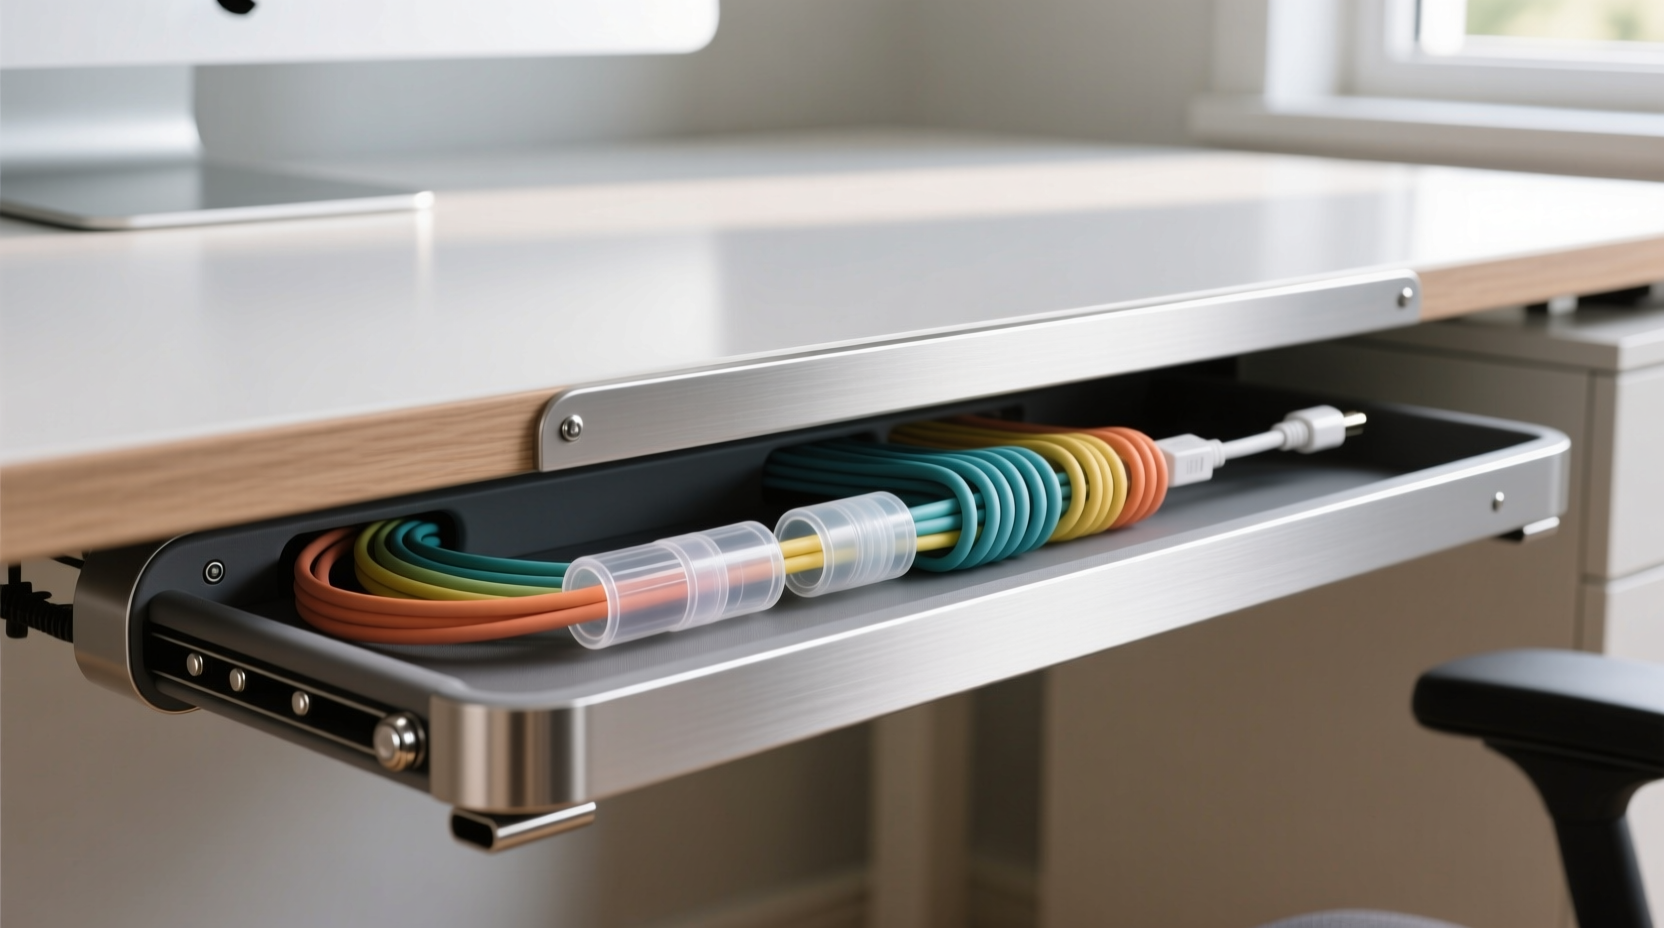
2. Employ Under-Desk Cable Trays
One of the most effective no-drill solutions is an under-desk cable tray. These trays mount underneath your desktop using heavy-duty adhesive strips or adjustable brackets that clamp onto the desk edge—no screws required.
Cable trays act as hidden highways for all your cords, keeping them bundled and out of sight. They’re especially useful if you have a standing desk or shared workspace where visible cables might be distracting or vulnerable to snagging.
When selecting a tray, look for models with built-in grommet slots or side openings so you can route cords easily. Flexible fabric sleeves or zip-up channels inside the tray help further organize individual wires.
“Over 70% of home office users report improved focus after installing under-desk cable management systems.” — Dr. Lena Patel, Ergonomics Researcher at Workspace Wellness Institute
3. Leverage Furniture and Desk Design
You don’t always need tools or accessories to manage cords. Sometimes, the solution lies in rethinking how you use your existing furniture.
Many desks have natural crevices—gaps between drawers, space behind keyboard trays, or recessed backsplashes—that can conceal cords effectively. Position your power strip near the center-back of the desk and let excess cord length tuck into these spaces.
If your desk has a modesty panel (a vertical board at the front), use it as a shield. Run cords vertically down one side, securing them loosely with reusable hook-and-loop straps. This hides them from view while keeping them accessible.
Another trick: place a small decorative box or tray at the back edge of your desk to house adapters and short cable segments. Choose one with slits or holes to allow cords through—this acts as both storage and camouflage.
Step-by-Step: Conceal Cords Using Built-In Features
- Identify natural gaps or recesses on your desk (e.g., behind drawers, under lip edges).
- Gather all cords and trace their paths from devices to outlets.
- Group low-voltage cables (USB, audio) separately from power cords.
- Use soft ties to bundle each group loosely.
- Weave bundles into available gaps, starting from the device end.
- Place a small basket or box at the rear to hide plugs and adapters.
- Test accessibility—ensure you can unplug devices when needed.
4. Try Magnetic Cable Organizers
Magnetic organizers are gaining popularity for their sleek design and ease of use. These consist of small magnetic discs or bars that attach to metal surfaces—like the back of a monitor, laptop stand, or even a metal desk frame—using strong neodymium magnets.
Wrap loose cord sections around the magnet to keep them coiled and secure. Some models include silicone grips or rubberized surfaces to prevent slipping. Since they rely on magnetism rather than adhesives or fasteners, they leave zero residue and can be moved freely.
They work especially well for charging cables. Attach a magnetic disc near your phone dock and wrap the excess Micro-USB or USB-C cord around it. When you need full length, simply unwind it; when done, snap it back into place.
5. Utilize Cord Covers and Raceways (No Screws Needed)
Cord covers, also known as cable raceways, are plastic channels that enclose multiple cords in a flat, low-profile strip. Traditional versions require screws, but newer peel-and-stick models use industrial-grade adhesive that holds firmly yet removes cleanly.
Choose a paintable raceway if you want it to blend with your wall or desk color. Install it along the back edge of your desk or down a desk leg to create a seamless cord pathway. Feed all your cords inside, then snap the cover shut.
For temporary setups, consider double-sided removable tape specifically designed for raceways. Brands like Scotch-Brite and Velcro offer mounting kits rated for repeated removal without residue.
Comparison Table: No-Drill Cord Management Solutions
| Solution | Installation Time | Visibility After Setup | Removability | Best For |
|---|---|---|---|---|
| Adhesive Cord Clips | 5–10 minutes | Low (minimal profile) | Easy, residue-free | Lightweight cords, short runs |
| Under-Desk Tray | 15–20 minutes | Hidden (under desk) | Very easy | Bundling multiple cables |
| Magnetic Organizers | 1–2 minutes | Medium (visible magnet) | Instant | Charging cables, quick fixes |
| Peel-and-Stick Raceway | 10–15 minutes | Medium (surface-mounted) | Easy with proper removal technique | Long cord runs, wall-to-desk paths |
| Furniture Routing | 5 minutes | None (fully concealed) | N/A (non-invasive) | Renters, minimalist setups |
Mini Case Study: Sarah’s Home Office Transformation
Sarah, a freelance graphic designer living in a rental apartment, struggled with a chaotic workspace. Her dual-monitor setup, drawing tablet, laptop, lamp, and speaker created a jungle of cords across her wooden desk. She couldn’t drill holes or use permanent tape due to lease restrictions.
She started by purchasing a clamp-on under-desk cable tray and applied adhesive cord clips along the back edge. She grouped her power cords and data cables separately using Velcro straps. Then, she used a decorative fabric box at the rear of the desk to hide her power strip and plug clusters.
The entire process took less than 30 minutes and cost under $25. Afterward, her desk looked streamlined and professional. Clients noticed the clean background during video calls, and Sarah reported feeling more focused and less stressed throughout her workday.
Checklist: How to Hide Desk Cords Without Drilling or Tape
- ✅ Assess your current cord layout and identify problem areas
- ✅ Unplug devices and label cords for easy identification
- ✅ Choose a no-drill method (clips, tray, magnets, etc.) based on your desk type
- ✅ Clean surfaces thoroughly before applying any adhesive products
- ✅ Bundle similar cords together using reusable ties
- ✅ Route cables along discreet paths (back edge, legs, gaps)
- ✅ Use a decorative box or sleeve to hide power strips and adapters
- ✅ Test access and functionality after installation
- ✅ Re-evaluate monthly and adjust as needed
FAQ
Will adhesive cord clips damage my desk finish?
No—if you use high-quality, removable adhesive products like those from 3M Command™ line. Always follow the manufacturer’s instructions for application and removal. Avoid using them on porous or unsealed wood surfaces.
Can I use these methods on a glass desk?
Yes. Most adhesive solutions work well on smooth, non-porous surfaces like glass. Just ensure the surface is clean and dry before attaching. For added security, opt for clamping trays instead of relying solely on adhesives.
What’s the cheapest way to hide cords without tools?
The cheapest method is reorganizing cords using existing desk features—tucking them behind drawers or wrapping them around legs. Adding simple Velcro straps or zip ties (under $5) significantly improves neatness at minimal cost.
Final Thoughts: A Cleaner Desk Is Within Reach
You don’t need power tools or permanent modifications to conquer cable chaos. With thoughtful planning and the right no-drill accessories, you can transform a messy desk into a clean, efficient workspace. Whether you choose magnetic organizers, under-desk trays, or smart routing techniques, the goal is consistency and simplicity.
Start small—tackle one cord at a time. Label them, shorten excess length, and guide them along invisible paths. Over time, these small actions add up to a major improvement in both function and appearance.


 浙公网安备
33010002000092号
浙公网安备
33010002000092号 浙B2-20120091-4
Comments
No comments yet. Why don't you start the discussion?