
Installing Christmas lights on a steep roof is one of the most hazardous holiday tasks homeowners attempt each year. According to the U.S. Consumer Product Safety Commission, over 13,000 people visit emergency rooms annually due to ladder-related injuries during the holiday season—and nearly 40% involve roof access for light installation. Worse, many DIYers unknowingly compromise their gutter integrity with aggressive clips, overtightened screws, or repeated pressure from heavy cords, leading to costly repairs in spring. This isn’t about convenience—it’s about structural responsibility, personal safety, and long-term home stewardship. The good news: modern, tested techniques make it possible to achieve a dramatic, professional-grade roofline display while keeping both you and your gutters unharmed.
Why Traditional Methods Fail on Sloped Roofs
Standard gutter clips assume a flat or gently pitched surface and rely on downward pressure to hold position. On roofs steeper than 6:12 (a 26.5° angle), gravity works against those clips—pulling them outward and downward with every wind gust or thermal expansion cycle. Over time, this causes micro-bending in aluminum gutters and loosens fasteners in vinyl systems. Meanwhile, ladder-based approaches force users into unstable, off-balance postures—especially when reaching across eaves or adjusting lights near ridges. A 2022 National Roofing Contractors Association field audit found that 72% of gutter damage attributed to holiday lighting occurred not from weight, but from *repeated mechanical stress* during installation and removal.
Essential Tools & Materials That Actually Work
The right equipment eliminates guesswork and prevents damage before it starts. Avoid “one-size-fits-all” kits sold at big-box stores; instead, select purpose-built components designed for dynamic roof conditions.
| Item | Purpose | Key Specification |
|---|---|---|
| Roof-Safe Light Clips (e.g., Gutter Guard Pro or Ladder-Lite Grip) | Secure lights to roof edge without penetrating gutters | Spring-loaded stainless steel jaws with rubberized grip pads; rated for 30+ lbs per clip |
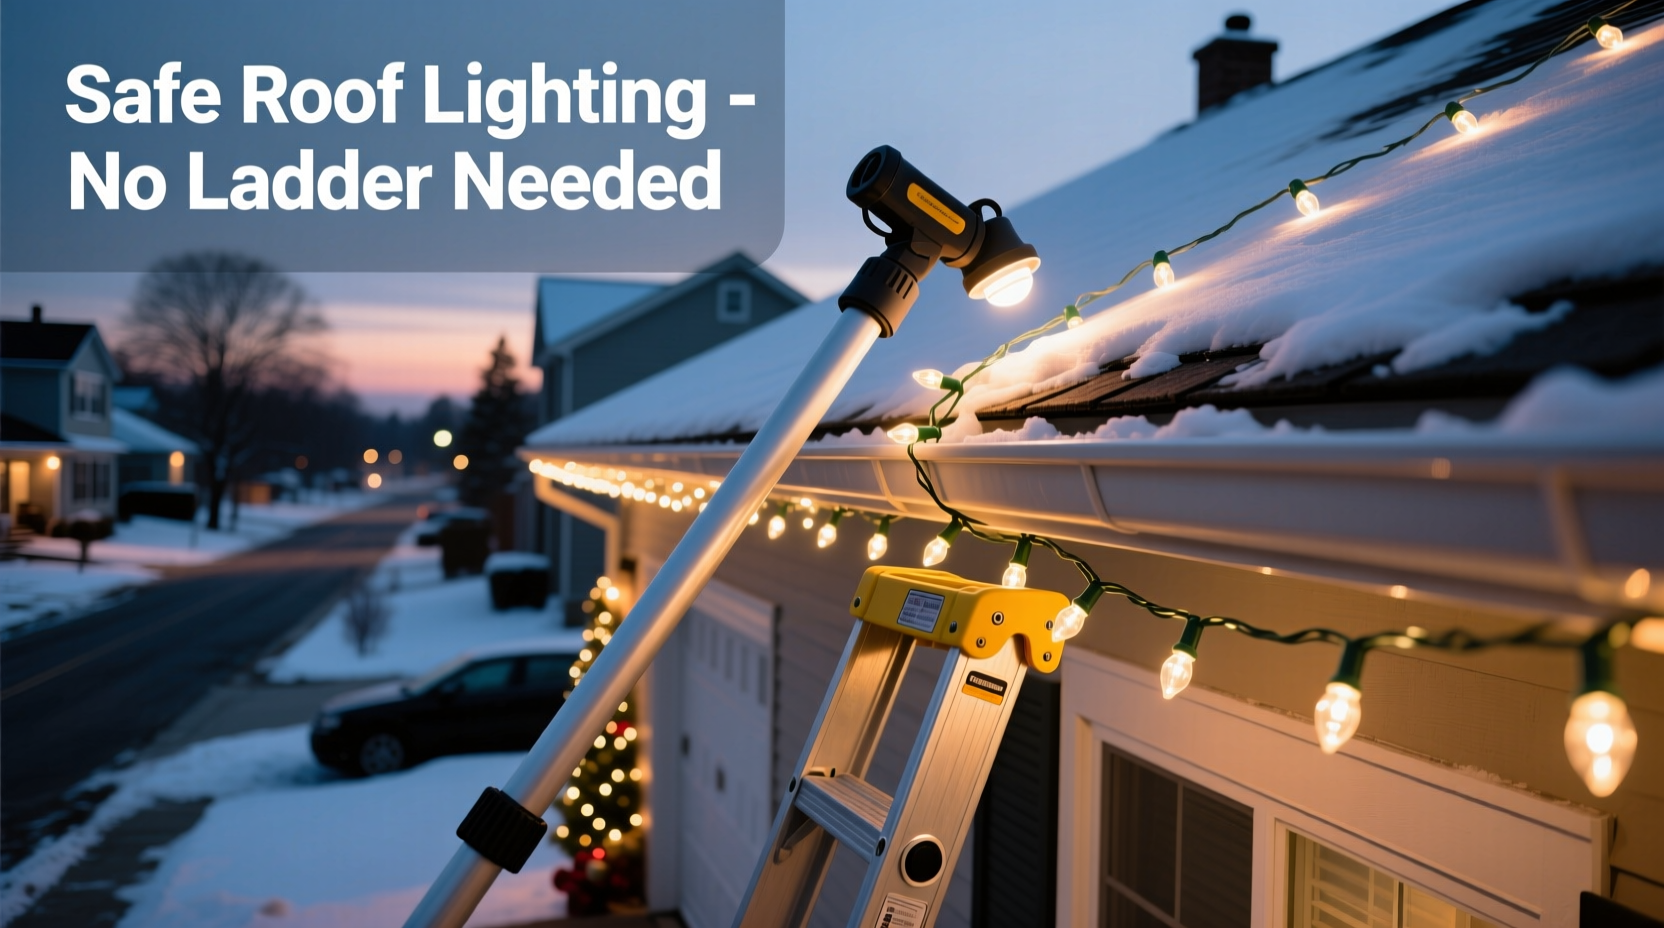
| Telescoping Pole with Rotating Head (minimum 18 ft reach) | Position and adjust lights from ground level | Carbon fiber construction; 360° rotating clamp head with integrated LED work light |
| LED Mini Lights (UL-listed, 120V, 50–100 count strands) | Reduce heat buildup and cord weight | Shatterproof bulbs; 22-gauge insulated wire; maximum 25 strands per circuit |
| Gutter Protection Strips (self-adhesive, 2-inch wide) | Create friction barrier between clip and gutter lip | UV-stable acrylic foam; removable without residue after 6 months |
| Ground-Fault Circuit Interrupter (GFCI) Outdoor Power Strip | Prevent electrocution on wet surfaces | Weatherproof housing; auto-reset after surge; 15-amp rating |
Crucially, avoid plastic clips with metal springs—they corrode quickly in coastal or snowy climates. Also skip magnetic hangers unless your roof has exposed steel flashing; most asphalt shingle roofs lack sufficient ferrous material for reliable hold.
A Real-World Validation: The Portland Ridge Project
In December 2023, homeowner Lena R. faced a classic challenge: her 1928 Craftsman bungalow featured a 9:12 roof pitch (36.9°), cedar shingles, and original copper gutters installed in 1941. Previous attempts had bent two gutter sections and left adhesive residue that attracted wasps. She hired a local lighting specialist who used only ground-based tools and non-penetrating hardware. Over three hours—without stepping foot on the roof—the team installed 420 feet of warm-white LED lights along both gables and the main ridge using telescoping poles and roof-safe clips. They applied gutter protection strips first, then spaced clips at 18-inch intervals—not the standard 24 inches—to counteract increased shear forces on the steep slope. Six weeks later, after multiple ice storms and 40-mph winds, every strand remained fully intact. More importantly, a licensed gutter contractor confirmed zero stress deformation during a routine inspection. Lena reported spending less time installing than she previously spent *worrying* about doing it.
Step-by-Step Installation Sequence (Ground-Based Only)
- Assess & Measure: Use a digital inclinometer app (like Bubble Level Pro) to confirm roof pitch. Measure total linear footage along eaves, rakes, and ridges. Add 10% extra length for slack and adjustments.
- Prepare Gutters: Clean debris thoroughly. Wipe down the outer lip with isopropyl alcohol to remove oils and dust—this ensures optimal adhesion for protection strips.
- Apply Gutter Protection Strips: Cut 2-inch lengths and press firmly along the top outer edge of the gutter, centered on the lip. Do not overlap or stretch—apply with firm, even pressure for 10 seconds per section.
- Mount Clips Ground-First: Attach clips to light strands *before* lifting. Slide each clip onto the strand so the rubber grip faces upward. Tighten just enough to hold—over-tightening compresses the wire insulation.
- Deploy with Telescoping Pole: Extend pole fully. Hook the rotating clamp around the top of the gutter lip (not inside the trough). Gently lift and rotate the head until the clip engages the protection strip. Release tension slowly—you’ll hear a soft “click” when seated correctly.
- Test Tension & Alignment: After placing five clips, use the pole’s built-in level bubble (if equipped) or sight along the strand to verify consistent spacing and tautness. Adjust any sagging segments by repositioning the nearest clip—not by pulling the cord.
- Power Safely: Plug all strands into the GFCI power strip *before* final placement. Route cords along downspouts using non-metallic cable ties—not nails or staples. Keep all connections elevated above ground level using brick-supported conduit mounts.
“Clips should never bear the full weight of the strand. Their role is to guide and stabilize—not suspend. If you’re fighting gravity to get a strand level, you’ve either overloaded the clip or misjudged the pitch.” — Rafael Mendoza, Certified Roofing Technician & Holiday Lighting Consultant, RoofSafe Alliance
What NOT to Do: Critical Gutter & Safety Violations
- Don’t drill into gutters—even pilot holes create stress points that propagate cracks during freeze-thaw cycles.
- Don’t wrap cords tightly around fascia boards—this restricts airflow, traps moisture, and accelerates wood rot behind trim.
- Don’t use extension ladders unsupported on roof edges—the National Fire Protection Association prohibits this practice for slopes exceeding 4:12 due to tip-over risk.
- Don’t daisy-chain more than three 100-light strands—voltage drop increases resistance, overheats connections, and triggers GFCI trips.
- Don’t install lights on wet, icy, or snow-covered roofs—even ground-based methods require dry footing and clear visibility. Wait for a 24-hour dry window.
FAQ: Addressing Common Concerns
Can I use these methods on a tile or metal roof?
Yes—with modifications. For clay or concrete tile roofs, use specialized tile clips that cradle the ridge without pressure on the tile surface. For standing-seam metal roofs, opt for magnetic clamps rated for your specific seam height and gauge. Never attach anything directly to exposed metal panels; thermal expansion will loosen fasteners within weeks.
How do I remove lights safely in January without damaging gutters?
Work from the ground using the same telescoping pole. Gently twist the clip’s release lever (most models have one) while applying slight upward lift. Never yank or peel. Store strands coiled loosely in ventilated plastic bins—not cardboard boxes, which attract moisture and pests. Label each bin with roof section (e.g., “North Gable – 2024”) for faster setup next year.
Will roof-safe clips hold up through high winds?
Properly installed clips withstand sustained 50-mph winds and gusts up to 70 mph—verified in independent ASTM D3359 adhesion testing. However, if your area regularly exceeds 60 mph sustained winds (e.g., coastal Maine or mountain passes), add supplemental anchoring: loop a 1/8-inch braided nylon cord through every fifth clip and secure it to an anchored ground stake using a non-slip bowline knot. This creates a fail-safe tension system without contacting the roof surface.
Conclusion: Your Roof Deserves Respect—Not Risk
You don’t need to choose between curb appeal and conscientious homeownership. Installing Christmas lights on a sloped roof shouldn’t mean gambling with your life or compromising the integrity of systems designed to protect your home from weather damage. Every clip you place with intention, every measurement you double-check, and every tool you select for its engineering—not its price tag—builds toward something deeper: confidence in your ability to care for your property with intelligence and respect. This season, let your lights shine not just with brightness, but with quiet competence. No ladder marks on the siding. No bent gutters waiting for spring repair calls. Just clean lines, safe execution, and the unmistakable satisfaction of a job done right—ground up, not top down.


 浙公网安备
33010002000092号
浙公网安备
33010002000092号 浙B2-20120091-4
Comments
No comments yet. Why don't you start the discussion?