
There’s a quiet elegance in the soft, continuous halo of rope lights framing a window—neither harsh nor distracting, but deeply intentional. It’s not just about illumination; it’s about architectural accenting, mood elevation, and subtle sophistication. Yet many homeowners abandon the idea after one crooked corner, tangled wires, or an uneven glow that looks more like a DIY experiment than a finished design element. The truth is, achieving a truly clean, uniform glow around windows is less about luck and more about method: precise measurement, thoughtful mounting, consistent tension, and electrical discipline. This guide distills field-tested techniques used by lighting installers and interior designers—not theoretical ideals, but practices proven on real homes with real windows, from double-hung sashes to arched transoms and modern floor-to-ceiling glazing.
Why “Clean Glow” Demands More Than Just Stringing Lights
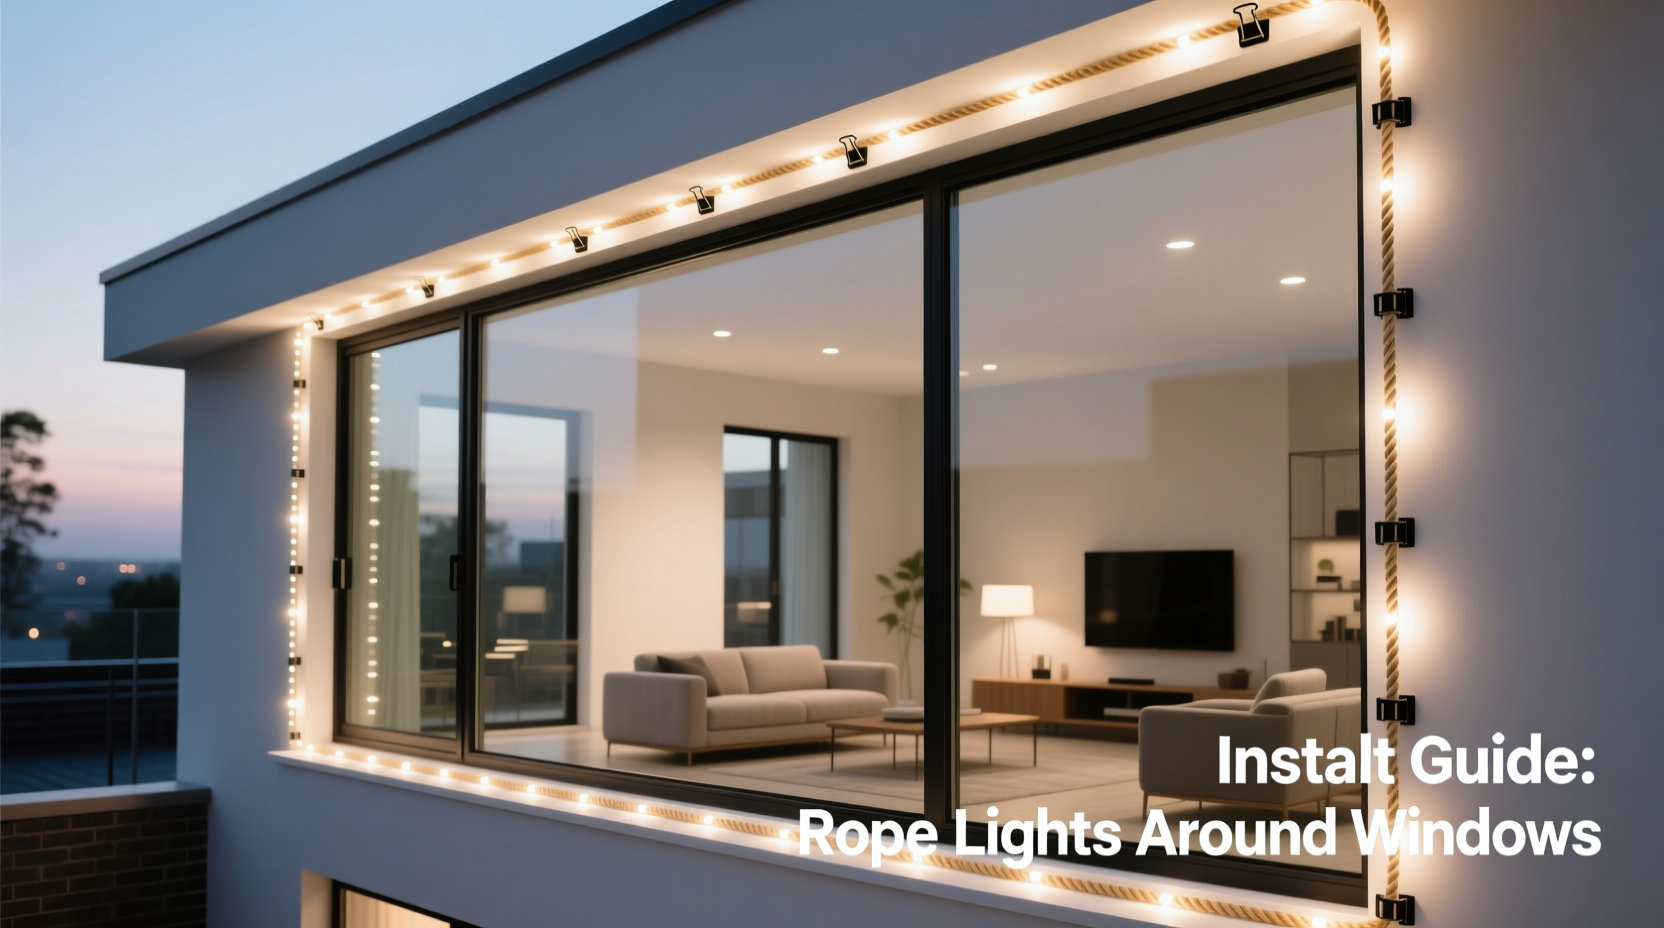
A “clean glow” isn’t defined by brightness—it’s defined by continuity, symmetry, and invisibility of hardware. It means no visible clips, no sagging sections, no hot spots or dark gaps, and no exposed cord running down the wall. It means the light appears to emanate *from* the window frame itself, as if the architecture were softly backlit. Achieving this requires resisting two common impulses: rushing the layout and underestimating the role of the mounting system. Rope lights are flexible, but they’re not forgiving. A 3mm deviation in clip spacing accumulates over 12 feet—and becomes glaringly obvious at night. Likewise, adhesive-backed clips may hold initially but often fail in temperature swings or UV exposure, leading to drooping corners and misaligned runs.
Professional installations succeed because they treat rope lighting as a precision finish—not a temporary decoration. That starts long before plugging anything in.
Pre-Installation Essentials: Tools, Materials & Window Assessment
Before measuring or mounting, conduct a thorough window assessment. Not all windows are created equal—and not all rope lights suit every application. Begin by identifying your window type (e.g., vinyl-clad wood, aluminum, masonry surround) and noting surface conditions: paint integrity, texture (smooth vs. stucco), and obstructions (security bars, built-in blinds, exterior trim depth). Then select materials accordingly.
| Item | Required Quantity & Notes | Why It Matters |
|---|---|---|
| Rope Light | Measure perimeter + 10% extra (for mistakes/corner adjustments); choose 5–8mm diameter for balance of flexibility and visibility; opt for UL-listed, outdoor-rated (if exterior) with integrated diffuser tube | Thinner rope (<5mm) lacks structural memory and sags; thicker (>10mm) overwhelms narrow frames. Integrated diffusers eliminate visible LED dots—a non-negotiable for clean glow. |
| Mounting System | Stainless steel or UV-stabilized plastic clips (not adhesive-only): 1 clip per 6–8 inches; include corner-specific L-brackets for 90° turns | Adhesive fails in cold, heat, or humidity. Mechanical clips anchor firmly and allow micro-adjustments during installation. |
| Power Supply & Wiring | Dedicated low-voltage transformer (if 12V/24V) or GFCI-protected outlet (if 120V); outdoor-rated junction box; silicone-sealed wire nuts; 18 AWG stranded wire for runs >25 ft | Voltage drop causes dimming at far ends. GFCI protection is code-mandated for exterior use. Silicone sealant prevents moisture ingress at connections. |
| Tools | Laser measure (not tape), level, fine-tip marker, cordless drill with 1/16\" bit, needle-nose pliers, cable tie gun (not hand-tied), heat gun (for shaping corners) | Laser ensures accuracy on tall or recessed windows. Heat gun gently warms rope for smooth 90° bends without kinking or cracking the jacket. |
The 7-Step Installation Process for Flawless Results
This sequence reflects how lighting contractors approach residential window framing—methodical, sequential, and calibrated for correction at each stage. Deviate from order, and you’ll fight physics (and frustration) later.
- Map & Mark Anchor Points: Use laser measure to record exact perimeter. Divide total length by 7 inches (ideal clip spacing). Mark each point lightly with fine-tip marker—on the window frame’s inner edge (for interior) or outer casing (for exterior). Use level to ensure marks align horizontally across sills and vertically on jambs.
- Drill Pilot Holes: At each mark, drill 1/16\" pilot hole using cordless drill. Depth: 1/4\". Do not overtighten screws later—this strips soft wood or cracks vinyl. For masonry, use hammer drill and plastic anchors rated for outdoor use.
- Install Mounting Clips: Secure clips with stainless steel screws (1\" for wood, 1.25\" for masonry). Ensure clip arms face inward toward window center—this directs light uniformly into the room (interior) or outward (exterior) without glare.
- Test Bend Radius & Corner Transition: Warm rope section near corner with heat gun (15 sec, 6\" distance). Gently bend to 90° while warm. Let cool 30 seconds before securing. Use L-bracket at corner—never force rope around sharp angles cold.
- Feed & Tension Rope Light: Start at power source location (usually bottom center or top center). Feed rope into first clip, then successive clips—pulling taut but not stretching. Maintain consistent 2–3 lbs tension: enough to eliminate sag, not enough to deform jacket. Use pliers to grip end while feeding.
- Secure Ends & Conceal Wiring: Terminate rope at opposite end with weatherproof end cap (screw-on, not push-in). Route power cord along jamb using low-profile cord cover or recessed channel. Never staple directly to rope or run cord across glass.
- Final Inspection & Adjustment: Turn on lights at dusk. Observe from multiple angles: standing, seated, and from outside (if applicable). Adjust any loose clips. Tighten only if rope visibly sags—over-tightening causes lens distortion.
Real-World Example: The Bay Window Challenge in Portland, OR
When interior designer Lena Torres installed rope lights on a 1920s Craftsman home’s three-panel bay window, she faced three complications: uneven plaster walls behind the trim, a 15° roof pitch above the center window, and west-facing exposure causing afternoon UV degradation. Her solution wasn’t more lights—it was smarter integration. She used a combination of shallow-depth stainless clips anchored into the original fir trim (avoiding plaster entirely), custom-bent L-brackets fabricated from 1/8\" aluminum for the angled roof transition, and UV-resistant 24V rope with silicone diffuser. Crucially, she installed the lights 1/2\" recessed into the trim’s shadow line—not flush—so daylight didn’t reveal the fixture, yet nighttime glow appeared to rise organically from the architecture. The result? A seamless ribbon of light that reads as part of the window’s heritage, not an add-on. Neighbors assumed it was original to the house.
“Rope lighting succeeds when it disappears as hardware and emerges as atmosphere. That only happens when every clip, bend, and connection serves the light—not the installer’s convenience.” — Marcus Chen, Architectural Lighting Designer, Lumina Studio
Avoid These 5 Costly Mistakes
Even experienced DIYers stumble here—not from lack of effort, but from assumptions about rope light behavior. These errors don’t show up until weeks or months in, when performance degrades or aesthetics unravel.
- Mistake #1: Skipping Voltage Drop Calculation — Running 120V rope light 40 feet from outlet? Fine. But 24V rope over 30 feet without boosting voltage causes 30%+ dimming at the far end. Always calculate: (Total Length × Wire Gauge Resistance × Current) ÷ 1000 = Voltage Drop. If >3%, add a secondary power feed.
- Mistake #2: Using Indoor-Rated Lights Outside — Even if “weather-resistant,” indoor rope lacks UV inhibitors. Within 6 months, jackets yellow, become brittle, and crack—exposing LEDs to rain. Outdoor-rated means UL 8750 listing and IP65+ rating.
- Mistake #3: Ignoring Thermal Expansion — Vinyl and aluminum frames expand/contract 1/8\" per 50°F change. Mounting rope too tightly in summer guarantees gaps in winter. Allow 1/16\" slack per 10 feet of run.
- Mistake #4: Overlooking Dimmer Compatibility — Not all rope lights dim smoothly. Leading-edge dimmers cause flicker with LED rope. Use trailing-edge (ELV) dimmers—or better, 0–10V dimming systems for true fade-to-black control.
- Mistake #5: Forgetting Maintenance Access — Sealing every connection with caulk sounds permanent—but what if one segment fails? Leave one end accessible behind removable trim or use quick-connect waterproof couplers every 10 feet.
FAQ: Practical Questions from Real Installations
Can I install rope lights on windows with deep reveals (more than 4 inches)?
Yes—but avoid mounting on the deepest plane (the wall behind glass). Instead, attach clips to the innermost trim edge facing the room. This projects light outward, filling the reveal evenly without casting shadows on the glass. For very deep reveals (6\"+), consider dual-layer rope: one on front trim, one recessed 2\" back, wired separately for layered dimming.
How do I handle windows with mullions or grilles?
Treat vertical mullions as separate framing elements. Run rope continuously around the full perimeter—including over mullions—but use micro-clips (3mm width) to secure rope where it crosses the grille bar. Avoid cutting rope at mullions; instead, gently lift rope over the bar and re-seat into clips on the other side. For ornate grilles, test fit first with unpowered rope to ensure clearance.
What’s the safest way to power multiple windows?
Never daisy-chain more than three standard 24V rope runs (max 150W total) from one transformer. Instead, run dedicated 18 AWG stranded wire from a central outdoor-rated junction box to each window’s transformer. Label every wire pair. Use a single GFCI breaker for all circuits—and install a manual disconnect switch near the main panel for safe servicing.
Conclusion: Your Window Deserves Intentional Light
A clean glow around a window does more than brighten a room—it reshapes perception. It tells visitors that this space was considered, that light was curated, not merely added. It transforms ordinary glass into a luminous threshold between inside and out. That level of refinement doesn’t come from buying the most expensive rope light. It comes from respecting the geometry of your window, honoring the physics of light and material, and executing each step with quiet precision. You don’t need a contractor’s license—just patience, the right tools, and the willingness to measure twice, bend once, and adjust thoughtfully. Start with one window. Get it right. Notice how the quality of light changes the feel of the room—not just at night, but in the quiet hours before dawn, when the rope emits its softest, most grounded warmth. That’s when you’ll understand: this isn’t decoration. It’s architecture made visible through light.


 浙公网安备
33010002000092号
浙公网安备
33010002000092号 浙B2-20120091-4
Comments
No comments yet. Why don't you start the discussion?