
A dead battery is one of the most common reasons a car won’t start, especially in extreme temperatures or after leaving lights on overnight. While it can be frustrating, jump-starting your vehicle is a straightforward process—if done correctly. However, improper technique can lead to serious damage to your car’s electrical system, injury, or even explosion. This comprehensive guide walks you through every critical step to jump start a car safely, efficiently, and without risk.
Why Jump Starting Requires Caution
Car batteries operate at 12 volts but can deliver hundreds of amps—more than enough to cause sparks, melt metal tools, or ignite hydrogen gas emitted by the battery. According to the National Highway Traffic Safety Administration (NHTSA), incorrect jump-start procedures contribute to over 400 emergency room visits annually due to burns, eye injuries, and explosions.
Beyond personal safety, modern vehicles contain sensitive electronics. Reversing jumper cable polarity or causing voltage spikes during a jump can fry onboard computers, sensors, or alternators—leading to repair bills far exceeding the cost of a simple tow.
“Jump-starting is a basic skill every driver should know, but rushing through it without understanding the risks turns a quick fix into a costly disaster.” — Mark Reynolds, ASE-Certified Master Technician
Essential Equipment Checklist
Before attempting a jump start, ensure you have the right tools. Having them ready prevents delays and reduces exposure to hazards like traffic or weather.
- Jumper cables (at least 10 feet long, 6-gauge recommended)
- Working donor vehicle (with a healthy 12V battery)
- Gloves (rubber or insulated work gloves)
- Safety glasses or protective eyewear
- Flashlight (if working in low light)
- Owner’s manual for both vehicles (optional but helpful)
Cables should show no frayed wires or cracked insulation. Thin or damaged cables increase resistance, reducing current flow and increasing heat—creating fire hazards.
Step-by-Step Guide to Jump Start a Car Safely
Follow this exact sequence to minimize risk and maximize success. Each step builds on the last, ensuring proper grounding, correct polarity, and safe disconnection.
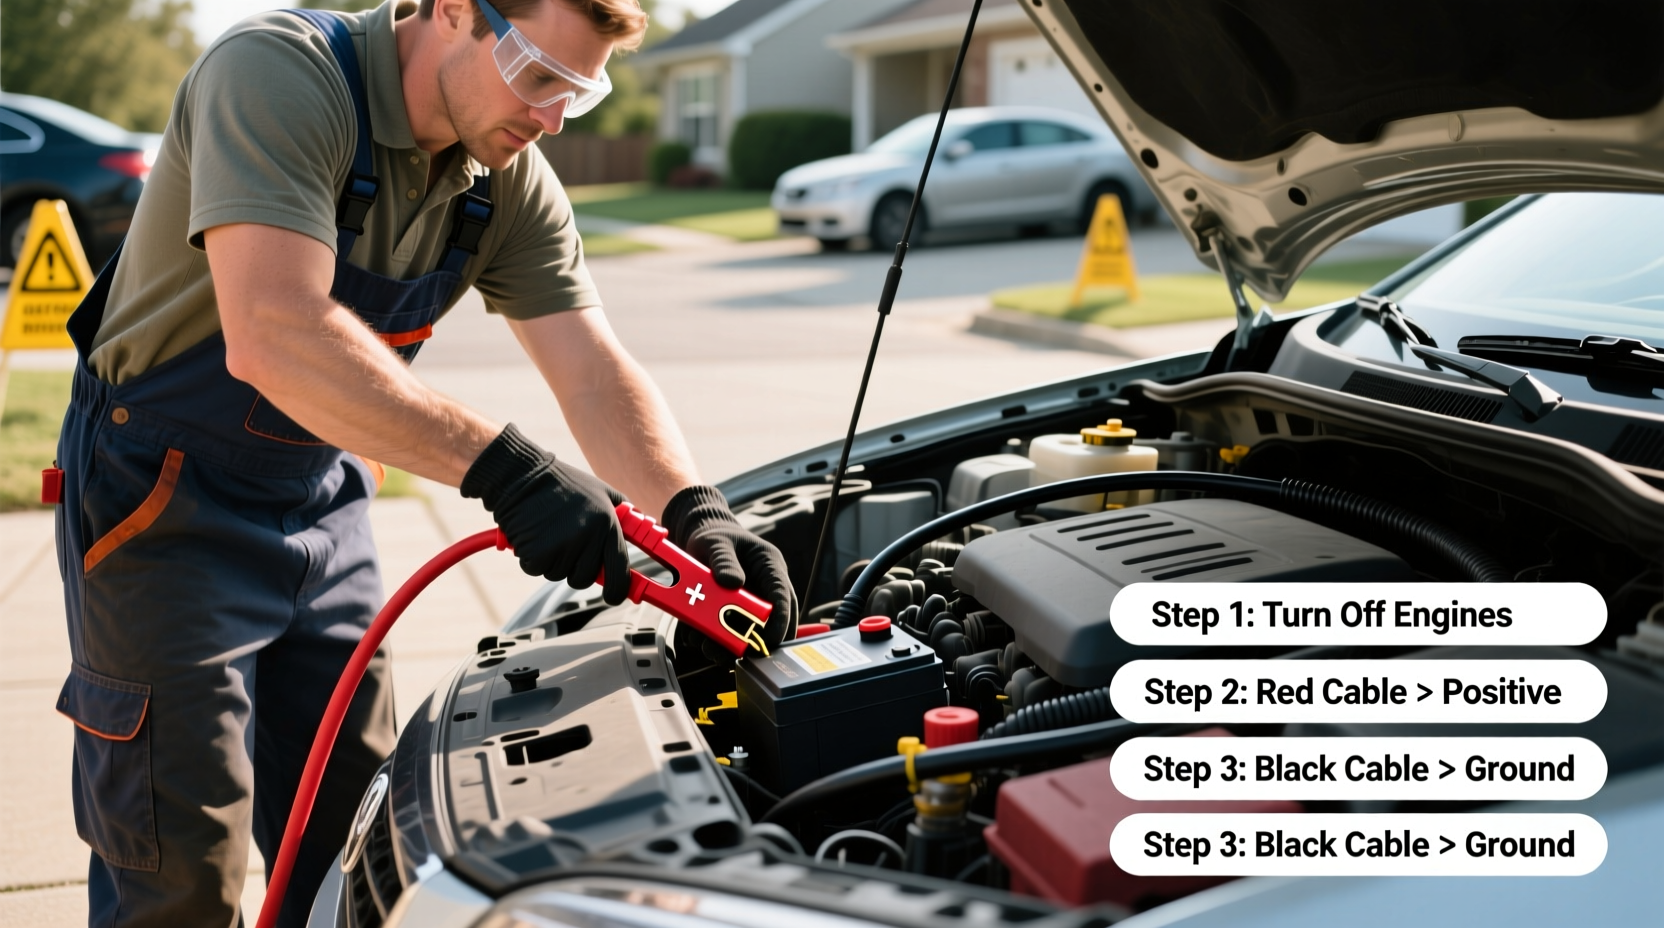
- Park the donor vehicle close—but not touching.
Position both cars so hoods face each other within cable reach (about 2–3 feet apart). Turn off both engines, shift into Park (or Neutral), and engage parking brakes. - Turn off all electrical systems.
Disable headlights, radio, climate control, phone chargers, and interior lights in both vehicles. This reduces load on the weak battery and prevents power surges. - Locate both batteries and identify terminals.
Open both hoods. Find the positive (+) and negative (–) terminals. On some cars, the battery may be hidden under plastic covers or located in the trunk or under seats. Refer to your owner’s manual if unsure. - Attach the red (positive) clamp to the dead battery.
Connect one end of the red cable to the positive terminal of the dead battery. Ensure a firm grip on the metal post, not the cover. - Connect the other red clamp to the donor battery’s positive terminal.
This links the two positive sides of the circuit. - Attach the black (negative) clamp to the donor battery’s negative terminal.
Use the metal post marked with a minus sign (–). - Connect the final black clamp to an unpainted metal surface on the disabled car.
Choose a bolt, bracket, or engine mount away from the battery and fuel lines. This acts as a ground and reduces spark risk near the battery, where hydrogen gas may accumulate. - Wait 2–5 minutes to allow charge transfer.
Let the donor vehicle run at idle. Do not rev the engine. This stabilizes voltage and begins charging the dead battery. - Attempt to start the disabled vehicle.
Turn the key or press the start button. If it doesn’t start immediately, wait another minute and try again. Limit cranking to 10 seconds per attempt. - If successful, disconnect cables in reverse order.
- Remove black clamp from grounded point on previously dead car.
- Remove black clamp from donor battery’s negative terminal.
- Remove red clamp from donor battery’s positive terminal.
- Finally, remove red clamp from formerly dead battery.
Once running, let the revived car idle for at least 5–10 minutes. Better yet, drive it for 20+ minutes to allow the alternator to recharge the battery fully.
Common Mistakes and How to Avoid Them
Even experienced drivers make errors when stressed or in poor conditions. Below are frequent missteps and their consequences.
| Mistake | Risk | How to Prevent |
|---|---|---|
| Connecting negative clamp to dead battery’s negative terminal | Sparks near battery can ignite hydrogen gas, causing explosion | Always ground the final clamp to bare metal away from the battery |
| Reversing red and black clamps | Sends reverse current; can destroy ECU, alternator, fuses | Double-check color coding before attaching any clamp |
| Using undersized or damaged cables | Inadequate current delivery; overheating; melted insulation | Inspect cables regularly; replace if worn |
| Starting donor car after connections | Unnecessary strain; potential surge during connection | Start donor car before making final connection only if needed |
| Removing cables in wrong order | Short circuit risk if wrench touches both terminals | Always disconnect in reverse: black first, then red |
Real-World Scenario: A Winter Morning Gone Wrong
It was 7:00 AM in January, and Sarah tried to start her 2018 Honda Civic after plowing snow the night before. The engine clicked once, then silence. She called her neighbor, who brought jumper cables from his pickup.
They rushed through the process—connecting both reds, then both blacks directly to the negative terminals. When Sarah turned the key, there was a loud pop and smoke rose from under the hood. The battery casing had ruptured.
A mechanic later explained that cold weather increases battery stress, and connecting the final clamp to the dead battery’s negative terminal created a spark in a hydrogen-rich environment. The repair cost $320 for a new battery and cleaning corrosion from surrounding components.
The mistake? Skipping proper grounding. Had they attached the last black clamp to the engine block instead, the jump would likely have succeeded safely.
When Not to Jump Start
Jump starting isn’t always the right solution. In some cases, attempting it can worsen the problem or create danger.
- Cracked, leaking, or swollen battery: Indicates internal failure or freezing. Jumping could cause acid leakage or explosion.
- Frequent jump needs: Suggests deeper issues like a failing alternator, corroded terminals, or parasitic draw.
- Modern stop-start vehicles: Many use AGM (Absorbent Glass Mat) batteries requiring specific charging protocols. Use caution or consult a professional.
- Visible corrosion or damage: Clean terminals first. Heavy white/green buildup insulates connections and blocks current flow.
If the car shows no signs of life—no dashboard lights, no clicking—there may be a blown main fuse, disconnected battery, or wiring fault. Jump starting won’t help.
Alternative Methods: Portable Jump Starters
For greater safety and independence, consider using a portable lithium jump starter. These compact devices eliminate the need for a second vehicle and reduce human error.
Steps to use:
- Charge the unit fully before use.
- Turn off the car and connect red clamp to positive terminal.
- Attach black clamp to a grounded metal surface.
- Power on the jump starter and start the car.
- Disconnect in reverse order once running.
Many models include USB ports, flashlights, and built-in safety features like reverse polarity alarms. A quality unit costs $60–$120 and can be a lifesaver in remote areas or during emergencies.
Frequently Asked Questions
Can I jump start a car in the rain?
Yes, but with extra caution. Water conducts electricity, increasing shock risk. Ensure cable insulation is intact, wear dry gloves, and avoid standing in puddles. Cover the battery area with a tarp if possible. Modern cars are well-insulated, but moisture near terminals can cause short circuits.
How long should I drive after a jump start?
Drive for at least 20–30 minutes at highway speeds to properly recharge the battery. Short trips may not provide enough alternator output to restore full charge, leading to another failure soon after.
Is it safe to jump start a hybrid or electric vehicle?
Most hybrids can be jump-started like conventional cars, but only to assist the 12V auxiliary battery—not the high-voltage traction battery. Never attempt to jump start a fully electric vehicle (EV) using another car. Consult the owner’s manual first, as improper handling can trigger safety cutoffs or void warranties.
Final Thoughts: Be Prepared, Stay Safe
Knowing how to jump start a car is more than a convenience—it’s a fundamental part of responsible vehicle ownership. With the right preparation, knowledge, and respect for the risks involved, you can handle a dead battery confidently and safely.
Keep a quality set of jumper cables or a portable jump starter in your vehicle at all times. Review the steps periodically, especially before seasonal extremes. And if you’re ever unsure, don’t hesitate to call roadside assistance. A few minutes of waiting beats hours of repairs—or worse.


 浙公网安备
33010002000092号
浙公网安备
33010002000092号 浙B2-20120091-4
Comments
No comments yet. Why don't you start the discussion?