
Candle tunneling—when only the center wax melts while the outer edges remain untouched—is one of the most common frustrations for candle lovers. Not only does it waste valuable wax, but it also shortens a candle’s lifespan and can cause poor scent throw or flame instability. The good news? Tunneling is preventable with the right techniques. By mastering simple wick management strategies and understanding optimal burn times, you can enjoy clean, even burns every time.
This guide dives into the science behind tunneling, explores practical wick-related solutions, and provides actionable steps to ensure your candles perform at their best from first light to final flicker.
Why Candles Tunnel: The Science Behind the Problem
Tunneling occurs when a candle doesn’t establish a full melt pool across its surface during early burns. Wax has memory—meaning each time it solidifies after melting, it tends to follow that same pattern in future burns. If the initial burn only melts a small circle around the wick, subsequent burns will likely repeat that narrow path, leaving thick walls of unmelted wax along the container's sides.
The root causes are typically:
- Inadequate first burn: Lighting a candle for too short a period prevents the wax from reaching the edges.
- Poor wick selection: A wick that’s too small won’t generate enough heat to melt wax laterally.
- Container material and shape: Thick glass or irregular shapes can insulate wax, slowing lateral melt.
- Wax type: Soy wax tends to be softer and more prone to tunneling than paraffin if not burned correctly.
Understanding these factors is the first step toward prevention. But knowing why tunneling happens isn't enough—you need precise control over wick behavior and burn duration.
The Role of Wick Management in Preventing Tunneling
The wick is the engine of your candle. It draws up liquid wax through capillary action and vaporizes it into fuel for the flame. When improperly managed, the wick fails to distribute heat evenly, leading directly to tunneling.
Here’s how to optimize your wick for maximum efficiency:
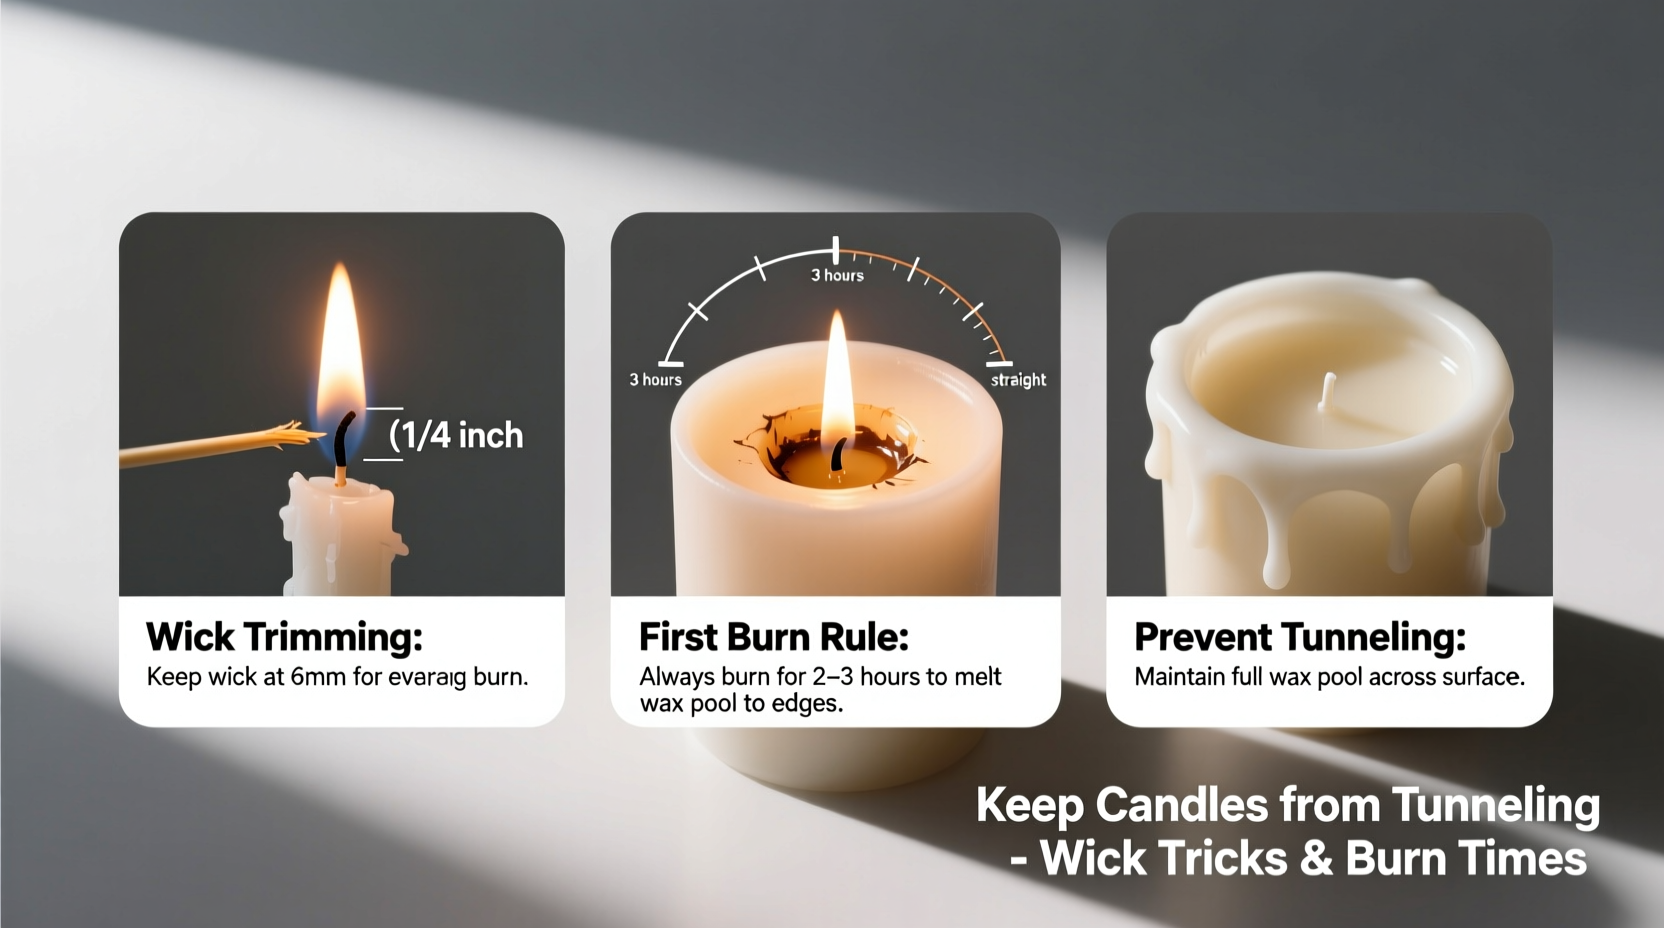
Trim the Wick to 1/4 Inch Before Every Burn
A consistently trimmed wick ensures a controlled flame size. Too long, and the flame becomes large and sooty, consuming wax unevenly. Too short, and it may drown or produce a weak flame unable to spread heat outward.
Center and Secure the Wick
During manufacturing or repeated use, wicks can drift off-center. An off-center wick heats one side more than the other, creating an asymmetric melt pool. For container candles, reposition the wick while the wax is still semi-soft after extinguishing (but never adjust a lit candle).
To maintain alignment:
- After blowing out the candle, gently nudge the wick back to center using a non-flammable tool.
- Use a wick holder or centering device during production or repouring.
- For existing candles, consider inserting a metal wick sustainer tab at the base to stabilize positioning.
Choose the Right Wick Type and Size
If you're making candles or notice consistent issues with store-bought ones, wick choice matters. Common wick types include cotton, wood, and zinc-core. Each behaves differently:
| Wick Type | Burn Characteristics | Suitable For |
|---|---|---|
| Cotton (braided) | Soft flame, self-trimming | Soy, coconut, beeswax blends |
| Wooden | Crisp crackle, broader flame | Larger containers, strong fragrance release |
| Zinc-core (cotton-wrapped) | Rigid, resists curling | Paraffin, gel, wide jars |
Using a wick too small for your candle diameter results in insufficient heat dispersion. As a rule of thumb, the flame should create a melt pool that reaches the container edge within 2–4 hours on the first burn, depending on size.
“Wick selection is 70% of successful candle performance. Get this wrong, and no amount of burn discipline will fix tunneling.” — Marcus Lin, Master Candle Artisan & Educator
Mastering Burn Times: The Key to Even Melting
Burn time is not about how long you want to enjoy your candle—it’s about giving the wax enough time to form a complete melt pool without overheating.
First Burn Rule: One Hour Per Inch of Diameter
The golden rule for preventing tunneling is to burn your candle for approximately one hour per inch of its diameter during the first lighting. For example:
- A 3-inch wide candle needs about 3 hours of continuous burn time.
- A 4-inch jar requires roughly 4 hours.
This allows sufficient time for the liquefied wax to travel to the edges via conduction. Skipping this step sets the stage for tunneling down the line.
Avoid Short Burns After the First Light
Once the wax “remembers” a narrow melt zone, it becomes increasingly difficult to correct. Repeated short burns (under 1–2 hours) reinforce this memory, deepening the tunnel.
If you must burn briefly, consider using tea lights or votives instead of large container candles. Reserve longer sessions for your main scented jars.
Maximum Continuous Burn Time: Don’t Overdo It
While long burns help prevent tunneling, there’s a limit. Burning a candle for more than 4 hours continuously increases risks:
- Overheating the container
- Excessive soot production
- Wick mushrooming (carbon buildup)
After 4 hours, extinguish the flame, let the candle cool completely (at least 2 hours), then relight if desired. This cycle maintains safety and performance.
Step-by-Step Guide to Correct Existing Tunneling
If your candle is already tunneling, don’t toss it. With careful intervention, you can rescue it and restore even burning.
- Assess the depth: Determine how far down the tunnel goes. Shallow tunnels (less than ½ inch) are easier to fix.
- Melt the wax walls: Wrap aluminum foil around the top of the container, leaving an opening in the center for airflow. This reflects heat inward, helping the outer wax catch up.
- Relight and extend burn time: Burn the candle for 2–3 hours, checking frequently. Rotate the jar gently (if safe) to encourage even melting.
- Add warmth from outside: Place the candle in a warm area (not direct sunlight) between burns to soften the outer wax slightly.
- Repeat as needed: It may take 2–3 corrected burns to fully retrain the wax memory.
Note: Do not use ovens, microwaves, or stovetops to melt wax—this poses serious fire hazards.
Real-World Example: Fixing a Tunneling Soy Candle
Sarah bought a popular soy-blend candle in a wide mason jar. On her first burn, she lit it for just 45 minutes while reading before bed. The next few uses followed the same pattern—short evening burns.
By week three, she noticed a deep hole forming. Despite trimming the wick, the flame stayed small and recessed. Frustrated, she almost discarded it—until she learned about wax memory.
She wrapped the jar in foil, ensuring the top was covered but the center open. She then burned it for 3.5 hours under supervision. The melt pool slowly expanded. Over two more sessions, rotating the jar slightly each time, the wax leveled out. From then on, she adhered to the one-hour-per-inch rule—and enjoyed six more weeks of even burning.
Her mistake was common; her recovery method is replicable.
Prevention Checklist: Keep Candles Burning Clean
Follow this checklist every time you light a candle to avoid tunneling and maximize longevity:
- ✅ Trim wick to ¼ inch before each burn
- ✅ Ensure wick is centered before lighting
- ✅ Burn for 1 hour per inch of diameter on first use
- ✅ Allow full melt pool to reach edges before extinguishing
- ✅ Limit continuous burns to 4 hours max
- ✅ Avoid drafts that cause flickering or uneven flames
- ✅ Store unused candles upright in cool, dry place away from sunlight
- ✅ Monitor for mushrooming; trim carbon buildup if necessary
Frequently Asked Questions
Can I fix a severely tunneled candle?
Yes, though it takes patience. Use the foil method to reflect heat inward and extend burn times gradually. In extreme cases, carefully scoop out excess wax and repour it as a new candle using a double boiler and fresh wick.
Does wax type affect tunneling risk?
Absolutely. Soy wax is more prone to tunneling due to its lower melting point and natural composition. Paraffin holds heat better and often forms melt pools faster. Beeswax burns hot and steady but requires larger wicks. Always match wick size to wax type and container width.
Why does my wick keep going out?
A drowning wick usually means the candle has tunneled deeply, cutting off oxygen and trapping the flame. To revive it, carefully remove some surrounding wax to expose the wick base, recenter it, and try relighting. Going forward, prevent this by maintaining proper initial burn times.
Final Thoughts: Make Every Burn Count
Candle tunneling isn’t inevitable—it’s a solvable problem rooted in early habits and wick care. By respecting the physics of wax and flame, you gain control over burn quality and candle lifespan. Trimming wicks, timing burns wisely, and intervening early when issues arise transforms occasional frustration into lasting satisfaction.
Whether you’re a casual candle user or a devoted collector, these practices preserve both function and beauty. A well-maintained candle doesn’t just last longer—it performs better, smells richer, and enhances your space more effectively.


 浙公网安备
33010002000092号
浙公网安备
33010002000092号 浙B2-20120091-4
Comments
No comments yet. Why don't you start the discussion?