
Disney headbands have become more than just accessories—they’re collectible fashion statements worn by fans of all ages at theme parks, events, and photo shoots. Many feature dazzling glitter finishes that catch the light and elevate any outfit. However, glitter has a notorious tendency to flake, rub off, or degrade quickly if not properly secured. This not only dulls the look but can create a mess on clothing or in bags. The good news is that with the right techniques, you can significantly extend the life of your glitter headband and keep it looking vibrant for months or even years.
Why Glitter Flakes Off Disney Headbands
Most store-bought Disney headbands use adhesive-backed glitter or loose glitter sealed with a basic topcoat. While visually appealing, these methods are often not durable enough to withstand regular handling, friction from hair, humidity, or temperature changes. The foam base common in these headbands can also expand and contract, causing the surface layer to crack and release glitter particles over time.
Manufacturers prioritize aesthetics and cost-efficiency over long-term durability, which means consumers must take additional steps to reinforce the glitter finish. Understanding this helps explain why preventive care is essential—not optional.
“Glitter adhesion depends on both the quality of the initial application and post-purchase protection. A clear sealant can make the difference between lasting sparkle and premature shedding.” — Lila Monroe, Textile Finish Specialist
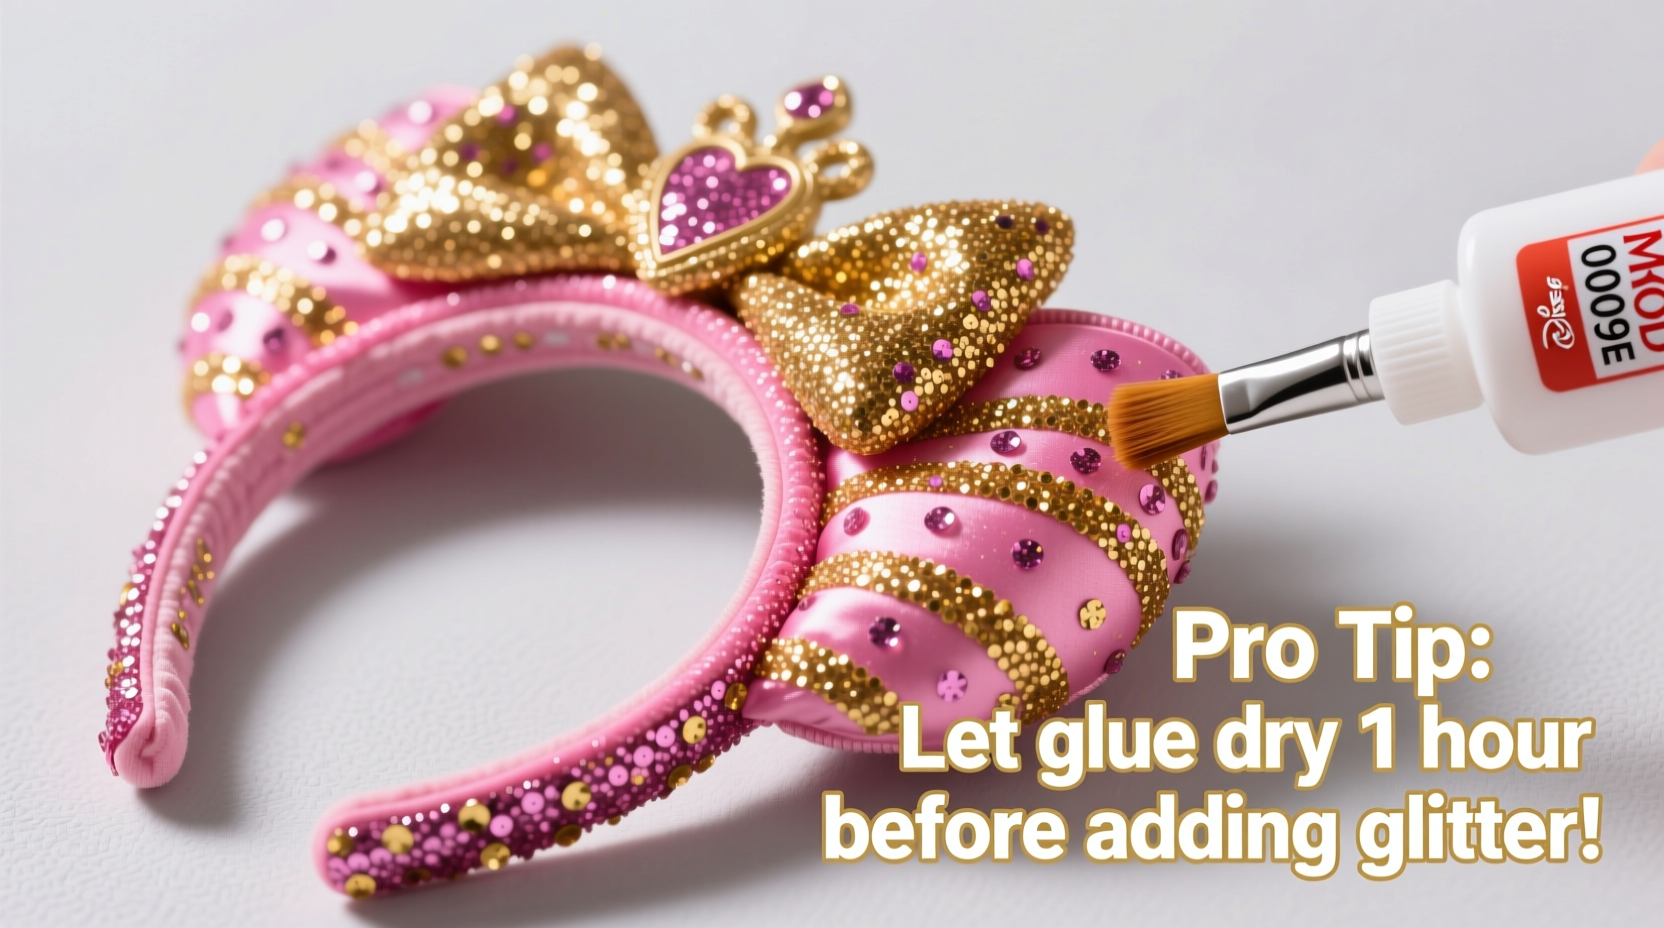
Step-by-Step Guide to Sealing Glitter on Headbands
Applying a protective sealant is the most effective way to lock glitter in place. Follow this detailed process to ensure maximum coverage and durability without altering the appearance.
- Clean the Surface: Use a cotton swab lightly dampened with isopropyl alcohol to gently remove dust, oils, or residue. Let dry completely—this ensures better adhesion of the sealant.
- Choose the Right Sealant: Opt for a flexible, clear-drying adhesive like Mod Podge Outdoor or Aleene’s Clear Gel Tacky Glue. These are water-resistant and remain pliable after drying, reducing cracking.
- Apply Thin, Even Coats: Using a small foam brush, apply a thin layer of sealant over the glittered area. Avoid heavy globs, which can cloud the glitter or cause drips. Work in one direction for consistency.
- Dry Thoroughly: Allow the first coat to dry for at least 2–4 hours. For best results, cure overnight.
- Sand Lighty (Optional): If the surface feels rough after drying, lightly buff with ultra-fine grit sandpaper (600+ grit) to smooth imperfections before applying a second coat.
- Second Coat: Apply a second thin layer to fully encapsulate any loose edges. Two coats typically provide optimal protection.
- Cure Completely: Wait 24–48 hours before wearing to ensure full hardness and chemical off-gassing.
Best Practices for Wearing and Handling
Even with proper sealing, how you wear and handle the headband affects longevity. Friction, moisture, and pressure are the main enemies of glitter integrity.
- Avoid wearing the headband in high-humidity environments like indoor pools or steamy restrooms.
- Don’t wear it while applying hairspray or perfume—chemicals can break down adhesives.
- Minimize contact with rough fabrics or surfaces that could scrape the glitter.
- If wearing with thick or curly hair, consider securing hair away from the glittered side to reduce friction.
- Never store the headband folded or under weight, as this can cause cracks in the sealant layer.
Real Example: Preserving a Limited-Edition Tinker Bell Headband
Sophia, a Disney collector from Orlando, purchased a limited-edition glitter Tinker Bell headband for her daughter’s birthday party. After noticing minor flaking within two wears, she decided to intervene. She cleaned the headband, applied two thin layers of Mod Podge Outdoor, and let it cure for 48 hours. Over the next six months, the headband was worn three additional times and stored upright in a padded box. No further flaking occurred, and the glitter remained intact even after being packed in a carry-on bag during a trip. Her proactive sealing made the difference between a disposable accessory and a lasting keepsake.
Do’s and Don’ts: Glitter Headband Care Table
| Do | Don’t |
|---|---|
| Seal glitter with a flexible, waterproof sealant | Use regular white glue, which becomes brittle and cracks |
| Store upright or flat in a soft container | Throw loosely into a purse or backpack |
| Clean gently with a dry microfiber cloth | Wipe with wet wipes containing alcohol or oils |
| Allow 24–48 hours of curing time after sealing | Wear immediately after applying sealant |
| Inspect monthly for lifting or wear | Ignore small flakes or cracks—early repair prevents bigger damage |
Checklist: How to Keep Glitter Secure on Your Disney Headband
Follow this concise checklist to maintain your headband’s sparkle and structural integrity:
- ☐ Clean the glitter surface before sealing
- ☐ Choose a flexible, clear-drying sealant
- ☐ Apply two thin, even coats with full drying time between
- ☐ Cure for at least 24 hours before use
- ☐ Store in a cool, dry place away from direct sunlight
- ☐ Handle by the non-glittered band portion when possible
- ☐ Inspect regularly and re-seal if needed
Frequently Asked Questions
Can I use hairspray to seal glitter on my headband?
No. Hairspray is not a suitable sealant. While it may temporarily hold glitter in place, it lacks durability, yellows over time, and can become sticky or gummy. It also breaks down under humidity and UV exposure. Use a craft-specific sealant instead.
What if my headband already has flaking glitter?
You can still save it. Gently remove any loose glitter with tweezers, clean the area, and apply a sealant over the remaining glitter. For larger gaps, consider filling with matching craft glitter before sealing. This restores both appearance and protection.
Is it safe to wash a glitter Disney headband?
Washing is not recommended. Water immersion can weaken adhesives and cause delamination. Instead, spot-clean with a dry or slightly damp microfiber cloth. Never submerge or machine-wash the headband.
Maintaining Long-Term Sparkle
The appeal of a glitter Disney headband lies in its magic—the instant shimmer that turns heads and elevates a costume. But that magic doesn’t have to be fleeting. With a few simple precautions and a small investment in materials, you can preserve the brilliance far beyond typical wear. The key is treating the headband not just as an accessory, but as a crafted piece worth protecting.
Regular inspection, smart storage, and timely maintenance will keep your favorite pieces looking fresh. Whether you’re a casual visitor or a dedicated collector, taking these steps ensures that your headbands remain wearable, photogenic, and flake-free for seasons to come.


 浙公网安备
33010002000092号
浙公网安备
33010002000092号 浙B2-20120091-4
Comments
No comments yet. Why don't you start the discussion?