
Creating a memorable holiday display goes beyond stringing lights around the eaves or draping them over a tree. The most captivating outdoor Christmas scenes use layered lighting—strategic placement of multiple light types and intensities—to create dimension, rhythm, and visual interest. When done well, layered lighting transforms flat, predictable outlines into immersive, three-dimensional spectacles that draw the eye and evoke wonder. Whether you're illuminating a towering evergreen in your yard or outlining the complex angles of your home’s roofline, understanding how to build depth through light can elevate your seasonal decor from ordinary to extraordinary.
Understanding Depth in Holiday Lighting
Depth in lighting refers to the illusion of space and volume created by varying brightness, color temperature, density, and placement. A flat lighting job uses one type of bulb in a single pattern—like outlining a roof with steady white mini lights. While neat, it lacks drama. Layered lighting, on the other hand, combines foreground, midground, and background elements to simulate distance and texture, much like a painter builds a landscape with foreground trees, middle hills, and distant mountains.
On trees, this means integrating inner-core illumination with outer silhouetting and accent highlights. On rooftops, it involves combining eave outlines, gable washes, ridge cap lighting, and shadow effects. The goal is not just visibility, but emotional impact—a sense that the structure or tree is alive with light.
“Layering isn’t about adding more lights—it’s about adding the right lights in the right places to guide the viewer’s eye.” — Daniel Reeves, Professional Holiday Lighting Designer
Step-by-Step Guide: Creating Layers on Trees
Trees are natural focal points in any yard. To maximize their potential, treat them as sculptural elements rather than mere supports for strings of bulbs. Follow this sequence to achieve professional-grade depth:
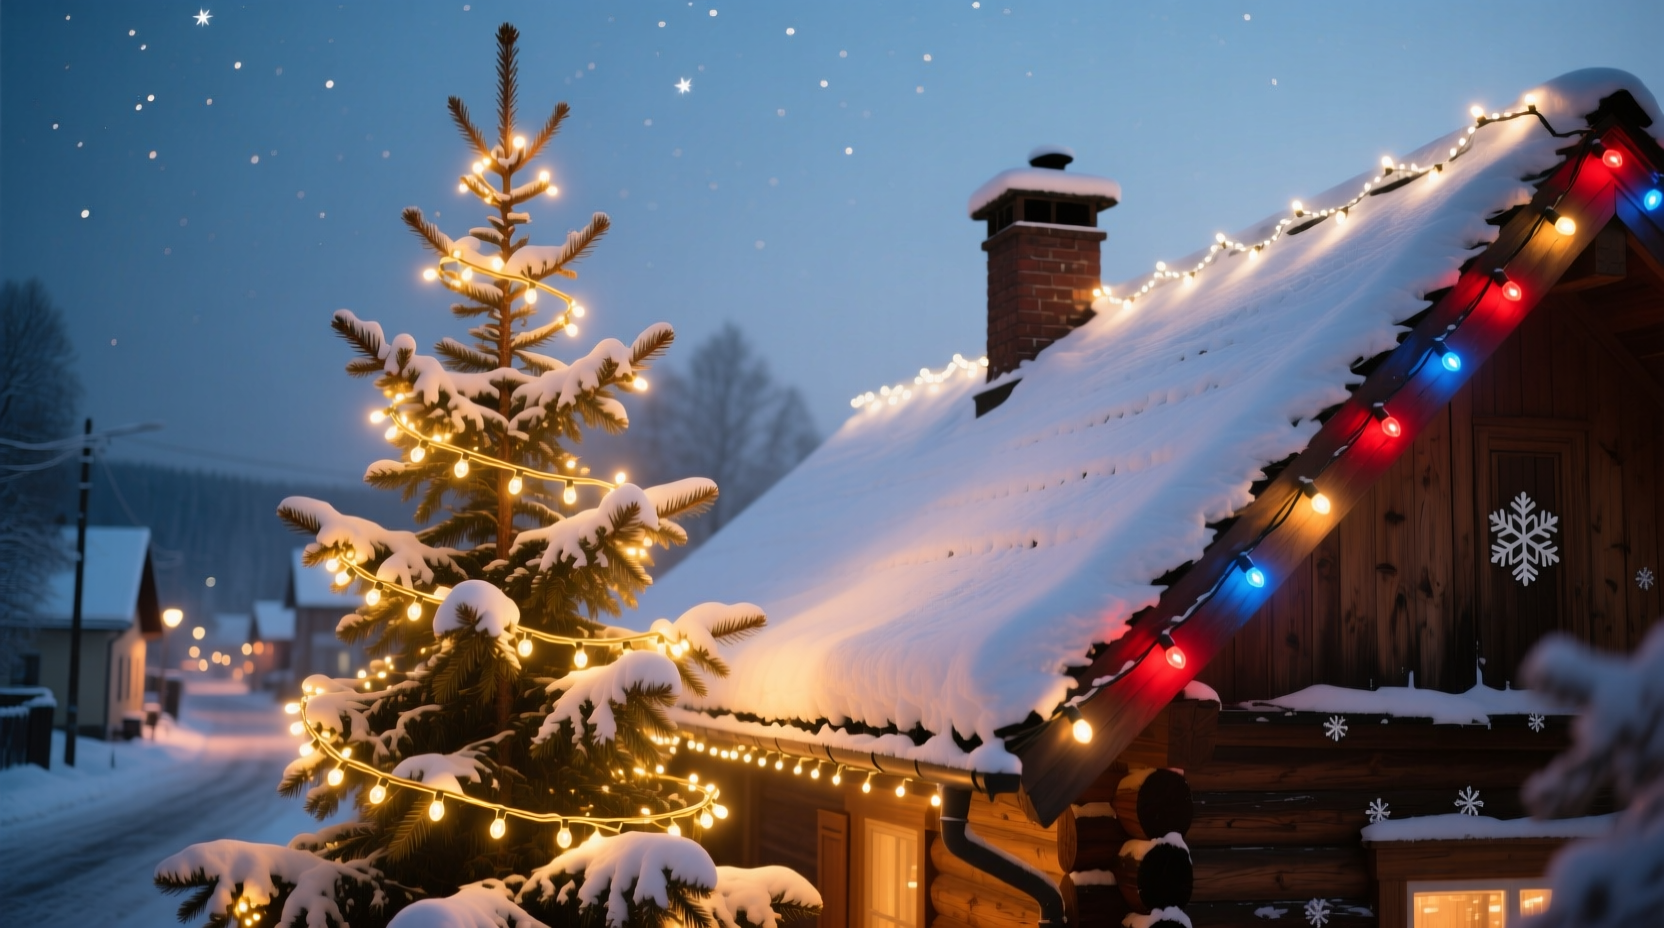
- Start with core illumination: Begin by wrapping the trunk and main branches with warm white LED mini lights. This creates a foundational glow that simulates internal light, making the tree appear lit from within. Work from the base upward, tucking lights into the canopy so they’re partially hidden but still visible from multiple angles.
- Add mid-canopy coverage: Spiral additional strands through the middle third of the tree. Use a slightly higher density here than at the core to create a bright center mass. For variety, consider using a mix of warm and cool whites to suggest sunlight filtering through foliage.
- Outline the silhouette: Use a separate strand to trace the outermost edge of the tree’s shape. This defines its form against the night sky. C9 bulbs work well for larger trees due to their visibility and spacing, while mini lights suit smaller specimens.
- Introduce accent layers: Place spotlights at the base aimed upward to wash the lower branches with light. Alternatively, hang net lights or icicle strands from upper limbs to create vertical drips of light that mimic frozen waterfalls. These break up monotony and add movement.
- Incorporate dynamic effects (optional): Integrate a few strands of twinkling, fading, or color-changing LEDs sparingly—no more than 10–15% of total lighting. These act as visual punctuation, drawing attention without overwhelming the composition.
Building Dimension on Rooftops and Architectural Features
Rooftops present unique challenges due to height, pitch, and structural complexity. However, they also offer the largest canvas for dramatic lighting. The key is to treat different roof planes as individual zones and illuminate them accordingly.
Begin by identifying the major architectural components: eaves, ridgelines, gables, dormers, and chimneys. Each can be highlighted to contribute to the overall depth.
- Eaves and gutters: Outline these with consistent, evenly spaced mini lights. This establishes the base perimeter of the house and anchors the design.
- Ridgelines: Run a contrasting color or brighter strand along the peak. White or blue LEDs stand out sharply against the night sky and emphasize the roof’s spine.
- Gable ends: Frame triangular gables with lights to create “windows” of brightness. Fill the interior with crisscross patterns or diagonal lines to suggest volume.
- Dormers and vents: Treat these as secondary features. Outline them subtly to avoid clutter, but ensure they’re visible enough to contribute to the layered effect.
- Downspouts and columns: Wrap vertical elements with tightly coiled lights to create glowing pillars that connect roof to ground.
For maximum depth, combine linear outlines with area washes. Use small floodlights or projector-style LEDs to bathe broad roof sections in soft light. Aim them from the lawn or adjacent structures to cast even illumination across shingles, enhancing texture and color.
Table: Roof Lighting Layer Comparison
| Layer | Purpose | Recommended Bulb Type | Placement Tip |
|---|---|---|---|
| Eave Outline | Define footprint of house | Mini LED (warm white) | Attach under gutter or fascia |
| Ridge Cap | Highlight roof peak | C7 or C9 (cool white) | Secure with clips along centerline |
| Gable Wash | Add volume to front face | LED floodlight | Position on ground or porch |
| Dormer Accent | Draw attention to detail | Net lights or mini strings | Frame window or roof edge |
| Vertical Pillars | Connect roof to foundation | Tightly wrapped mini lights | Spiral down downspouts or columns |
Real Example: Transforming a Two-Story Colonial
The Thompson family had always decorated their colonial-style home with basic eave lighting—white mini lights along the gutters and a wreath by the door. After attending a neighborhood display known for its elaborate setup, they decided to upgrade.
They began by installing 200-count warm white mini lights along all eaves and porch railings. Next, they added C9 bulbs in cool white along the main roof ridge and two dormer peaks. To create depth, they placed two waterproof LED spotlights at ground level, aimed at the front-facing gable. The wash effect brought out the texture of the shingles and made the gable appear forward in space.
For the large spruce tree near the driveway, they used 1,000 warm white mini lights wrapped from the inside out, then added a spiral of C7 multicolor lights from base to top. Finally, they installed a single string of icicle lights along the porch ceiling to suggest melting snow.
The result was transformative. Neighbors commented that the house looked “professionally done,” and foot traffic increased during the holiday season. Most importantly, the layered approach made the property feel festive without appearing chaotic.
Essential Checklist for Layered Lighting Success
- ✅ Assess your property’s architecture and tree locations before buying lights
- ✅ Choose at least two color temperatures (e.g., warm and cool white) for contrast
- ✅ Use different bulb sizes (mini, C7, C9) to distinguish layers visually
- ✅ Install core lighting first, then build outward with accents
- ✅ Test all strands and circuits before final mounting
- ✅ Group lights by zone on separate timers or controllers
- ✅ Secure wiring safely—use insulated clips, avoid nails through cords
- ✅ Include at least one dynamic element (twinkle, fade, or slow chase)
- ✅ Step back frequently during installation to evaluate balance
- ✅ Take a photo at night to assess overall effect and spot gaps
Frequently Asked Questions
How many layers of lighting should I use on a single tree?
Most trees benefit from 3–4 layers: core illumination, mid-canopy wrapping, silhouette outlining, and one accent feature (like spotlighting or icicles). Over-lighting can flatten the effect, so maintain contrast between dense and sparse areas.
Can I mix LED and incandescent bulbs in a layered design?
It’s not recommended. LEDs run cooler, use less energy, and last longer. Incandescents generate heat and can pose fire risks when enclosed in foliage. For consistency in brightness and color, stick with one technology—preferably LED.
What’s the best way to power multiple layers without overloading circuits?
Use dedicated outdoor-rated extension cords and distribute loads across multiple outlets. Never daisy-chain more than three light strands unless labeled for it. Consider using smart power strips or GFCI-protected outlets to manage amperage safely.
Final Thoughts and Call to Action
Layering Christmas lighting is both an art and a science—one that rewards planning, patience, and a keen eye for detail. By treating trees and rooftops as multidimensional canvases, you can craft displays that do more than shine: they tell stories, evoke nostalgia, and become part of your community’s holiday memory.
You don’t need a warehouse of lights or a contractor’s budget to achieve depth. Start small: pick one tree or one roof section and apply the principles of core, outline, and accent lighting. Refine as you go. Over time, you’ll develop an intuitive sense of balance and rhythm that turns your home into a beacon of seasonal joy.


 浙公网安备
33010002000092号
浙公网安备
33010002000092号 浙B2-20120091-4
Comments
No comments yet. Why don't you start the discussion?