
Flat, uniform lighting makes holiday displays feel two-dimensional—like a postcard rather than an experience. Depth transforms your home’s exterior into a living vignette: warm light spilling from under eaves, crisp beams highlighting textured bark or architectural detail, and delicate string lights tracing the soft curve of a roofline. Achieving that layered effect isn’t about adding more bulbs—it’s about intentionality, contrast, and strategic hierarchy. Spotlights and string lights are complementary tools, not competitors: one defines structure and draws the eye; the other softens, connects, and invites. This guide distills field-tested techniques used by professional lighting designers and experienced homeowners alike—no guesswork, no overloading circuits, just repeatable methods for creating luminous dimension that feels cohesive, intentional, and quietly magical.
The Three-Layer Lighting Principle
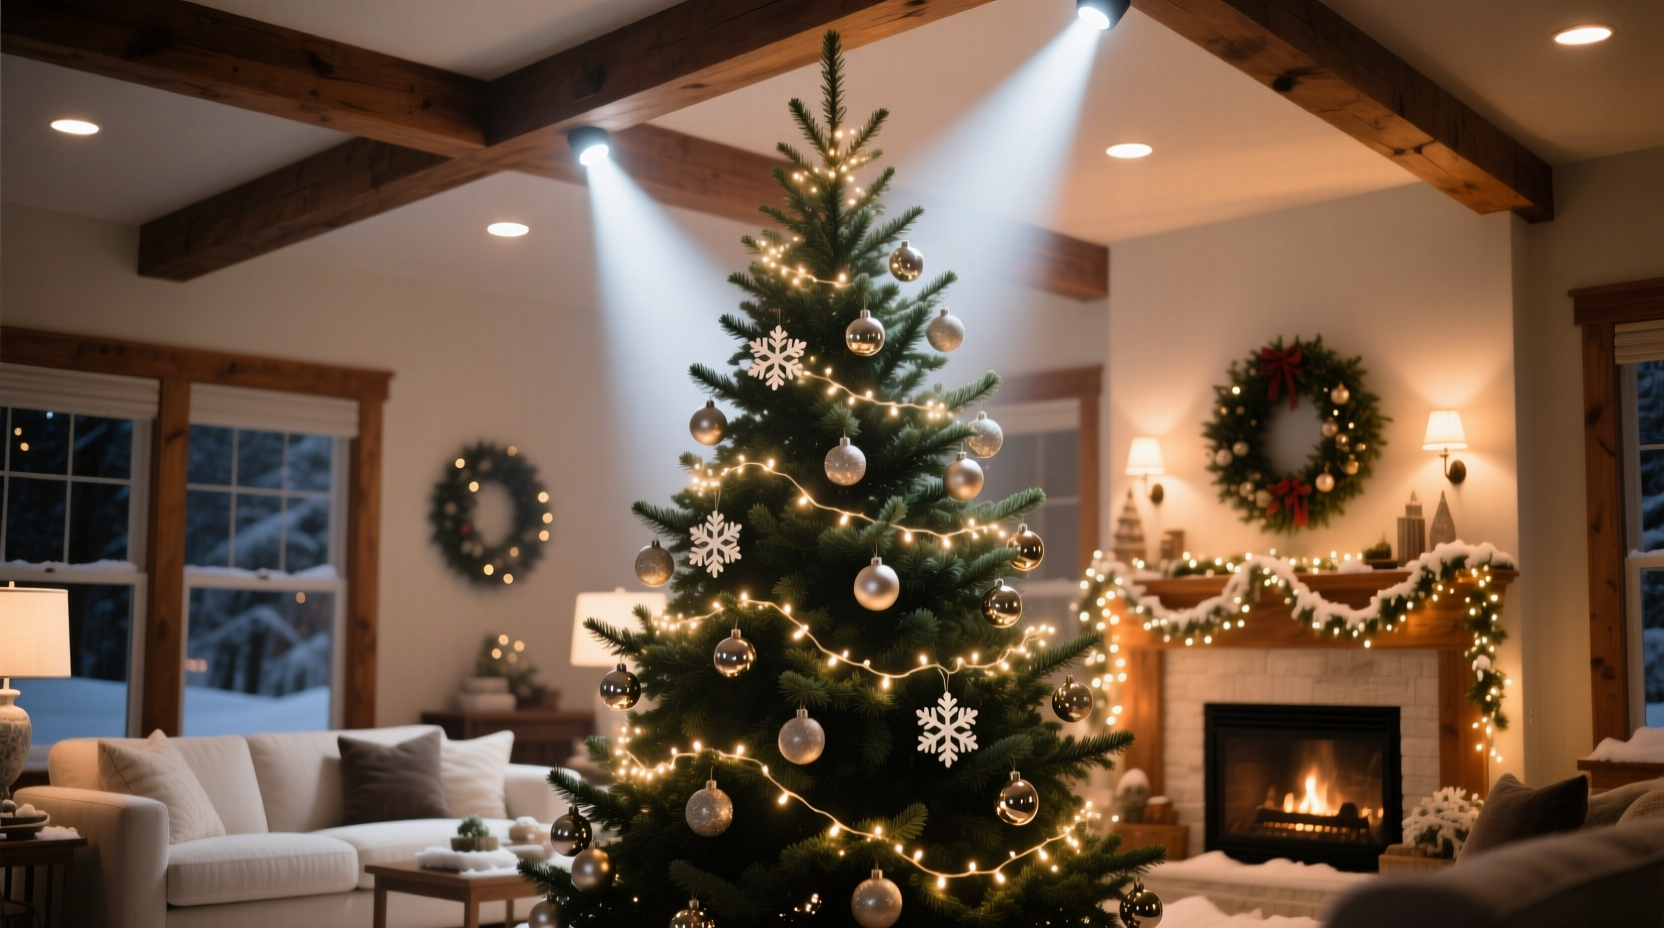
Professional outdoor lighting design relies on a foundational framework: ambient, accent, and task layers. For Christmas displays, this translates directly to depth-building roles:
- Ambient layer: Provides overall wash and mood—soft, diffused, low-contrast. String lights (especially warm-white LED microdots or C7/C9 rope lights) serve this role when draped loosely in trees, wrapped around railings, or hung in gentle swags across porches.
- Accent layer: Creates focal points and highlights texture, form, or architecture. Spotlights (LED PAR36 or PAR38 with adjustable barn doors or narrow flood lenses) fulfill this function—illuminating a wreath, grazing a column, uplighting a conifer, or cross-lighting a front door.
- Highlight layer: Adds visual punctuation—smaller, brighter, often rhythmic elements like net lights in shrubs, icicle lights along gutters, or mini-lights outlining windows. This layer bridges ambient and accent, reinforcing rhythm without competing for dominance.
Depth emerges when these layers operate at different intensities, angles, and color temperatures—and crucially, when they’re controlled independently. A single circuit powering all lights eliminates the ability to dim the ambient layer while keeping accent beams sharp. Always plan for separate channels: one for strings, one for spotlights, and ideally a third for highlights. Use smart plugs or multi-channel controllers (like those from Lumenplay or Twinkly Pro) to sequence or dim layers individually.
Spotlight Placement Logic: Angle, Distance, and Intensity
Spotlights don’t just “light things up.” Their power lies in directional control. Misplaced, they flatten surfaces or create harsh glare. Correctly placed, they sculpt space. The following principles apply regardless of fixture type:
- Grazing: Position spotlight 1–2 feet from a vertical surface (e.g., brick wall, column, or tree trunk), aiming upward at a 10–15° angle. This emphasizes texture and creates long, dramatic shadows. Ideal for stone, stucco, or rough-bark trees.
- Washing: Place spotlight 3–5 feet from the surface, angled at 30–45°. Produces even, broad illumination—best for smooth surfaces like vinyl siding or large evergreen branches where you want gentle coverage, not shadow play.
- Uplighting: Set fixture at the base of a feature (e.g., arbor, tall shrub, or sculpture), aimed straight up or slightly inward. Use narrow-beam (15°–25°) spots to avoid spilling light onto the house or sky. Avoid placing directly under dense foliage—light must escape upward to be seen.
- Cross-lighting: Use two spotlights on opposite sides of a central feature (e.g., front door or wreath), each angled inward at ~45°. Eliminates flatness by casting subtle, overlapping shadows—adding volume and realism.
Distance matters more than wattage. A 7-watt LED spotlight placed correctly outperforms a 20-watt unit poorly aimed. Test placement at dusk—not full dark—to see how light interacts with natural shadows. Adjust incrementally: small changes in angle or distance dramatically alter perceived depth.
String Light Strategy: Density, Pattern, and Integration
Strings are the connective tissue—the “air” between spotlighted features. Their job is to suggest continuity, not compete. That means avoiding uniform density and predictable patterns.
Instead of wrapping every branch of a tree identically, use a variable wrap technique: densely cluster strings near the trunk and inner branches (creating warm, glowing mass), then gradually reduce density toward outer limbs—leaving some tips unlit to preserve silhouette and allow spotlight beams to pierce through. On railings or pergolas, hang strings in alternating lengths—some drooping 12 inches, others 6 inches, others taut—to create visual rhythm and break horizontal monotony.
For architectural integration, avoid outlining every window or door frame. Instead, run strings *behind* gutters (tucked into the drip edge), weave them vertically between deck posts, or suspend them from eave brackets in staggered heights. This creates layered planes: foreground (spotlit features), midground (strings at varying depths), and background (house structure).
| String Type | Best Layer Role | Placement Tip | Avoid |
|---|---|---|---|
| Warm-white microdot (20–50 ft) | Ambient | Wrap loosely around mature evergreens; drape in asymmetrical swags across porches | Over-wrapping thin branches or using on glossy surfaces (causes glare) |
| C7/C9 rope light (flexible) | Ambient/Highlight bridge | Install under eaves or along stair railings with 3–4 inch spacing between bulbs | Using on moving surfaces (e.g., garage doors) or in direct contact with wood shingles (heat risk) |
| Icicle lights (LED) | Highlight | Hang along gutters with staggered lengths (6\", 12\", 18\") to mimic natural ice formation | Mounting flush against fascia—keep 1–2 inches gap for airflow and visual separation |
| Net lights (warm white) | Ambient fill | Layer over lower shrubs *under* spotlighted trees to create foreground glow | Using on tall hedges (>6 ft) without supplemental uplighting—results in top-heavy, flat appearance |
A Real-World Layering Sequence: The Elm Street Porch Project
In December 2023, homeowner Maya R. transformed her modest Craftsman porch from “nice” to “unforgettable” using only 4 spotlights and three string types—no animatronics, no projection mapping. Her process illustrates layered thinking in action:
She began by identifying structural anchors: the tapered porch columns, the gabled roof peak, and the wide front door with stained glass. She installed two 12° narrow-beam spotlights at the base of each column, aimed upward to graze the fluted texture—creating vertical ribbons of light that drew the eye upward. Next, she mounted a 25° flood spotlight high on the left eave, angled down and across to wash the stained-glass door with soft, even light—revealing color without glare. A fourth spotlight, set low and right of the door, uplit a potted Alberta spruce, its beam catching individual needles.
Only then did she add strings: warm-white microdots were loosely wrapped around the spruce’s lower third (enhancing the uplight’s effect), while C9 rope lights ran horizontally *behind* the gutter line—visible as a warm band above the porch roof. Finally, she draped 30-ft microdot strings in irregular swags from the porch ceiling beams to the railing, varying length and spacing so some strands ended mid-air, others touched the rail—creating floating planes of light between the spotlighted columns and door.
The result? Visitors didn’t notice “lights”—they noticed depth: the columns felt taller, the door more substantial, the porch roof receded into soft shadow, and the spruce appeared three-dimensional, not flat. Maya spent under four hours installing and under $120 on materials—all because she built layers, not just brightness.
“Depth in lighting isn’t about quantity—it’s about choreography. Every light must have a relationship with another: one answers, one responds, one rests in between. That’s where memory lives.” — Derek Lin, Architectural Lighting Designer, 15+ years residential holiday installations
Step-by-Step: Building Your Layered Display (60-Minute Setup)
Follow this timed sequence to install thoughtfully—not hurriedly:
- Minute 0–10: Map & Measure
Walk your property at dusk. Note 3–5 key features worth accenting (e.g., entryway, mature tree, architectural detail). Measure distances from potential spotlight locations to each feature. Sketch a quick diagram showing where ambient strings will flow *between* those features. - Minute 10–25: Install & Focus Spotlights
Mount fixtures first—use ground stakes for lawns, brackets for walls. Connect temporarily to test. Aim using the “thumb rule”: hold your thumb up at arm’s length; if the beam covers your thumbnail at the target, it’s likely well-framed. Fine-tune after full dark. - Minute 25–40: Hang Ambient Strings
Start with largest-scale strings (rope lights, net lights). Prioritize areas that connect spotlighted features—e.g., along a fence linking two uplit trees. Use zip ties or insulated clips—not staples—to avoid wire damage. - Minute 40–52: Add Highlight Strings
Install icicles, microdots, or net lights in foreground zones (shrubbery, railings, steps). Keep these 20–30% dimmer than spotlights using a separate dimmer channel or lower-lumen bulbs. - Minute 52–60: Refine & Balance
Stand back 20 feet. Turn off all lights, then switch on spotlights only. Observe contrast and shadow quality. Then add ambient strings. Finally, add highlights. Adjust spotlight aim or string density until no single element dominates—and the space feels inhabited, not illuminated.
FAQ
Can I mix warm-white and cool-white lights in layered displays?
Yes—but strategically. Use only warm-white (2200K–2700K) for ambient and highlight layers to maintain cohesion and evoke traditional warmth. Reserve cool-white (3000K–3500K) *only* for specific accent tasks: illuminating white-painted trim, snow-dusted shrubs, or frosted glass where crisp definition is desired. Never mix within the same layer—cool-white strings against warm-white spotlights create visual dissonance, not depth.
How many spotlights do I realistically need for a standard 2,000 sq ft home?
Start with 4–6. Focus on quality over quantity: two for primary entry features (door/columns), two for landscape anchors (trees/shrubs), and two optional for secondary interest (garage door, side patio). More than eight often leads to cluttered contrast and competing focal points. Depth comes from selective emphasis—not saturation.
Do LED spotlights generate enough heat to damage siding or plants?
Modern low-voltage (12V) or plug-in 120V LED spotlights produce negligible heat at the beam source—far less than incandescent or halogen. However, avoid mounting fixtures directly against vinyl, wood, or dry vegetation for extended periods. Maintain at least 6 inches of clearance from flammable surfaces and ensure fixtures are rated for wet/damp locations. Heat buildup occurs only if fixtures are enclosed or improperly ventilated—not from the light beam itself.
Conclusion
Layering Christmas lighting for depth isn’t decoration—it’s spatial storytelling. It asks viewers to move their eyes, to pause, to feel the weight of shadow and the lift of light. Spotlights define; strings connect; together, they turn your home into a narrative told in lumens and contrast. You don’t need a warehouse of gear or a contractor’s budget. You need observation, patience, and the willingness to treat light as material—sculpting with it, editing with it, trusting that restraint reveals more than abundance ever could.
Start small this season: pick one doorway, one tree, one porch railing. Apply the three-layer principle. Adjust one spotlight. Drape one string with intention. Notice how the space changes—not just in brightness, but in presence. Then share what you learn. Post your layered setup in community forums. Tag a neighbor who’s always admired your lights. Tell us in the comments which layer surprised you most—the way grazing light revealed texture you’d never seen, or how a single string, hung just so, made your front step feel like an invitation.


 浙公网安备
33010002000092号
浙公网安备
33010002000092号 浙B2-20120091-4
Comments
No comments yet. Why don't you start the discussion?