
Decorating for the holidays is more than a seasonal tradition—it’s an opportunity to transform your space into a luminous celebration of warmth and joy. While many homeowners hang a string of lights or drape a single garland over the mantel, the most striking displays are built through thoughtful layering. When done well, layered lighting and greenery create depth, rhythm, and dimension that capture attention and elevate your holiday aesthetic. This guide reveals the professional techniques used by interior stylists and landscape designers to achieve show-stopping results using strategic layering of Christmas lights and garland.
Understanding the Principles of Visual Layering
Layering isn’t just about adding more elements—it’s about creating harmony between light, texture, and form. The goal is to mimic the natural complexity found in festive scenes: think of snow-dusted evergreens lit from within, or city streets glowing under strings of warm bulbs. To replicate this richness, begin with three foundational layers:
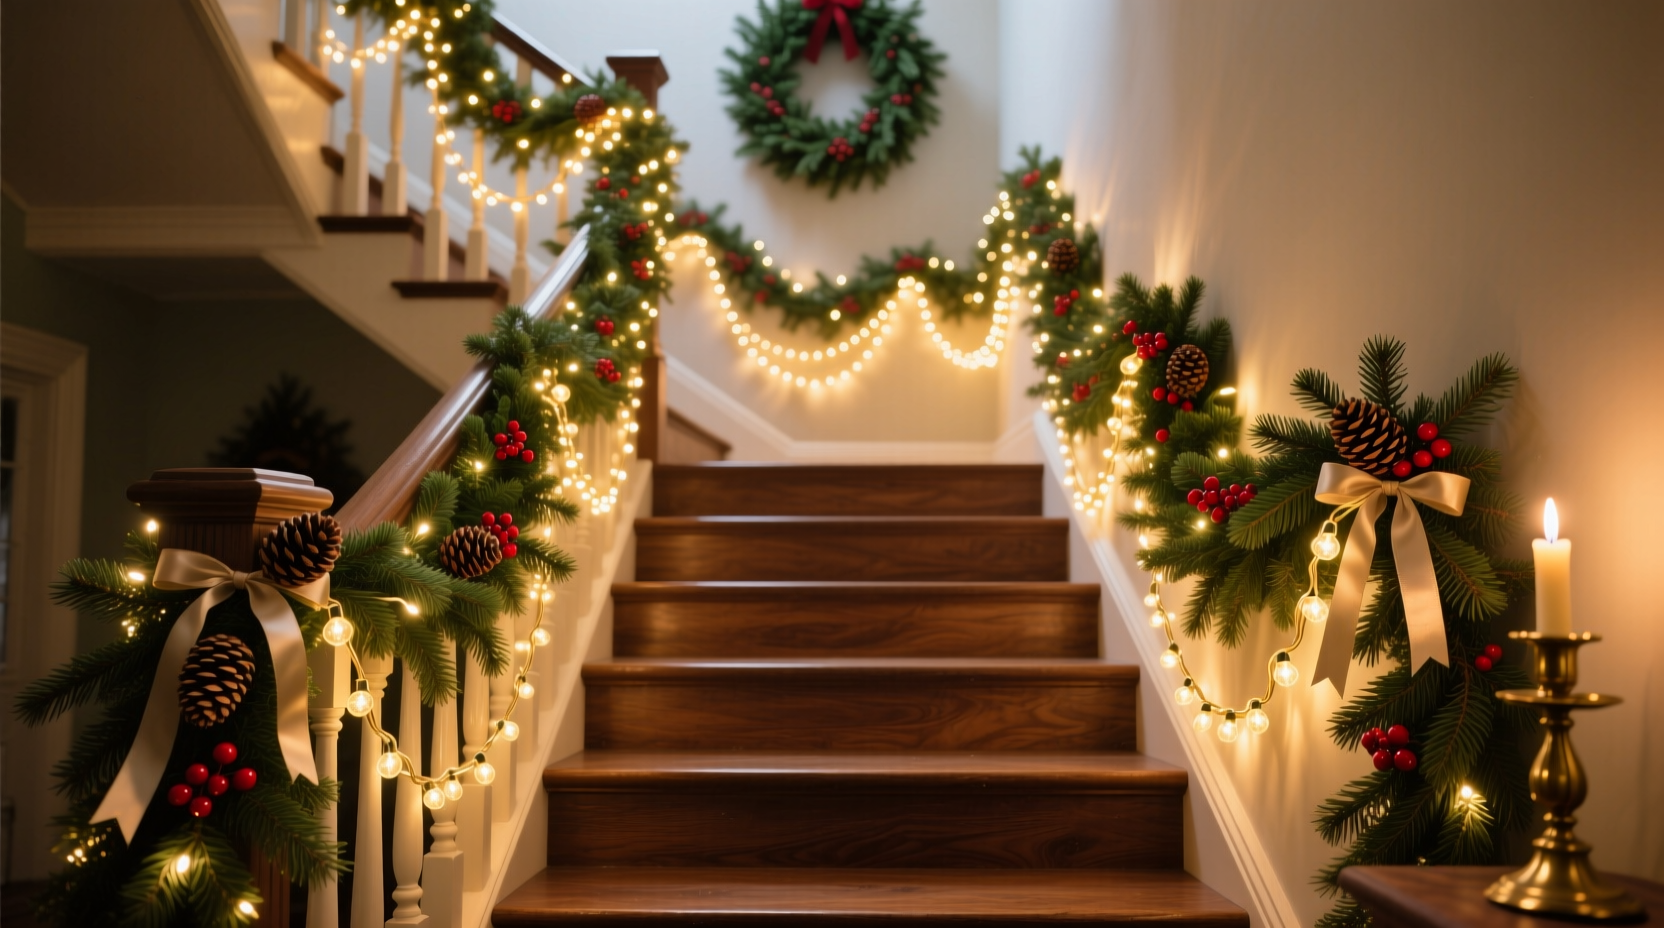
- Base Layer: Provides structure and coverage—think full strands of lights wrapped around railings or garland laid along a banister.
- Middle Layer: Adds movement and variation, such as swags of mixed greenery or staggered light clusters.
- Highlight Layer: Draws the eye with focal points like spotlighted ornaments, flickering candle-effect bulbs, or metallic-dipped pinecones nestled in garland.
Each layer should complement rather than compete. For example, if your base uses cool white lights, consider warming the middle layer with amber-tinted mini-lights or incorporating red berries in your garland mix. The contrast creates visual interest without chaos.
Choosing the Right Lights and Garland for Layering
Not all lights and greenery are created equal when it comes to layering. The materials you choose will determine how effectively they interact with one another and respond to ambient light.
Lights: Warm vs. Cool, Size vs. Impact
Miniature fairy lights (often called “twinkle lights”) are ideal for soft, diffused glows, especially when woven through garland. Their subtlety allows them to blend seamlessly into the middle and highlight layers. C7 and C9 bulbs, larger and brighter, function best as base lighting on eaves or trees where visibility from afar matters.
Color temperature plays a critical role. Warm white (2700K–3000K) mimics candlelight and pairs beautifully with traditional red-and-green themes. Cool white (5000K+) offers a crisp, modern look suited for silver, blue, or minimalist palettes. Mixing both temperatures can add dimension—use warm near ground-level features and cool for overhead outlines.
Garland: Real vs. Artificial, Texture vs. Fullness
Fresh garland made from fir, pine, or cedar brings authentic fragrance and lush texture but lasts only 7–14 days unless misted daily. Artificial options offer longevity and consistency, especially those with built-in wire cores for easy shaping. Look for garlands with varied foliage—combining spruce tips, holly leaves, and seeded eucalyptus increases realism and shadow play.
For maximum impact, use garlands that allow light penetration. Avoid dense, flat-back designs; instead, opt for full-round profiles that let light filter through from multiple angles.
| Feature | Best for Base Layer | Best for Middle/Highlight Layer |
|---|---|---|
| Lights | C9 bulbs, steady warm white | Mini twinkle lights, color-changing options |
| Garland | Pine rope or wide artificial rolls | Textured mixes with berries, pinecones, or ribbon |
| Placement Focus | Eaves, columns, railings | Centerpieces, mantels, tree branches |
Step-by-Step Guide to Layering Lights and Garland
Follow this sequence to build a professionally layered display across indoor and outdoor spaces.
- Plan Your Layout: Sketch a rough diagram of the area—front porch, staircase, living room mantle—and mark where each layer will go. Identify primary sightlines (e.g., street view, entryway approach).
- Install Base Lighting: Begin with large-scale illumination. Wrap C9 lights around roof lines, secure them along fence tops, or coil them inside large planters. Use clips or insulated hooks to prevent damage.
- Anchor the Garland: Lay your primary garland strand first. On railings, start at one end and loosely drape in consistent swags (12–18 inches apart). Secure every 18 inches with floral wire or zip ties hidden beneath foliage.
- Add Secondary Lighting: Weave smaller fairy lights directly into the garland. Alternate directions—under, over, through—to create internal sparkle. For fresh garlands, wrap gently to avoid breaking stems.
- Introduce Textural Accents: Nestle pinecones, cinnamon sticks, or velvet bows into the garland at irregular intervals. These break monotony and catch light differently than foliage.
- Create Focal Points: Highlight key areas—a front door center, stair post top—with oversized ornaments or spiral-wrapped light coils. Use dimmable controllers to brighten these zones slightly above ambient levels.
- Test and Adjust: Turn off daylight lamps and view your setup at dusk. Look for dark spots, uneven spacing, or glare. Rebalance as needed before finalizing connections.
Real Example: Transforming a Front Porch
Consider the case of a two-story colonial home with a wraparound porch. The homeowner wanted a welcoming yet sophisticated look without appearing overly commercial.
The decorator began by outlining the roofline and columns with warm C9 lights—establishing the base layer. Then, 20 feet of premium artificial garland was draped along the main railing in uniform swags, secured with black zip ties painted to match the wood.
Next, 100-count warm mini-lights were hand-woven through the garland, concentrating density near the front steps and door. To enhance depth, clusters of red berry sprigs and gold-dipped pinecones were spaced every 24 inches.
Finally, three vintage-style lanterns flanking the door were fitted with amber LED candles, their flicker reflecting off nearby glass ornaments tucked into the greenery. From the sidewalk, the result was a cohesive cascade of light and texture—inviting, dimensional, and far more dynamic than any single element could achieve alone.
“Layering is not about quantity—it’s about choreography. Each strand and sprig should have a purpose.” — Lydia Chen, Seasonal Design Director at Evergreen Atelier
Avoiding Common Layering Mistakes
Even experienced decorators fall into predictable traps that diminish visual impact. Steering clear of these errors ensures your effort translates into elegance.
- Over-lighting: Too many competing bulb types or colors create visual noise. Stick to one dominant light style per zone.
- Symmetry Obsession: Perfectly even swags can look robotic. Introduce slight variations in garland length or light spacing for organic flow.
- Neglecting Power Management: Daisy-chaining too many strands risks tripping breakers. Use surge-protected timers and distribute loads across circuits.
- Ignoring Scale: Tiny fairy lights get lost on large porches. Match bulb size to architectural proportions—C9s for grand entries, minis for intimate spaces.
- Skipping Maintenance Checks: Outdoor lights exposed to wind or snow may shift. Inspect weekly and reposition fallen sections promptly.
Indoor vs. Outdoor Layering Strategies
While principles remain consistent, environmental factors require different approaches indoors and out.
Outdoors, durability and visibility dominate. Use weather-rated lights (look for UL certification), space garland thicker to withstand wind, and aim for higher lumen output so displays shine at night from a distance. Trees, shrubs, and walkways benefit from uplighting—placing fixtures at ground level to cast upward shadows.
Indoors, intimacy allows for finer detail. Drape garland over bookshelves, chandeliers, or picture frames. Combine battery-operated fairy lights with sheer ribbons for ethereal effects. Mantels offer prime real estate: layer garland front to back, tuck small spotlights behind it for backlighting, and intersperse with taper candles in brass holders.
Checklist: Pre-Hang Preparation
Before installation day, ensure everything is ready:
- ✅ Test all light strands for burnt-out bulbs or frayed wires
- ✅ Measure linear footage of railings, mantels, and eaves
- ✅ Purchase extra mounting clips, zip ties, and extension cords
- ✅ Choose a consistent color temperature for all lights
- ✅ Decide on accent elements (bows, ornaments, pinecones)
- ✅ Confirm outlet access and circuit capacity
- ✅ Schedule installation 1–2 weeks before desired display date
Frequently Asked Questions
How many strands of lights do I need per foot of garland?
A good rule is one 100-count string of mini lights for every 3 feet of garland. For denser sparkle, use two strands—one woven through the top and one along the underside.
Can I mix real and artificial garland in the same display?
Yes, but plan carefully. Place fresh garland in high-visibility, easily accessible areas where you can maintain moisture. Use artificial for hard-to-reach spots. Blend them visually by choosing artificial pieces with similar needle shape and color tone.
What’s the best way to store layered setups for reuse next year?
Disassemble by layer. Coil lights separately from garland, label each box by location (e.g., “Front Porch – Base Lights”), and store in climate-controlled conditions. Wrap garland around cardboard forms to prevent tangling and crushing.
Final Thoughts: Elevate Your Holiday Presence
Layering Christmas lights and garland is an art that balances technical precision with creative intuition. When executed with intention, it transforms ordinary decorations into immersive experiences that resonate with guests and passersby alike. The most memorable displays aren’t the brightest or longest—they’re the ones that feel alive, with light dancing through textured greenery and subtle details rewarding closer inspection.
Start small if needed—a layered mantel can be your testing ground. As confidence grows, expand to porches, staircases, or even backyard patios. With each season, refine your approach, noting what draws compliments and what fades into the background. Over time, you’ll develop a signature style that becomes part of your home’s holiday identity.


 浙公网安备
33010002000092号
浙公网安备
33010002000092号 浙B2-20120091-4
Comments
No comments yet. Why don't you start the discussion?