
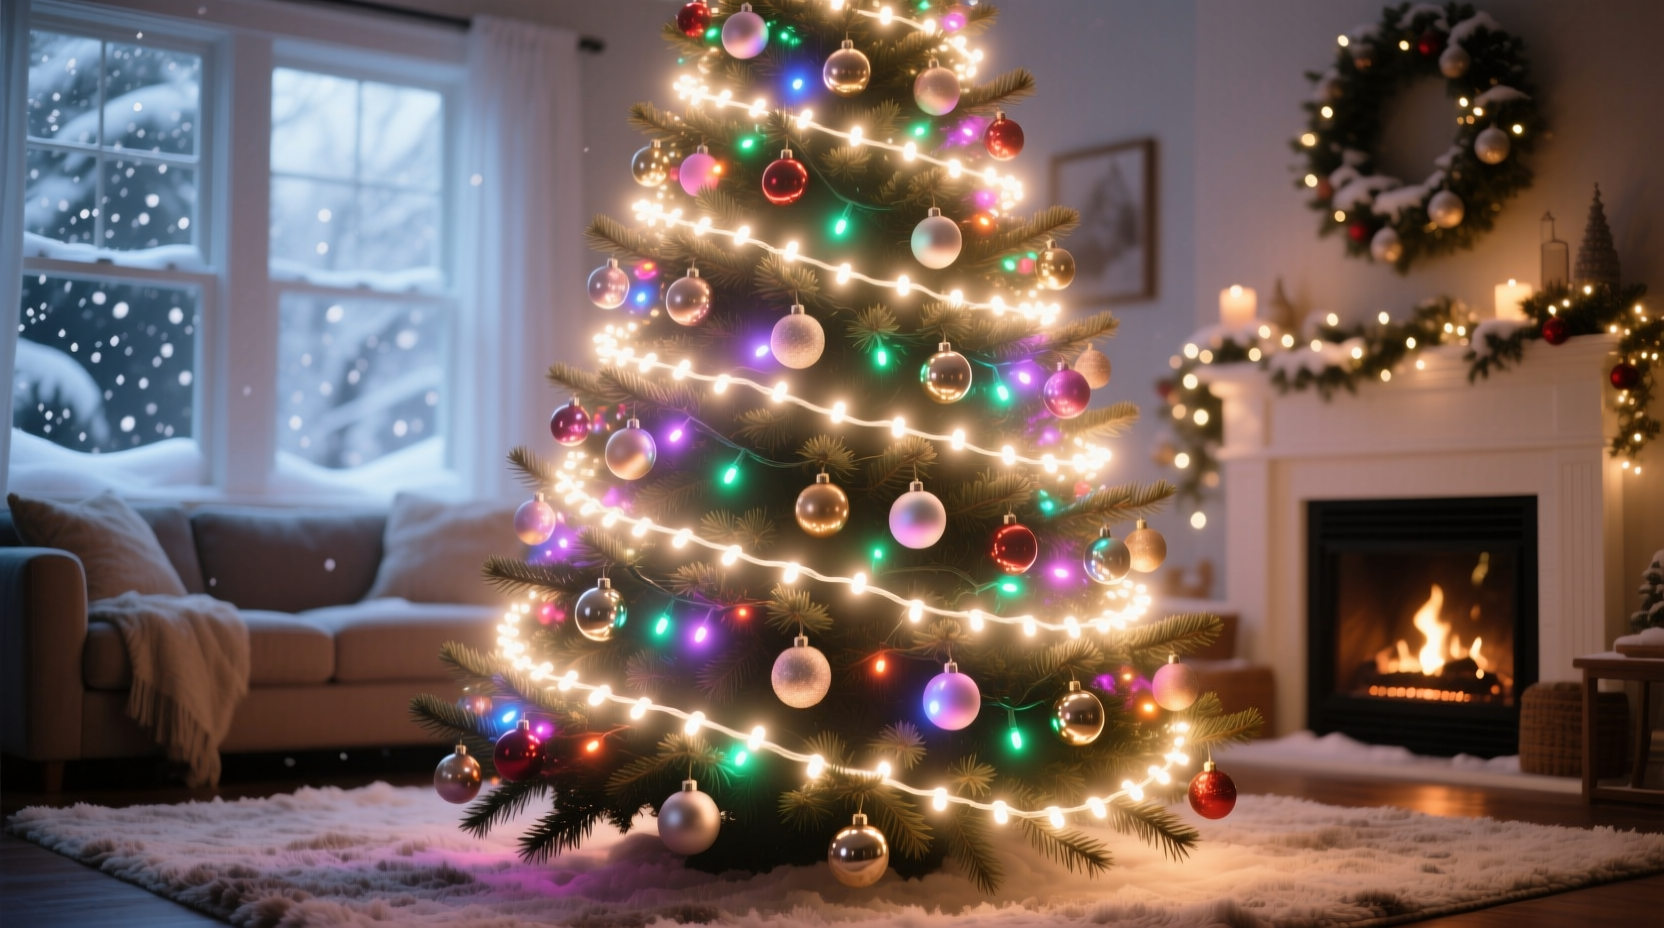
A well-lit Christmas tree can transform a space into a warm, festive sanctuary. But when it comes to large trees—those towering 8-footers and beyond—achieving that deep, even, radiant glow isn’t just about stringing up more lights. It’s about layering them strategically. Done right, layered lighting creates depth, eliminates dark spots, and gives the illusion of the tree glowing from within. Many people overload their trees with cords and bulbs only to end up with hotspots, tangled messes, or a flat, one-dimensional shine. The secret lies not in quantity alone, but in intelligent placement and technique.
This guide walks through the proven methods used by professional decorators to layer lights on large trees for maximum visual impact. From selecting the right bulb type to mastering spiral wrapping and inner-canopy illumination, you’ll learn how to create a luminous centerpiece that commands attention without looking chaotic.
Choose the Right Lights for Layering
The foundation of a successful light layer begins long before you touch the tree—with your choice of bulbs. Not all Christmas lights are created equal, especially when scaling up for larger trees.
For large trees, opt for LED mini lights in warm white (2700K–3000K). Warm white mimics candlelight and blends naturally with wood tones and traditional decor. Cool whites may appear too harsh and clinical, especially indoors. LEDs are ideal because they run cooler, use less energy, and last longer—critical when dealing with hundreds of bulbs across multiple strands.
Bulb spacing matters. For large trees, choose strings with 4-inch or 6-inch spacing between bulbs. Closer spacing (like 2.5 inches) works for smaller trees but can make large trees look over-lit or busy. A strand with 50 bulbs on a 25-foot string (5-inch spacing) is ideal for smooth coverage.
Calculate How Many Lights You Need
There's a rule of thumb often cited in the decorating world: use 100 lights per foot of tree height. For a 9-foot tree, that means 900 lights. But this is a bare minimum—especially for thick, full trees. For true maximum glow, double it. Aim for 200 lights per foot.
Here’s a quick reference table to help plan your purchase:
| Tree Height | Min. Lights (100/ft) | Ideal Lights (200/ft) | Strands Needed* (50-bulb strands) |
|---|---|---|---|
| 6 ft | 600 | 1,200 | 24 |
| 7 ft | 700 | 1,400 | 28 |
| 8 ft | 800 | 1,600 | 32 |
| 9 ft | 900 | 1,800 | 36 |
| 10 ft | 1,000 | 2,000 | 40 |
*Assumes 50-light strands; adjust if using 100-light strands (divide numbers by 2).
While 200 lights per foot may sound excessive, remember that large trees have volume. Light gets absorbed by dense branches, especially toward the center. Under-lighting results in a dim, uneven appearance when viewed from across a room.
Step-by-Step: How to Layer Lights on a Large Tree
Layering isn’t just about adding more strands—it’s about placing them at different depths to build dimension. Follow this sequence for optimal results.
- Prepare the tree. Fluff every branch fully. A poorly fluffed tree will hide lights and create shadows. Work from the bottom up, separating each bough to mimic natural growth.
- Start with inner-canopy lighting. This is the first and most overlooked layer. Take 1/3 of your total lights and weave them deep into the trunk and central core. Wrap them around the central pole and tuck strands between inner branches. These lights illuminate the heart of the tree, eliminating the “dark center” effect.
- Add mid-layer spiral wrapping. Use another third of your lights to spiral outward from the top down. Begin at the top of the trunk and wrap diagonally, moving clockwise. Keep the angle consistent—about 6 to 8 inches between loops. Tuck each bulb slightly under a branch so it faces outward, not straight ahead. This creates a smooth, cascading effect.
- Apply outer-tip lighting. With the final third, focus on the outermost tips of the branches. Drape these lights loosely over the ends to highlight the tree’s silhouette. This layer catches the eye from a distance and adds sparkle.
- Test and adjust. Turn off the room lights and power up the tree. Walk around it. Look for dark zones, clumps of brightness, or visible wires. Rebalance by shifting strands or adding micro-lights in shadowed areas.
Pro Techniques Used by Decorators
Professional holiday designers use advanced tricks to elevate the glow beyond basic layering. These aren’t gimmicks—they’re time-tested methods for achieving magazine-worthy results.
Use multiple light types. Combine mini lights with C7 or fairy string lights. Mini lights provide structure and volume; fairy lights (with tiny, closely spaced bulbs) add delicate shimmer along branch edges. Use them sparingly on upper tiers for a “snow-dusted” effect.
Directional tucking. Never let bulbs face straight out or up. Angle them slightly downward and outward so the light spreads across neighboring branches instead of vanishing into the ceiling. This increases perceived brightness.
Zone control. Plug different layers into separate extension cords or smart outlets. This lets you turn on inner lights first for a soft base glow, then add outer layers gradually. It also helps isolate problems if a section fails.
“Most people light the surface of the tree. Pros light the soul of it. Depth is everything.” — Marcus Reed, Lead Designer at Evergreen Holiday Studios
Real Example: Transforming a 10-Foot Flocked Tree
Jamie, a homeowner in Vermont, struggled for years with her 10-foot flocked Douglas fir. Despite using 1,500 lights, the tree looked flat and dull in evening photos. She reached out to a local decorator who assessed the setup and found three issues: all lights were on the exterior, strands were haphazardly draped, and no inner lighting existed.
The decorator applied the layering method: 1,000 lights were added (bringing the total to 2,500), with 800 dedicated to the inner canopy, 1,000 for spiral wrapping, and 700 for outer tips. They used warm white LEDs with 6-inch spacing and tucked each bulb beneath a branch.
The result? A tree that glowed like a lantern. Family members said it felt “warmer” and more inviting. Photos taken at night showed even illumination from every angle. Jamie now uses the same method every year—and has inspired three neighbors to adopt it.
Common Mistakes to Avoid
- Overloading one side. Symmetry matters. If one quadrant has twice as many strands, it will dominate the room visually.
- Ignoring the back of the tree. Even if it faces a wall, reflections and ambient light matter. At least 70% of the lighting should be evenly distributed around the full circumference.
- Using multicolored lights on a large tree. While fun for small displays, rainbow bulbs on big trees can look chaotic and distract from the glow effect. Stick to one color temperature for cohesion.
- Skipping the test phase. Installing all lights in daylight hides flaws. Always do a dark-room check before adding ornaments.
Checklist: Perfect Tree Lighting in 10 Steps
- Fluff the tree completely.
- Calculate total lights needed (200 per foot).
- Buy matching strands from the same batch.
- Test every strand before use.
- Install inner-canopy lights first.
- Spiral mid-layer from top to bottom.
- Add outer-tip lights for sparkle.
- Use directional tucking (bulbs facing down and out).
- Do a darkness test from multiple angles.
- Adjust and rebalance before hanging ornaments.
Frequently Asked Questions
Can I use extension cords to connect multiple strands?
Yes, but follow safety limits. Most light strings are rated to connect up to 3–5 sets end-to-end (check manufacturer specs). For large trees, use a heavy-duty surge-protected power strip with multiple outlets rather than daisy-chaining too many strands. Overloading circuits is a fire hazard.
Should I put lights on before or after ornaments?
Always install all lights before adding ornaments. Ornaments can block light paths and make it difficult to reach inner branches. Once lights are tested and balanced, ornaments enhance the glow rather than interfere with it.
How do I hide the cords and plugs?
Route cords down the back of the tree, securing them gently with twist ties or Velcro straps. Plug them into a floor outlet behind the stand. If necessary, use a decorative tree skirt with a slit to conceal wiring. Avoid covering cords with heavy objects that could cause overheating.
Final Thoughts: Let the Tree Shine
A truly luminous Christmas tree doesn’t happen by accident. It’s the product of planning, patience, and precise layering. When done well, the result is more than decoration—it becomes a focal point of warmth, memory, and celebration. The glow of a properly lit tree does more than brighten a room; it lifts spirits.
Don’t settle for a tree that flickers faintly in the corner. Commit to the process: calculate your needs, invest in quality lights, and apply the layering method with care. Whether your tree stands in a family living room or a grand lobby, it deserves to radiate fully.


 浙公网安备
33010002000092号
浙公网安备
33010002000092号 浙B2-20120091-4
Comments
No comments yet. Why don't you start the discussion?