
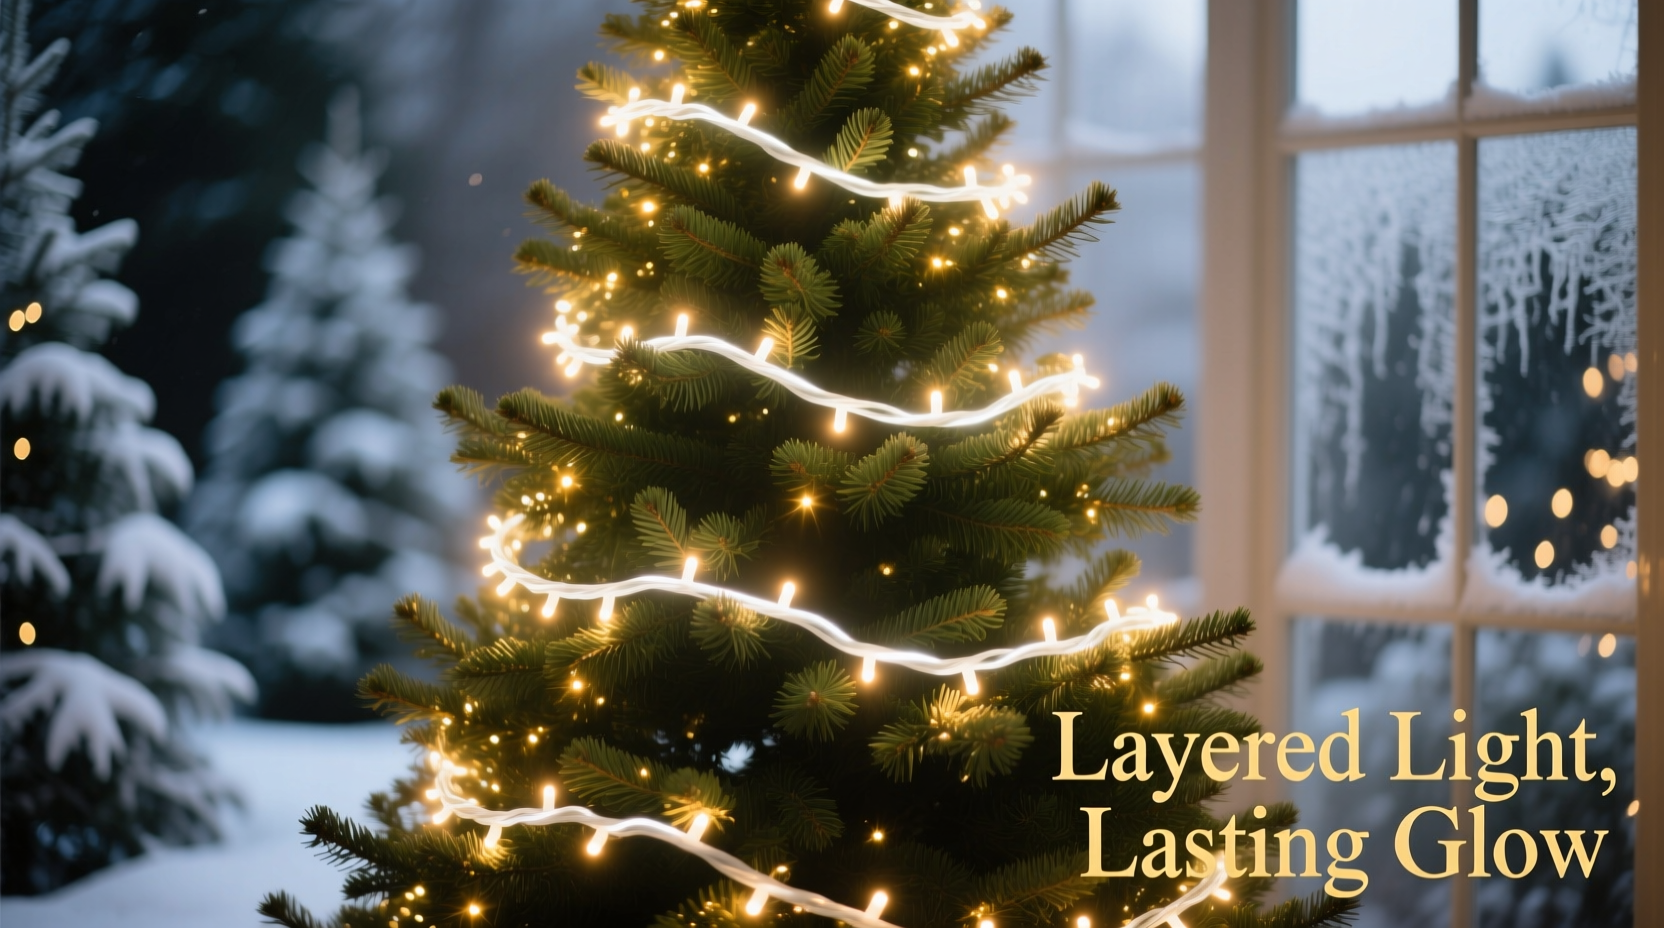
A beautifully lit Christmas tree is the centerpiece of holiday decor. Yet many people struggle with flat, patchy lighting that fails to capture the warmth and depth seen in boutique displays or magazine spreads. The secret isn’t more lights—it’s better layering. Professional decorators achieve that coveted radiant glow not through guesswork, but through intentional placement, strategic depth, and a methodical approach. When done right, layered lighting creates dimension, softness, and an inviting luminosity that feels both festive and timeless.
This guide breaks down the exact process used by lighting designers and experienced home stylists to build a glowing foundation before ornaments are even added. Whether you have a real fir, an artificial spruce, or a slim urban silhouette, these techniques apply universally. By focusing on coverage, direction, and balance, you can transform your tree from ordinary to extraordinary—no special tools required.
Why Layering Matters: Beyond Stringing Lights
Most people treat Christmas lights like spaghetti—winding them around the tree from top to bottom in a single pass. This results in concentrated brightness along the outer edges while leaving the interior dark and hollow. A professionally layered tree avoids this by treating light as a three-dimensional medium.
Layering means placing lights at multiple depths: near the trunk, mid-branch, and outer tips. This builds volume and prevents shadow zones. It also allows light to reflect off tinsel, metallic ornaments, and glass baubles from within, creating internal sparkle rather than just surface shine.
“Light should come from inside the tree, not just sit on it.” — Marcus Bell, Lighting Designer & Holiday Display Consultant
The goal is uniformity—not uniform spacing, but consistent visual brightness across all angles. A well-layered tree looks equally impressive from the hallway, the living room sofa, or across the dining table.
Step-by-Step Guide to Layering Christmas Lights
Follow this detailed sequence to build professional-grade illumination. Allow 45–75 minutes depending on tree size. Work slowly and deliberately—rushing leads to clumping and gaps.
- Start with a bare tree: Remove all ornaments, garlands, and toppers. You need full access to branches.
- Choose the right lights: Use LED mini-lights with warm white tones (2700K–3000K). Cool whites create a clinical look; warm whites mimic candlelight. For a six-foot tree, plan for 600–900 bulbs (or 3–4 strands of 200-count).
- Begin at the base, work upward: Plug your first strand into an outlet nearby. Start at the lowest back branch near the trunk. Tuck the plug and part of the cord into the stand so it stays hidden later.
- Go deep first: Push lights toward the center of the tree, letting them emerge at natural intervals. Wrap around thicker limbs and snake through clusters. Think “weaving,” not “wrapping.”
- Use the hand-over-hand technique: With one hand inside the branch, guide the light strand outward. Place a bulb every 3–4 inches, adjusting based on branch density. Dense areas may need fewer; sparse sections require closer spacing.
- Move in a spiral pattern: Work upward in a clockwise or counterclockwise motion, circling the trunk. Shift position every few feet to maintain even distribution.
- Add a second layer: Once the first strand ends, begin the next not on the outside—but slightly offset inward. Overlap coverage subtly, filling any thin spots without doubling up visibly.
- Focus on the front third: While lights should circle the tree, emphasize the viewing side (usually facing the room). Add 20–30% more density here without making the back appear neglected.
- Test frequently: After each strand, plug in the lights to check for dead bulbs, flickering, or tangling. Fix issues immediately.
- Conceal connections: Use twist ties or floral wire to secure junctions between strands inside thick foliage. Never leave connectors exposed on outer tips.
Do’s and Don’ts of Light Placement
| Do | Don’t |
|---|---|
| Work from the inside out to build depth | Wrap lights only around the outer perimeter |
| Space bulbs evenly based on sightlines, not math | Place lights exactly 6 inches apart regardless of branch shape |
| Use warm white LEDs for a cozy, classic glow | Use multicolored or cool white lights as primary illumination |
| Weave lights along upper and lower sides of branches | Lay lights only on top of branches where they’re most visible |
| Overlap layers slightly to eliminate dark pockets | Leave large gaps between strands hoping ornaments will cover them |
| Secure loose ends and plugs within the trunk | Let cords dangle down the back or hang over the stand |
The difference between amateur and expert results often comes down to attention to detail in these small decisions. A single dangling wire or glaring gap can distract the eye from an otherwise beautiful tree.
Real Example: Transforming a Flat-Lit Tree
Sarah, a homeowner in Portland, had struggled for years with her pre-lit artificial tree looking dull and uninviting. She followed the manufacturer’s suggestion—simply turning it on—and supplemented with a single string of colored lights wrapped loosely around the outside. From a distance, it looked okay. Up close, the interior was nearly black, and the color mix clashed with her gold-and-crimson ornament scheme.
Last season, she decided to re-light the entire tree manually despite having built-in wiring. She removed the existing bulbs (which were unevenly spaced), then applied the layering method described above. Using four strands of warm white micro-lights, she spent two hours weaving them through the branches at varying depths. She focused extra coverage on the front and middle tiers, where the tree was most visible from her open-concept living space.
The result? A dramatic transformation. Friends remarked that the tree looked “expensive” and “like something from a hotel lobby.” More importantly, the light now reflected off her vintage mercury glass balls and copper stars, creating internal sparkle. The room felt warmer, and the tree served as a true focal point during evening gatherings.
Tips for Different Tree Types
Not all trees accept lights the same way. Adjust your layering strategy based on structure and material.
- Fir or Spruce (Real Trees): These have strong, flexible branches ideal for deep light insertion. Begin layering immediately after setting up—real trees dry out fast, and brittle needles make rewiring difficult later.
- Pine (Real Trees): Longer needles can hide wires well, but branches are fragile. Support limbs as you work and avoid overloading with heavy lights.
- Pre-lit Artificial Trees: Many suffer from poor bulb placement. Don’t assume factory lights are sufficient. Add supplemental strands using the layering method to fill voids and boost warmth.
- Slender or Corner Trees: With limited depth, focus on vertical layering—place lights at top, middle, and base levels along the front plane. Use smaller bulbs to avoid overwhelming narrow profiles.
- Flocked or Snow-Tipped Trees: Handle gently to preserve texture. Insert lights carefully to avoid knocking off flocking. Warm white enhances the snowy effect; avoid colored lights that distort the finish.
Essential Checklist: Pre-Lighting Preparation
Before touching a single strand, ensure you’re set up for success.
- ☐ Unpack and test all light strands—replace any with broken bulbs or frayed wires
- ☐ Choose warm white LEDs with consistent color temperature
- ☐ Have zip ties, floral wire, and scissors on hand for securing
- ☐ Clear floor space around the tree stand for mobility
- ☐ Confirm outlet access and use a surge-protected power strip
- ☐ Remove all decorations from the tree
- ☐ Fluff branches fully to reveal inner structure
- ☐ Plan your spiral direction (clockwise or counterclockwise) and stick to it
Skipping preparation leads to frustration and uneven results. Testing lights ahead of time avoids discovering dead strands halfway through the process.
FAQ: Common Questions About Tree Lighting
Can I mix different types of lights when layering?
You can, but it’s best to keep primary illumination uniform. Use one style (e.g., warm white mini-lights) for layering, then add specialty lights—like twinkle LEDs, rope lights, or vintage bulbs—as accents after ornaments are placed. Mixing styles during layering risks visual clutter.
How many strands do I need for a 7-foot tree?
A general rule is 100 lights per foot of tree height. For a 7-foot tree, that’s about 700 bulbs. If using 200-count strands, four strands (800 bulbs) will give you slight overlap and ensure full coverage. Adjust based on desired brightness and tree density.
Should I leave the lights on the tree after the holidays?
No. Remove lights carefully after taking down ornaments. Leaving them wound on the tree—especially artificial ones—can compress branches and create permanent indentations. Store lights on cardboard reels or spools to prevent tangling.
Final Touches and Ongoing Care
Once lights are layered, wait to add ornaments until you’ve done a final lighting review. View the tree in dim evening light from multiple angles. Walk around it completely. Look for hotspots (areas too bright) or caves (dark centers). Adjust by adding short filler strands if needed.
If using a tree topper like a star or angel, consider integrating a separate low-voltage light into it. Many designers use battery-operated fairy lights within crowns or wings to draw the eye upward without overpowering the rest of the display.
During the season, check lights weekly. LEDs rarely fail, but vibrations or pets can loosen connections. Keep spare bulbs and fuses on hand. Dust accumulation can reduce brightness—gently wipe cords with a dry microfiber cloth if needed.
“The best-lit trees don’t shout—they glow. It’s subtle, enveloping, and draws people in.” — Lena Ruiz, Interior Stylist & Seasonal Decor Author
Conclusion: Illuminate with Intention
A professional glow isn’t about luxury or budget—it’s about method. Anyone can achieve stunning Christmas tree lighting by shifting focus from speed to strategy. Layering transforms light from an afterthought into the foundation of your holiday aesthetic. It invites warmth into your space and sets the tone for celebration, reflection, and joy.
Take your time. Use the techniques outlined here. Test, adjust, refine. Your tree doesn’t need to be perfect—it needs to feel alive with light. When friends gather around it with mugs of cocoa, they won’t analyze your bulb spacing. They’ll simply feel its presence.


 浙公网安备
33010002000092号
浙公网安备
33010002000092号 浙B2-20120091-4
Comments
No comments yet. Why don't you start the discussion?