
Christmas lighting is more than decoration—it’s storytelling. A flat, single-string approach may illuminate your home, but it rarely inspires awe. The secret to a breathtaking holiday display lies in layering: combining different lengths, densities, and placements of lights to create dimension, rhythm, and emotional impact. When done thoughtfully, layered lighting draws the eye, evokes warmth, and turns your property into a seasonal destination.
This technique isn’t reserved for professional decorators or sprawling estates. With careful planning and attention to detail, any homeowner can achieve dramatic results using multiple strands of varying lengths. Whether you’re working with 25-foot incandescents, 50-light mini strings, or net lights for shrubs, strategic layering unlocks visual richness that simple outlining cannot match.
Why Layering Matters in Holiday Lighting
Flat lighting—where one uniform string traces rooflines or wraps trees—often lacks visual interest. It defines edges but doesn’t enhance volume or texture. In contrast, layered lighting mimics natural light behavior: highlights, shadows, depth, and movement. By incorporating multiple lengths and intensities, you simulate how sunlight filters through branches or how city lights glow from different elevations.
Consider architectural features. A two-story home has vertical lines, overhangs, dormers, and landscaping that respond differently to light. Shorter strands can accentuate eaves or window frames, while longer runs fill large surfaces like gables or fences. Combining them creates contrast—some areas densely lit, others subtly glowing—which guides attention and adds sophistication.
Light layering also allows for creative rhythm. Alternating dense clusters with sparse runs produces a dynamic pattern, much like musical phrasing. This variation prevents visual fatigue and keeps viewers engaged longer.
Step-by-Step Guide to Layering Light Lengths
Effective layering follows a sequence—not just of installation, but of intention. Begin with structure, then build texture, and finally add accents. Here’s how to execute it methodically.
- Assess Your Space: Walk around your property at dusk. Note high points (peaks, chimneys), mid-level features (windows, doors), and low elements (shrubs, walkways). Identify which areas naturally draw attention and which need enhancement.
- Plan by Zone: Divide your exterior into zones—roofline, façade, landscaping, entryway. Assign a primary and secondary lighting strategy to each. For example, the roofline might use long continuous runs as a base, with shorter icicle lights layered beneath for texture.
- Select Light Lengths Strategically: Purchase a mix of string lengths. Avoid relying solely on standard 25-foot sets. Supplement with 10-foot accent strands, 50-foot runs for perimeter wrapping, and 100-foot extension-compatible strings for large trees or fences.
- Install Base Layers First: Start with longer strings to establish continuity. Outline roof ridges, wrap pillars, or drape across wide bushes. These serve as the “canvas” for additional layers.
- Add Mid-Density Layers: Use medium-length strings (20–35 feet) to cross over or under base layers. On trees, weave these diagonally through branches. On walls, crisscross between anchor points to create a web-like effect.
- Finish with Accent Lighting: Apply short strings (10–15 feet) to highlight specific features—door frames, planters, or sculptures. Wrap banisters or tuck into wreaths. These act as punctuation marks in your lighting narrative.
- Test and Adjust: Turn off ambient lights and evaluate after dark. Look for balance. Are some areas too bright? Do shadows compete with highlights? Shift or remove strands as needed.
Matching Light Lengths to Common Features
Not all architectural or landscape elements demand the same treatment. The right length enhances form without overwhelming it. Below is a guide to pairing string lengths with typical outdoor features.
| Feature | Recommended String Length | Layering Purpose |
|---|---|---|
| Roof Ridge (20+ ft) | 50–100 ft continuous run | Base layer for linear continuity |
| Eaves / Overhangs | 25–50 ft with drip loops | Secondary contour highlighting |
| Medium Evergreen Tree | Three 25-ft strands per layer | Inner depth + outer glow |
| Window Frames | 10–15 ft per window | Accent framing |
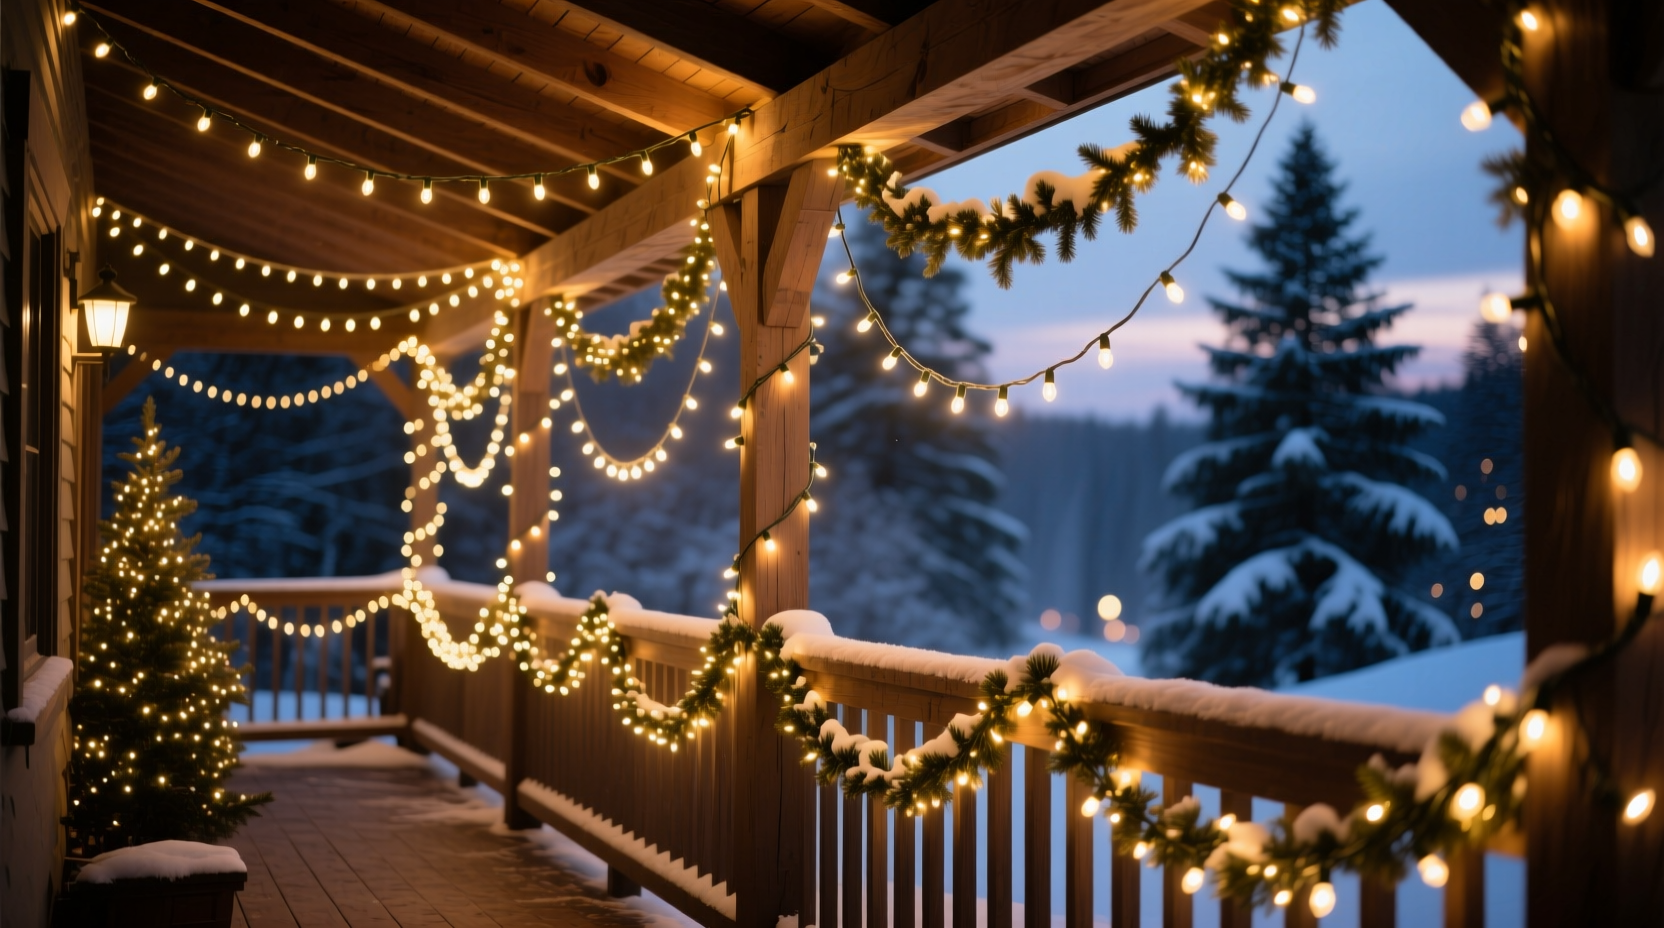
| Front Porch Railings | One 25-ft strand per 6 ft railing | Rhythm and safety illumination |
| Shrub Beds (3x3 ft) | 10-ft net lights or micro-strands | Ground-level texture |
Real Example: Transforming a Suburban Front Yard
Jamie, a homeowner in Portland, Oregon, had always used pre-lit garlands and a single string of white lights along her roofline. Her display was neat but forgettable. Last season, she decided to experiment with layering using mixed-length strings.
She began by installing a 75-foot warm white LED strand along the main roof ridge. Then, she added three 25-foot strings vertically down the gable, weaving them slightly to avoid rigidity. Around each window, she applied 12-foot mini-light rectangles, creating soft halos. In her juniper bushes, she placed 10-foot net lights, partially buried for a “glowing from within” effect. Finally, she draped a 50-foot string loosely across her front porch railing in a wave pattern.
The result was transformative. Neighbors commented that her house looked “professional,” and foot traffic increased during peak viewing hours. Jamie hadn’t used more lights—just better-placed ones. Her total wattage remained similar, but the perceived brightness and emotional impact grew exponentially due to layered depth.
Expert Insight: The Psychology of Layered Light
Professional lighting designer Marcus Bell, who has orchestrated displays for municipal holiday events across the Midwest, emphasizes the psychological power of layered lighting.
“People don’t just see layered lights—they feel them. Depth triggers subconscious recognition of space and safety. A well-layered display feels inviting because it mimics the complexity of natural environments. Single-line lighting feels artificial; layered lighting feels alive.” — Marcus Bell, Certified Lighting Designer (CLD)
Bell recommends a 3:2:1 ratio for effective layering: three parts long-run base lighting, two parts medium-density cross layers, and one part short accent lighting. This proportion ensures dominance without clutter.
Checklist: Pre-Layering Preparation
Before hanging a single bulb, complete this checklist to ensure success:
- ☐ Inventory all light strings by length and color temperature
- ☐ Test every strand for burnt bulbs or faulty connections
- ☐ Measure key architectural dimensions (e.g., roofline, tree height)
- ☐ Sketch a rough layout indicating where each length will go
- ☐ Purchase necessary clips, stakes, and waterproof connectors
- ☐ Confirm GFCI-protected outlet access and circuit capacity
- ☐ Schedule installation on a dry, wind-free day
Avoiding Common Layering Mistakes
Even with good intentions, many homeowners undermine their efforts through preventable errors. Awareness is the first step toward refinement.
One frequent issue is overloading a single area. Clumping multiple long strings on a tree trunk or crowding lights around the front door creates a “hotspot” that distracts from the rest of the display. Balance is essential—distribute intensity evenly across your property.
Another mistake is ignoring color consistency. Mixing cool white (5000K) with warm white (2700K) across layers introduces visual discord. Choose one color temperature per project, or intentionally transition from warm (near entry) to cool (outer perimeter) for directional effect.
Finally, neglecting scale leads to mismatched impact. A 100-foot string on a tiny shrub overwhelms; a 10-foot string on a tall pine disappears. Match the energy of the light to the mass of the object.
Frequently Asked Questions
Can I layer different types of lights (e.g., C9s with mini lights)?
Yes, but do so intentionally. Combine larger bulbs (C7/C9) as base layers on strong architectural lines, and use mini lights for intricate detailing. Avoid mixing within the same feature unless creating a deliberate contrast, such as a mini-light halo inside a C9 outline.
How do I prevent tangled wires when layering?
Use cable management clips and route cords vertically before connecting. Coil excess neatly behind fixtures or under mulch. Label each string at the plug end during installation to simplify removal later.
Is it safe to layer lights on live trees or plants?
Yes, if using low-heat LEDs and avoiding tight wraps that restrict growth. Check annually for embedded wires. Use adjustable straps instead of twisting lights directly around trunks or branches.
Conclusion: Elevate Your Holiday Presence
Layering different lengths of Christmas lights isn’t about excess—it’s about expression. Each added strand, when placed with purpose, contributes to a richer visual story. Depth transforms decoration into art; drama turns houses into homes filled with wonder.
Start small. Pick one area—a porch, a tree, a garden path—and apply the principles of base, mid, and accent layers. Observe how shadows shift and highlights emerge. Refine year after year. Soon, your lighting won’t just mark the season—it will define it for everyone who passes by.


 浙公网安备
33010002000092号
浙公网安备
33010002000092号 浙B2-20120091-4
Comments
No comments yet. Why don't you start the discussion?