
A well-decorated staircase transforms a home’s entryway into a statement of warmth, intention, and seasonal grace. Yet many homeowners struggle with cluttered arrangements, uneven lighting, or garlands that slip, sag, or overwhelm the architecture. Layering isn’t about adding more—it’s about orchestrating rhythm, contrast, and proportion so each element supports the next. This guide distills proven techniques used by professional interior stylists, set designers, and architectural decorators who install staircase greenery for high-end residences and boutique hotels. You’ll learn not just *how* to attach garlands and lights—but *why* certain placements create visual lift, how light temperature affects perceived scale, and how to work safely and sustainably with real and faux botanicals.
Understand Your Staircase Architecture First
Before selecting materials or turning on a string of lights, spend five minutes observing your staircase as a three-dimensional design canvas. Note its defining features: is it straight-run, L-shaped, or curved? Are the balusters evenly spaced wood spindles, wrought iron, or glass panels? Does the handrail slope gently or rise steeply? These details determine everything—from where garland weight must be anchored to how far lights can extend without creating glare or tripping hazards.
Architectural historian and residential stylist Maya Lin observes:
“A staircase is the spine of a home’s vertical circulation—and its decoration should honor that structural dignity. Overloading the rail or hiding the balusters erases rhythm. The most impactful installations don’t shout; they frame.”
Measure key dimensions: total linear feet along the handrail (not the tread), height from floor to top of handrail at mid-landing (if applicable), and spacing between balusters. For safety compliance, ensure any draped element stays at least 3 inches clear of treads and never obstructs the handrail’s functional grip zone. If your staircase serves as a primary egress route—or has young children or elderly residents—prioritize low-profile anchoring and UL-listed LED lights only.
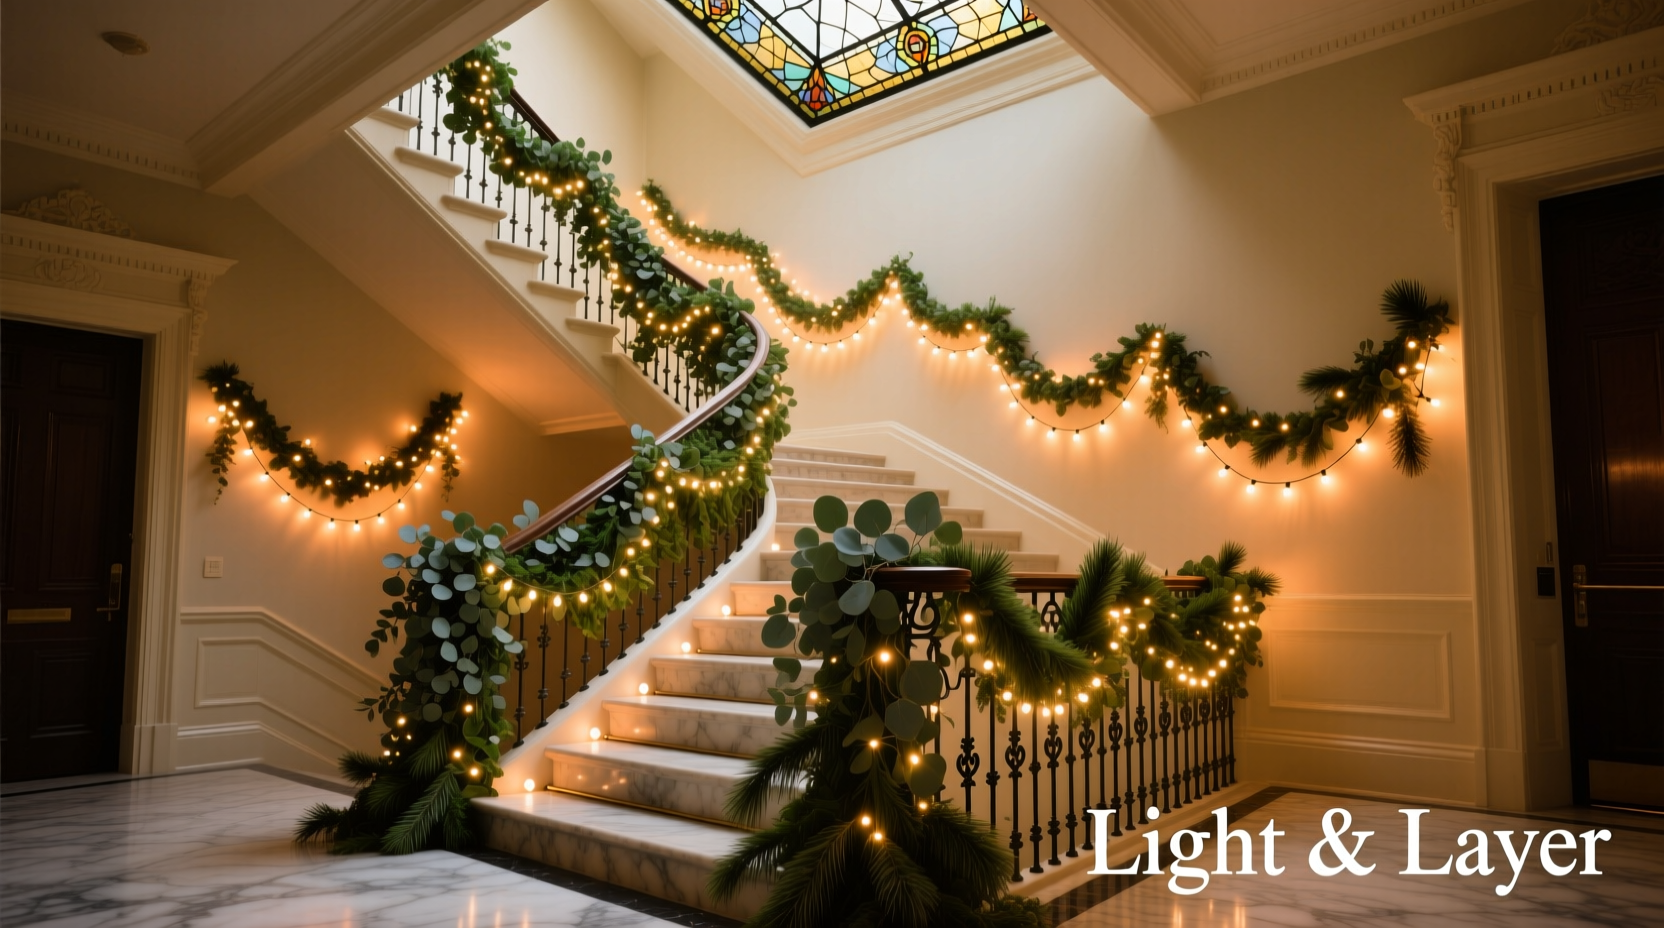
The Layering Framework: Three Distinct Visual Zones
Professional installers divide staircase decor into three intentional zones—not by height, but by function and eye-level emphasis:
- Zone 1 (Base & Structure): Balusters and newel posts — this is where texture and grounding occur. Think wrapped ribbon, small pinecones, or miniature ornaments tied at intervals.
- Zone 2 (Midline & Flow): The handrail itself — the dominant horizontal line where garlands live. This zone carries movement and continuity.
- Zone 3 (Crown & Accent): The top of the newel post, underside of landings, or ceiling above the stairwell — reserved for focused highlights like clusters of battery-operated candles, hanging crystals, or directional uplighting.
This zonal approach prevents visual competition. A dense garland on the rail won’t compete with delicate accents on the newel if each occupies its own spatial tier. It also simplifies troubleshooting: if the overall look feels “heavy,” you know to lighten Zone 2 before adjusting Zone 1.
Step-by-Step Installation Sequence (With Timing Notes)
Follow this precise order—not chronologically, but hierarchically—to avoid rework and ensure structural integrity:
- Prep & Safety Check (15–20 min): Test all lights for functionality and inspect cords for fraying. Verify ladder stability and use a spotter if working above 6 feet. Remove dust/debris from balusters and rails with microfiber cloth.
- Anchor Points First (10 min): Install discreet hooks, cup hooks, or adhesive-backed command strips at every third baluster (or every 18–24 inches on open-rail designs). Space them 2–3 inches below the top of the handrail to allow garland drape without slipping.
- Garland Base Layer (25–40 min): Drape your primary garland (real cedar, faux boxwood, or mixed eucalyptus) loosely along the rail, letting it rest naturally in the anchor points. Do *not* secure yet. Adjust loops, curves, and density until the silhouette reads smooth—not stiff or lumpy.
- Light Integration (20–30 min): Weave warm-white (2700K–3000K) LED mini-lights *underneath* the garland first, securing with floral wire or twist ties at anchor points. Then lay a second, lighter strand *on top*, partially nestling into foliage. Avoid wrapping lights tightly around stems—they generate heat and accelerate drying in fresh greens.
- Finishing Accents (15 min): Add ribbon bows, dried orange slices, cinnamon sticks, or velvet ornaments—only at anchor points and newel posts. Never attach heavy items directly to garland stems; they pull downward and distort shape.
Timing matters: installing lights *before* final garland securing lets you hide cord paths and adjust brightness without disturbing botanical placement. Rushing to “finish” the garland first often leads to awkward light gaps or visible wires.
Do’s and Don’ts: A Practical Comparison Table
| Action | Do | Don’t |
|---|---|---|
| Garland Selection | Choose flexible, pliable garlands with wired stems for easy shaping and secure anchoring. | Use rigid, brittle garlands (e.g., thick magnolia or un-wired holly) that resist bending and snap under tension. |
| Light Placement | Layer lights in two strands—one beneath (for ambient glow), one atop (for sparkle)—using warm-white LEDs only. | Drape multicolor or cool-white lights across the entire rail; they create visual noise and make wood tones appear colder. |
| Anchoring Method | Use floral wire, zip ties rated for indoor use, or removable adhesive hooks—tested for weight capacity. | Rely solely on hot glue, tape, or suction cups—they fail under humidity, temperature shifts, or garland weight. |
| Safety Margin | Keep all elements at least 3 inches above stair treads and fully clear of handrail gripping surface. | Allow garland tails or ribbon ends to drape over the edge—creates tripping hazard and violates fire code in multi-family dwellings. |
| Maintenance | For fresh garlands: mist stems lightly every 48 hours and keep away from heating vents. | Spray entire garland with water or glycerin solution—causes mold, attracts pests, and warps wood finishes. |
Real-World Case Study: The Narrow Colonial Staircase
In a 1920s Boston townhouse, homeowner Lena R. faced a classic challenge: a steep, narrow staircase with closely spaced turned-wood balusters and no landing. Initial attempts resulted in a “green wall” effect—garland bunched tightly, lights tangled, and the rail nearly invisible. She consulted with stylist Aris Thorne of Hearth & Line Studio, who applied zonal layering with precision adjustments:
- Removed 30% of the original garland length to avoid overcrowding the tight curve.
- Used only 1-inch-wide velvet ribbon (burgundy, matte finish) tied at every fourth baluster—no bows, just clean knots.
- Installed 100-count warm-white micro-LEDs *under* the garland, then added just 30 larger “pearl” bulbs *on top*, spaced 12 inches apart for rhythm—not uniformity.
- Left the newel post bare except for a single brass candleholder holding an unscented ivory pillar candle.
The result? A staircase that felt taller, calmer, and intentionally curated—not decorated. Neighbors reported “feeling the air change” when entering. More importantly, the installation remained secure for six weeks with zero slippage or maintenance calls. The lesson: restraint, repetition, and respect for architectural scale outperform density every time.
Essential Tools & Materials Checklist
Gather these *before* beginning—not as optional extras, but as non-negotiable components of a professional-grade installation:
- UL-listed LED mini-lights (warm-white, 2700K, with end-to-end connectors)
- Flexible garland with wired stem (minimum 10 ft per linear foot of rail)
- Floral wire (22-gauge, green) or reusable zip ties (6-inch, low-profile)
- Microfiber cloths and soft-bristle brush (for pre-cleaning)
- Sturdy step ladder with platform (never stand on top two rungs)
- Painter’s tape and fine-tip marker (for layout planning)
- Small wire cutters and needle-nose pliers
- Battery-operated timer (to automate lights and reduce energy use)
Frequently Asked Questions
How do I prevent garland from slipping on a smooth metal or glass rail?
Smooth surfaces require mechanical grip—not adhesives. Wrap thin strips of rubberized shelf liner around anchor points before attaching garland. Alternatively, use small C-clamps fitted with felt pads (tightened just enough to hold, not mar). For glass rails, apply double-sided adhesive mounting squares *only to the baluster side*, then loop garland through them—never directly onto glass.
Can I mix real and faux greenery on the same staircase?
Yes—but only if textures and color temperatures align. Pair fresh cedar with high-fidelity faux eucalyptus (matte, sage-green, slightly dusty), not glossy plastic pine. Never mix real greens with bright emerald faux spruce—the contrast reads artificial and cheapens both. Also, limit fresh greens to Zone 2 only; their weight and moisture make them unsuitable for upper-zone accents.
How long will a professionally layered staircase display last?
Faux garlands with quality UV-resistant foliage retain shape and color for 5+ years with proper off-season storage (cool, dry, flat, covered in breathable cotton bags). Fresh garlands last 3–4 weeks with misting and airflow—but their impact peaks in week one. For maximum longevity and impact, install faux as the base layer, then refresh with seasonal accents (dried florals in fall, white berries in winter) that can be swapped annually.
Conclusion: Your Staircase Is a Canvas—Not a Checklist
Layering garlands and lights isn’t about checking boxes or replicating Instagram trends. It’s about reading your home’s language—the pitch of its stairs, the grain of its wood, the way light falls at 4 p.m. in December—and responding with intention. When done well, the staircase becomes a quiet invitation: to pause, to ascend with presence, to feel the season not as decoration, but as atmosphere. You don’t need expensive materials or a decorator’s budget—just observation, patience, and respect for structure.
Start small. Try one section of your rail this weekend. Use the tape-and-assess method. Notice how light moves across the banister at different times of day. Adjust one element—not ten—and see what changes. That’s where true impact begins: not in abundance, but in attention.


 浙公网安备
33010002000092号
浙公网安备
33010002000092号 浙B2-20120091-4
Comments
No comments yet. Why don't you start the discussion?