
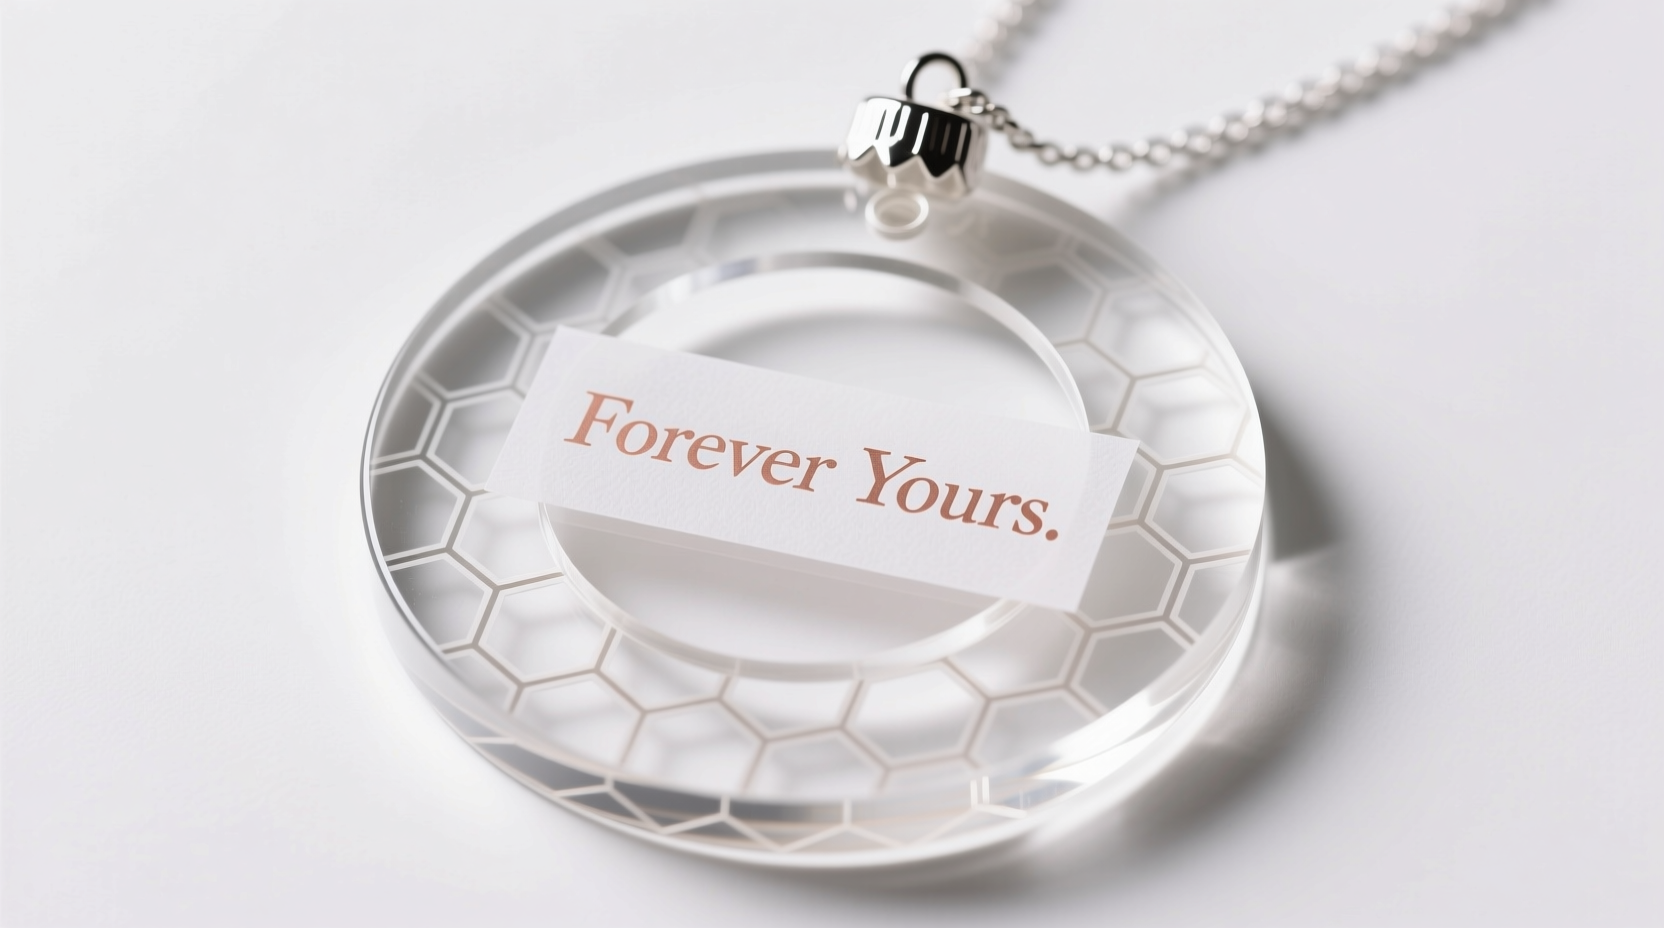
Personalized decor has become a hallmark of thoughtful gifting and meaningful home styling. Among the most elegant and versatile options are transparent acrylic ornaments layered with printed vellum inserts. These delicate yet durable pieces combine modern materials with timeless craftsmanship, allowing you to embed custom messages, names, dates, or artwork in a way that feels both intimate and refined. Whether for weddings, holidays, memorials, or milestone celebrations, this technique offers endless creative potential.
The process hinges on three core elements: clarity of design, precision in assembly, and durability in finishing. When executed well, the result is a luminous, multi-dimensional ornament where light passes through the acrylic, softly illuminating the vellum’s printed details. The contrast between the crisp transparency of the outer shell and the soft opacity of the insert creates visual depth without clutter.
Selecting the Right Materials
Success begins with choosing high-quality components. Not all acrylics or vellums behave the same under printing and layering conditions. Understanding material properties ensures longevity and aesthetic appeal.
Acrylic Ornaments: Opt for laser-cut, transparent acrylic blanks with a flat profile and pre-drilled hanging holes. Shapes vary—circles, hearts, stars, and ovals are common—but consistency in thickness (ideally 3mm) ensures even spacing when layered. Look for scratch-resistant, optically clear acrylic to maximize light transmission.
Vellum Paper: True vellum is a translucent fiber-based paper, not synthetic tracing paper. It should be printer-safe (compatible with inkjet or laser printers depending on your setup) and have a slight tooth to hold ink without bleeding. A weight between 50–70 lb (140–190 gsm) provides enough body to stay in place while remaining thin enough to fit inside the ornament cavity.
Adhesives: Avoid liquid glues that can warp vellum or leave visible residue. Double-sided tape with low tack or repositionable adhesive dots work best. For permanent bonds, use ultra-thin glue runners designed for delicate papers.
Designing and Printing Custom Messages
The message is the soul of the ornament. Whether it's “Baby’s First Christmas,” “In Loving Memory of Grandpa James,” or “Est. 2024,” the text must be legible, emotionally resonant, and visually balanced within the frame.
Use graphic design software like Adobe Illustrator, Canva, or Affinity Designer to create your layout. Set your canvas size to match the interior dimensions of the acrylic ornament, subtracting 2–3 mm from each side to allow for easy insertion and prevent edge overlap. Center-align text unless creating a deliberate asymmetry.
Font choice matters. Serif fonts like Garamond or Playfair Display lend elegance; sans-serifs like Montserrat or Lato offer modern clarity. Avoid overly thin strokes—they may disappear when printed at small sizes. Use a minimum font size of 10 pt for readability, adjusting based on ornament scale.
For photos or illustrations, ensure they are high-resolution (300 DPI) and converted to grayscale or black-and-white to maintain contrast against the vellum’s translucency. Consider adding subtle borders or frames in light gray to ground the composition without overpowering it.
When printing, feed vellum sheets slowly through the printer, ideally one at a time, to avoid jams. Place a sheet of cardstock behind the vellum in the tray to provide support. Let prints dry completely—especially with inkjet printers—to prevent smudging during handling.
“Customization transforms ordinary objects into emotional artifacts. A name, date, or short phrase can carry decades of meaning.” — Lena Torres, Textile & Keepsake Designer
Step-by-Step Assembly Process
Layering requires patience and precision. Follow this sequence to achieve clean, professional results every time.
- Prepare your workspace: Lay out a lint-free cloth or silicone mat to protect acrylic surfaces from scratches.
- Clean the acrylic pieces: Wipe both inner and outer surfaces with a microfiber cloth and isopropyl alcohol to remove oils and dust.
- Cut the vellum insert: Trim the printed vellum to fit snugly within the inner rim of the front acrylic piece, ensuring it won’t peek out from the edges.
- Apply adhesive: Place two small dots of repositionable glue or a strip of double-sided tape along the back inner edge of the front acrylic piece. Do not cover the entire surface—this allows air to escape and prevents bubbling.
- Attach the vellum: Carefully position the vellum onto the adhesive, pressing gently from center to edges to smooth out wrinkles.
- Align and close: Place the back acrylic piece over the assembly, aligning the edges perfectly. Apply light pressure around the perimeter to secure the bond.
- Add finishing touches: Thread a satin ribbon, leather cord, or tassel through the hanging hole. Knot securely and trim excess.
Do’s and Don’ts: Best Practices Summary
| Do | Don’t |
|---|---|
| Use optical clarity acrylic for maximum transparency | Use colored or frosted acrylic if you want sharp text definition |
| Print test designs on copy paper first | Assume all vellum brands feed the same in printers |
| Allow printed vellum to dry for 10–15 minutes before handling | Touch the printed surface with bare fingers—oils can smear ink |
| Store finished ornaments in soft pouches or divided boxes | Stack them loosely where edges can chip |
| Include a protective liner between layers during shipping | Seal in plastic without padding—condensation can damage vellum |
Real Example: A Wedding Favors Project
Sophie Chen was tasked with creating favors for her sister’s outdoor wedding in Napa Valley. She wanted guests to take home something personal but not wasteful. Her solution: circular acrylic ornaments (6 cm diameter) with vellum inserts featuring the couple’s names, wedding date, and a watercolor-style vineyard illustration.
She used a laser-cut acrylic supplier for consistent sizing and printed the vellum inserts on 65 lb translucent stock using a pigment-based inkjet printer. To speed up production, she created a jig from cardboard with a cutout matching the ornament size—this allowed her to align each vellum piece quickly before applying adhesive.
The final touch was a sage-green silk ribbon threaded through each ornament, tied into a loop. Guests hung them from rearview mirrors or displayed them on windowsills. Months later, Sophie received messages from attendees saying they still had the ornaments up—a testament to their lasting impact.
Expert Tips for Longevity and Presentation
These ornaments aren’t just decorative—they’re often sentimental. Ensuring they endure means considering environmental factors and user experience.
- UV Protection: If displaying near windows, consider applying a UV-protective spray to the vellum before insertion. This helps prevent fading, especially for inkjet prints.
- Dust Resistance: Fully sealed edges (achieved through tight-fitting backs or perimeter adhesive) reduce dust accumulation inside the ornament.
- Gifting Packaging: Present each ornament in a clear cellophane sleeve with a thank-you tag. For premium presentation, use rigid kraft boxes lined with cotton wool.
- Bulk Production: When making more than 20 units, batch tasks: print all vellum first, then clean all acrylics, then assemble in stages. This minimizes errors and increases efficiency.
Frequently Asked Questions
Can I reuse the acrylic ornaments?
Yes, if assembled with removable adhesive or magnetic closures. Standard glued versions are typically permanent, but you can design future projects with snap-in or screw-post mechanisms for interchangeability.
What printer settings work best for vellum?
Use \"transparency\" or \"heavy paper\" mode. For inkjet printers, select high quality and manual feed tray. Turn off fast-dry settings that apply excessive heat, which can curl thin vellum.
Are these ornaments safe for outdoor use?
Short-term exposure is fine, but prolonged sunlight and moisture can degrade ink and cause warping. They are best suited for indoor display or sheltered areas like covered patios.
Checklist: Creating Your First Layered Ornament
- Choose ornament shape and size (e.g., 5–7 cm diameter)
- Select compatible vellum paper (printer-safe, 50–70 lb)
- Design message/layout with proper margins and readable fonts
- Test print on regular paper for alignment
- Print final version on vellum; let dry completely
- Cut vellum to fit inner dimension of acrylic
- Clean acrylic pieces with microfiber and alcohol
- Apply minimal adhesive to front acrylic rim
- Attach vellum smoothly, avoiding bubbles or wrinkles
- Secure back acrylic plate with even pressure
- Add ribbon or cord for hanging
- Pack carefully for storage or gifting
Conclusion: Craft Meaning That Lasts
Layering transparent acrylic ornaments with printed vellum inserts bridges the gap between industrial precision and handmade warmth. Each piece becomes a vessel for memory—whether celebrating joy, honoring loss, or marking a new beginning. The technique is accessible to beginners but refined enough for artisans and small business creators alike.
With attention to detail, the right tools, and a clear vision, you can produce heirloom-quality keepsakes that resonate far beyond the moment they’re given. Start small, experiment with typography and textures, and let your messages carry the weight of what truly matters.


 浙公网安备
33010002000092号
浙公网安备
33010002000092号 浙B2-20120091-4
Comments
No comments yet. Why don't you start the discussion?