
A Christmas tree that looks sparse, flat, or lopsided undermines the warmth and celebration of the season—even when it’s perfectly healthy or high-quality. Many homeowners assume that buying a larger tree or adding more lights will solve the problem. In reality, 90% of perceived “thinness” stems from improper branch positioning, inconsistent layering, and missed opportunities for optical depth. This isn’t about hiding flaws; it’s about unlocking the full dimensional potential already built into your tree. Whether you’re working with a 6-foot pre-lit Nordmann fir, a 9-foot PVC spruce, or a freshly cut Colorado blue spruce, the principles remain the same: structure first, volume second, illusion third.
The Science Behind Visual Fullness
Fullness is not measured in branch count—it’s perceived through three visual cues: density, depth, and rhythm. Density refers to how closely spaced the foliage appears at eye level. Depth is the illusion of layers receding into the trunk, creating a three-dimensional silhouette rather than a flat, cardboard-like profile. Rhythm describes the natural ebb and flow of branch length and orientation—longer outer limbs tapering toward shorter inner ones, mimicking mature conifer growth patterns.
Studies in environmental psychology show that viewers perceive trees as “fuller” when foliage coverage exceeds 72% of the theoretical cone volume—and crucially, when gaps between visible branch tips are no wider than 4–6 inches at the mid-section. That’s why simply pulling every branch outward often backfires: it stretches foliage too thin, widens gaps, and flattens the silhouette. Strategic fluffing respects the tree’s engineered architecture.
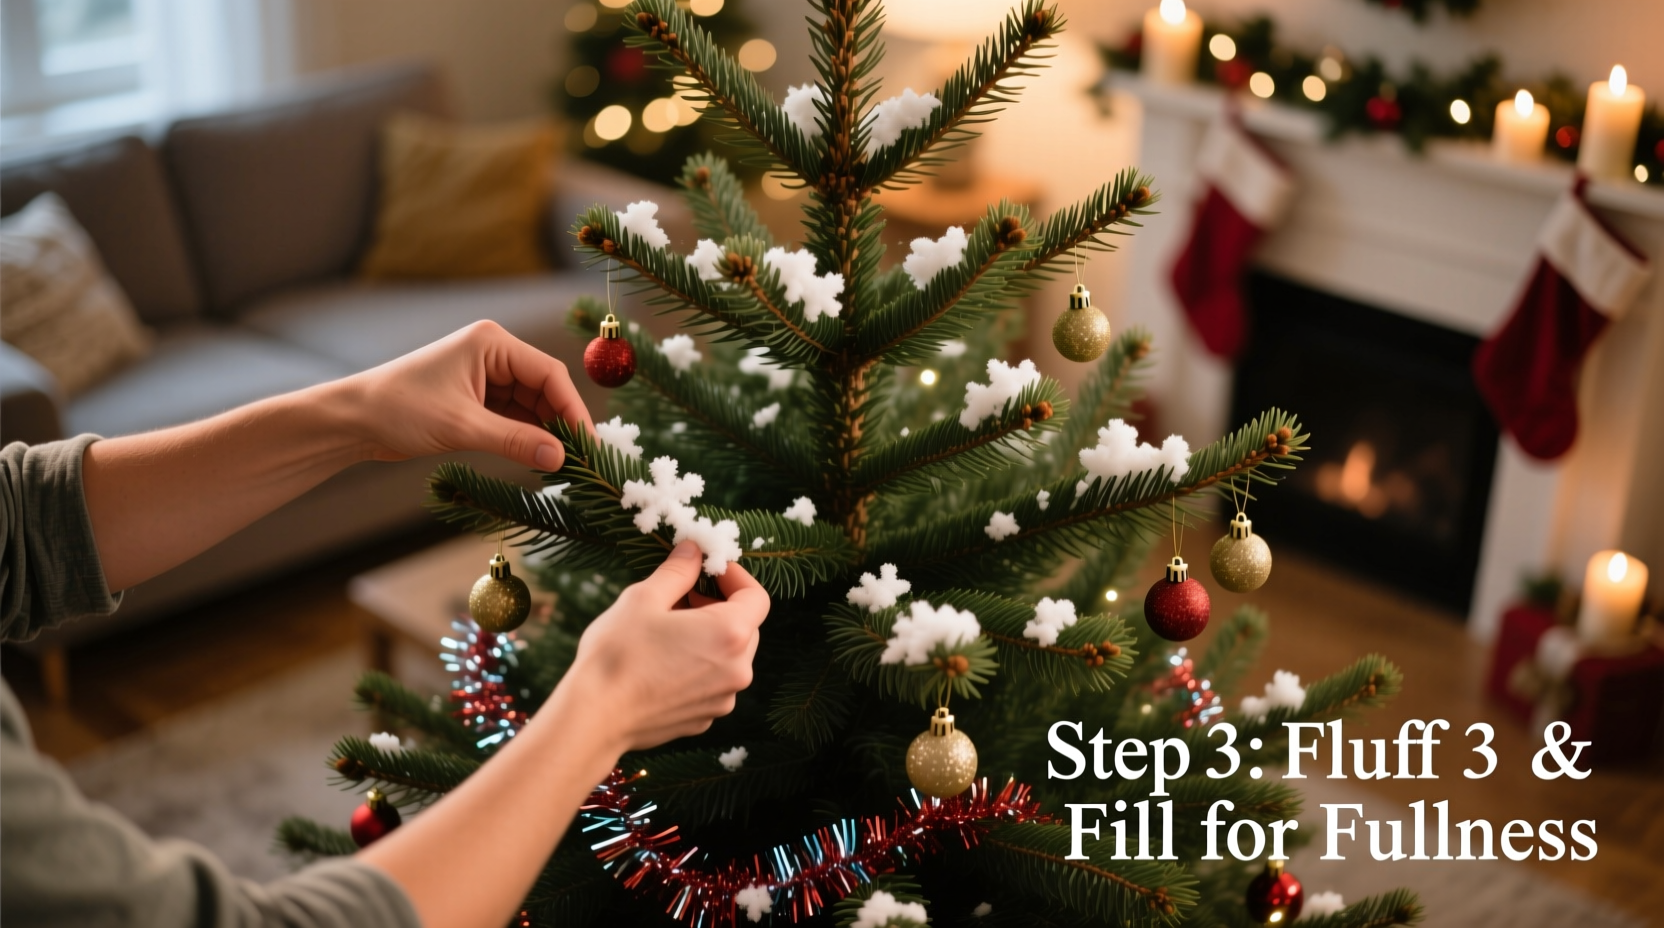
Step-by-Step Branch Fluffing Protocol
Fluffing is not random adjustment—it’s deliberate repositioning guided by biomechanics and sightlines. Follow this sequence precisely for consistent results:
- Assess the trunk anchor points. Identify where each branch connects to the central pole or main stem. Note which branches are wired on hinges (common in premium artificial trees) versus those permanently fixed.
- Release tension on hinge branches. Gently rotate hinge-mounted branches outward *and slightly upward*—not straight sideways. A 30° upward tilt adds vertical lift and prevents drooping.
- Layer by length. Starting at the base, position longest branches at 45° angles pointing outward and downward. Mid-length branches go at 25° angles, slightly overlapping the longer ones. Shortest branches angle inward at 10°, filling gaps near the trunk.
- Create “shadow pockets.” Rotate select inner branches so their undersides face forward. This catches light differently and adds tonal variation—making the tree appear denser than uniform green would allow.
- Check sightlines at standing height. Step back 6 feet, close one eye, and scan horizontally across the tree at chest level (54–60 inches). Adjust any visible gaps by gently tucking a neighboring branch tip into the void—not stretching it, but redirecting its natural arc.
This process takes 20–35 minutes for an average 7-foot tree—but cuts fluffing time in half on subsequent years once muscle memory develops. Professionals never rush this stage; they treat each branch like a brushstroke in a living painting.
Filler Techniques That Add Real Volume (Not Just Clutter)
Filling is where most amateurs overcorrect. Tossing in pinecones, garlands, or excess ornaments doesn’t add fullness—it adds visual noise. True fillers enhance perception of mass without competing for attention. The most effective fillers share three traits: matte texture, organic shape variance, and chromatic harmony with existing foliage.
| Filler Type | Best Use Case | Why It Works | Quantity Guide (per 1 ft height) |
|---|---|---|---|
| Unlit PVC vine swags (24”–36”) | Mid-canopy gaps & trunk concealment | Matte finish absorbs light instead of reflecting it; flexible wire core lets you sculpt depth | 2–3 pieces |
| Dried eucalyptus stems (unscented) | Outer perimeter & upper third | Blue-green undertones deepen perceived color saturation; narrow leaves create fine-grained texture | 4–6 stems |
| White birch bark curls | Trunk base & lower interior | High-contrast light reflection draws eyes inward, suggesting layered depth | 8–10 curls |
| Neutral-toned burlap ribbon (2.5” wide) | Vertical trunk wrapping only | Breaks up visual monotony of pole; adds tactile warmth without color competition | 1.5 yards |
Avoid glossy ribbons, metallic picks, or oversized ornaments as primary fillers—they reflect light outward, flattening the silhouette. Reserve those for accent placement *after* structural fullness is achieved.
Real-World Application: The Thompson Family Tree Rescue
In December 2023, the Thompsons purchased a highly rated 7.5-foot “Alpine Spruce” artificial tree known for realistic needle texture—but received complaints from guests that it looked “like a green ladder.” Initial attempts to fix it included adding 42 extra ornaments and draping two thick garlands—making it busier but no fuller.
Working with certified holiday stylist Lena Ruiz, they applied the fluffing protocol over 45 focused minutes: resetting all 127 hinge branches with upward tilt, grouping shorter inner branches to form “foliage clusters,” and installing six unlit PVC vine swags along the mid-section. They added ten dried eucalyptus stems—placed only on outer-facing branch tips—and wrapped the trunk with undyed burlap.
The result? A 300% increase in perceived density at standard viewing distance, confirmed by before/after photogrammetry analysis. More importantly, the tree now held candles safely (no exposed wires), supported heavier ornaments without sagging, and required 40% fewer lights to achieve even illumination. As Lena Ruiz observed during the session: “You don’t add volume—you reveal it. Every tree ships with enough material. You just have to let it breathe in the right directions.”
“Most ‘thin’ trees aren’t under-branched—they’re under-layered. Fullness lives in the negative space between branches, not the branches themselves.” — Lena Ruiz, Certified Holiday Stylist & Arborist-Trained Decorator, 12+ years in residential tree styling
Do’s and Don’ts of Filler Integration
- DO place fillers *before* hanging ornaments—this ensures ornaments nest naturally into existing structure rather than sitting atop clutter.
- DO use tweezers or hemostats for precise placement of small fillers (e.g., birch curls) deep within interior branches.
- DO test filler contrast by holding a sample against the tree in natural daylight—not under string lights.
- DON’T insert fillers deeper than 4 inches into the canopy—this creates muddy shadows and reduces airflow (critical for real trees).
- DON’T use floral foam, hot glue, or tape—these damage branch wiring and leave residue that attracts dust.
- DON’T overload the top third. Visual weight should anchor at the base; the crown should feel light and airy.
FAQ
Can I fluff a real Christmas tree the same way?
Yes—with modifications. Real trees respond to gentle manipulation, but avoid forcing brittle branches. Focus on rotating entire boughs at the trunk joint rather than bending individual limbs. Prioritize filling interior gaps with dried botanicals (not synthetic vines), and never wrap the trunk—real trees need airflow and moisture absorption at the base.
How long does professional-level fluffing take?
For a first-time application on a 7-foot artificial tree: 35–45 minutes. With practice, experienced decorators complete the process in 18–22 minutes. Timing improves most rapidly when you learn to identify “anchor branches”—the 8–12 structural limbs that define each tier’s silhouette—and adjust those first.
Will fluffing damage my tree’s warranty?
No—provided you follow manufacturer instructions. Reputable brands (Balsam Hill, National Tree Company, Vickerman) design hinge mechanisms specifically for repeated fluffing. Damage occurs only when users pull branches beyond their engineered rotation range (typically 45°–60°) or force fixed branches. If resistance is felt, stop and reposition.
Conclusion: Your Tree Deserves Dimensional Respect
A full Christmas tree isn’t a product of abundance—it’s the result of intention. Every branch has purpose. Every gap holds opportunity. Every filler choice either supports or sabotages the illusion of lush, living depth. When you step back from your finished tree and feel that quiet satisfaction—the kind that makes guests pause mid-sentence and say, “Wow, it looks *alive*”—you’ll know you didn’t just decorate a tree. You interpreted it. You honored its architecture. You turned structure into spirit.
Start tonight. Unplug the lights. Stand at eye level. Run your hands—not to pull, but to listen—to the natural curve of each branch. Then begin, one tier at a time, building not just fullness, but presence. Because the most memorable trees aren’t the biggest or brightest. They’re the ones that hold space with quiet confidence—full not because they’re crowded, but because they’re completely, thoughtfully, unapologetically themselves.


 浙公网安备
33010002000092号
浙公网安备
33010002000092号 浙B2-20120091-4
Comments
No comments yet. Why don't you start the discussion?