
As the holiday season approaches, many seek meaningful ways to build anticipation while reducing waste. A handmade advent calendar offers both charm and sustainability—especially when crafted from materials already in your home. Repurposing old gift boxes into a lighted advent display combines creativity, environmental mindfulness, and festive spirit. This guide walks through every step of transforming forgotten packaging into a glowing centerpiece that brings joy each December.
Unlike store-bought calendars, this version allows full customization in size, design, and contents. Whether you're crafting for children, gifting to a loved one, or adding warmth to your own home decor, integrating soft LED lighting elevates the experience with a magical glow. More than just a countdown tool, it becomes a conversation piece—a testament to thoughtful making and resourceful reuse.
Gather Your Materials Thoughtfully
The foundation of any successful DIY project lies in preparation. For this advent calendar, sourcing begins not at the store but within your own space. Gift boxes accumulate quickly during holidays, often discarded after one use. Instead, save sturdy ones throughout the year—shoeboxes, cosmetic containers, small shipping boxes—with consistent depth and clean surfaces.
Beyond boxes, consider what lighting will best suit your vision. Battery-operated fairy lights are ideal: safe, flexible, and available in warm white or multicolor options. Choose string lights with replaceable batteries to ensure longevity beyond a single season. Each box will eventually hold a surprise—small toys, handwritten notes, tea sachets, chocolates, or mini ornaments—so think ahead about what fits comfortably inside your chosen containers.
Essential Supplies Checklist
- 24–25 small to medium-sized gift boxes (uniform size recommended)
- Scissors or craft knife
- Glue gun or strong double-sided tape
- Pencil and ruler
- Decorative paper, fabric scraps, or paint
- Number stickers or printable numerals (1–24)
- Battery-powered LED fairy lights (at least 2–3 strands)
- Small surprises or treats for each day
- Hanging mechanism: ribbon, twine, or picture wire
- Optional: clear cellophane sheets for window fronts
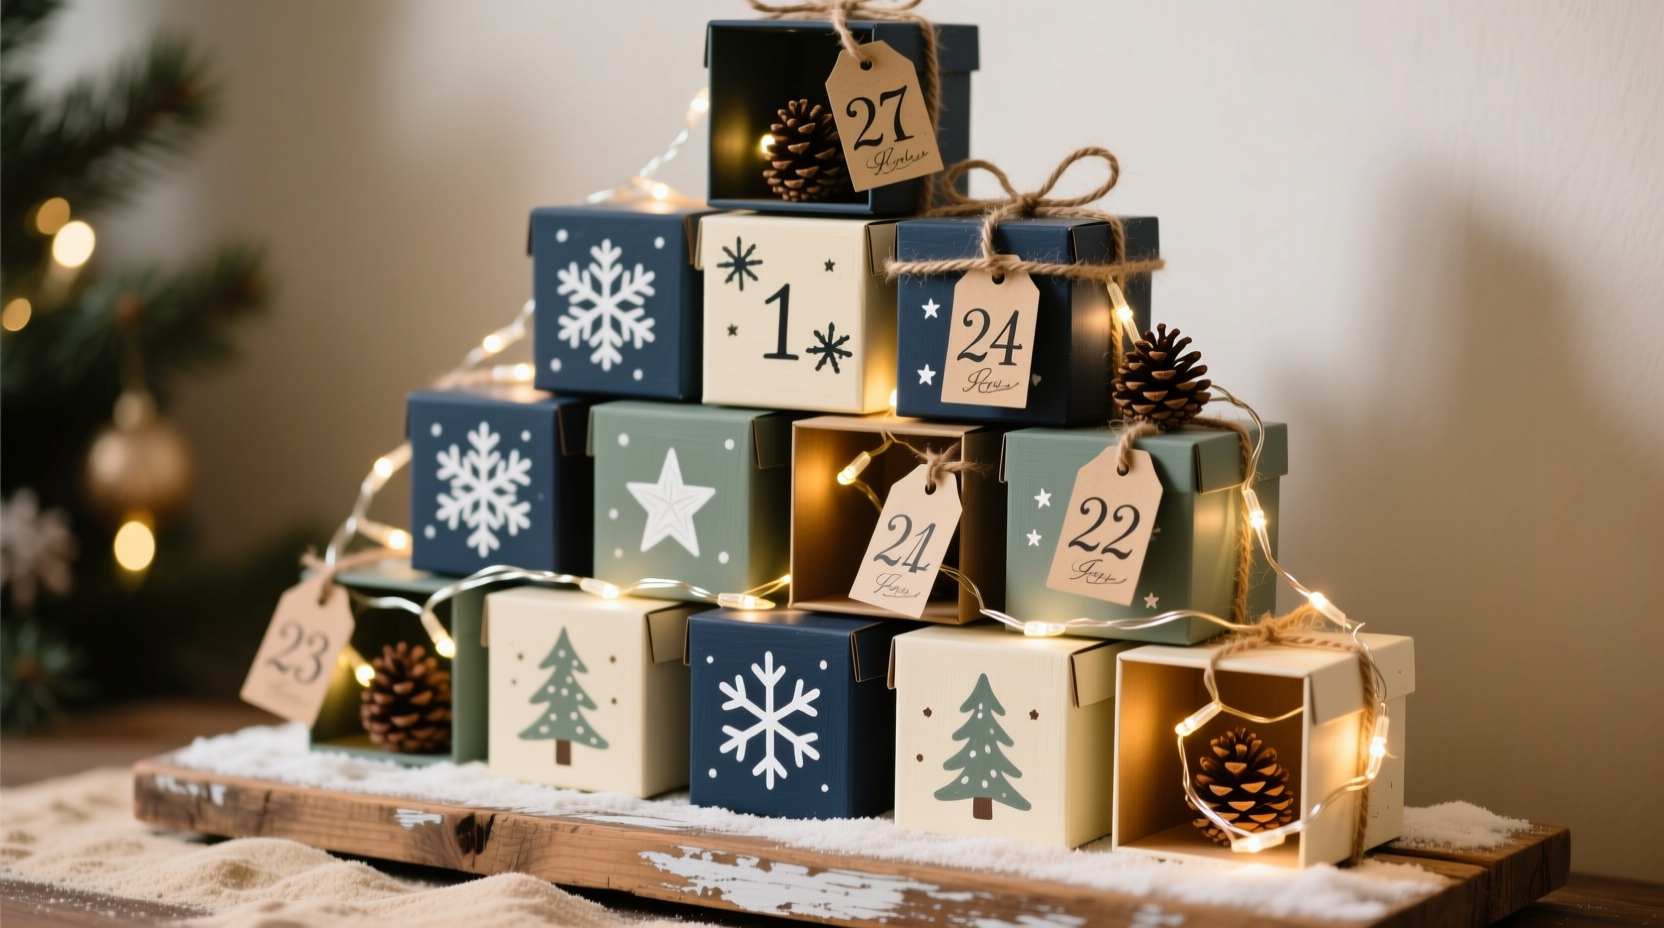
Design Layout and Assembly Strategy
Before attaching anything permanently, lay out your boxes on a large table or floor area to test configurations. Popular arrangements include grids (6x4), cascading rows, or even thematic shapes like trees or stars. Leave slight spacing between boxes—at least half an inch—to allow light to peek through and create visual rhythm.
Once satisfied with layout, number each box clearly on its bottom or back to avoid confusion during assembly. Decide whether doors will open forward, lift upward, or feature transparent fronts. If using cellophane, cut slightly oversized squares and secure them with glue or decorative washi tape to mimic stained glass windows.
For structural integrity, mount the entire arrangement onto a backing board—corrugated cardboard, foam core, or reclaimed wood. Trace the full layout, then adhere each box precisely using hot glue. Allow time for bonds to set fully before handling. Reinforce corners and edges where stress may occur, especially if hanging.
“Upcycling isn’t just about saving money—it’s about reimagining value. Every dented box has potential waiting to be unlocked.” — Lena Torres, Sustainable Craft Educator
Integrating Lights Safely and Creatively
Lighting transforms a static calendar into a dynamic focal point. Begin by testing all light strands to confirm functionality. Weave them behind, between, and around the boxes rather than inside them—this prevents heat buildup and keeps wires accessible for battery changes.
Plan the route carefully: start near the top center and spiral outward, letting bulbs nestle into gaps. Use short dabs of hot glue or twist ties to anchor wires discreetly. Avoid covering batteries; position them at the base or side for easy access. If placing lights inside boxes (e.g., for backlighting cellophane), only use low-heat LEDs and never leave unattended.
| Lighting Method | Best For | Caution |
|---|---|---|
| Backlit cellophane fronts | Dramatic glow effect | Ensure no direct contact with bulbs |
| Edge-wrapped strands | Highlighting borders and depth | Secure loose ends to prevent snagging |
| Clustered corner lighting | Creating cozy ambiance | Don’t overload circuits if using plug-ins |
| Inter-box threading | Uniform illumination across grid | Maintain even spacing for balanced look |
Step-by-Step Build Timeline
Constructing the calendar doesn’t need to happen in one sitting. Break it into manageable phases over several days, especially if involving family members or coordinating with other holiday prep.
- Day 1 – Collection & Prep: Gather boxes, inspect for damage, remove labels, and clean surfaces. Trim excess flaps and reinforce weak seams with tape.
- Day 2 – Surface Decoration: Wrap or paint boxes uniformly or thematically. Add patterns, textures, or personalized touches like names or motifs.
- Day 3 – Layout & Mounting: Arrange boxes on backing board. Finalize numbering and attach securely. Install cellophane windows if desired.
- Day 4 – Lighting Integration: Thread lights through the structure. Test brightness and adjust placement. Conceal wires where possible without restricting access.
- Day 5 – Filling & Finishing: Place daily items inside boxes. Attach hanging hardware. Do a final light check and decorative touch-up.
This phased approach reduces fatigue and improves precision. It also allows children to participate meaningfully—decorating their own boxes or helping place treats—deepening emotional connection to the final piece.
A Real Example: The Johnson Family Project
The Johnsons in Portland, Oregon, began collecting gift boxes in January after realizing how much packaging waste they generated annually. By November, they had 30 suitable containers stored in their garage. Together, parents and two children selected a 5x5 grid design shaped like a Christmas tree, leaving the center box empty as a star placeholder.
They used leftover wrapping paper scraps to cover each box, assigning themes by row: books, baking ingredients, outdoor activities, puzzles, and kindness challenges. Fairy lights were woven along the outer edge and through internal gaps, powered by two separate battery packs for redundancy.
On December 1st, their youngest daughter opened the first door to find a hot cocoa packet and a note: “Build a snowman together.” The lit calendar became a nightly ritual—the family gathering to admire the glow, discuss the next day’s surprise, and reflect on shared moments. Neighbors later asked for tutorials, turning a personal craft into a community inspiration.
Common Pitfalls and How to Avoid Them
Even well-planned projects can stumble without foresight. One frequent issue is misaligned boxes due to uneven adhesion. To prevent this, press each box firmly onto the backing and use spacers (like coins) between units during drying.
Another concern is tangled or broken lights. Always untangle strands gently before installation and reserve one spare strand as backup. If lights flicker intermittently, check battery orientation and corrosion—clean contacts with a cotton swab if needed.
Overfilling boxes risks difficulty closing doors or damaging hinges. Keep contents compact and prioritize lightweight items. Consider digital surprises too: QR codes linking to videos, songs, or family memories printed on cardstock.
“Sustainability meets storytelling when we reuse materials with intention. Each box holds more than a treat—it holds memory.” — Dr. Marcus Lin, Environmental Design Researcher
Frequently Asked Questions
Can I make this advent calendar reusable every year?
Absolutely. Construct it with durable materials and removable inserts. Store treats separately and refill annually. Replace worn lights or boxes as needed. With care, the frame can last five years or more.
Are there fire risks with placing lights near paper or fabric?
LED fairy lights produce minimal heat and are generally safe. However, always use battery-powered sets (not mains-connected), monitor for overheating, and turn off when unattended or overnight unless specifically rated for continuous use.
What if I don’t have 24 matching boxes?
Variety adds character. Mix sizes and wrap uniformly with the same paper or paint. Emphasize cohesion through color or texture rather than identical shape. Just ensure all closures function reliably.
Final Touches and Display Tips
Once assembled, elevate your calendar with thoughtful presentation. Hang it on a blank wall using D-rings or command strips to avoid damage. Position near seating areas or entryways where it invites interaction. Pair with complementary decor—wreaths, garlands, or candles—but avoid overcrowding.
Add a title banner above: “Our Lighted Countdown” or “24 Days of Joy.” Include a dedication tag if gifting: “Made with love for Emma, 2024.” These details deepen sentiment and mark the piece as heirloom-worthy.
Conclusion: Light Up the Season with Purpose
Crafting a DIY advent calendar from repurposed gift boxes and lights is more than a seasonal activity—it’s an act of mindful creation. You reduce waste, exercise imagination, and generate lasting memories. Each glowing box serves as a reminder that beauty and joy emerge not just from new purchases, but from thoughtful reinvention.
Start today: sort through your storage bins, test those old light strands, and sketch a rough layout. Involve others. Laugh over lopsided glue jobs. Celebrate imperfections as marks of authenticity. When December arrives, your handmade calendar won’t just count down days—it will illuminate what matters most.


 浙公网安备
33010002000092号
浙公网安备
33010002000092号 浙B2-20120091-4
Comments
No comments yet. Why don't you start the discussion?