
Advent calendars have long been a cherished part of the holiday season, offering daily anticipation and small joys leading up to Christmas. But what if you could elevate the tradition by combining handmade charm with interactive mystery? A DIY advent calendar featuring hidden Christmas light clues transforms a simple countdown into an engaging family experience. Each day, instead of simply opening a door or drawer, participants solve a clue revealed only when lights illuminate a secret message. This fusion of crafting, storytelling, and technology creates lasting memories and encourages curiosity throughout December.
This guide walks through every step of creating your own illuminated clue-based advent calendar—from conceptual design to wiring circuits and writing daily riddles. Whether you're a seasoned crafter or new to basic electronics, this project is scalable, customizable, and deeply rewarding.
Why Combine Advent Calendars with Light-Revealed Clues?
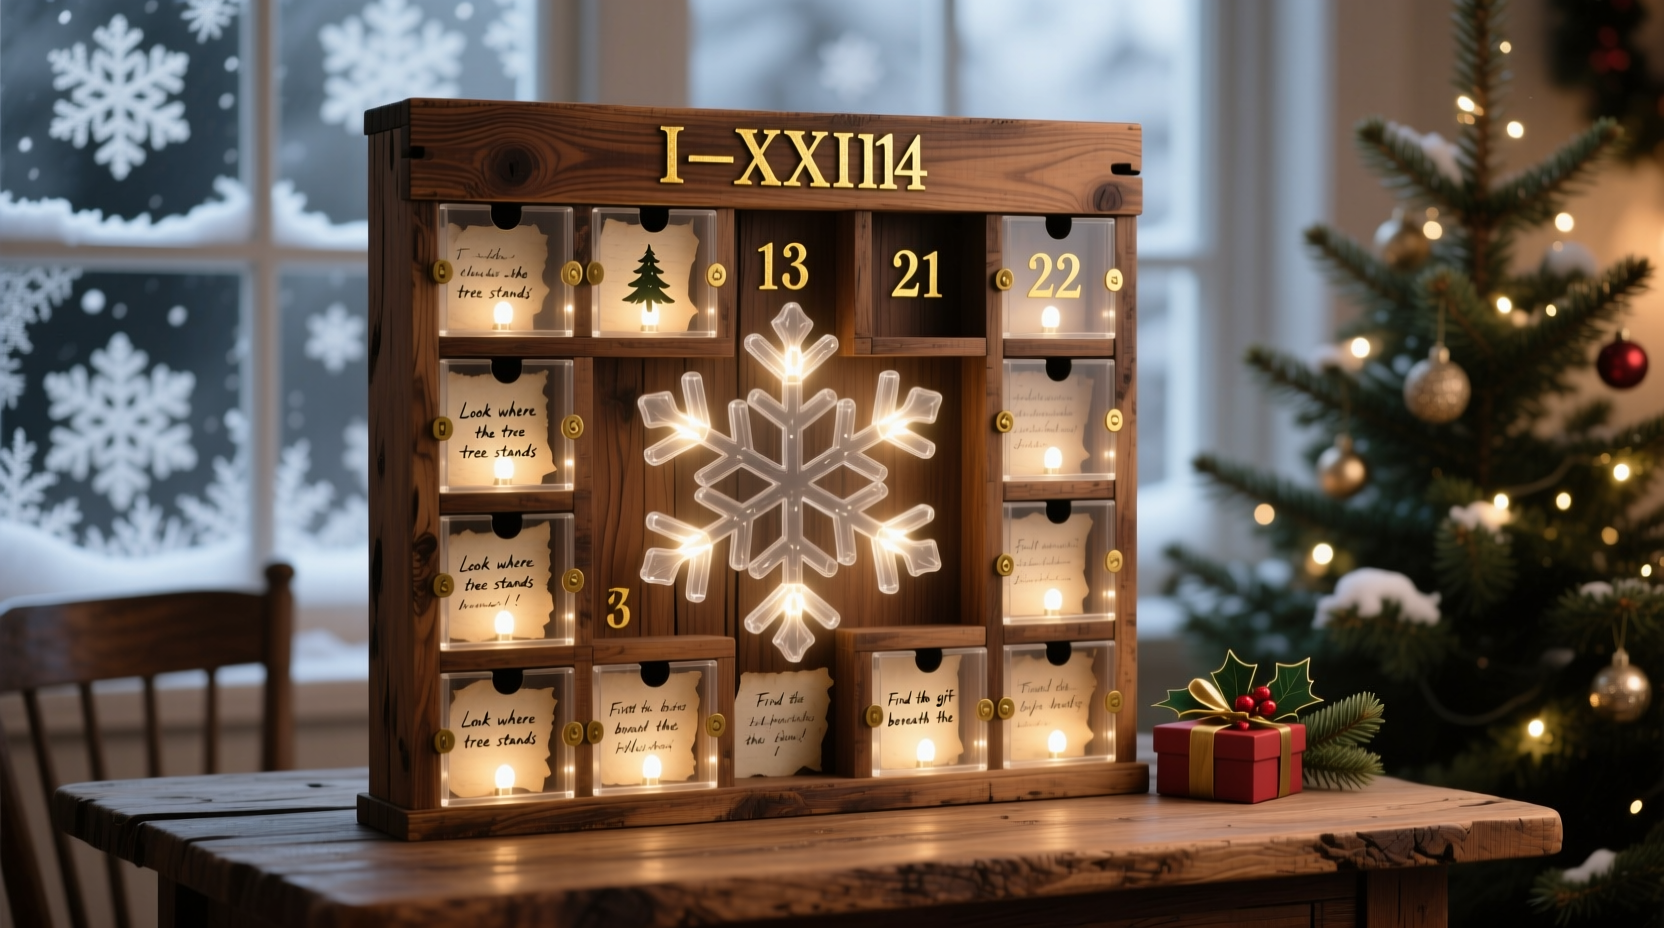
The magic of an advent calendar lies in its ability to build excitement day by day. Traditional versions offer chocolate or trinkets behind numbered doors, but adding light-activated clues introduces narrative depth and interactivity. When a small LED illuminates a previously invisible message—written in UV ink, hidden under flaps, or embedded in translucent paper—the reveal feels like solving a tiny holiday puzzle.
This approach works especially well for families with children who enjoy games and surprises. It can also be adapted for adults, perhaps revealing cocktail recipes, nostalgic memories, or romantic gestures. The use of lights not only enhances visual appeal but symbolizes the growing brightness of the season as Christmas approaches.
“Blending tactile craftsmanship with subtle technology makes traditions more immersive. Kids remember not just the gift, but the moment of discovery.” — Dr. Lydia Chen, Educational Play Specialist
Materials and Tools You’ll Need
Creating a functional and visually appealing light-clue calendar requires both craft supplies and basic electronic components. Below is a comprehensive list organized by category.
| Category | Item | Purpose |
|---|---|---|
| Crafting | Cardboard, wood, or fabric base | Main structure for mounting pockets or doors |
| Crafting | Mini envelopes, fabric pouches, or paper pockets | Hold daily clues or small gifts |
| Crafting | Markers, paint, washi tape, stickers | Decorate the calendar surface |
| Electronics | LED tea lights (battery-powered, warm white) | Illuminate clue areas without heat risk |
| Electronics | Conductive copper tape or thin wires | Connect switches to LEDs discreetly |
| Electronics | Slide or push-button switches (optional) | Activate lights only when door opens |
| Writing & Design | UV pen or invisible ink markers | Write clues that appear only under light |
| Writing & Design | Translucent vellum or tracing paper | Diffuse light to reveal faint messages |
| Tools | Scissors, glue gun, ruler, pencil | General assembly |
| Tools | Tweezers, craft knife | Precise placement of small parts |
Step-by-Step Assembly Guide
Follow this structured process to build your calendar from concept to completion.
- Design the Layout: Sketch a grid of 24 squares (or 25 including Christmas Day). Common arrangements are 4x6 or 5x5. Leave space between sections for wiring and decorations.
- Create Compartments: Attach numbered envelopes, boxes, or fabric pockets to each square. Ensure they open easily and conceal contents until revealed.
- Incorporate Hidden Messages: Write each day’s clue using a UV pen on the inside back of the compartment. Alternatively, print faint text on white paper and cover it with vellum—only visible when lit from behind.
- Install LEDs Behind Each Panel: Tape a small LED behind the back wall of each compartment, facing forward. Position it so light spreads evenly across the clue area.
- Add Simple Switches (Optional): For automatic activation, attach a micro-switch so that opening the door completes the circuit. Or use manual toggle switches labeled “Turn on the light” for added interaction.
- Power Management: Most LED tea lights have built-in batteries. If using wired LEDs, consider a central battery pack with individual leads routed to each light. Label wires during installation to avoid confusion later.
- Test Before Finalizing: Activate each light to confirm visibility of the clue. Adjust positioning or brightness as needed.
- Final Decorations: Embellish the frame with garlands, painted snowflakes, or holiday motifs. Keep decorations removable for access to electronics.
Sample Daily Clue Progression
The real enchantment comes from how clues unfold. Instead of direct rewards, clues can point to locations, unlock stories, or initiate activities. Here’s a sample week of themed reveals:
- Dec 1: \"I sparkle when cold and vanish in warmth. Find me where we keep tonight’s dinner.\" → Clue leads to freezer; treat inside is a candy cane.
- Dec 5: \"I have pages but no words, and I’m filled with joy every year. Look inside me to find your gift.\" → Points to family photo album; small ornament tucked within.
- Dec 10: \"I hang high and jingle when touched. Reach above to claim your prize.\" → Leads to a bell on the tree.
- Dec 18: \"I warm hands and hearts alike. Check the kitchen cupboard after lighting tonight’s candle.\" → Hot cocoa mix reward.
- Dec 24: \"The final clue glows brightest of all—gather beneath the tree at dawn to see what light reveals.\" → Leads to a heartfelt letter or main gift.
Real-Life Example: The Thompson Family Calendar
The Thompsons, a family of four in Vermont, wanted to make their holiday mornings more meaningful. In previous years, their children rushed through the advent calendar in minutes. Seeking a slower, more thoughtful experience, they built a wooden board advent calendar with light-revealed clues.
Each night, the parents placed a small token—like a pinecone ornament or cookie recipe—in a numbered fabric pocket. Behind each was a UV-written clue activated by pressing a button next to the pocket. One evening, the clue read: “I protect books and dreams. Shine your light where stories sleep.” Their daughter figured it out instantly—her bookshelf—and found a new illustrated edition of *The Polar Express*.
By integrating reading, exploration, and shared moments, the Thompsons extended their morning ritual from five minutes to nearly half an hour of laughter and teamwork. “It didn’t feel like just another toy,” said 8-year-old Emma. “It felt like a mission.”
Do’s and Don’ts for Success
To ensure your calendar functions smoothly and delights users, follow these guidelines.
| Do’s | Don’ts |
|---|---|
| Use non-toxic materials, especially if children will handle components. | Don’t overload compartments with too many elements—keep focus on the clue. |
| Label wires and test circuits early. | Don’t place hot or high-voltage lights near paper or fabric. |
| Write clues with multiple hints if intended for younger kids. | Don’t make clues too obscure—frustration kills fun. |
| Involve family members in brainstorming clue ideas. | Don’t wait until December 1st to start building—it takes time! |
| Store spare batteries and tools nearby for quick fixes. | Don’t hide critical electronics where moisture accumulates (e.g., kitchens). |
Frequently Asked Questions
Can I make this without any electronics experience?
Absolutely. Battery-powered LED tea lights require no wiring—you simply place one behind each clue panel. For even simpler setups, use glow sticks or flashlights to manually illuminate messages. The key is creativity, not technical skill.
What if a light stops working mid-calendar?
Always include backup LEDs and spare batteries. If using pre-wired systems, isolate each light so one failure doesn’t affect others. With individually powered tea lights, replacement takes seconds.
Are UV pens safe for kids?
Yes, most UV pens use non-toxic ink. However, supervise young children during use, and avoid direct eye exposure to UV light sources. Standard LED lights do not emit UV radiation, so there's no risk during clue reveals.
Checklist: Building Your Light-Based Advent Calendar
Use this checklist to stay on track from planning to launch.
- ☐ Choose a theme (e.g., winter forest, North Pole journey, family memories)
- ☐ Select base material and size (wood board, fabric banner, cardboard)
- ☐ Gather 24+ small containers or pockets
- ☐ Purchase 24 battery-powered LED tea lights
- ☐ Buy UV pens or prepare vellum-covered clue cards
- ☐ Draft a set of clues linked to meaningful locations or activities
- ☐ Assemble the base and attach compartments
- ☐ Install LEDs behind each section
- ☐ Test illumination and readability of clues
- ☐ Decorate the exterior with seasonal flair
- ☐ Prepare daily items or hints to place in pockets
- ☐ Do a full run-through from Day 1 to Day 24
Conclusion: Illuminate More Than Just Clues
A DIY advent calendar with hidden Christmas light clues does more than count down days—it fosters connection, curiosity, and wonder. Each glowing revelation becomes a shared moment, a pause in the rush of the season to notice something small yet significant. Whether you’re guiding a child to a hidden toy, reminding a partner of a favorite memory, or inviting someone to bake cookies together, the light doesn’t just expose ink on paper—it reveals intention, care, and love.
Start gathering your materials now. Sketch your layout. Write your first clue. By the time December arrives, you won’t just have a calendar—you’ll have a tradition in the making. And when that first light flickers on December 1st, casting a soft glow over a mystery waiting to be solved, you’ll know it was worth every careful step.


 浙公网安备
33010002000092号
浙公网安备
33010002000092号 浙B2-20120091-4
Comments
No comments yet. Why don't you start the discussion?