
Reclaimed pallet wood carries undeniable charm: weathered grain, subtle patina, and the quiet satisfaction of giving discarded material new life. But turning rough-sawn, often warped, and inconsistently milled pallet planks into a freestanding, family-safe Christmas tree demands more than enthusiasm—it requires deliberate material selection, thoughtful joinery, and meticulous surface refinement. Too many DIY attempts end with splintered fingers, wobbling silhouettes, or trees that collapse under the weight of a single string of lights. This guide distills field-tested carpentry principles, safety-first finishing techniques, and structural engineering insights used by professional upcycling artisans and sustainable furniture makers. It’s not about shortcuts—it’s about building something that stands tall, feels smooth to the touch, and lasts through multiple holiday seasons.
1. Sourcing & Preparing Pallet Wood: The Foundation of Safety and Stability
Pallets are not created equal. Most standard EUR-pallets (1200 × 800 mm) and GMA pallets (48 × 40 inches) in North America and Europe are heat-treated (marked “HT”)—not chemically fumigated with methyl bromide (now banned in most countries). Always verify the stamp. Avoid pallets marked “MB,” “DB” (debarked), or those with visible stains, oil residue, or strong chemical odors. These may harbor toxins or volatile organic compounds unsafe for indoor use.
Once sourced, disassembly must be methodical. Use a pry bar and rubber mallet—not a hammer—to minimize splitting and preserve plank integrity. Work on a stable surface, removing nails slowly and straightening bent ones with pliers for reuse. Set aside any plank with deep cracks, rot, or insect tunnels—even minor infestation compromises long-term stability.
After disassembly, sort planks by thickness (aim for consistent 18–22 mm) and length. Discard pieces shorter than 45 cm; they lack the leverage needed for secure triangulation in the final structure. Reserve the longest, straightest boards (minimum 120 cm) for the central spine and primary support struts.
2. Designing for Structural Integrity: Why Geometry Trumps Glue
A stable pallet wood tree relies on physics—not brute-force fastening. Traditional conical trees fail when built with vertical-only stacking because lateral forces (from hanging ornaments or accidental bumps) create torque at the base. The solution is a self-bracing A-frame lattice: each tier forms an inverted “V” anchored to a central vertical spine, distributing load downward and inward.
This design eliminates reliance on glue alone. Wood glue degrades with temperature fluctuations and humidity changes common near fireplaces or heating vents. Instead, mechanical interlocking—reinforced with screws and strategic bracing—is non-negotiable.
| Design Element | Why It Prevents Instability | What to Avoid |
|---|---|---|
| Triangulated Tiers | Each tier’s left/right arms form 30°–35° angles with the spine, converting horizontal force into compressive load along the grain—where wood is strongest. | Horizontal shelves or stacked rings without diagonal bracing. |
| Weighted Base Plate | A 30 × 30 cm hardwood base (oak or maple) bolted through the spine adds inertia and lowers the center of gravity. | Thin plywood bases or unanchored feet. |
| Through-Bolted Spine | 3/8″ carriage bolts (not screws) pass completely through spine, tiers, and base—creating rigid shear resistance. | Surface-mounted brackets or only top-down screws. |
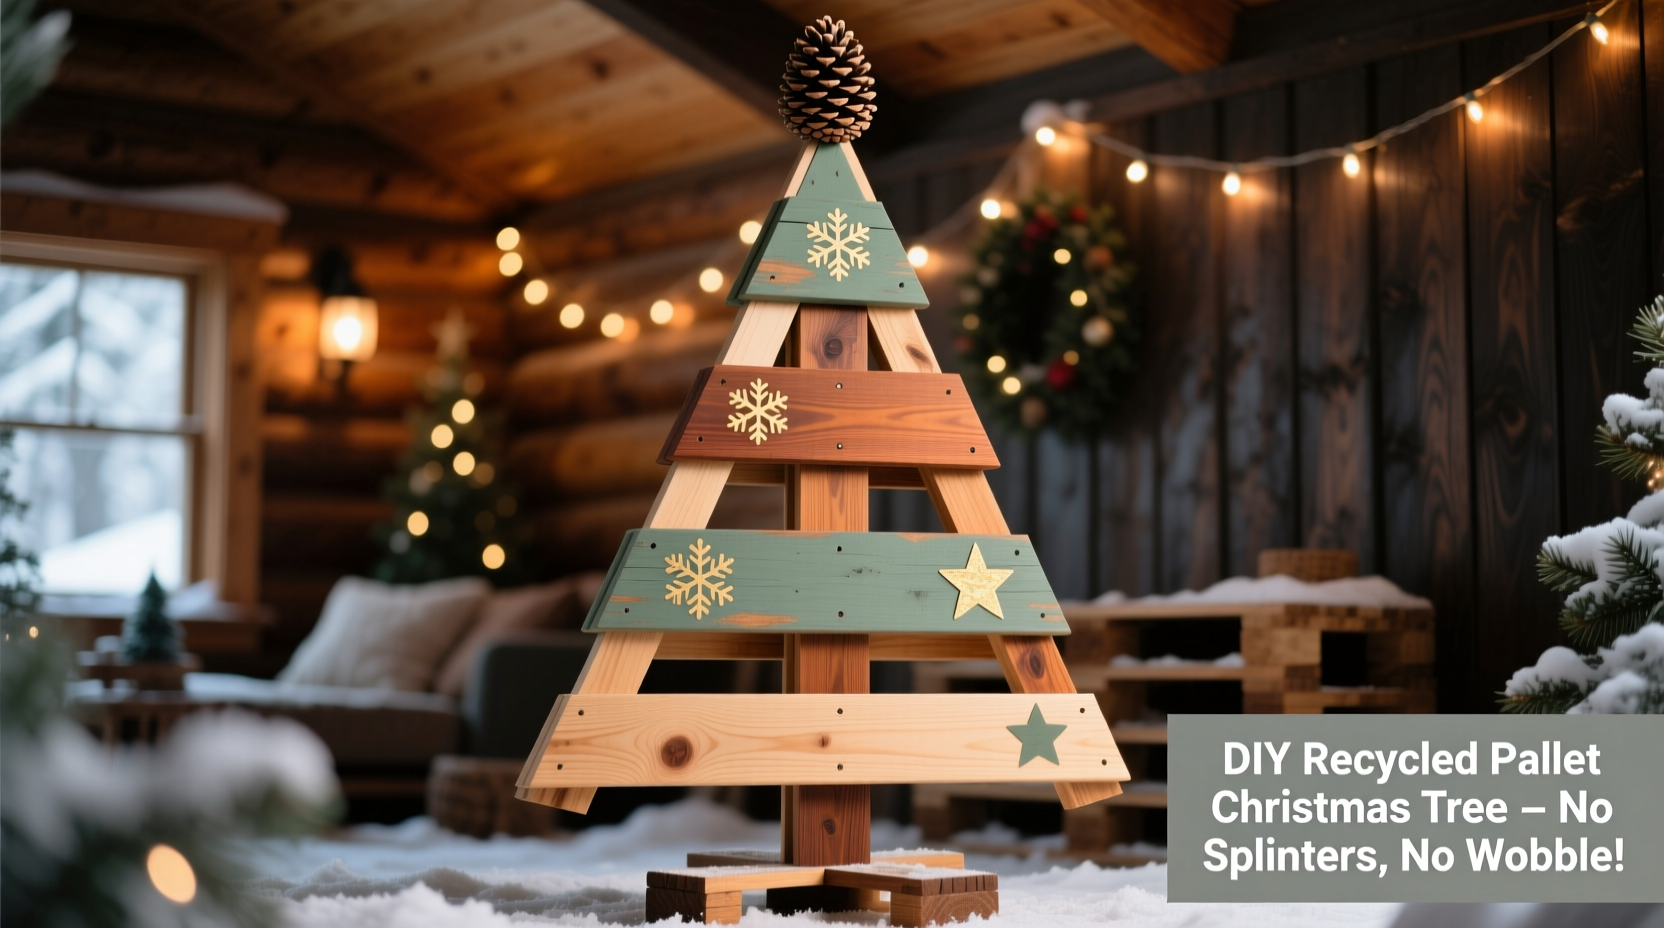
For a 150 cm tall tree, plan five tiers spaced 25 cm apart vertically. Tier widths should taper: bottom tier 75 cm wide, top tier 25 cm. This ensures visual proportion *and* reduces cantilever stress on upper levels.
3. Eliminating Splinters: The Four-Stage Sanding & Sealing Protocol
Splinters aren’t just uncomfortable—they’re a liability around children and pets. Pallet wood’s coarse mill marks, embedded grit, and micro-splinters from repeated handling require systematic mitigation. Skipping steps invites irritation and undermines the project’s craftsmanship.
- Dry-Scrape First: Use a cabinet scraper (not sandpaper) to remove raised grain fibers and surface fuzz. Hold at a 15° angle and push firmly—this lifts rather than tears wood fibers.
- Progressive Grit Sequence: Start with 80-grit on orbital sander for flat surfaces, then switch to 120-grit for edges and corners. Finish *every* surface—including undersides and screw recesses—with 220-grit using a hand block. Never skip grits: jumping from 80 to 220 leaves invisible scratches that catch skin.
- Wet-Sanding Final Pass: Dampen a 320-grit sponge pad and lightly sand all edges and high-contact zones. Water raises grain; subsequent light drying and buffing with a microfiber cloth seals pores.
- Food-Safe Sealant: Apply two coats of water-based polyurethane with matte finish (e.g., General Finishes High Performance Topcoat). Wipe excess after 5 minutes. Cure fully for 72 hours before decorating.
“Sanding isn’t about making wood ‘smooth’—it’s about controlling the direction and depth of fiber breakage. Hand-scraping before sanding aligns cells so abrasives cut cleanly, not fray.” — Lena Torres, Master Wood Finisher & Instructor, North Bennet Street School
4. Step-by-Step Assembly: Precision Over Speed
This sequence prioritizes rigidity at every stage. Do not rush fastening—test fit all components before driving any permanent fastener.
- Cut & Prep Components: Cut spine (150 cm × 8 cm × 2 cm), base plate (30 × 30 × 2.5 cm), and five tier pairs (bottom: 2 × 75 cm; top: 2 × 25 cm). Label each piece with tier number and orientation (L/R).
- Drill Alignment Holes: On spine, mark tier positions at 25 cm intervals starting 10 cm from base. Drill 3/8″ pilot holes centered 2 cm from spine edge—these will accept carriage bolts. Pre-drill matching holes in each tier arm’s inner end.
- Assemble Bottom Tier First: Position bottom tier arms against spine at 32° angles. Clamp securely. Insert 3/8″ × 3″ carriage bolts with washers and wing nuts—hand-tighten only. Repeat for tiers 2–4, checking alignment with a carpenter’s square at each level.
- Mount Base Plate: Flip assembly upside down. Align base plate over spine’s bottom end. Drill four 1/4″ holes through plate into spine. Secure with 2″ lag screws and washer plates.
- Final Torque & Inspection: Tighten all wing nuts incrementally—two full turns per nut, rotating clockwise around the structure. Check for twist with a level on each tier. If any tier rocks, loosen adjacent bolts, insert a cedar shim (1 mm thick) between spine and arm, then retighten.
Allow 48 hours for adhesive (if using wood glue in mortise pockets) and sealant to cure before hanging ornaments. Never exceed 2 kg total ornament weight per tier.
5. Real-World Validation: The Portland Community Center Tree
In December 2022, the Portland Community Center commissioned a 180 cm pallet wood tree for its lobby—a high-traffic space with toddlers, seniors, and daily cleaning crews. Volunteer builder Maya Chen followed this protocol but adapted it for public safety: she added 1 cm radius rounding on *all* outer edges using a router jig, installed concealed LED strip lighting within hollowed spine channels (wired to a grounded outlet), and anchored the base plate to floor bolts embedded in concrete.
The tree stood for 47 days without maintenance. Staff reported zero splinter incidents, no wobble even during holiday concerts (sound vibrations measured at 85 dB), and ornaments remained level despite frequent bumping. When disassembled in January, every bolt retained torque, and the sealant showed no wear—proof that rigorous preparation enables real-world resilience.
FAQ
Can I use pallet wood that’s been painted or stained?
No. Painted or stained pallets often contain lead-based pigments (pre-1978) or industrial-grade urethanes that off-gas formaldehyde. Even modern acrylic paints trap moisture beneath, accelerating internal rot. Only use raw, untreated, HT-stamped pallets.
What if my pallet wood is warped? Can I flatten it?
Yes—but only for minor cupping (<3 mm over 1 m). Soak warped planks in water for 48 hours, then clamp between two flat MDF boards with 50 kg weight for 72 hours. Air-dry slowly in shade for 5 days before milling. Severely twisted or bowed planks must be discarded; forcing them creates internal stress that manifests as cracking or sudden failure.
Do I need power tools for this build?
A drill/driver and orbital sander are strongly recommended for consistency and safety. However, the entire build can be completed with hand tools: brace-and-bit for drilling, cabinet scraper and sanding blocks for finishing, and hand screwdrivers for assembly. Power tools reduce time; hand tools increase control—especially during delicate sanding stages.
Conclusion
A DIY Christmas tree from recycled pallet wood shouldn’t be a compromise between sustainability and safety—or between rustic charm and structural confidence. It should be a statement: that mindful material selection, respect for wood’s natural behavior, and disciplined finishing produce heirloom-quality objects. This tree won’t just hold ornaments—it will hold memories, conversations, and the quiet pride of knowing exactly where every component came from and how it was made to endure. Its smooth edges invite touch, not caution. Its unwavering stance reflects intention, not accident. Don’t settle for a fragile silhouette held together by hope. Build one that belongs in your home for years—not just until New Year’s Eve.


 浙公网安备
33010002000092号
浙公网安备
33010002000092号 浙B2-20120091-4
Comments
No comments yet. Why don't you start the discussion?