
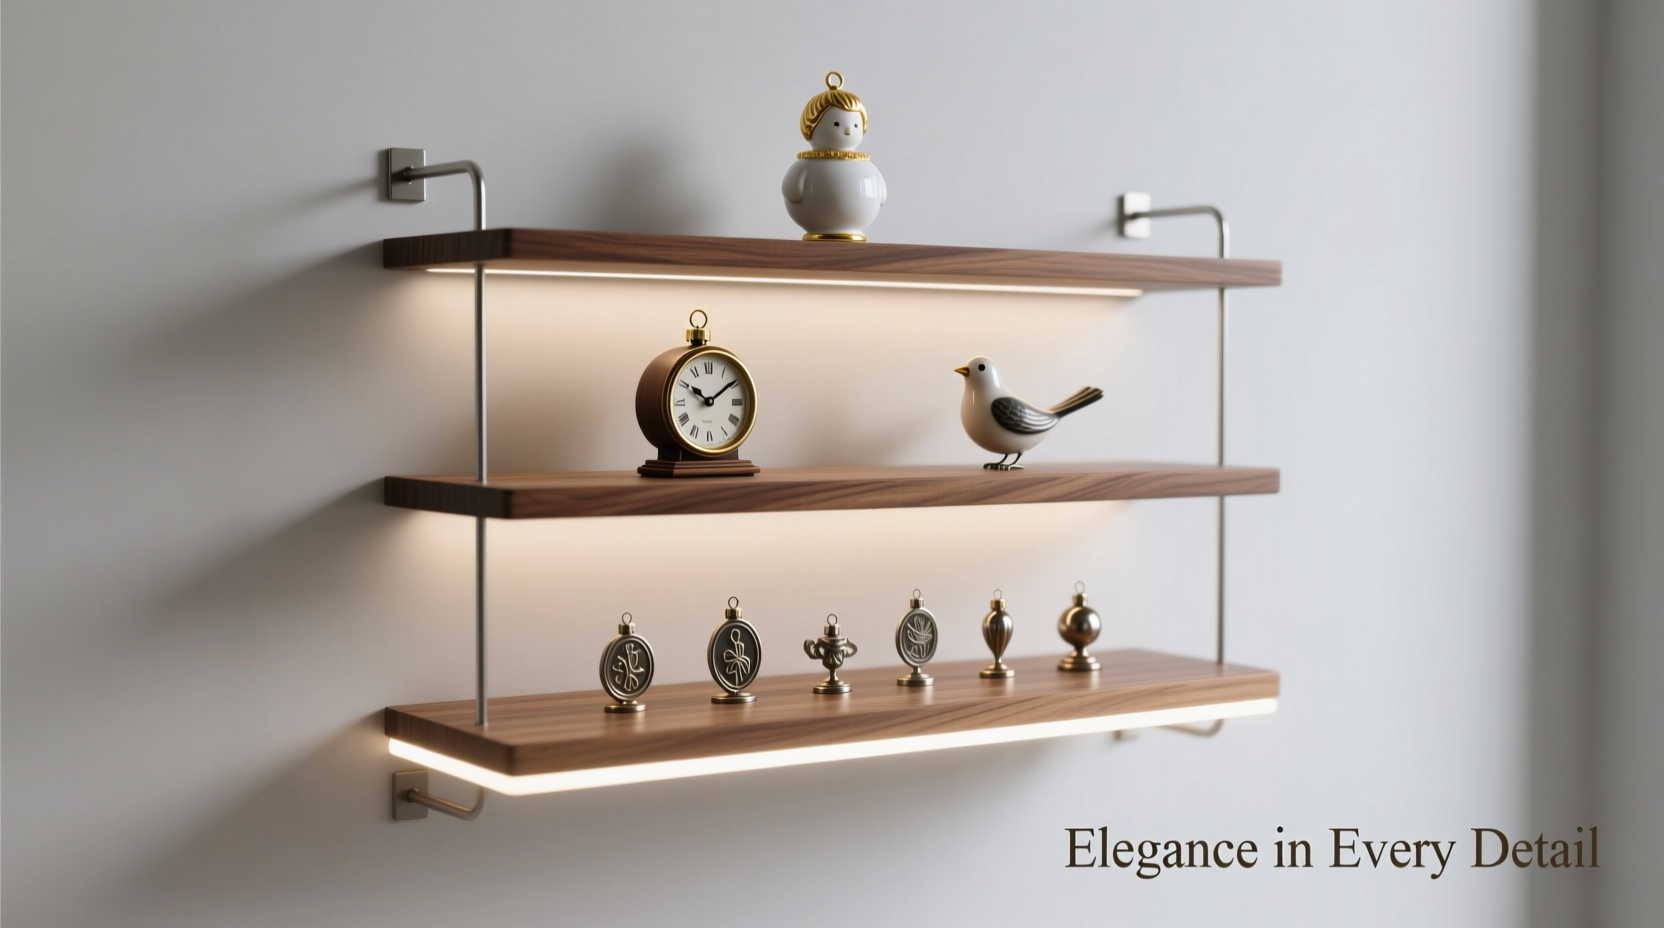
Floating shelves offer more than visual lightness—they provide a curated stage where collectible ornaments shine without visual clutter. Unlike traditional cabinets or enclosed cases, well-designed floating shelves invite close inspection while maintaining spatial openness. But success hinges on more than aesthetics: structural integrity, precise leveling, thoughtful spacing, and long-term preservation must all be addressed from the outset. Ornament collections—whether vintage glass baubles, hand-blown Czech figurines, ceramic Santas, or delicate porcelain birds—vary widely in weight, fragility, and sensitivity to environmental shifts. A poorly anchored shelf risks not only damage but loss of irreplaceable pieces. This guide distills years of experience from museum preparators, interior designers specializing in heirloom displays, and serious collectors who treat their ornaments as both art and memory. Every recommendation is grounded in material science, load-testing standards, and real-world longevity—not just theory.
1. Design Principles: Prioritizing Safety, Visibility, and Narrative Flow
Before cutting wood or drilling into drywall, define your display’s functional and emotional intent. A floating shelf for ornaments isn’t merely a surface—it’s a narrative device. Consider three core design pillars:
- Weight Distribution Logic: Ornaments rarely weigh the same. Heavy brass nutcrackers (1.2–2.5 lbs each) demand deeper brackets and closer stud alignment than lightweight blown-glass balls (0.1–0.3 lbs). Never assume uniform load capacity across a shelf span. The center third of any shelf carries up to 60% of total weight—even with even placement.
- Visual Hierarchy & Breathing Room: Allow at least 1.5× the widest ornament’s diameter between items. A 3-inch ceramic angel needs 4.5 inches of clearance on either side. This prevents visual competition and reduces accidental contact during dusting or rearranging.
- Depth-to-Ornament Ratio: Shelf depth should exceed the deepest ornament’s projection by at least 1 inch—but never exceed 10 inches. Deeper shelves encourage leaning forward, increasing risk of toppling; shallower ones (under 6 inches) limit stability for taller pieces. For most collections, 7–8 inches is optimal.
2. Materials & Hardware: What Holds Up—Literally and Aesthetically
Material choices directly impact durability, appearance, and conservation safety. Avoid shortcuts that compromise ornament integrity—or your walls.
| Component | Recommended Specification | Why It Matters |
|---|---|---|
| Shelf Material | 1¾\" thick solid hardwood (walnut, maple, or white oak) or premium-grade plywood with hardwood veneer (minimum ¾\" core + 1/16\" veneer) | Thicker stock resists sagging under cumulative weight. Veneered plywood offers stability without warping—critical in seasonal humidity swings. Avoid MDF: it swells with moisture and cannot hold heavy-duty anchors reliably. |
| Bracket System | Steel concealed French cleat (rated ≥75 lbs per foot) OR solid steel rod system with embedded wall plates (e.g., Wall Control or SuperAnchor) | French cleats distribute load evenly along the entire shelf back. Rod systems eliminate visible brackets but require precise wall anchoring into studs or high-density toggle anchors (minimum 100-lb shear rating). |
| Wall Anchors | For drywall: ⅜\" x 3\" SnapToggle TB-330 (125-lb capacity per anchor) or for plaster/lath: ¼\" x 3½\" masonry sleeve anchors with epoxy setting | Standard plastic toggles fail under vibration and repeated loading. SnapToggles expand behind drywall for true shear resistance. Plaster requires specialized anchors due to inconsistent substrate density. |
| Finishing | Water-based polyurethane (matte or satin) or hard-wax oil (e.g., Osmo Polyx-Oil) | Oil finishes remain micro-porous, allowing wood to breathe and reducing off-gassing near delicate surfaces. Avoid solvent-based varnishes—they emit VOCs that can cloud glass or degrade historic paint layers over time. |
Collectors often underestimate how finish chemistry interacts with ornaments. “We once had a client whose 1920s mercury glass ornaments developed hazy halos after six months on a shelf finished with oil-based poly,” notes conservator Dr. Lena Petrova of the Midwest Decorative Arts Institute. “The volatiles migrated through microscopic gaps in the glass coating. Switching to water-based acrylic eliminated the issue within weeks.”
3. Step-by-Step Installation: Precision Over Speed
This sequence assumes standard drywall over wood studs. Adjust for plaster, concrete, or masonry walls using appropriate anchors and drilling protocols.
- Locate & Mark Studs: Use a calibrated stud finder (not a magnetic one) to identify centers—not edges—of every stud in the planned shelf zone. Mark centers with pencil, then verify with a small pilot hole (⅛\") at 16\" intervals.
- Build the Cleat or Rod Mount: For French cleats, cut two identical 1\" × 1\" hardwood strips. One attaches to wall (angled 35°), the other to shelf back (matching angle). For rod systems, drill ⅜\" holes in wall at exact height, insert anchors, then thread rods. Ensure all rods protrude identically (use calipers).
- Level & Shim the Wall Cleat: Attach the wall cleat using four 3\" deck screws into studs. Check level across its entire length with a 48\" aluminum level. If uneven, insert thin cedar shims behind cleat ends until perfectly horizontal. Re-check after tightening.
- Mount Shelf & Verify Load Path: Lift shelf onto cleat or slide onto rods. Gently press down center and ends. You should hear a firm, consistent “click” or feel secure engagement. Tap lightly along the shelf edge—if any section wobbles or sounds hollow, dismount and recheck cleat alignment or rod protrusion.
- Final Load Test: Place weights equivalent to 150% of your intended ornament load (e.g., sandbags or books) evenly distributed for 48 hours. Inspect daily for movement, creaking, or wall flex. If present, reinforce anchors or add a third mounting point.
4. Styling & Preservation: Beyond Decoration to Conservation
A display shelf becomes a conservation environment. Light, dust, and handling are the primary threats to ornament longevity.
- Light Management: Position shelves away from direct sunlight and unfiltered south-facing windows. UV-filtering acrylic glazing (not glass) can be mounted 2\" above the shelf plane if ambient light is intense. LED bulbs with CRI ≥95 and color temperature ≤3000K minimize fading and thermal stress.
- Dust Mitigation: Install a low-profile, brushless DC fan (e.g., AC Infinity T8) set to 20% speed on the shelf’s underside rear edge. Gentle airflow prevents static-dust accumulation without disturbing ornaments. Clean fans quarterly—dust buildup reduces efficiency and increases vibration.
- Anti-Tip Security: For ornaments taller than 4 inches, use museum-grade clear silicone putty (e.g., Quakehold! Gel) applied to the base—not the ornament itself. Roll pea-sized amounts, press firmly onto shelf, then set ornament gently on top. Reapply every 12 months.
“The goal isn’t to freeze an ornament in time—it’s to slow change to a rate that respects its material reality. A floating shelf isn’t passive furniture; it’s an active interface between human intention and object vulnerability.” — Dr. Aris Thorne, Senior Conservator, Winterthur Museum
5. Real-World Application: A Collector’s Refinement Journey
When Elena R. inherited her grandmother’s 1940s German glass ornament collection—42 pieces ranging from fragile spun-glass icicles to dense hand-painted fruit—she installed a single 6-foot walnut shelf using basic L-brackets. Within eight months, two ornaments cracked during seasonal humidity drops. She consulted a preservation specialist, who diagnosed three failures: insufficient bracket depth (causing front-edge flex), lack of humidity buffering, and improper spacing that allowed ornaments to vibrate against each other during nearby HVAC cycling.
Elena rebuilt the display using a 1¾\" thick maple shelf with a continuous French cleat anchored into five studs. She added a small digital hygrometer (maintaining 40–45% RH year-round) and installed microfiber shelf liners cut to fit precisely beneath each ornament’s footprint. Most critically, she grouped ornaments by weight and material type—glass on the left, painted ceramics in the center, heavier metal pieces on the right—to balance dynamic load distribution. Two years later, her collection remains intact, and she now mentors new collectors through her local historical society’s “Heirloom Stewardship” program.
FAQ
Can I mount a floating shelf on plaster walls?
Yes—but only with proper anchoring. Historic plaster over lath requires masonry anchors drilled into the brick or block substrate behind the plaster. Use a masonry bit and epoxy-set sleeve anchors rated for at least 100 lbs shear force. Never rely on plaster alone; it crumbles under sustained load. Hire a contractor experienced in historic wall systems if unsure.
How do I clean ornaments without removing them from the shelf?
Use a soft, natural-hair artist’s brush (size 6–8) held at a 15° angle to gently sweep dust toward the shelf edge. Follow with a microfiber cloth dampened *only* with distilled water—wring until barely damp—and wipe bases only. Never spray cleaners near ornaments; aerosolized chemicals accelerate metal tarnish and degrade historic adhesives.
What’s the maximum safe shelf length for ornaments without mid-span support?
For 1¾\" thick hardwood shelves anchored into studs at 16\" intervals, the maximum unsupported span is 48 inches. Beyond that, deflection increases exponentially—even with light loads. At 60 inches, sag exceeds ⅛\" under 30 lbs, creating instability. Add a third stud-mounted anchor at the center for spans over 48 inches.
Conclusion
A floating shelf for collectible ornaments is never just about holding things up. It’s about honoring craftsmanship—both the artisan who made the ornament and the builder who creates its sanctuary. Every decision—from wood species to anchor torque to the angle of your dusting brush—carries consequence. This isn’t decorative DIY; it’s responsible stewardship. Your ornaments likely carry decades of memory, cultural resonance, or personal history. They deserve infrastructure that anticipates not just today’s arrangement, but tomorrow’s humidity shift, next year’s careful rearrangement, and the quiet dignity of being seen—clearly, safely, and respectfully—for generations to come.


 浙公网安备
33010002000092号
浙公网安备
33010002000092号 浙B2-20120091-4
Comments
No comments yet. Why don't you start the discussion?