
In compact city apartments where floor space is at a premium, traditional Christmas trees can feel like an impossible luxury. But the holiday spirit doesn’t need square footage—it needs creativity. A hanging pocket Christmas tree offers a brilliant alternative: vertical, lightweight, and full of charm. This innovative decoration uses fabric or felt pockets arranged in a triangular shape to mimic a tree, suspended from the ceiling or wall. It’s perfect for studio apartments, dorm rooms, or anyone who wants a festive touch without sacrificing precious floor real estate.
Beyond its space-saving design, this DIY project is customizable, budget-friendly, and environmentally conscious. You can reuse materials, incorporate sentimental ornaments, and dismantle it easily after the holidays. Whether you’re a seasoned crafter or a first-time decorator, building a hanging pocket tree is a rewarding way to bring seasonal joy into even the tiniest of homes.
Why Choose a Hanging Pocket Christmas Tree?
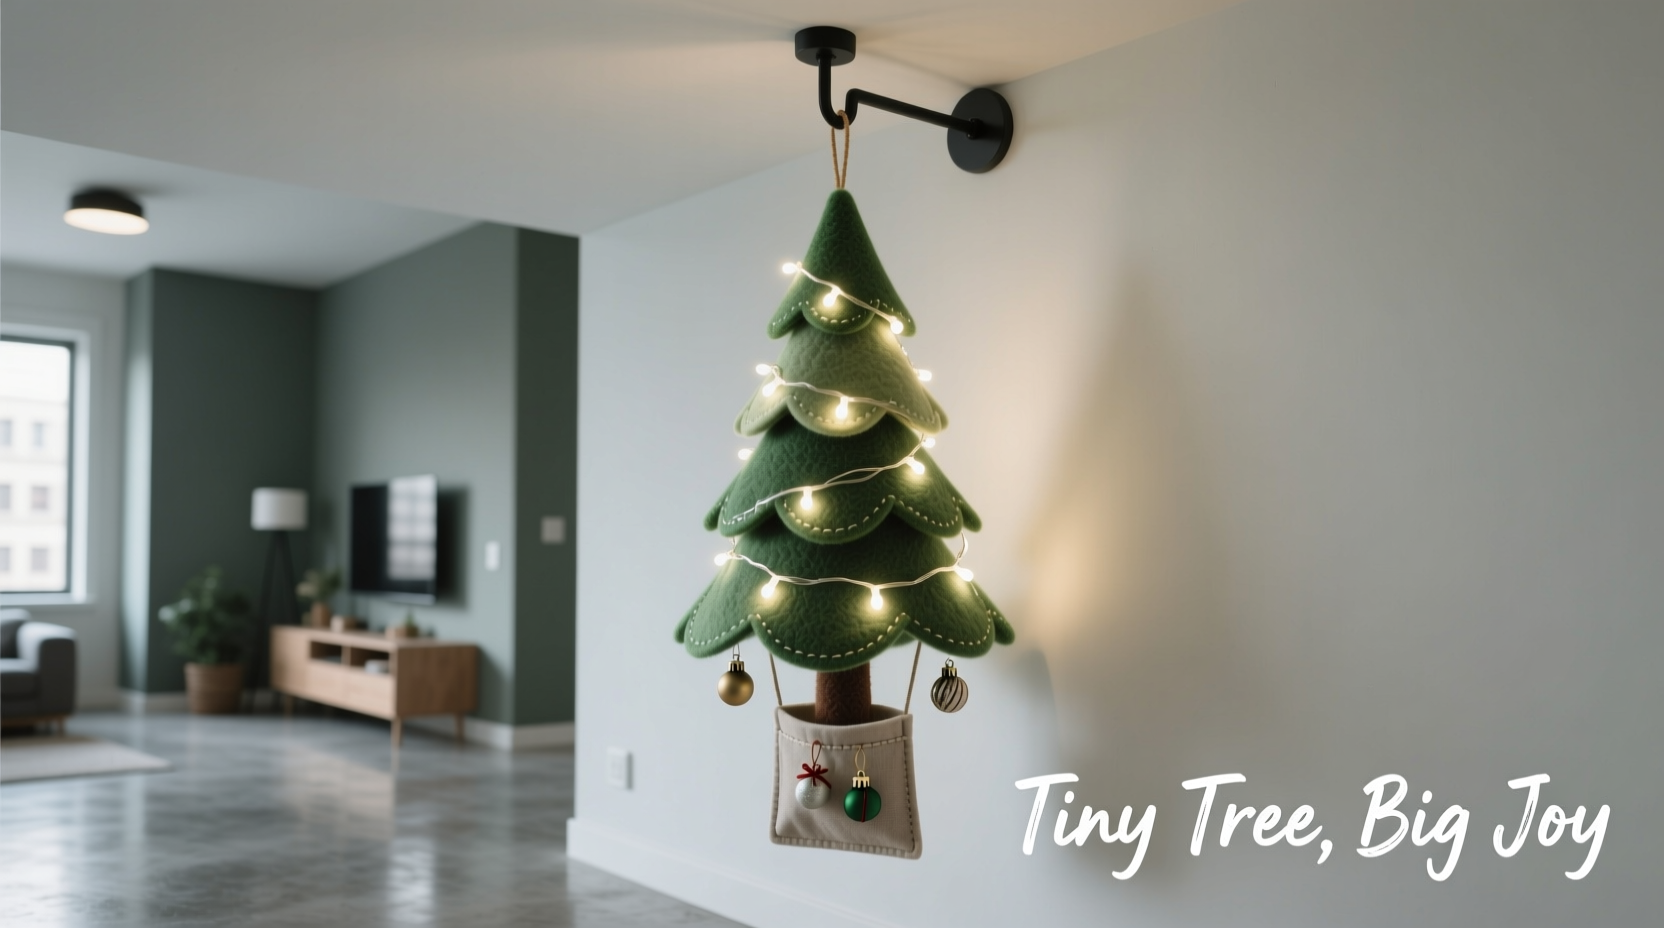
Urban living often means rethinking how we use space. In micro-apartments and shared housing, every inch counts. Traditional trees take up valuable floor area, require stands, and can be difficult to transport. A hanging pocket tree eliminates these issues while adding a whimsical, modern twist to holiday decor.
This style of tree works particularly well in entryways, above dining nooks, or in corners where vertical space goes unused. Because it’s made from soft materials like felt or canvas, it’s also safer around children and pets. Plus, each pocket can hold small gifts, ornaments, or LED lights, turning the tree into both decoration and functional storage.
“Small-space holiday decorating isn’t about compromise—it’s about clever design. The hanging pocket tree proves that festive impact doesn’t depend on size.” — Lena Torres, Urban Interior Designer & Author of *Compact Celebrations*
Materials and Tools You’ll Need
One of the best aspects of this project is its accessibility. Most materials can be found at craft stores, repurposed from old fabrics, or ordered online affordably. Below is a comprehensive list to get you started.
| Material/Tool | Purpose | Recommended Type |
|---|---|---|
| Felt or canvas fabric | Main structure (tree pockets) | Wool-blend felt (sturdy, fray-resistant) |
| Scissors or rotary cutter | Cutting fabric | Sharp fabric scissors or precision cutter |
| Hot glue gun or sewing machine | Assembling pockets | Low-temp glue gun for beginners |
| Sewing thread & needle (optional) | Hand-stitching for durability | Polyester thread in matching color |
| Wooden dowel or curtain rod | Top support beam | 1/2 inch diameter, cut to desired width |
| Twine, ribbon, or fishing line | Hanging mechanism | Clear fishing line for invisible suspension |
| Measuring tape & fabric marker | Marking pocket sizes | Water-soluble fabric pen |
| Ornaments, mini lights, tags | Decorating pockets | LED string lights (battery-powered) |
You don’t need advanced tools to succeed. If you're hand-sewing, take your time—the process is meditative and allows for greater personalization. For those short on time, a hot glue gun speeds up assembly, though glued seams may not last as long as stitched ones if reused annually.
Step-by-Step Assembly Guide
Follow this detailed sequence to create a balanced, visually appealing hanging pocket tree. The design follows a tiered triangle, with larger pockets at the base narrowing toward the top, mimicking a classic evergreen silhouette.
- Design the Tree Shape: Sketch a triangle on paper—typically 24–36 inches tall. Divide it into 5–7 horizontal tiers. Each tier will hold one row of pockets.
- Cut Fabric Pockets: Use the sketch as a guide. Cut felt into trapezoidal or rectangular shapes. Example dimensions:
- Bottom row: 6” wide x 4” high (3–5 pockets)
- Middle rows: Gradually decrease width by 1” per row
- Top row: 2” wide x 2” high (1 pocket)
- Form Each Pocket: Fold the fabric piece in half (right sides together), then glue or sew along the two sides. Turn right-side out. Leave the top open to insert items.
- Attach to Support Beam: Securely tie or stitch each pocket to the wooden dowel at the top edge. Arrange them in staggered rows so lower pockets slightly overlap upper ones, creating depth.
- Add Hanging Cords: Cut two equal lengths of twine or fishing line (approx. 18–24 inches). Tie each end to the left and right ends of the dowel. Ensure balance by testing with a level or measuring both sides.
- Hang and Decorate: Suspend from a ceiling hook, shelf bracket, or over a door. Insert mini ornaments, pinecones, handwritten notes, or battery-powered fairy lights into each pocket.
Customization Ideas
The beauty of this project lies in its adaptability. Consider these variations:
- Color Theme: Use red and white for a classic look, gold and black for elegance, or pastels for a Scandinavian vibe.
- Eco-Friendly Version: Repurpose old sweaters, scarves, or denim jeans for a sustainable, textured tree.
- Kids’ Version: Let children decorate their own pockets with stickers, drawings, or holiday messages.
- Non-Traditional Topper: Instead of a star, hang a small wreath, bell, or origami dove from the center top pocket.
Real-Life Example: A Brooklyn Studio Transformation
Maria, a graphic designer living in a 400-square-foot Brooklyn apartment, struggled each year with holiday decor. “I love Christmas, but my living room doubles as my office and bedroom,” she said. “A real tree blocked my desk, and an artificial one took weeks to assemble.”
Last November, she discovered the hanging pocket tree concept online. Using leftover wool felt from a previous craft project, she cut seven tiers of green pockets, arranging them on a bamboo skewer mounted to a driftwood slice. She hung it above her Murphy bed using clear fishing line.
Each pocket held a small gift for her partner—one per night leading up to Christmas. She added tiny fairy lights woven through the top rows. “It became the centerpiece of our tiny space without cluttering it,” Maria shared. “People thought it was store-bought, but it cost under $20 and took me one Sunday afternoon.”
Her solution not only saved space but sparked joy in a minimalist way. Neighbors began asking for tutorials, and she now hosts an annual “Tiny Tree Workshop” in her building’s common room.
Do’s and Don’ts for Best Results
To ensure your hanging pocket tree looks polished and lasts through the season, follow these guidelines.
| Do’s | Don’ts |
|---|---|
| Use flame-resistant materials if adding lights | Overload pockets with heavy items |
| Balance weight evenly across the dowel | Use flimsy fabric that sags when filled |
| Test hang before finalizing decorations | Place near heat sources or vents |
| Label pockets for gifting or advent use | Forget to measure ceiling clearance |
| Store flat in a labeled box post-holiday | Use permanent adhesive on rental walls |
“Durability meets design when function aligns with aesthetics. A well-made pocket tree should feel intentional, not makeshift.” — Raj Patel, Sustainable Home Stylist
Frequently Asked Questions
Can I make this without sewing or crafting experience?
Absolutely. Use pre-cut felt sheets and a low-temperature hot glue gun. Templates are available online for printing and tracing. Many crafters complete their first tree in under three hours with minimal tools.
Is it safe to hang over a bed or couch?
Yes, as long as it’s securely fastened and not overloaded. Use ceiling anchors for heavier versions. Avoid glass ornaments or sharp objects in pockets. Battery-powered LED lights are safer than plug-in versions.
How do I store it for next year?
Lay the tree flat in a shallow storage box with tissue paper between layers to prevent creasing. Keep in a cool, dry place away from pests. Felt can attract moths, so consider adding cedar chips or lavender sachets.
Checklist: Building Your Hanging Pocket Tree
Stay organized with this step-by-step checklist:
- ☐ Measure available vertical space (height and width)
- ☐ Choose fabric color and texture
- ☐ Sketch tree design with tier layout
- ☐ Cut all pocket pieces using template
- ☐ Assemble pockets (glue or sew)
- ☐ Attach pockets to dowel in staggered rows
- ☐ Attach hanging cords to dowel ends
- ☐ Test balance and adjust cord length if needed
- ☐ Hang in desired location
- ☐ Decorate with ornaments, lights, or gifts
- ☐ Take a photo and enjoy the season!
Conclusion: Celebrate Big in Small Spaces
The holiday season shouldn’t be limited by square footage. A hanging pocket Christmas tree proves that ingenuity can replace space, and heart can outweigh size. With simple materials and a few creative decisions, you can transform an overlooked corner into a festive focal point.
This project isn’t just practical—it’s meaningful. Each pocket can tell a story, hold a surprise, or reflect your personal style. And because it’s designed for reuse, it becomes a tradition rather than a disposable decoration.


 浙公网安备
33010002000092号
浙公网安备
33010002000092号 浙B2-20120091-4
Comments
No comments yet. Why don't you start the discussion?