
Apple Pay has transformed the way people handle everyday transactions—making it faster, safer, and more convenient than ever to pay in stores, online, or within apps. Yet, for first-time users, setting it up can feel overwhelming. This guide breaks down everything you need to know to get Apple Pay working smoothly from day one. Whether you're using an iPhone, Apple Watch, or iPad, you'll be tapping and paying in no time.
Understanding Apple Pay: What It Is and Why It Matters
Apple Pay is a digital wallet service developed by Apple that allows users to make secure contactless payments using their iPhone, Apple Watch, iPad, or Mac. Instead of swiping a physical card, you simply hold your device near a contactless reader. The technology uses Near Field Communication (NFC) and tokenization—a method that replaces your actual card number with a unique digital code—to keep your financial information private and secure.
Unlike traditional payment methods, Apple Pay doesn’t store your real card number on your device or Apple’s servers. This means even if your phone is lost or stolen, your data remains protected. According to the National Retail Federation, contactless payments grew by over 40% in 2023, with Apple Pay leading the market share among mobile wallets.
“Apple Pay combines convenience with enterprise-grade security, making it one of the safest ways to pay both in-store and online.” — Mark Reynolds, Senior Analyst at TechSecure Insights
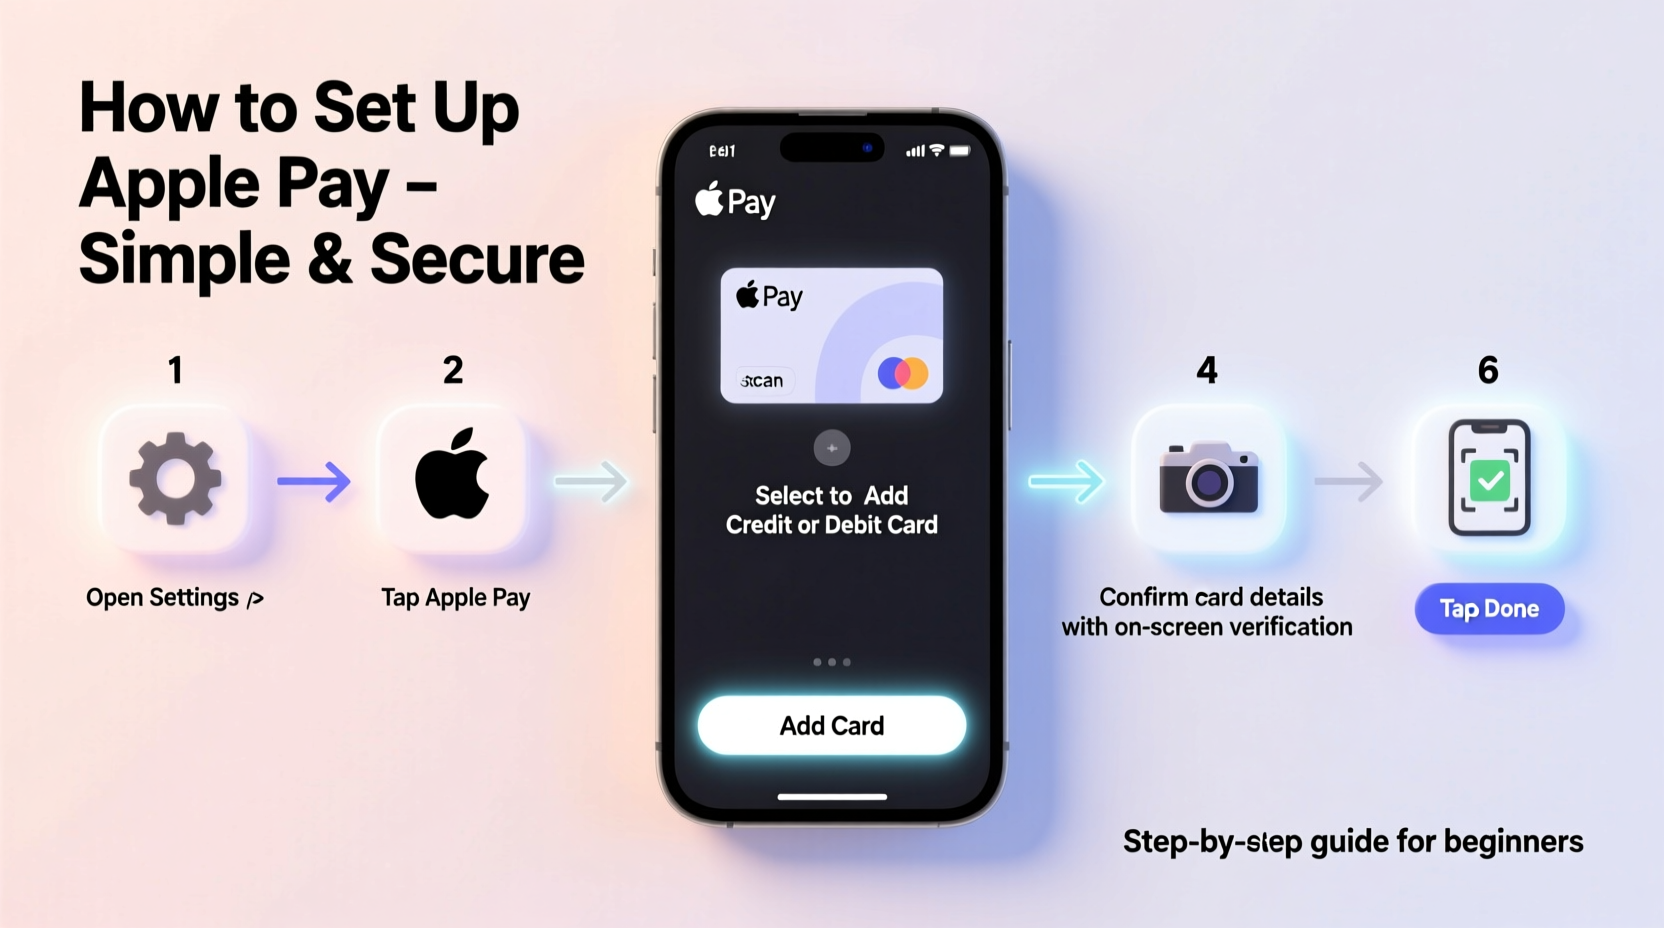
Step-by-Step Guide to Setting Up Apple Pay
Getting started with Apple Pay takes just a few minutes. Follow this timeline to activate it on your device:
- Check Device Compatibility: Ensure your device supports Apple Pay. iPhones from the iPhone 6 onward (including all models with Face ID or Touch ID), Apple Watch Series 1 and later, and select iPads and Macs are compatible.
- Update Your Software: Go to Settings > General > Software Update and install the latest version of iOS or watchOS.
- Open the Wallet App: Locate the Wallet app on your iPhone (it looks like a credit card icon). Tap the “+” sign in the top-right corner to add a new card.
- Add Your Payment Card: You can use your iPhone’s camera to scan your card or enter the details manually. Follow the prompts to verify the card with your bank—this may involve a text message, email, or phone call.
- Set as Default (Optional): Once added, you can set the card as your default payment method by dragging it to the front in the Wallet app.
- Enable Apple Pay on Apple Watch (if applicable): Open the Apple Watch app on your iPhone, go to Wallet & Apple Pay, and follow the instructions to add the same card.
After verification, your card will be ready to use. You’ll receive a confirmation in the Wallet app when setup is complete.
Using Apple Pay in Different Scenarios
Once configured, Apple Pay works across multiple environments. Here's how to use it effectively:
In Physical Stores
To pay at a retail location, wake your iPhone (either with Face ID, Touch ID, or passcode), then hold the top of the device near the contactless reader. If you have an Apple Watch, double-click the side button and hold the display to the terminal. A gentle vibration and beep confirm the transaction.
Within Apps and Websites
When shopping in supported apps or Safari, look for the Apple Pay button at checkout. Tap it, authenticate with Face ID or Touch ID, and your payment details are securely sent without typing anything. This reduces errors and speeds up the process.
On the Web via Mac
If you’re using a Mac with Touch ID, you can use Apple Pay on websites that support it. Click the Apple Pay button during checkout, authenticate, and the payment processes instantly.
For Public Transit
In cities like New York, London, Tokyo, and Sydney, Apple Pay works directly with transit systems. Just tap your iPhone or Apple Watch on the reader—no app open required. Fares are automatically deducted, and monthly caps may apply depending on the city.
| Use Case | Device Needed | Authentication Required? |
|---|---|---|
| In-store purchase | iPhone or Apple Watch | Yes (Face/Touch ID or passcode) |
| In-app purchase | iPhone or iPad | Yes |
| Online checkout (Safari) | iPad, iPhone, or Mac | Yes |
| Transit fare | iPhone or Apple Watch | No (unless locked) |
Troubleshooting Common Issues
Even with seamless design, occasional hiccups occur. Here’s how to resolve them quickly:
- Card Not Verified: Some banks require additional steps. Call customer service or log into your online banking portal to approve the device linkage.
- Payment Declined at Terminal: Ensure the merchant accepts contactless payments. Look for the contactless symbol (four curved lines) on the terminal. Also, check that your default card has sufficient funds.
- Apple Watch Not Responding: Make sure it’s charged and within range of your iPhone. Restart the watch if needed.
- Wallet App Crashes: Force close the app and reopen it. If issues persist, restart your iPhone.
Mini Case Study: Sarah’s First Week With Apple Pay
Sarah, a 32-year-old teacher in Chicago, decided to go card-free after reading about digital wallets. She followed the setup guide, added her Visa debit card, and began using Apple Pay at her local coffee shop, grocery store, and subway station. Within three days, she stopped carrying her wallet altogether. One morning, her card was declined at a vending machine—she realized her bank had flagged the activity as suspicious. After a quick call to customer service, the block was lifted. By week’s end, she’d saved nearly 15 minutes in checkout lines and felt more confident knowing her card details weren’t being stored on merchant systems.
Sarah’s experience highlights both the efficiency and minor learning curve of adopting Apple Pay. With proper bank communication and a little patience, the transition was smooth and ultimately life-enhancing.
Best Practices Checklist
To ensure Apple Pay works flawlessly every time, follow this actionable checklist:
- ✅ Confirm your device and card are Apple Pay-compatible
- ✅ Update to the latest iOS or watchOS version
- ✅ Add only verified, active cards from trusted banks
- ✅ Set your most-used card as default
- ✅ Enable Find My iPhone for remote lock/wipe capabilities
- ✅ Test Apple Pay at a low-stakes location (e.g., convenience store) before relying on it daily
- ✅ Monitor bank notifications for verification requests
Frequently Asked Questions
Can I use Apple Pay without an internet connection?
Yes. Apple Pay stores encrypted card tokens locally on your device, so you can make purchases even when offline. However, your device must be unlocked and powered on.
Is Apple Pay free to use?
Absolutely. Apple does not charge any fees for using Apple Pay. Your bank or card issuer may have standard transaction policies, but there are no additional costs for using the service.
What happens if I lose my iPhone?
If your device is lost, immediately use Find My iPhone to put it in Lost Mode or erase it remotely. This disables Apple Pay and protects your payment information. Your physical cards remain safe since they were never shared with Apple.
Final Thoughts: Embrace the Future of Payments
Apple Pay isn’t just a tech trend—it’s a practical upgrade to how we manage money every day. From reducing physical clutter to enhancing transaction security, its benefits are immediate and long-lasting. By following this guide, you’ve taken the first step toward a smoother, more efficient financial routine. The key is consistency: use it daily, keep your settings updated, and stay informed about new features like Apple Pay Later or enhanced loyalty integrations.


 浙公网安备
33010002000092号
浙公网安备
33010002000092号 浙B2-20120091-4
Comments
No comments yet. Why don't you start the discussion?