
Cheap sneakers don’t have to mean short-lived footwear. With the right care and a few smart DIY reinforcements, budget-friendly shoes can last just as long—or even longer—than their pricier counterparts. Most low-cost sneakers are built with thinner materials and less durable construction, but that doesn't mean they're destined for the trash after a few months of wear. By identifying common failure points and reinforcing them early, you can significantly extend the life of your favorite pairs. This guide breaks down practical, affordable methods to strengthen soles, prevent upper tears, maintain cushioning, and keep your kicks looking fresh.
Why Cheap Sneakers Wear Out Faster
Inexpensive sneakers often cut corners in three key areas: materials, stitching, and sole durability. The uppers may be made from thin synthetic fabrics or lightweight mesh that tears easily. Stitching is frequently minimal or poorly reinforced, especially around high-stress zones like the toe box and heel collar. The outsoles are commonly made from softer rubber compounds that degrade quickly on rough surfaces. Midsoles, usually composed of compressed EVA foam, compress permanently after repeated use, leading to loss of support and comfort.
These design compromises make cheap sneakers more vulnerable to daily wear, but understanding where and why they fail allows you to intervene before damage becomes irreversible. Instead of replacing them every few months, proactive reinforcement can stretch their lifespan by six months or more—sometimes doubling it.
“Most sneaker failures start small—a loose thread, a faint crease, a tiny crack in the sole. Catch these early, and you can stop them from becoming major issues.” — Marcus Tran, Footwear Repair Technician with 15 years of experience
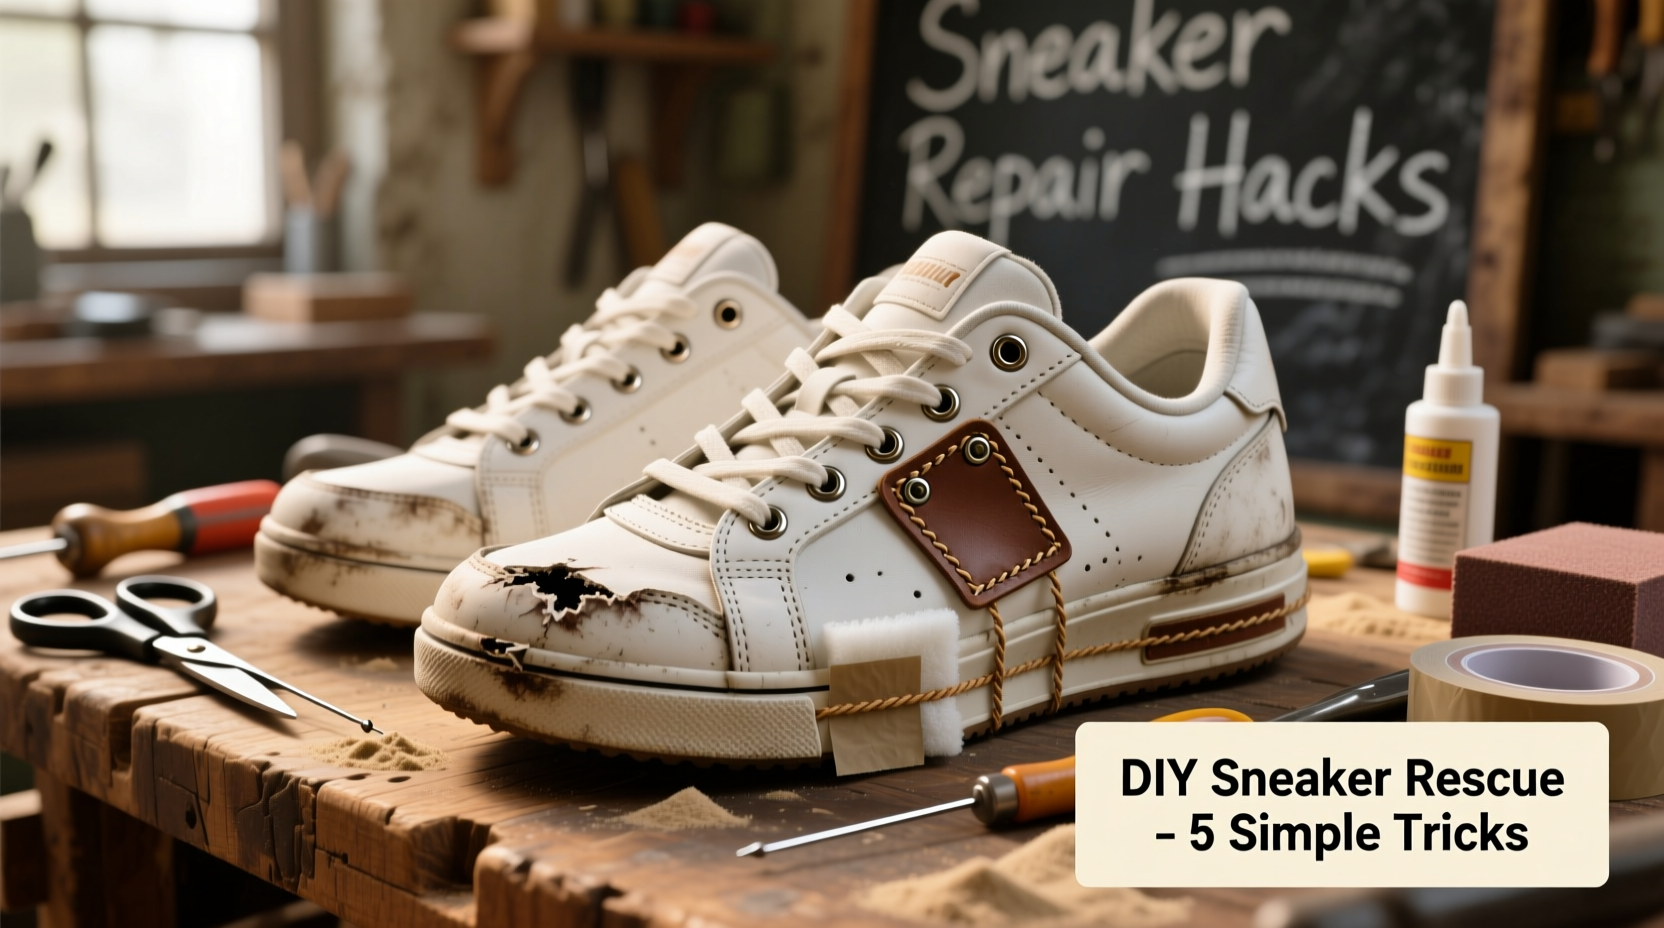
Step-by-Step: Reinforce the Sole with Shoe Goo
The outsole separating from the midsole is one of the most common reasons cheap sneakers get discarded. This delamination often starts at the toe or heel and worsens with each step. Fortunately, this is one of the easiest problems to fix—and prevent—with a simple DIY solution.
- Clean the area thoroughly: Use rubbing alcohol and a cotton pad to wipe the seam between the sole and upper. Remove any dirt, dust, or old adhesive residue.
- Roughen the surface: Lightly sand the edge of the sole and the base of the upper with fine-grit sandpaper. This helps the adhesive bond better.
- Apply Shoe Goo: Squeeze a thin, continuous bead of Shoe Goo along the seam. Don’t overapply—excess will ooze out and harden awkwardly.
- Smooth and shape: Use a toothpick or plastic tool to spread the adhesive evenly into the gap. Ensure full coverage without gaps.
- Dry completely: Let the shoe sit undisturbed for at least 24 hours. Avoid wearing it during this time.
This method not only repairs existing separation but also acts as a preventive measure when applied early. For best results, reinforce both the front and rear seams of new sneakers within the first week of ownership.
Strengthen the Upper with Fabric Patches and Iron-On Backing
The upper material on budget sneakers—especially mesh or knit models—is prone to punctures and abrasions. A small tear near the big toe or along the side can quickly grow into a gaping hole. Rather than waiting for damage to occur, reinforce high-friction zones proactively.
Start by identifying stress points: the medial side of the forefoot (where toes rub), the heel collar (from slipping on and off), and the lateral side of the pinky toe (from pavement contact during strides). Cut small pieces of iron-on denim or canvas patch material slightly larger than the target zone. Place the patch on the inside of the shoe, aligning it with the outside wear point. Use a household iron (medium heat, no steam) to bond the patch through the fabric. Hold for 10–15 seconds per section, applying firm pressure.
For extra durability, seal the edges with a thin layer of Flex Seal Liquid or clear nail polish to prevent fraying. This dual-layer approach—internal patch plus external sealant—can turn fragile mesh into a resilient barrier.
When to Patch: A Real Example
Jamal, a college student in Chicago, bought a pair of $45 running-style sneakers for campus walking and part-time delivery gigs. After three weeks, he noticed a small hole forming on the outer side of his right shoe’s forefoot. Instead of retiring them, he applied an iron-on patch inside and sealed the outside with Shoe Goo. He continued wearing them daily for another five months without further deterioration. “I thought they’d be gone by now,” he said. “But they still look usable.”
Prevent Midsole Compression with Insoles and Rotation
One silent killer of cheap sneakers is midsole breakdown. The soft foam compresses unevenly over time, leading to flat spots, reduced cushioning, and discomfort. While you can’t reverse compression, you can slow it dramatically.
- Add supportive insoles: Insert gel or memory foam insoles to redistribute pressure and reduce direct impact on the original midsole.
- Avoid daily wear: Rotate between two or more pairs. Giving a shoe 24–48 hours of rest allows the foam to partially rebound.
- Store properly: Keep sneakers in a cool, dry place away from direct sunlight. Heat accelerates foam degradation.
For added protection, avoid wearing cheap sneakers in heavy rain or snow. Waterlogged foam loses resilience faster and promotes internal mold, which weakens glue bonds.
| Reinforcement Method | Best For | Cost | Longevity Boost |
|---|---|---|---|
| Shoe Goo sole sealing | All sneaker types | $5–$8 per tube | 6–12 months |
| Iron-on fabric patches | Mechanical wear zones | $3–$6 per sheet | 4–8 months |
| Aftermarket insoles | Cushion preservation | $5–$15 per pair | 3–6 months |
| Waterproof sprays | Fabric uppers | $6–$10 per can | 2–4 months |
Essential Do’s and Don’ts for Long-Lasting Budget Sneakers
Small habits make a big difference in footwear longevity. Follow these guidelines to maximize the return on your investment.
| Do | Don’t |
|---|---|
| Inspect shoes weekly for loose threads or cracks | Wait until a hole appears to act |
| Tighten loose eyelets with pliers or replace with metal aglets | Pull laces aggressively if they snag |
| Use a shoehorn to preserve heel structure | Wear sneakers without socks |
| Clean with mild soap and water; air dry naturally | Put wet sneakers in a dryer or near a heater |
| Apply waterproof spray monthly on fabric models | Use harsh chemicals like bleach or acetone |
Detailed Checklist: Extend Your Sneakers’ Life in 7 Steps
Follow this actionable checklist every time you buy a new pair of inexpensive sneakers:
- Inspect the sole-to-upper seam for gaps or weak glue.
- Apply Shoe Goo along all perimeter seams as a preventive seal.
- Identify high-wear zones on the upper and apply internal fabric patches.
- Insert quality insoles to reduce midsole compression.
- Spray the entire upper with a silicone-based waterproofing agent.
- Rotate with at least one other pair to allow recovery time.
- Perform monthly maintenance: clean, inspect, reseal if needed.
Completing these steps within the first week of ownership sets a strong foundation. Monthly upkeep keeps issues from escalating.
Frequently Asked Questions
Can I use super glue instead of Shoe Goo?
Super glue (cyanoacrylate) is not recommended for shoe repair. It dries brittle and lacks flexibility, so it cracks under foot movement. Shoe Goo is specifically formulated to remain flexible while bonding rubber, foam, and fabric. It’s worth the small extra cost for reliable results.
How do I stop the white midsole from yellowing?
Yellowing is caused by UV exposure and oxidation. Store sneakers in a dark closet and avoid leaving them in direct sunlight. To clean already-yellowed midsoles, mix equal parts hydrogen peroxide (3%) and laundry detergent, apply with a soft brush, wrap in plastic, and expose to indirect sunlight for 2–3 hours. Rinse thoroughly. Repeat if necessary.
Are DIY repairs noticeable?
If done carefully, most reinforcements are nearly invisible. Shoe Goo dries clear or translucent, and internal patches don’t show from the outside. For aesthetic concerns, choose colored patches that match the shoe or apply clear sealants. The trade-off—longer wear and saved money—is usually worth minor visual changes.
Conclusion: Small Efforts, Big Returns
Extending the life of cheap sneakers isn’t about magic fixes—it’s about consistent, thoughtful maintenance. A few dollars in supplies and minutes of effort each month can transform a disposable $50 pair into a reliable, long-term companion. You’re not just saving money; you’re reducing waste and making more sustainable fashion choices. These DIY techniques empower you to take control of your footwear’s fate, turning overlooked budget options into durable, personalized staples.


 浙公网安备
33010002000092号
浙公网安备
33010002000092号 浙B2-20120091-4
Comments
No comments yet. Why don't you start the discussion?