
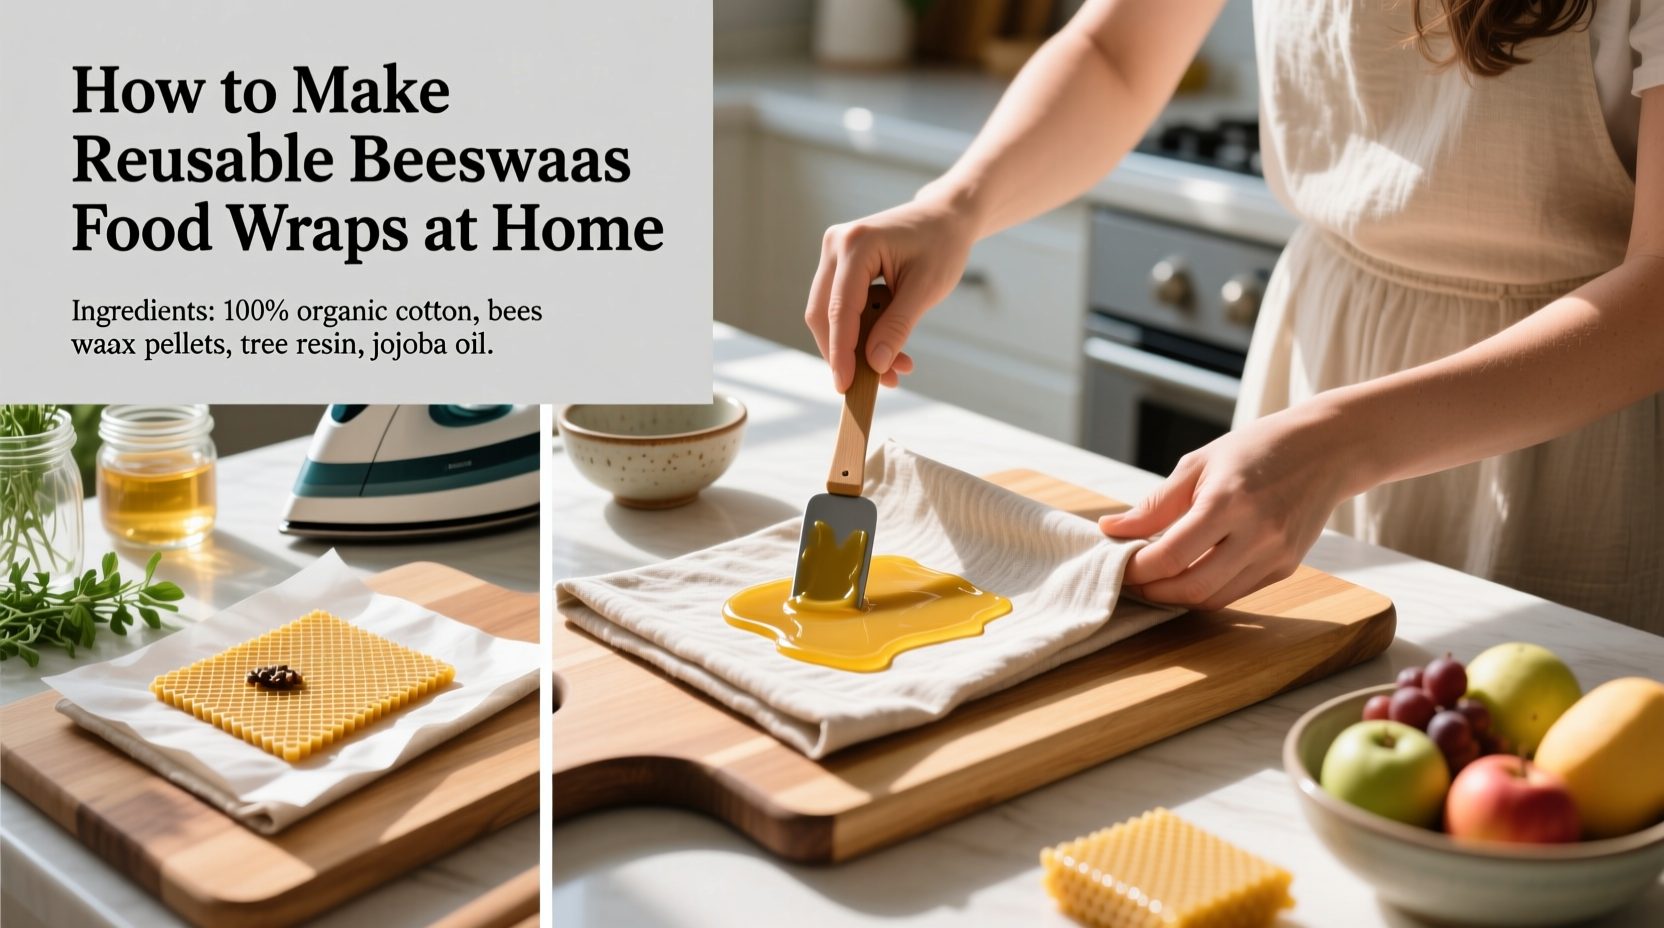
In a world increasingly aware of single-use plastic waste, many households are turning to sustainable alternatives in the kitchen. One such innovation is the reusable food wrap made from beeswax. These pliable, naturally antimicrobial wraps can seal bowls, cover cut produce, or wrap sandwiches—replacing cling film and aluminum foil without sacrificing functionality. The best part? You can make them yourself with just a few basic materials. This guide walks you through every step of crafting high-performing beeswax wraps at home, including sourcing materials, avoiding common mistakes, and extending their lifespan.
Why Beeswax Wraps Matter
Traditional plastic wrap contributes significantly to environmental pollution. It’s rarely recycled, often ends up in landfills or oceans, and can take over 500 years to degrade. In contrast, beeswax wraps are biodegradable, compostable at end-of-life, and can be reused for up to a year with proper care. They work by using the warmth of your hands to soften the wax coating, allowing the wrap to mold around containers or food items. Once cooled, it holds its shape securely.
The natural ingredients—beeswax, pine resin, jojoba oil, and cotton fabric—create a breathable yet protective barrier that keeps food fresh while inhibiting bacterial growth. Unlike plastic, which traps moisture and accelerates spoilage, beeswax wraps allow slight airflow, helping fruits and vegetables stay crisp longer.
“Beeswax wraps represent one of the most accessible entry points into zero-waste living. They’re effective, affordable, and empower people to make tangible changes in their daily habits.” — Dr. Lena Patel, Sustainable Living Researcher, Green Home Institute
Materials You’ll Need
Creating beeswax wraps requires only four core ingredients and a few basic tools. All materials are widely available online or in craft and health food stores.
- 100% cotton fabric: Pre-washed and cut into desired sizes (e.g., 8x8”, 12x12”, 15x15”). Avoid synthetic blends as they don’t absorb wax well.
- Beeswax pellets or grated block: Look for filtered, pesticide-free beeswax. About 1–2 tablespoons per small wrap.
- Pine resin: Adds tackiness and helps the wrap adhere to itself and surfaces. Optional but highly recommended.
- Jojoba oil: Conditions the wrap, improves flexibility, and extends shelf life. A few drops per wrap suffice.
- Baking sheet and parchment paper: For even melting and cooling.
- Oven or iron: Two methods exist for applying wax—one uses low oven heat, the other an iron with parchment protection.
- Paintbrush or spatula: To spread melted wax mixture evenly.
Step-by-Step Guide to Making Beeswax Wraps
Follow this detailed process to create durable, functional wraps in under an hour. This method uses the oven technique, which offers more consistent results than ironing, especially for beginners.
- Pre-wash and cut fabric: Wash cotton pieces to remove sizing and pre-shrink. Cut into standard sizes based on intended use—small for cups, medium for bowls, large for bread or platters.
- Preheat oven to 175°F (80°C): Low temperature prevents scorching the wax while ensuring full melt.
- Prepare baking sheet: Line with parchment paper. Arrange fabric pieces flat, not overlapping.
- Mix ingredients: Combine 1 cup beeswax pellets, 2 tablespoons pine resin, and 1 tablespoon jojoba oil in a double boiler or heat-safe bowl over simmering water. Stir until fully melted and blended.
- Apply mixture: Using a brush or spoon, evenly coat each fabric square. Focus on edges—they tend to dry out first. Aim for a thin, uniform layer; too much wax makes wraps stiff.
- Bake for 4–6 minutes: Place tray in oven until wax melts completely and soaks into fabric. Watch closely—bubbling means overheating.
- Cool vertically: Remove tray and immediately lift one corner of each wrap with tongs or tweezers, letting excess drip off. Hang over a clean edge (like a broom handle) for 30 seconds to cool slightly.
- Final cool-down: Lay wraps flat on another sheet of parchment to harden completely, about 5–10 minutes.
- Test flexibility: Gently fold a corner. It should crease without cracking. If brittle, remelt with less time or add a drop more jojoba oil next batch.
Once cooled, your wraps are ready to use. Test one by covering a small bowl—press edges with warm hands to seal. It should hold snugly.
Do’s and Don’ts of Beeswax Wrap Care
Proper maintenance determines how long your wraps last. Follow these guidelines to get the most out of each piece.
| Do’s | Don’ts |
|---|---|
| Wash in cool water with mild dish soap after each use. | Never use hot water—it melts the wax coating. |
| Allow wraps to air-dry completely before storing. | Avoid wringing or twisting, which damages fibers. |
| Store flat or rolled in a cool, dry drawer. | Don’t store near heat sources like stoves or ovens. |
| Refresh wraps every 2–3 months by remelting surface wax. | Never put in dishwasher, microwave, or washing machine. |
| Use for cheese, veggies, bread, and covering containers. | Don’t wrap raw meat or hot foods—risk of contamination and wax damage. |
Real-Life Example: A Family Reduces Plastic Waste
The Thompson family of four in Portland, Oregon, decided to eliminate single-use plastics from their kitchen after learning about microplastic contamination in drinking water. They began by replacing sandwich bags and plastic wrap with homemade beeswax wraps. Using leftover cotton quilting squares and bulk-purchased beeswax, they made six wraps in one afternoon. Over the next three months, they tracked their savings: they avoided buying three rolls of plastic wrap and two boxes of sandwich bags, saving $42. More importantly, they estimated preventing over 120 feet of plastic film from entering the waste stream.
“We love how the kids can pick their favorite pattern,” said Sarah Thompson. “It made switching easier because it felt personal, not restrictive.” When one wrap started peeling after five months, they refreshed it using the oven method and extended its life another four months. Their success inspired neighbors to host a wrap-making workshop, turning sustainability into community action.
Troubleshooting Common Issues
Even experienced makers encounter hiccups. Here’s how to fix frequent problems:
- Wrap is too sticky: Likely too much pine resin. Reduce ratio to 1 teaspoon per cup of beeswax next time.
- Wax beads up on fabric: Fabric may have residual detergent or oils. Always pre-wash without fabric softener.
- Wrap cracks when folded: Wax layer is too thick or lacks conditioning oil. Remelt and add a few drops of jojoba oil.
- Not adhering well: Hands may be too cold. Warm palms by rubbing together before shaping.
- Faded appearance: Prolonged sun exposure degrades color. Store wraps away from windows.
FAQ: Your Questions Answered
Can I use soy or candelilla wax instead of beeswax?
Yes, plant-based waxes work for vegan versions, but they typically don’t perform as well. Beeswax has superior water resistance and malleability. Candelilla wax is harder and may require more oil to prevent brittleness. Expect shorter lifespan with non-beeswax alternatives.
How long do homemade beeswax wraps last?
With regular use and proper care, most wraps last 6 to 12 months. Signs it’s time to replace include thinning fabric, flaking wax, or loss of stickiness. At end-of-life, cut into strips and compost—the natural fibers and wax break down safely.
Can I wash beeswax wraps in the sink with other dishes?
Yes, but gently. Use cool water and a soft sponge. Avoid scrubbing with abrasive pads. Wash separately if other dishes are greasy or hot. Let air-dry on a rack—don’t stack wet wraps.
Checklist: Make & Maintain Beeswax Wraps Like a Pro
Keep this checklist handy for your first (and future) batches:
- ☐ Pre-wash all cotton fabric pieces
- ☐ Cut into practical sizes (8\", 12\", 15\")
- ☐ Measure wax mixture: 1 cup beeswax, 2 tbsp pine resin, 1 tbsp jojoba oil
- ☐ Preheat oven to 175°F (80°C)
- ☐ Line baking sheet with parchment paper
- ☐ Evenly apply wax mixture with brush
- ☐ Bake 4–6 minutes until fully absorbed
- ☐ Cool vertically, then flat
- ☐ Test flexibility and adhesion
- ☐ Store in a dry, cool place
- ☐ Wash in cool water after use
- ☐ Refresh every 2–3 months if needed
Conclusion: Start Small, Think Big
Making reusable food wraps at home is more than a DIY project—it’s a step toward mindful consumption. With minimal investment and effort, you can produce a set of functional, attractive wraps that reduce waste, save money, and spark conversations about sustainability. Each wrap you use replaces dozens of plastic counterparts. Multiply that across households, and the environmental impact becomes significant.


 浙公网安备
33010002000092号
浙公网安备
33010002000092号 浙B2-20120091-4
Comments
No comments yet. Why don't you start the discussion?