
Polymer clay is one of the most accessible, forgiving, and expressive mediums for handmade holiday decor. Unlike fragile glass baubles or mass-produced plastic trinkets, ornaments crafted from polymer clay carry warmth, personality, and intention. They hold up beautifully over years—not just as decorations, but as heirlooms. Whether you’re a beginner who’s never touched clay before or an experienced crafter seeking fresh seasonal inspiration, this guide delivers practical, field-tested methods for designing, shaping, baking, and finishing ornaments that look professional, feel substantial, and withstand decades of careful handling.
Why Polymer Clay Stands Out for Holiday Ornaments
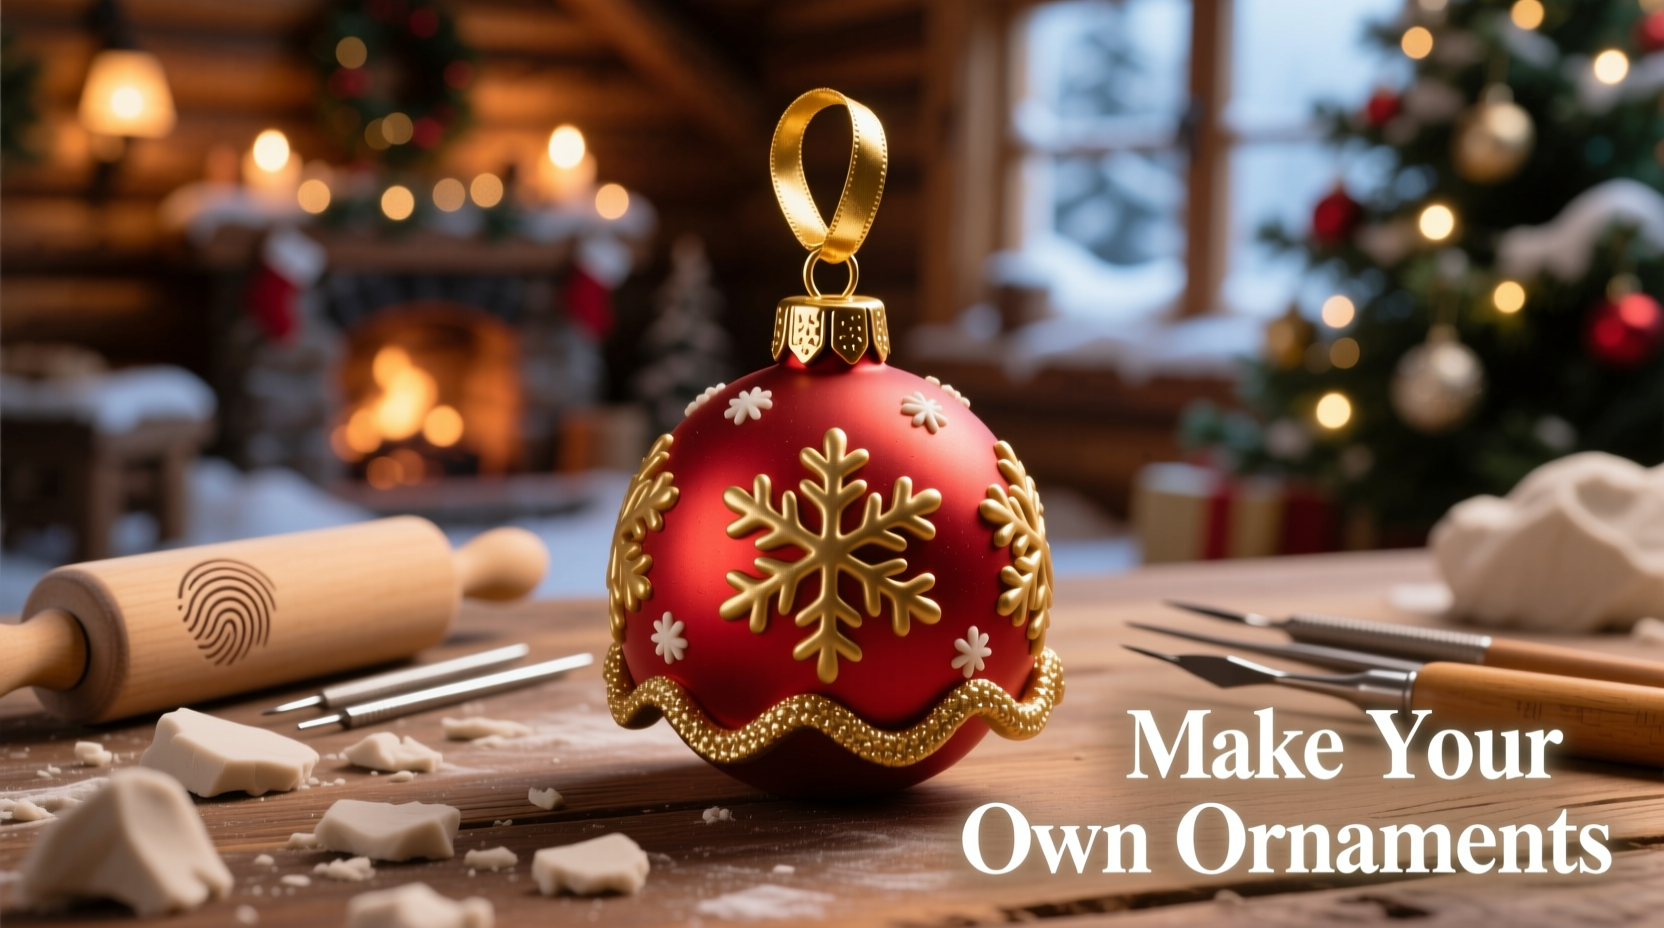
Polymer clay isn’t “play dough” or air-dry clay—it’s a PVC-based modeling compound that cures permanently when baked at low temperatures (typically 230–275°F). Its advantages for ornament-making are structural and aesthetic: it holds fine detail without cracking, accepts paint, glaze, and metallic finishes exceptionally well, and remains lightweight even in larger forms. Most importantly, it doesn’t shrink, warp, or yellow under indoor lighting—critical for pieces meant to hang on a tree year after year.
Unlike ceramic or wood, polymer clay requires no kiln, lathe, or workshop. A toaster oven, basic tools, and a clean workspace are enough to begin. And because it stays pliable until baked, mistakes are easily corrected: overworked surfaces can be smoothed with a damp brush; misshapen forms reconditioned with gentle kneading; colors blended directly in hand.
Essential Tools & Materials (No Specialty Shop Required)
You don’t need a craft store haul to get started. Here’s what actually matters—and what you can skip:
| Item | Why It’s Essential | Smart Substitution (If Needed) |
|---|---|---|
| Conditioned polymer clay (e.g., Sculpey Premo!, Fimo Soft, or Cernit) | Pre-conditioned clays bake evenly and resist crumbling; avoid cheap “craft-grade” lines with high filler content—they crack or bubble during baking. | Use higher-end clay for visible surfaces; reserve budget clay for armatures or hidden cores. |
| Non-stick work surface (glass, ceramic tile, or silicone mat) | Prevents clay from sticking—and avoids transferring oils or residue that cause surface flaws. | A clean, smooth sheet of parchment paper works temporarily—but avoid wax paper (wax migrates into clay). |
| Basic tools: blade, needle tool, acrylic roller, small metal ruler | A sharp blade gives clean cuts; a needle tool creates precise holes for hanging; a roller ensures uniform thickness; a ruler helps scale consistent shapes (like stars or trees). | Use a butter knife instead of a blade (with caution); a straightened paperclip for poking holes. |
| Oven thermometer + dedicated toaster oven | Oven dials are notoriously inaccurate. A $5 oven thermometer prevents underbaking (soft, crumbly ornaments) or overbaking (browning, brittleness). | Never use your kitchen oven for clay—fumes are minimal but best isolated. A $30 toaster oven is a permanent, safe investment. |
| Light sandpaper (400+ grit) and matte/gloss varnish | Sanding removes fingerprints and baking residue; varnish seals pigment, adds depth, and protects against moisture and abrasion—especially important for ornaments handled by children or stored in attics. | Use superfine emery board (nail file) for light sanding; skip varnish only if using translucent or metallic clays designed for shine. |
Step-by-Step Ornament Creation Process
This sequence reflects real studio practice—not idealized theory. Each step includes common pitfalls and how to resolve them:
- Design & Plan: Sketch three variations of your ornament (e.g., minimalist snowflake, vintage-style bell, abstract geometric shape). Note dimensions—most ornaments perform best between 2\" and 4\" tall. Avoid thin, unsupported projections (like long antlers on a reindeer)—they snap during baking or hanging.
- Condition & Color: Warm clay in your palms for 60 seconds, then knead vigorously for 2–3 minutes until pliable and cool to the touch. For custom colors, blend small portions on a non-stick surface—start with 10% darker pigment than desired, as baked clay often lightens slightly.
- Shape & Refine: Roll to consistent thickness (⅛\" for delicate pieces, ¼\" for sturdy ones). Cut cleanly with a blade held vertically. Use a needle tool to pierce the top third of the ornament *before* baking—this prevents cracks caused by thermal expansion pushing against hardened clay.
- Bake Strategically: Place ornaments on a ceramic tile inside the preheated toaster oven. Bake at manufacturer-recommended temperature for full duration (e.g., 30 minutes at 275°F for Premo!). Do not open the oven early—even 10 seconds of temperature drop risks undercuring. Let cool fully on the tile before handling.
- Finish Thoughtfully: Lightly sand edges and surfaces with 400-grit paper. Wipe away dust with a lint-free cloth. Apply two thin coats of water-based polyurethane varnish (matte for chalky finishes, gloss for jewel-like depth), allowing 2 hours dry time between coats.
Real Example: The “Maple Leaf” Ornament Series
When Toronto-based educator and clay artist Lena Ruiz launched her first holiday workshop in 2021, she focused on regional symbolism—creating ornaments tied to local identity rather than generic motifs. Her maple leaf series began as a simple request from a student whose family had immigrated from Quebec: “Something that feels like home, not Hallmark.”
Lena used translucent polymer clay layered over deep burgundy base clay, then imprinted veins with a dried leaf pressed gently into the surface before baking. She drilled tiny holes along the outer edge post-bake and threaded natural jute twine—intentionally rustic, not polished. The result? Ornaments that sold out in 72 hours—not because they were technically flawless, but because they carried narrative weight. Customers reported hanging them beside childhood photos or gifting them to relatives who’d never seen Canada’s autumn forests. That project confirmed what seasoned clay artists know: the strongest ornaments aren’t the most complex—they’re the most meaningfully made.
“Polymer clay’s magic lies in its honesty. It shows every fingerprint, every pause, every decision. That’s why handmade ornaments resonate—they don’t hide the human behind them.” — Maya Chen, Founder of Clay & Hearth Studio, Portland OR
Creative Ideas That Go Beyond Basics
Once you’ve mastered fundamentals, elevate your ornaments with these proven techniques:
- Layered Translucency: Stack thin sheets of translucent clay over colored bases, then bake. After cooling, lightly sand the top layer to reveal soft gradients—ideal for frosted berries or stained-glass-style angels.
- Imprint & Texture: Press lace, burlap, or even crumpled aluminum foil into raw clay for instant organic texture. Seal with matte varnish to preserve depth without glare.
- Metallic Accents: Rub gold or copper mica powder onto raised surfaces *after* baking and *before* varnish. The powder adheres only where clay is slightly porous—no glue, no smudging.
- Personalized Lettering: Use tiny alphabet cutters or hand-carve letters with a fine needle tool. For legibility, keep strokes ≥1mm thick—thinner lines vanish during sanding or varnishing.
- Functional Integration: Embed small magnets (rated for 200°C+) into the back of flat ornaments before baking—turns them into fridge art or cabinet closures that double as holiday decor.
Frequently Asked Questions
Can I bake polymer clay ornaments with wire hangers embedded inside?
Yes—but only if the wire is stainless steel or aluminum. Avoid copper, brass, or coated craft wire: they oxidize in heat, leaching green or black residue into the clay. Insert wire before baking, leaving ½\" exposed at the top for tying. Bend the end into a small loop *after* baking to prevent sharp edges.
My ornaments warped slightly after baking. What went wrong?
Warpage almost always traces to uneven thickness or inconsistent oven temperature. If one side is thicker, it expands more during heating and cools slower, causing curl. Always use a ruler and acrylic roller to verify uniformity. Also, place ornaments on a level ceramic tile—not cardboard or wood—which insulates unevenly and traps steam.
How do I sign my ornaments without ruining the finish?
Press your initials or a tiny symbol (e.g., a star or dot pattern) into the *back* of the ornament with a needle tool *before* baking. Once cured, the impression becomes permanent and subtle—no ink, no fading, no added layers. For series numbering, add “#1/12” alongside your mark.
Building a Sustainable Ornament Tradition
Handmade ornaments gain value with age—not depreciation. Unlike disposable decor, polymer clay pieces deepen in significance: a child’s first ornament, a wedding year, a milestone recovery. Their longevity depends less on perfection and more on thoughtful construction. That means avoiding shortcuts that compromise integrity: skipping conditioning leads to breakage; omitting sanding invites chipping; rushing varnish causes cloudiness or pooling.
Consider building a “clay calendar”: dedicate one Sunday each November to create three ornaments. Use that time not just for crafting, but for reflection—choose symbols that represent gratitude, growth, or connection from that year. Store finished pieces in compartmentalized boxes lined with acid-free tissue, not plastic bags (which trap moisture). Label each box with year, creator, and story—“2024: First apartment, made with Mom.”
Over time, these become more than decorations. They become tactile archives—small, vivid chapters in a family’s unfolding story.


 浙公网安备
33010002000092号
浙公网安备
33010002000092号 浙B2-20120091-4
Comments
No comments yet. Why don't you start the discussion?