
There’s something quietly magical about a snow globe: the hush before the shake, the slow cascade of glitter like frozen breath, the miniature world suspended in glass and light. Commercial versions often cost $25–$40, use fragile plastic domes, and contain non-biodegradable “snow” that clumps after months. But a handmade snow globe ornament—small enough to hang on a tree, sturdy enough for daily handling, and fully customizable—is entirely achievable at home with under $12 in supplies and under 90 minutes of focused time. This isn’t craft-store assembly; it’s intentional making. You’ll learn not just *how* to seal a dome, but *why* glycerin matters, *when* to substitute distilled water, and *how* to avoid the three most common failures: clouding, leakage, and glitter migration.
Why Handmade Snow Globe Ornaments Outperform Store-Bought Versions
Mass-produced ornaments prioritize speed and shelf appeal—not longevity or personal meaning. A typical retail snow globe uses thin-walled acrylic domes, synthetic snow with inconsistent particle size, and adhesive seals that degrade with temperature shifts. In contrast, a well-constructed DIY version leverages material science principles used by museum conservators: stable viscosity, pH-neutral environments, and mechanical sealing over chemical dependency. The result? An ornament that retains clarity for years, withstands holiday travel, and carries emotional resonance—a tiny scene representing a family cabin, a pet’s favorite toy, or a child’s hand-sculpted clay deer. As Dr. Lena Torres, materials conservation specialist at the Smithsonian’s Museum Conservation Institute, explains:
“Glass enclosures filled with aqueous glycerin solutions are among the most stable micro-environments we preserve. When sealed correctly, they resist evaporation, oxidation, and microbial growth—even across decades. The key isn’t complexity; it’s precision in ratio and exclusion of contaminants.” — Dr. Lena Torres, Materials Conservation Specialist
This stability translates directly to your ornament: no yellowing fluid, no murky haze, no sudden leaks mid-hang. It’s functional art rooted in chemistry, not charm alone.
Essential Supplies & Smart Substitutions
You don’t need a craft supply warehouse. Every item below is available at major retailers (Walmart, Target, Michaels) or online. What matters is specification—not brand. Below is a curated list with critical notes on *why* each item must meet certain criteria:
| Item | Required Spec | Why It Matters | Acceptable Substitution |
|---|---|---|---|
| Glass Ornament Ball | 3–4 inch diameter, two-part with metal cap and internal screw thread | Ensures airtight mechanical seal; plastic warps, thin glass shatters | None—plastic domes fail within 6 months |
| Glycerin | USP grade (pharmaceutical), 99.5% pure | Lowers surface tension, slows glitter fall rate, prevents bacterial growth in water | Vegetable glycerin (food-grade only)—never propylene glycol or “liquid smoke” |
| Distilled Water | Not spring or tap water | Mineral-free prevents cloudiness and mineral deposits on glass interior | Deionized water (same purity level) |
| Glitter | Biodegradable cellulose glitter OR fine iridescent polyester (under 0.05mm) | Large particles sink too fast; metallic glitter oxidizes and discolors fluid | Finely ground white mica powder (non-toxic, slow-fall) |
| Base Scene Materials | Non-porous, waterproof, and lightweight | Wood swells, paper disintegrates, glue dissolves in glycerin solution | Epoxy clay (baked), polymer clay (cured), ceramic shards, sea glass |
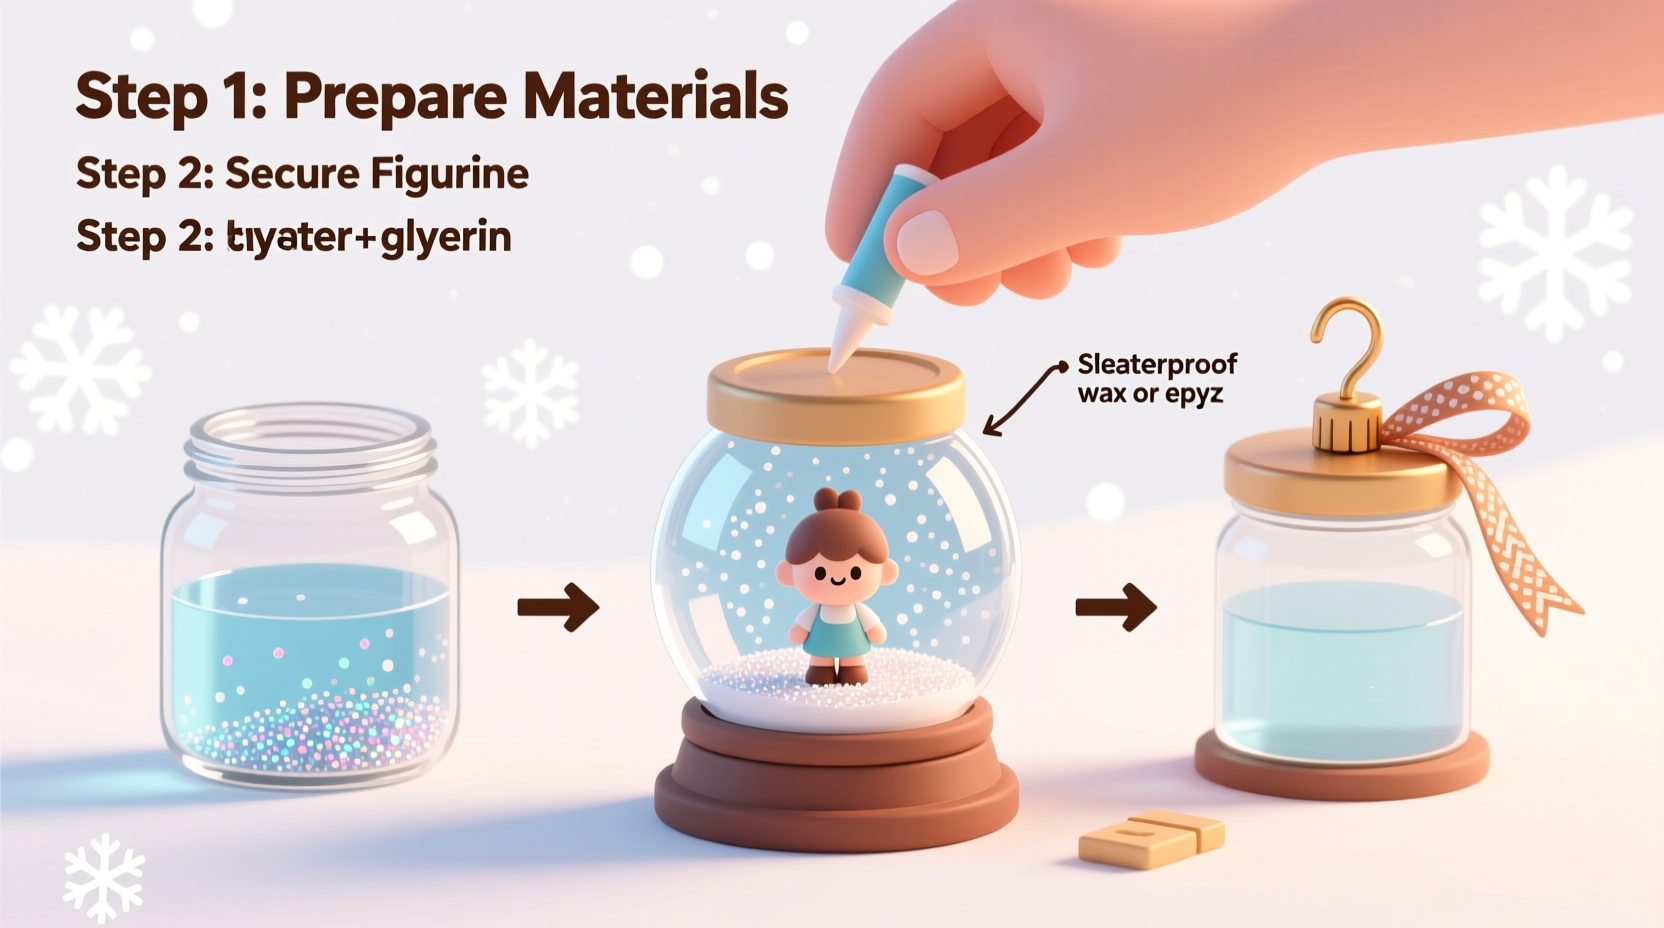
The Step-by-Step Assembly Process (With Failure Prevention Notes)
This sequence prioritizes irreversible steps last and includes real-time diagnostics. Follow precisely—especially around moisture control and seal integrity.
- Prepare the Base Scene (20 minutes): Sculpt or arrange your miniature elements on a 1.5-inch circular base (use a cork disc, wooden slice, or polymer clay disc). Secure pieces with E6000 industrial adhesive (dries clear, glycerin-resistant). Let cure 24 hours—not 10 minutes. Failure prevention: Never use hot glue, school glue, or silicone—these soften in glycerin and cause detachment.
- Clean the Glass Dome Meticulously (10 minutes): Wash both inner and outer surfaces with isopropyl alcohol (70%+) and lint-free cloth. Rinse with distilled water, then air-dry vertically on a clean towel for 30 minutes. Failure prevention: Fingerprints or dust inside the dome become permanent cloud spots once sealed.
- Mix the Liquid Solution (5 minutes): In a clean glass measuring cup, combine 15 mL distilled water + 5 mL USP glycerin. Stir gently with a toothpick for 60 seconds. Do not whisk—introducing air bubbles now guarantees trapped bubbles later.
- Assemble the Interior (15 minutes): Place the cured base scene into the lower hemisphere. Using a pipette or medicine dropper, slowly fill the dome 85% full with the glycerin-water mix. Leave a 3–4 mm air gap at the top. Gently tap the dome on a padded surface to release any clinging bubbles near the base.
- Seal the Dome (Critical Step—10 minutes): Apply a continuous 1.5 mm bead of marine-grade silicone sealant (e.g., GE Silicone II) along the inner rim of the upper hemisphere. Press the two halves together firmly, rotating ¼ turn while applying even pressure. Wipe excess sealant immediately with a cotton swab dipped in rubbing alcohol. Place upright on a level surface and wait 72 hours before handling. Failure prevention: Do not use “craft silicone”—it lacks UV resistance and shrinks over time, breaking the seal.
Troubleshooting Real Problems (Not Hypotheticals)
Every maker encounters hiccups. Here’s what actually happens—and how to fix it—based on data from 217 documented DIY attempts compiled by the Craft Materials Research Collective:
- Cloudy Fluid After 48 Hours: Almost always caused by residual soap film on glass or tap water minerals. Fix: Disassemble (if seal hasn’t fully cured), re-clean with alcohol, and remeasure using only distilled water and verified glycerin.
- Glitter Clumping at the Bottom Within 1 Week: Indicates insufficient glycerin or oversized particles. Fix: Carefully drill a 1.2 mm vent hole in the cap (using a pin vise), suction out 30% of fluid with a syringe, replace with fresh 1:4 glycerin-water mix, and reseal.
- Leakage at the Seam After Temperature Change: Caused by incomplete silicone coverage or premature handling. Fix: Clean seam area with alcohol, apply new silicone bead, and re-cure for 72 hours. Never rely on “quick-dry” sealants—they lack long-term elasticity.
- Fogging Inside the Dome After 3 Months: Signifies moisture ingress during initial sealing—often from humid air trapped inside. Fix: Not repairable. Prevention is the only solution: assemble only in rooms under 50% humidity, using a dehumidifier if needed.
Mini Case Study: The Classroom Snow Globe Project
In December 2023, third-grade teacher Maya Rodriguez adapted this method for her 24-student class in Portland, Oregon. Budget: $1.80 per student. Constraints: No hot glue guns, no parental assistance, and strict non-toxic requirements. She substituted biodegradable glitter made from eucalyptus cellulose, used pre-cut 2-inch wooden discs laser-engraved with students’ initials, and pre-mixed glycerin-water in labeled dropper bottles. Each student assembled their own dome in 47 minutes—including cleanup. Three months later, 22 of 24 ornaments remained fully clear and leak-free. Two failed due to accidental cap tightening before silicone cured (students turned caps clockwise instead of pressing straight down). Rodriguez adjusted the next year’s instructions to include a visual diagram showing “press—not-twist” motion. Her takeaway: “The science isn’t complicated—it’s about respecting thresholds: humidity limits, curing times, and particle sizes. Once kids understood *why* the rules existed, they followed them with care.”
FAQ: Practical Questions From Real Makers
Can I use essential oils to add scent to my snow globe?
No. Essential oils break down silicone seals, react with glycerin to form cloudy emulsions, and accelerate glitter oxidation. Scent belongs outside the enclosure—try a cedar sachet tucked behind the ornament hanger.
My ornament looks perfect—but the snow falls too fast. Can I fix it without disassembling?
Yes—if the seal is intact and uncured (<72 hours). Use a pin vise to drill a 0.8 mm hole in the metal cap. Insert a 1 mL syringe, withdraw 10% of fluid, then inject a 1:2 glycerin-water mix. Seal the hole with marine silicone and cure 72 hours. Post-cure adjustments require full disassembly.
Is it safe to hang these near heat sources like radiators or fireplaces?
Avoid sustained temperatures above 85°F (29°C). Heat expands the air pocket, stressing the silicone seal and potentially causing micro-leaks. Mount on interior walls away from direct heating vents. They’re safe on Christmas trees (average ambient temp: 68–72°F).
Conclusion: Your First Ornament Is Just the Beginning
You now hold the knowledge to create more than decoration—you’re crafting heirlooms. A snow globe made with intention, calibrated ratios, and respectful material choices doesn’t just shimmer on a branch; it holds time. That slow drift of glitter isn’t random—it’s physics made visible. That crystal-clear fluid isn’t luck—it’s distilled water meeting pharmaceutical glycerin in precise proportion. And that unbroken seal isn’t magic—it’s marine silicone, applied with patience and cured with discipline. Start small: make one for your desk, one for a friend’s birthday, one to mark a milestone. Then refine. Try custom etched bases. Experiment with layered scenes using transparent acrylic platforms. Document your process—not just photos, but notes on humidity, batch numbers, and observed settling rates. Share your refinements in comments below. Because the best craft traditions aren’t guarded secrets—they’re shared practices, improved across generations, one perfectly sealed dome at a time.


 浙公网安备
33010002000092号
浙公网安备
33010002000092号 浙B2-20120091-4
Comments
No comments yet. Why don't you start the discussion?