
Woodworking doesn’t require a full garage workshop or expensive machinery. With just a few basic tools and a piece of scrap wood, you can create elegant, minimalist wooden ornaments that bring warmth and texture to any space. Whether you're decorating for the holidays, crafting personalized gifts, or adding handcrafted elements to your home, this project is accessible, rewarding, and deeply satisfying.
Minimalist design thrives on simplicity, clean lines, and intentionality. A wooden ornament embodies these principles perfectly—small in scale but rich in meaning. This guide walks you through the entire process, from selecting materials to finishing techniques, ensuring even complete beginners can achieve professional-looking results with confidence.
Gather Your Tools and Materials
The beauty of this project lies in its accessibility. You don’t need power tools or years of experience. Most of what you’ll need can be found in a typical household toolkit or purchased affordably at a local hardware store.
Here’s what you’ll need to get started:
- A small offcut of hardwood (such as birch, walnut, or maple)—approximately 6” x 4” x ½”
- Fine-tooth handsaw or coping saw
- Sandpaper (120, 220, and 320 grit)
- Wood pencil or marking pen
- Ruler or straight edge
- Drill with a 1/8” drill bit (or a nail and hammer for pilot holes)
- Clothespin or small clamp (optional, for stability)
- Mineral oil, beeswax, or food-safe wood finish
- Soft cloth for finishing
- Emery board or fine steel wool (for final smoothing)
Using reclaimed or sustainably sourced wood adds an eco-conscious layer to your creation. Old furniture scraps, broken pallets (cleaned and sanded), or even a discarded cutting board can be repurposed into something beautiful.
Designing Your Minimalist Ornament
Minimalism isn’t about emptiness—it’s about purpose. Before making a single cut, take time to consider the form your ornament will take. The most effective minimalist designs often draw from geometry, nature, or abstract shapes.
Popular minimalist forms include:
- Simple circles or ovals
- Triangles or pyramids
- Abstract wave or mountain silhouettes
- Negative space patterns (e.g., a circle with a crescent cutout)
- Single-line engravings (like a horizon or sun symbol)
Sketch your design lightly on paper first. Once satisfied, transfer it to the wood surface using a pencil. Use a ruler to ensure symmetry and proportion. For circular shapes, trace around a small bowl, cup, or compass tool.
“Good design is as little design as possible.” — Dieter Rams, industrial designer and pioneer of minimalist aesthetics
Keep your lines clean and uncluttered. Avoid intricate carvings unless they serve a clear visual purpose. Remember: the grain of the wood is part of the design. Let it show.
Step-by-Step Crafting Process
Follow this timeline to turn your idea into a finished wooden ornament.
- Prepare the Wood: Cut your chosen wood to a manageable size if needed. Wipe it clean with a dry cloth to remove dust.
- Transfer the Design: Lightly sketch your chosen shape onto the wood. Double-check proportions and balance.
- Cut Out the Shape: Using a fine-tooth handsaw or coping saw, carefully follow the outline. Work slowly—let the saw do the work. Clamp the wood to a table edge if necessary for stability.
- Smooth the Edges: Begin sanding with 120-grit paper to remove rough spots and refine the shape. Progress to 220-grit for a smoother feel, then finish with 320-grit for a silky surface.
- Create a Hanging Hole: Drill a small hole (1/8”) near the top edge. For a cleaner look, angle the hole slightly inward. Alternatively, carve a small notch at the top for twine to rest in.
- Final Smoothing: Use an emery board or fine steel wool to polish corners and curves. Remove all dust with a soft brush or cloth.
- Apply Finish: Rub a small amount of mineral oil or beeswax onto the surface with a lint-free cloth. Let it absorb for 10–15 minutes, then buff lightly.
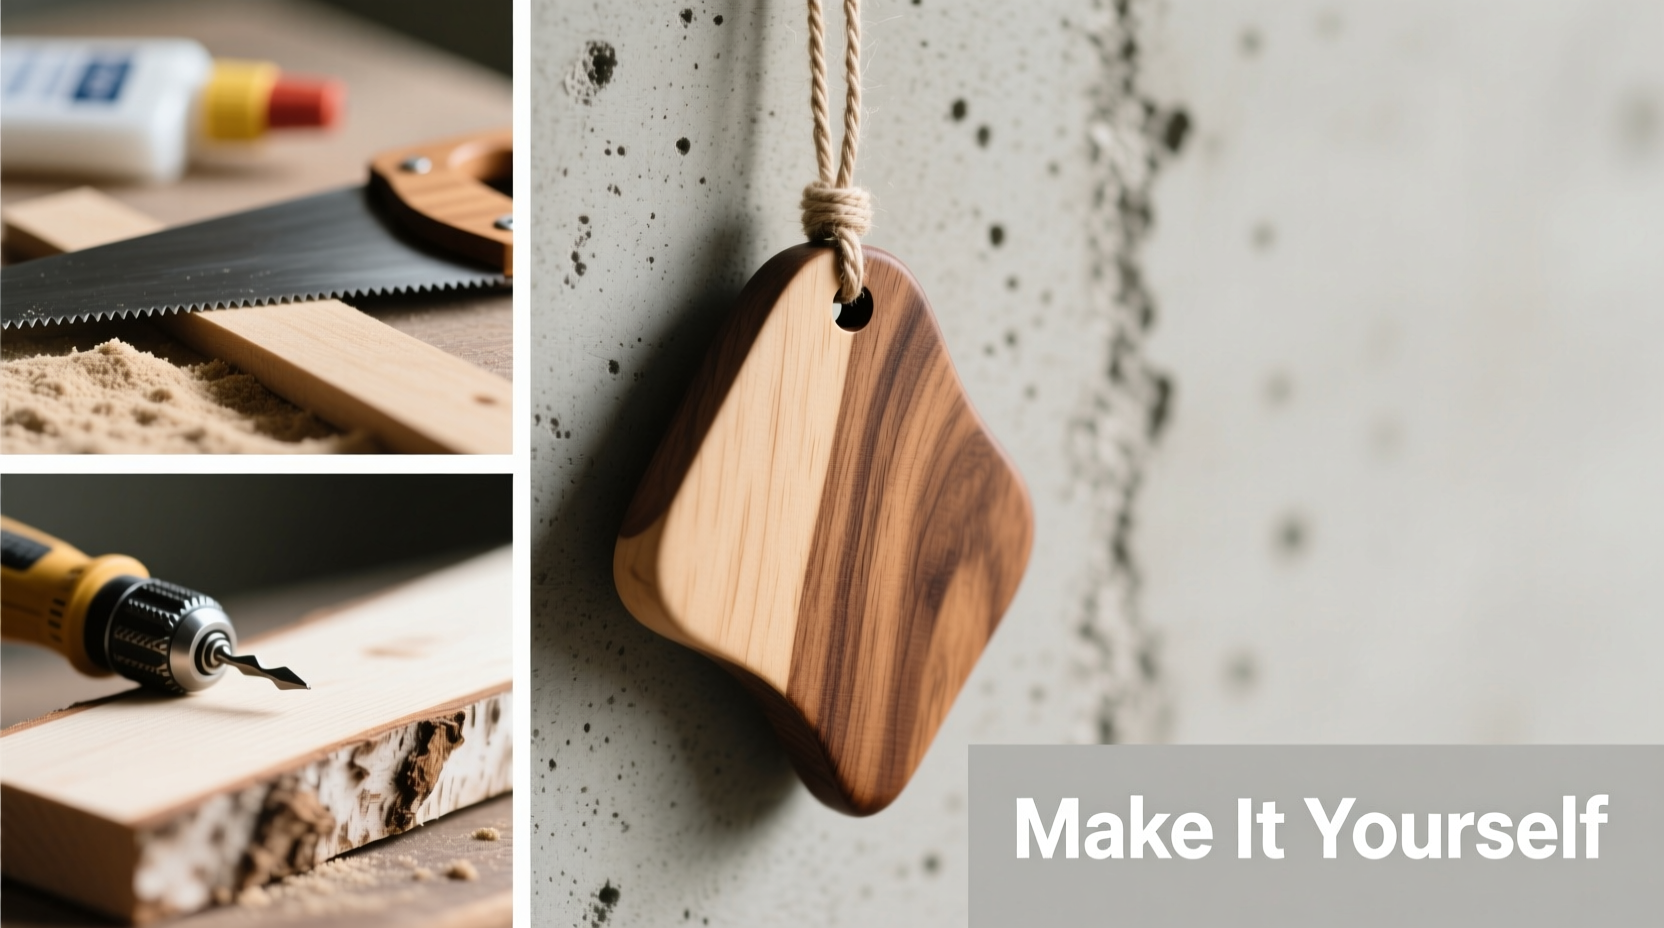
- Add Cord or Hanger: Thread natural twine, leather strip, or linen thread through the hole. Tie a secure knot, leaving enough length to hang freely.
This entire process can take as little as 45 minutes once you’re familiar with the steps. First attempts may take longer—and that’s perfectly okay. Each cut and sand teaches precision and patience.
Do’s and Don’ts of Hand-Crafted Wooden Ornaments
To ensure your ornament turns out both beautiful and durable, refer to this quick-reference table.
| Do | Don’t |
|---|---|
| Use stable, dry hardwoods that resist warping | Use green (freshly cut) wood—it may crack as it dries |
| Sand progressively through grits for a polished feel | Skip sanding steps—rough edges detract from minimalism |
| Seal with natural finishes like beeswax or linseed oil | Use glossy polyurethane—it overwhelms subtle wood grain |
| Work in a well-lit area to see fine details | Rush the cutting—slow, steady strokes prevent splintering |
| Keep designs simple and balanced | Overcomplicate with too many elements or text |
Real Example: A First-Time Maker’s Journey
Jamie, a graphic designer from Portland, had never used a saw before but wanted to create meaningful holiday gifts for her family. She began with a scrap piece of birch plywood left over from a bookshelf project. Inspired by mountain landscapes, she drew a simple triangular peak with a small sun above it.
Her first cut was uneven, and one corner split slightly. Instead of discarding it, she sanded the break into a soft curve, turning the flaw into a design feature. After three attempts, she produced a set of five nearly identical ornaments, each subtly unique.
She finished them with a blend of beeswax and coconut oil, giving them a warm glow without shine. Hung from kraft paper tags on a mantle display, they became conversation pieces. “People assumed I bought them from a boutique,” she said. “But the imperfections are what make them feel real.”
Customization and Creative Variations
Once you’ve mastered the basics, explore variations that reflect your personal style or seasonal themes.
- Engraved Initials: Use a wood-burning tool (or fine chisel) to add a single initial or short word like “Joy” or “Peace.” Keep lettering sparse and centered.
- Natural Shapes: Follow the wood’s edge instead of cutting geometric forms. An organic, bark-included silhouette celebrates raw material.
- Layered Designs: Glue two thin pieces together at an angle to create depth. Stain one slightly darker for contrast.
- Seasonal Themes: Make snowflakes (with careful cuts), leaf silhouettes in autumn, or wave forms for coastal decor.
- Gift Tags: Scale down to 2-inch ornaments and write names directly on the back for tree gifts.
For group projects—like classroom activities or family gatherings—pre-cut shapes can save time while still allowing individual sanding and finishing. This maintains the hands-on experience without requiring advanced skills.
Storage and Care Tips
Your wooden ornament can last for years with proper care. Store it flat in a breathable cotton bag or wrapped in tissue paper. Avoid plastic sleeves, which can trap moisture and encourage mold.
If the surface dulls over time, refresh it with another light coat of oil. Dust gently with a dry microfiber cloth—never damp wipes, which can warp thin wood.
“Handmade objects carry energy—the time, breath, and attention of the maker.” — Clara Nguyen, sustainable craft educator
FAQ
Can I make these ornaments with softwood like pine?
Yes, but pine is softer and more prone to dents and splintering. It also has prominent grain that may overpower minimalist designs. Hardwoods like birch, walnut, or cherry yield cleaner edges and a more refined appearance.
What if I don’t have a drill?
You can create a hanging point without power tools. Heat a small nail over a stove flame, then carefully press it through the wood to make a pilot hole. Alternatively, carve a shallow notch at the top edge and loop twine over it.
Are these safe for children to make?
With adult supervision, yes. Replace the saw with pre-cut blanks or use a push knife with protective guards. Sanding and finishing are excellent tasks for kids. Always use non-toxic finishes like beeswax or food-grade mineral oil.
Checklist: Making Your Minimalist Wooden Ornament
Follow this concise checklist to stay on track from start to finish:
- ☐ Source a clean, dry wood scrap (hardwood preferred)
- ☐ Sketch a simple, balanced design on paper
- ☐ Transfer the design to wood with a pencil
- ☐ Cut along the lines using a handsaw (clamp if needed)
- ☐ Sand progressively: 120 → 220 → 320 grit
- ☐ Drill or burn a small hanging hole near the top
- ☐ Remove dust with a dry cloth or brush
- ☐ Apply natural finish (oil or wax) and buff
- ☐ Thread with twine, leather, or linen cord
- ☐ Display or gift with pride
Conclusion
Making your own minimalist wooden ornament is more than a craft—it’s a quiet act of mindfulness. In a world saturated with mass-produced goods, creating something by hand reconnects you with material, process, and intention. The result is not just an object, but a small testament to presence and care.
You don’t need perfection. You only need a piece of wood, a sharp pencil, and the willingness to begin. Whether hung on a tree, placed on a shelf, or given as a gift, your ornament carries the weight of your attention. And sometimes, that’s the most meaningful decoration of all.


 浙公网安备
33010002000092号
浙公网安备
33010002000092号 浙B2-20120091-4
Comments
No comments yet. Why don't you start the discussion?