
Transforming a living room, event space, or holiday display into a winter wonderland no longer requires artificial snow machines or complex installations. One of the most elegant and immersive solutions is projecting animated snowfall through a transparent artificial tree. When done correctly, this technique creates a mesmerizing illusion of gently falling snow that appears to drift through real branches. The key lies in precise projector placement, careful calibration, and understanding how light interacts with translucent materials. This guide walks you through every phase—planning, mounting, alignment, and optimization—to achieve a professional-grade visual experience.
Understanding the Visual Effect
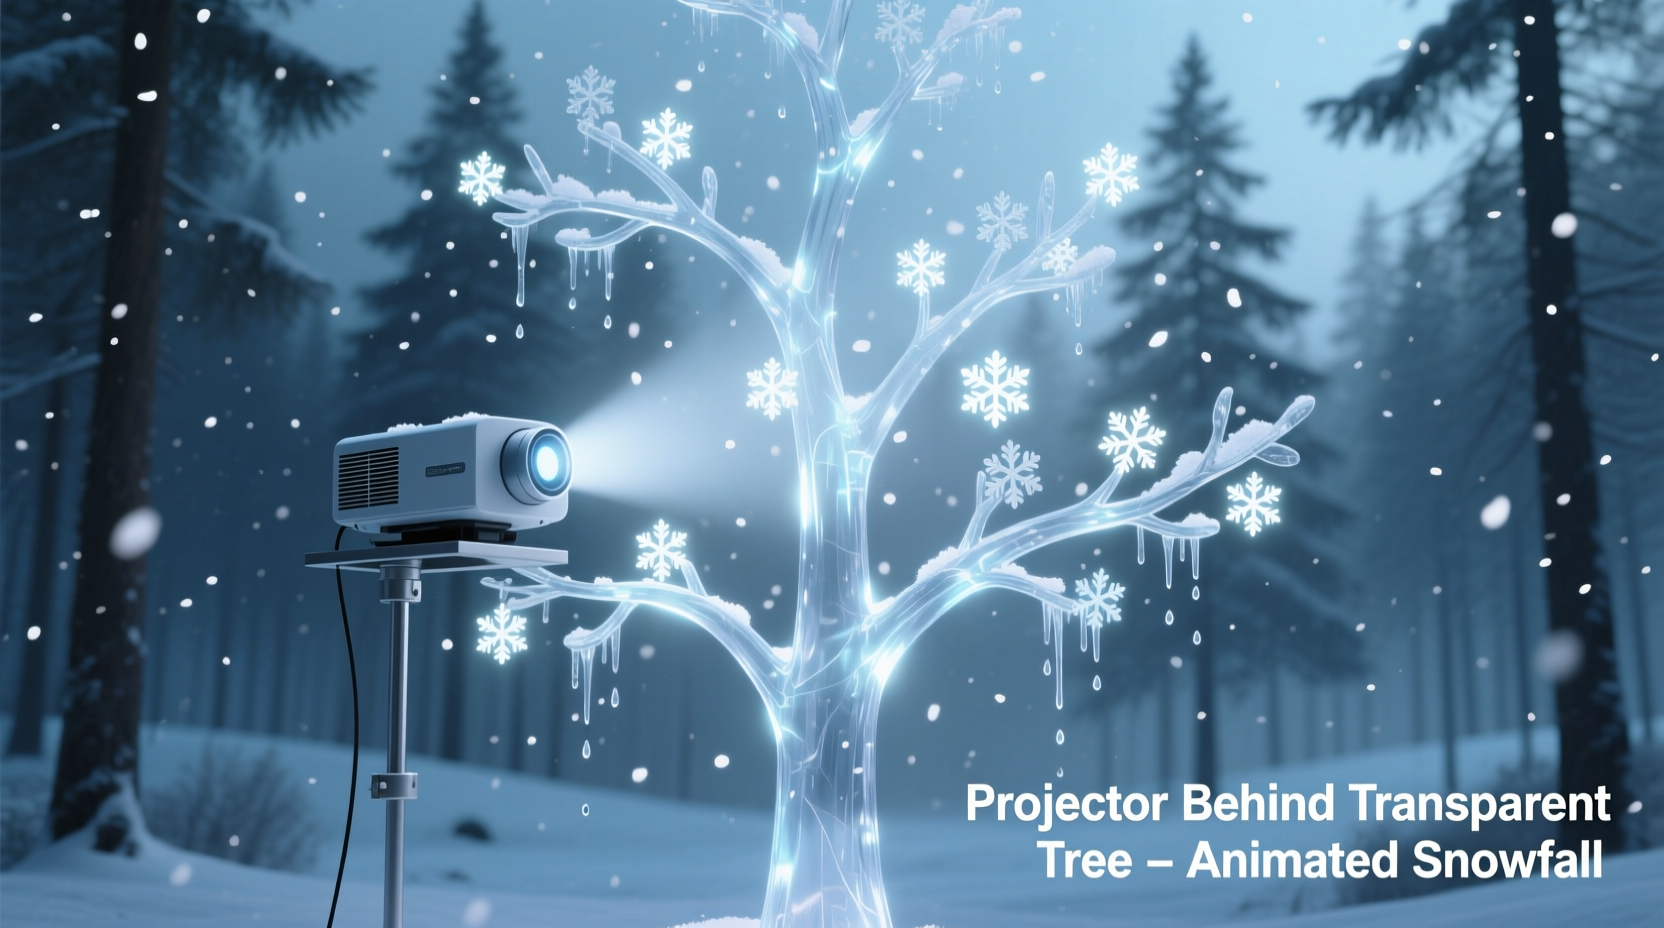
The magic of casting animated snowfall through a transparent tree stems from optical layering. A high-lumen projector mounted behind the tree beams a looping animation of falling snowflakes onto a rear-projection screen or wall. The transparent acrylic or plastic branches partially obscure and diffuse the light, creating depth and realism. Unlike flat video displays, this method adds physical dimensionality—the snow appears to fall *through* the tree, not just on it.
This technique is commonly used in luxury retail displays, holiday window installations, and upscale home theaters. It works best with trees made of clear or frosted acrylic rods, which scatter light subtly while maintaining structural integrity. Avoid opaque or heavily textured trees, as they block too much light and disrupt the continuity of the animation.
“Projection mapping through layered transparent objects creates one of the most convincing atmospheric effects in ambient design.” — Marcus Lin, Projection Designer at Lumina Studios
Essential Equipment Checklist
Before beginning installation, gather all necessary components. Using incompatible or underpowered gear can result in dim visuals, misalignment, or overheating.
- Projector: Minimum 3,000 lumens, native 1080p resolution, short-throw or ultra-short-throw lens preferred
- Transparent Tree: Acrylic or polycarbonate construction with evenly spaced vertical rods (avoid tangled designs)
- Rear Screen: Translucent projection surface (e.g., rear-projection vinyl or diffusion panel) placed 1–3 feet behind the tree
- Media Player: USB-enabled device or HDMI-connected computer playing looped snowfall animation (MP4 format recommended)
- Mounting Hardware: Ceiling brackets, adjustable arms, or floor stands compatible with projector weight
- Cables: HDMI extension, power extension, optional IR repeater for remote control access
- Calibration Tools: Laser level, measuring tape, tripod (for initial alignment)
Step-by-Step Installation Guide
Proper setup ensures sharp imagery, even coverage, and long-term reliability. Follow these steps in order for optimal results.
- Determine Viewing Angle and Space Requirements
Measure the distance between the intended viewer position and the front of the tree. Allow at least 6–8 feet of clearance behind the tree for projector placement and airflow. Mark the ideal centerline axis using a laser level. - Install the Rear Projection Surface
Mount a taut, wrinkle-free rear-projection screen or diffusion panel vertically behind the tree. Secure it to a frame or wall to prevent vibrations. Ensure it extends beyond the tree’s height and width by at least 6 inches on all sides. - Position the Transparent Tree
Place the tree on a stable base directly in front of the screen, centered along the horizontal axis. Maintain a gap of 12–18 inches between the tree and screen to allow light diffusion and reduce shadow artifacts. - Mount the Projector Behind the Tree
Attach the projector to a ceiling mount, floor stand, or wall bracket located behind the tree. Use an adjustable arm to fine-tune pitch and yaw. For short-throw models, position the lens 2–4 feet from the screen; standard throw may require 8–12 feet. - Align the Image
Power on the projector and display a grid pattern. Adjust keystone correction minimally—preferably use physical repositioning instead. Rotate and shift the projector until the image fills the screen uniformly without distortion. - Focus and Zoom Calibration
Adjust focus manually for maximum clarity. If using zoom, avoid digital zoom; rely only on optical settings. Recheck focus after warming up the projector for 15 minutes. - Connect Media Source and Loop Animation
Load a high-frame-rate (24–60fps) snowfall animation onto a media player. Use soft white snowflakes on black background for strongest contrast. Enable continuous loop playback. - Dim Ambient Lighting
Turn off overhead lights and close blinds. Even small light leaks can wash out projected details. Consider installing blackout curtains for permanent setups. - Final Visual Inspection
Observe the effect from primary viewing positions. Look for hotspots, uneven edges, or clipping. Make micro-adjustments to alignment if needed.
Optimization Table: Do’s and Don’ts
| Do | Don't |
|---|---|
| Use a black backdrop behind the rear screen to improve contrast | Allow direct sunlight to hit the projection area |
| Choose animations with variable flake sizes and speeds for realism | Use compressed, low-bitrate videos that cause pixelation |
| Clean acrylic branches regularly with anti-static cloth | Touch branches with bare hands frequently (oils attract dust) |
| Ensure projector has adequate ventilation space | Enclose the projector in a sealed cabinet without cooling |
| Test system continuously for 2+ hours before finalizing | Run the projector at maximum brightness indefinitely (reduces lamp life) |
Real-World Example: Holiday Display at Evergreen Mall
In December 2023, the Evergreen Mall in Portland upgraded its central atrium display using this exact technique. Previously reliant on mechanical snow machines, the team transitioned to a silent, maintenance-free projection system featuring a 12-foot transparent acrylic tree. They mounted a 5,000-lumen short-throw projector on a custom ceiling rail behind the structure, projecting onto a tensioned rear screen.
After initial trials, they discovered that standard snow animations looked flat. By switching to a custom-rendered particle simulation with parallax layers—foreground flakes moving faster than background ones—they achieved a three-dimensional effect. Visitors reported feeling “as if standing under a real snow-laden pine.” The system ran 10 hours daily for six weeks with no hardware failures, consuming less energy than previous lighting-based displays.
Troubleshooting Common Issues
Even well-planned installations encounter challenges. Here are frequent problems and their solutions.
- Fuzzy or Blurry Snowflakes: Caused by incorrect focus, vibration, or poor-quality source video. Refocus the lens after warm-up and ensure the media file is 1080p or higher.
- Uneven Brightness (Hotspots): Often due to off-center projector placement or screen wrinkles. Recenter the image and smooth the rear surface.
- Shadow Bands Across Animation: Occurs when thick or closely spaced branches block light. Choose trees with thinner rods or increase the gap between tree and screen.
- Image Overspill Beyond Tree Outline: Trim excess projection using the projector’s lens shift or digital masking (if supported). Avoid cropping via media editing unless absolutely necessary.
- Overheating Projector: Ensure minimum 6 inches of clearance around vents. Install a small exhaust fan nearby if enclosed.
Frequently Asked Questions
Can I use a regular artificial tree instead of a transparent one?
No—not effectively. Opaque green or metallic trees absorb or reflect too much light, blocking the animation. Only transparent or semi-transparent acrylic trees allow sufficient light transmission while adding visual texture.
Is it safe to leave the projector running overnight?
It depends on the model. Many modern projectors support 24/7 operation in eco mode, but always consult the manufacturer’s specifications. Monitor temperature during extended use and disable automatic shutdown features if needed.
What type of animation file works best?
A 1080p MP4 with a frame rate of 30fps, encoded in H.264, provides excellent balance of quality and compatibility. Use a black background and white snowflakes with alpha channel transparency if your projector supports it. Loop duration should be at least 5 minutes to avoid noticeable repetition.
Long-Term Maintenance Tips
To preserve both visual quality and equipment lifespan, implement a simple care routine.
- Wipe the projector lens monthly with a microfiber cloth designed for optics.
- Vacuum dust from the tree rods using a soft brush attachment—never wipe dry.
- Update firmware on the media player annually to maintain compatibility.
- Store animations on redundant drives to prevent data loss.
- Inspect cables annually for fraying or loose connections.
“The most impactful installations aren’t the loudest—they’re the ones that make people pause and ask, ‘How is that happening?’” — Lena Cho, Immersive Experience Designer
Conclusion: Bring Winter Magic to Life
Mounting a projector behind a transparent tree to cast animated snowfall blends technology and artistry into a single breathtaking experience. With thoughtful planning, precision alignment, and attention to detail, you can create an enchanting atmosphere suitable for homes, galleries, or commercial spaces. This method offers durability, quiet operation, and unmatched visual depth compared to traditional alternatives. Whether for seasonal decor or year-round ambiance, the effect resonates emotionally—evoking nostalgia, calm, and wonder.


 浙公网安备
33010002000092号
浙公网安备
33010002000092号 浙B2-20120091-4
Comments
No comments yet. Why don't you start the discussion?